Whether you 8217 re considering upgrades or simply aiming to optimize your current applications understanding your computer 8217 s specifications is essential for optimizing performance
Microsoft OneDrive is a widely used cloud storage service that is integrated into the Windows operating system It enables users to save photos videos and
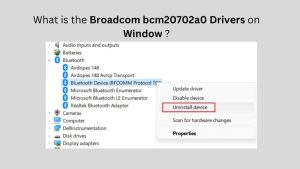
Drivers are special software components that allow the Windows OS to communicate with the hardware devices connected to your computer These drivers translate the user
Have you ever encountered the perplexing NET ERR CERT DATE INVALID error while browsing the web This seemingly innocuous message can bring your online activities