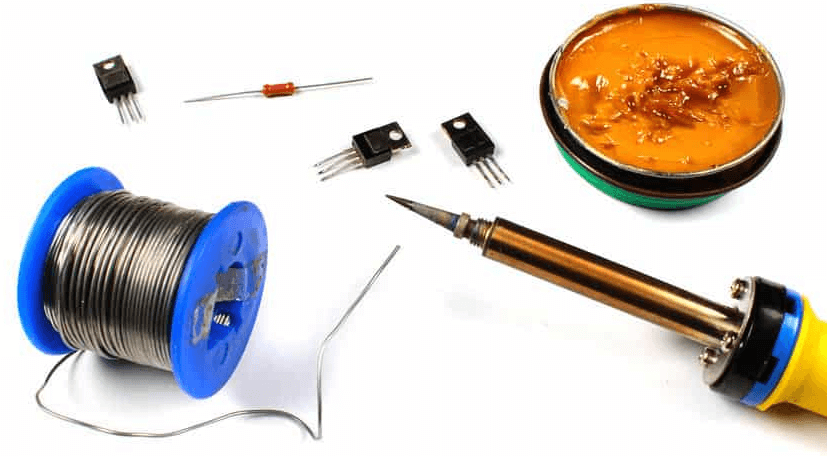
Soldering is the process of creating a joint between two metals by using a different molten metal. And it is generally used to create circuit joints in various electronic components. While Soldering Iron and Solder are the main ingredients of the soldering process, Solder Flux is equally important. Soldering flux acts as a catalyst in achieving reliable connections between components. At its core, soldering flux is a chemical agent that facilitates the soldering process by preparing metal surfaces for bonding. Without flux, soldering would be significantly more challenging and less effective, as it helps overcome common obstacles such as oxidation and surface contamination.
In this article, we will talk about the importance of solder flux and how to use solder flux while soldering.
What Is Solder Flux?
Solder flux is a chemical cleaning agent used in the soldering process to prepare metal surfaces for joining. Its primary function is to remove oxidation from the metal surfaces that will be soldered together, ensuring a clean, strong bond between the surfaces. Flux also helps improve heat transfer during soldering and prevents further oxidation during the heating process.
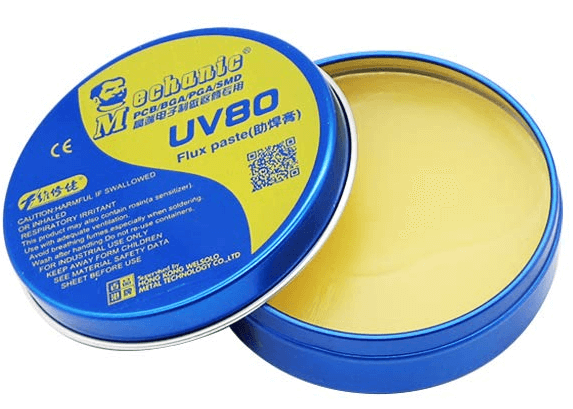
There are various types of solder fluxes, including rosin-based, water-soluble, and no-clean fluxes. Each type has specific properties suited to different soldering environments and requirements. Rosin flux, derived from pine sap, is common for electronics due to its effectiveness and minimal residue. Water-soluble fluxes are used where higher levels of cleanliness are required, as they can be washed off with water after soldering. No-clean fluxes leave a minimal residue that doesn’t need to be cleaned off, useful in mass production where post-soldering cleaning would be impractical.
Choosing The Right Equipment
1. Consider Rosin-Based Flux To Perform Electrical Soldering
Using corrosive flux to remove the metal oxide will prove to be a deadly mistake for thin and delicate wires. You can also end up shorting the circuit and thus ruining your actual work. To prevent this, using rosin-based flux is an appropriate choice.
2. Opt For An Acid Flux While Soldering Pipes
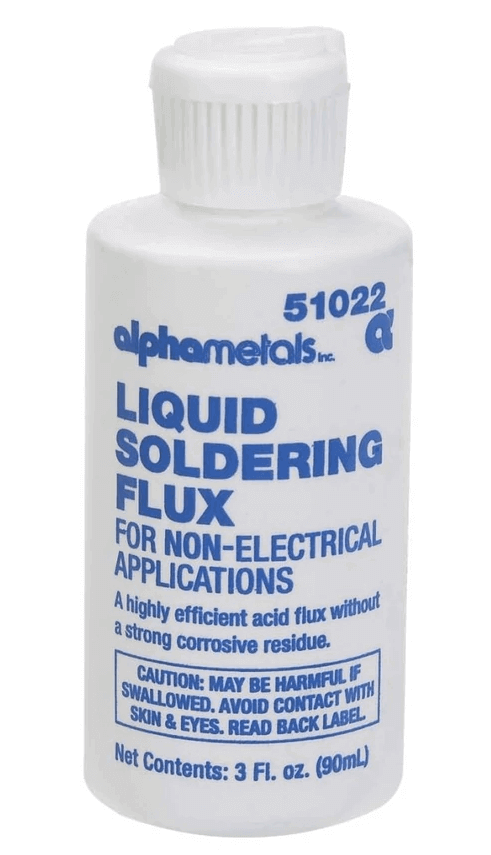
Less corrosive rosin-based flux is not enough to clean pipes. The type of flux that best suits you now is the acid flux. Acid or tinning flux is much more corrosive. It will help you remove large areas of the oxidized metal surface and provide you with a stronger soldering surface.
3. Go For Leaded Solder While Working With Electronics
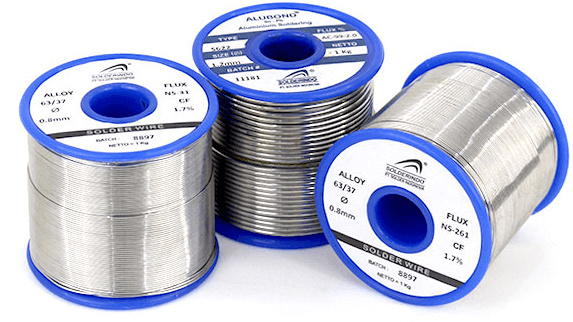
Leaded solder is a good choice for fragile electronic parts, especially if you are a beginner. The low melting point helps in easy soldering. Those which are solid and do not have a rosin core oxidize a little more while others with rosin core can help in additional flux coating.
4. Use Silvered Solder To Solder Pipes Together
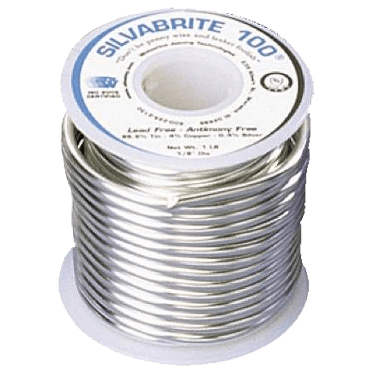
You cannot use lead solders for water pipes as it is toxic. Silver solders are the best fit for this case. Lead-free solders are weak and cannot create good joints.
5. Heat Your Soldering Iron And Clean It While Working With Electronics
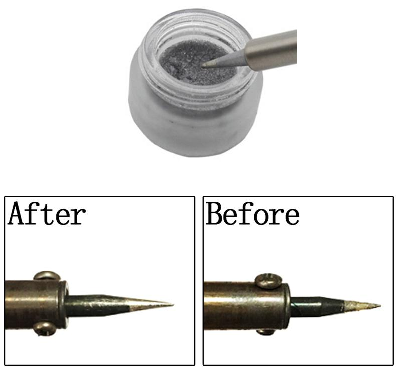
Heat the soldering iron and use a moist sponge to clean the surface. The sponge should not be dry as it will get charred. Touching the heated iron can cause second- or third-degree burns. Apply a small amount of solder to prevent further oxidation. This is known as tinning.
6. Opt For A Blowtorch While Soldering Pipes
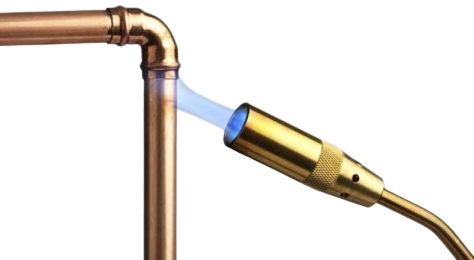
While soldering pipes, your options are an oxyacetylene torch or propane torch. For proper soldering, adjust the blue flame to be around 5 cm in length. Now hold the peak of flame near the pipes. Setting the right amount of heat requires practice. If the solder flux begins to shoulder, it indicates that you are applying excessive heat.
How To Use Solder Flux?
Soldering Electronics
1. Twist or Rotate the Exposed Endpoints of the Wires Together
In the case of soldering wires, first, expose a sufficient amount of wire by removing the insulator material. Now twist the two ends of the wire by overlapping with each other. Take care that no sharp pointed ends are present. You can also separate each thin wire and weave them to form a mesh for a stronger joint.
2. Coat your Wires with Soldering Flux
Now it is time to apply the solder flux. Using a paintbrush or a finger, apply a generous amount of solder flux on the joint and cover the area. Soldering the overlapped area is enough to get a conducting joint. You might want to ask someone to hold all those wires together while you solder or you can buy a clamp.
3. Push the Soldering Gun onto a Side of Your Wires to Melt Flux
The solid flux needs to be melted to spread it evenly. Touch the already hot soldering iron with the soldering gun onto the wire to heat the cross-section. After a few moments, the solder flux will melt.
4. Press the Solder into Your Wires to Join Them Together
The necessary step is to melt the solder to create the joint. As you are touching the iron, the wire is sufficiently hot. Touch the solder wire onto the other side of the wire. It will melt and deposit on the woven wire.
For safety as well as proper soldering, hold the wire around 1 to 2 cm away from the wire’s tip. Move the wire to bare areas and do the same to finally cover all of the surfaces.
5. Allow the Solder to Cool and Harden
Now just wait for a few moments to let it cool down. By this time the molten metal will harden and create a good joint.
Soldering Pipes
1. Clean the Specific Area That You will be Soldering
Before soldering pipes, cleaning dirt is mandatory. Use sandpaper or steel wool to remove dirt. The length of the cleaned area may not increase by 2 inches.
2. Put Flux to the Outer Area of Your Pipes
Apply flux to the outside of the pipe using a paintbrush. Maintain a uniform coating and try to avoid any lumps of flux near the corners. Tinning flux can hold pipes together but is more expensive. Acid flux can do the job but corrode fragile pipes. Seek advice if you are confused.
3. Join the Pipes and Fittings
Keeping the two pipes away from the workspace, press them against each other to connect. Brush off any excess amount of flux. Trying to work with the whole section together might be difficult. Work in segments to solder efficiently.
4. Heat the Female Connector by Using a Soldering Iron or Blowtorch
Hold the blowtorch to heat the female pipe. Now bring the soldering it on close to the joint to melt and deposit it. The flux might start to bubble but don’t worry.
5. Push the Solder to the Parallel Side of the Pipe
Now press the two ends together to secure the joint. After pulling back the torch, quickly run the iron around the joint to seal any space. If the solder forms beads, move away from that area. You have likely burnt flux for that region.
6. Inspect the Joints to Ensure They are Perfectly Soldered
After the pipes have cooled down a bit, look for empty spaces or accumulated flux regions. Use the blow torch to melt solidified flux or use solder iron to seal empty spaces.
Applications Of Different Types Of Flux
Soldering flux with various compositions is available but all are not good for different types of soldering. The various flux applicable for different soldering methods are:
- Selective Soldering: The soldering flux used in this method is towards fluid composition. The flux is sprayed over the surface to be soldered. Another approach is to use the drop jet process. The latter is more precise and thus preferred.
- Solder Reflow: The composition for this method is a sticky flux mixed with small beads of metal solder. This paste holds the parts to be soldered in place until the heat in the oven causes it to reflow. The flux serves a dual purpose. The metal surface is cleaned as well as the paste seals any air gaps to prevent oxidation.
- Wave Soldering: The flux is sprayed on the board before soldering. Hence the flux contains more solvents than any other soldering flux. The board is cleaned off any oxidation. If the board to be soldered is using a less corrosive flux, it needs additional cleaning to be done on it.
Cleaning Flux From Electronics
Cleaning flux is good for removing oxide coating but needs to be cleaned afterwards. This is because corrosive flux continues to damage the board if not removed. Different flux types need to be cleaned differently.
- Water-Soluble: Deionized water and simple detergents are enough to clean water-soluble solder fluxes.
- Rosin Based: Specific chemical agents are typically used to remove these types of flux.
- No Clean: This type of flux only need cleaning for cosmetic appearances. If left as it is, it does not do any harm to the circuit or board.
The Best Types Of Flux For Soldering Electronics
To form a good metallurgical joint, choosing a good flux is essential. For electronic works, leaded solder with rosin cores is the best buy. It is better for delicate wirings as it melts at low temperatures and also coats a slim rosin layer.
Rosin flux is made from pinesap. It flows perfectly when hot and removes oxides faster. One drawback is that it solidifies faster and hence alcohol is required to clean it.
Water-soluble flux is more powerful than rosin-based. They are also easy to clean and have better performance rates. Inorganic acid fluxes should be avoided. Lead-free solder cannot make a strong joint.
How You Should Prepare The Soldering Machine?
A Complete Guide To Solder Wires With Flux Agents
The process of soldering with flux agents appear to be simple if proper steps are followed.
- Firstly, check that the surfaces are clean.
- Remove a sufficient amount of insulating material to expose the conducting wire.
- Interweave those wires to create a temporary yet proper joint.
- Upon heating the soldering iron, press it at a side of the wire surface. Apply the flux before-hand. Now, the heat gradually spreads across the area and melts the flux.
- Let it sit for a few minutes to let the seam harden
This process is for amateurs as the weak flux joint quickly falls off. This is the reason, applying solder metal is necessary.
Tips For Soldering Electronics With Flux
- Apply a generous amount of flux on the board before-hand.
- The dense composition is always preferred over liquid in manual soldering.
- Avoid no-clean soldering flux as solvents, it can’t remove these.
- Prevent solvent and water, used for flux cleaning to reach the conducting body. If it occurs, use any fresh solvent to remove the remaining flux.
- Preparing de-ionized water beforehand to clean the rest is a smart choice.
FAQs:
Yes, it is important to clean the solder flux residue after soldering to ensure the longevity and reliability of the solder joint. Flux residue left on the soldered joints can attract dirt, dust, and moisture, potentially causing corrosion or electrical issues over time. You can clean flux residue using isopropyl alcohol, a flux remover, or water (for water-soluble flux).
In most cases, you cannot reuse solder flux. Once flux has been used, it often becomes contaminated with solder and other debris, diminishing its cleaning and fluxing properties. Reusing contaminated flux can lead to poor solder joints and may cause damage to electronic components.
The type of solder flux you should use depends on the materials being soldered and the specific requirements of your project. Common types of solder flux include rosin flux, water-soluble flux, and no-clean flux. Rosin flux is suitable for general-purpose soldering on electronics, while water-soluble flux is preferred for applications requiring post-soldering cleaning. No-clean flux leaves minimal residue and is suitable for applications where cleaning is challenging or unnecessary.
Yes, solder flux can expire or degrade over time, especially if not stored properly. Exposure to air, moisture, and heat can accelerate the degradation of flux, reducing its effectiveness. Check the expiration date on flux containers and store them as per manufacturer’s instructions to ensure maximum shelf life and performance. If flux appears discolored, has a strong odor, or does not seem to work as effectively as before, it may be time to replace it with fresh flux.
Conclusion
Soldering flux plays a pivotal role in the soldering process, serving as a catalyst for achieving strong and reliable connections between electronic components. Its importance cannot be overstated, as it facilitates the cleaning of metal surfaces, prevents oxidation, and enhances the wetting of solder, ultimately leading to robust solder joints. Without soldering flux, the soldering process would be fraught with challenges, resulting in weaker bonds and potential reliability issues in electronic assemblies.
This draws an end to the detailed overview of the importance of soldering flux and how to use solder flux. Always remember to wear safety equipment to prevent any accidents while soldering. If you have any queries, comments, or suggestions, do mention them using the comments.

One Response
Your post is very educative. Worked on electronics panels for about 29 years and I am now into cable jointing and battery charging as well as winding of electrical machines. Keep on the good work. I appreciate.