Sometimes in plumbing and roofing applications, you may need to join two pieces of stainless steel together. In such cases, soldering is one of the cheapest and easiest solutions. Since solder has a melting point that is much lower than that of stainless steel, it can be used safely to join two pieces of stainless steel. All metals tend to form an oxide layer on the surface when left exposed to the atmosphere. Stainless steel, on the other hand, forms a thick layer or chromium oxide when exposed to atmosphere, thanks to its chromium content. Unfortunately, the feature that prevents corrosion of the surface of the stainless steel also prevents solder to bond to the surface. If this is the case, then how to solder stainless steel with soldering iron?
In this guide, let us take a step-by-step approach and learn the process of soldering stainless steel.
How to Solder Stainless Steel with Soldering Iron?
Pre-Treat the Stainless Steel
As discussed, an oxide layer makes it difficult for the solder to bond to the stainless steel. Therefore, before soldering, the surface of the stainless steel must be treated to remove the oxide layer.
1. Set Your Work Bench
Treating stainless steel surfaces requires the use of chemicals and toxins that may harm you physically. Therefore, before you begin to treat the stainless steel surface, you must take all the necessary precautions.
The first and the most important thing is to wear eye protection. This is because if any of the solvents or chemicals touch your eye then it can cause some serious damage.
The next thing to worry about is the toxic gas or fumes that the chemicals may emit. While wearing a mask gives you some level of protection, it is always recommended to work in an open environment. If you are working inside a closed space, make sure that it is well-ventilated. Keep the doors and windows open at all times during the process.
2. Remove Oil and Grease
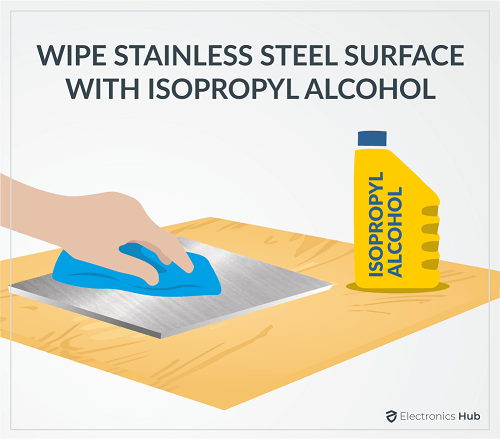 Oil and grease contaminants are also responsible for preventing solder from bonding to the surface. They should be the first thing to clean. Simply pour copious amounts of solvent onto a cloth and wipe the surface. Isopropyl alcohol is a great solvent for this purpose. In order to remove grease, however, it may not be enough. You need to use acetone in such cases.
Of course, you must observe caution while handling acetone as it is not only corrosive but also flammable in nature. Keep any naked flame away and wear protective gloves. Keep some water handy in case you end up spilling some onto your skin.
3. Remove Solid Contaminants
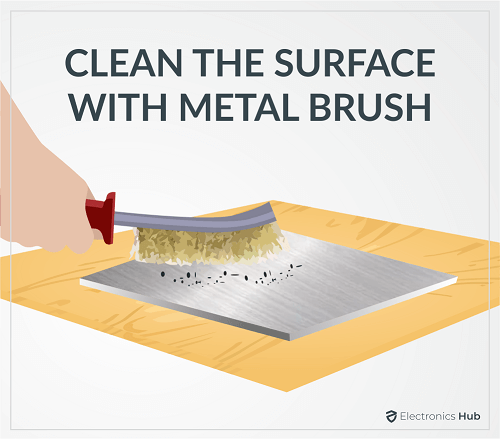 Some solid contaminants like dust etc. cannot be removed with solvents. Therefore, the only way to remove them is by using a metal brush. You can also roughen up the surface a bit so that the solder sticks to it better.
4. Apply Acid-Based Flux
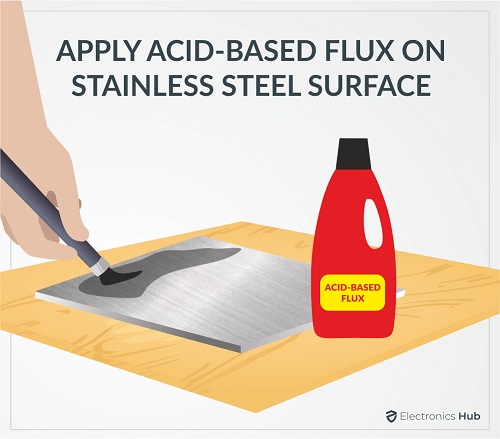 Even after you clean the surface with solvents and metal brushes, the oxide layer will persist. Unless it is removed, the solder will not stick. Hence, the best solution is to treat the surface with acid-based flux. Flux is a paste-like substance that becomes corrosive when melted and corrodes the oxide surface to expose the metal underneath.
You should use a flux that is specifically produced for use with stainless steel. Acid-based fluxes are best suited for this purpose. You can either use a brush or a piece of cloth to apply the flux paste all over the surfaces of the pieces to be joined together.
Binding the Metals
1. Use Proper Solder
There are various kinds of solder available in the market. They differ in terms of composition. For binding to stainless steel, you will require a solder that is composed of more than 50% tin. Another great advantage of using high-tin solder is that it matches the color of the stainless-steel surface and does not affect its visual appeal too much. Solder that contains silver will form an even stronger bond with stainless steel. However, it will take much longer to melt.
2. Clampdown the Two Metal Pieces
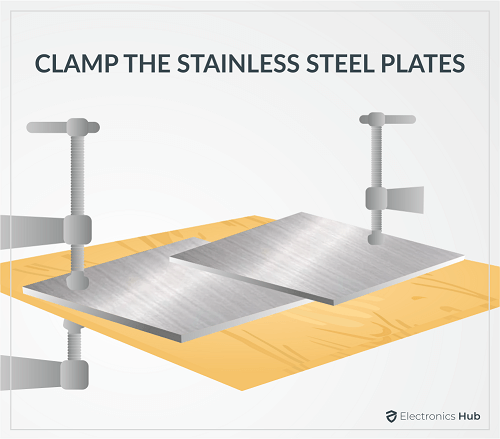 Soldering requires you to use both your hands. So, while soldering, you won’t have any free hands to hold the metal pieces together. Hence, the two pieces must be clamped together. You can do this either by purchasing a soldering stand or a table vise.
3. Pre-Heat the Metal Surfaces
Since the melting point of solder is much lower than that of stainless steel, you can heat the stainless steel using a flame or torch until it gets hot enough to melt the solder. You can touch a bit of the solder to check if it is hot enough for the solder to melt.
4. Melt Some Solder onto the Non-Steel Metal
If you plan on soldering some metal other than steel (such as copper or tin) to a piece of stainless steel, then the best way is to pre-melt some solder onto the surface of the non-steel metal. This will help form a better bond and will make soldering easier. Remember to unroll enough solder to keep the heating element away from your hands.
5. Apply Solder at the Joint
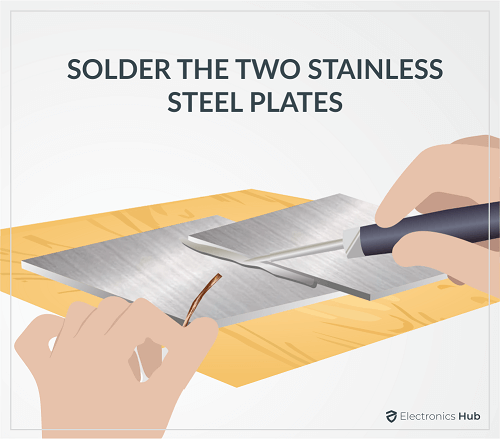 When the pieces of metal that are to be soldered are pre-tinned with solder, they tend to bind much more easily. Touch the solder wire at the joint where the metal pieces are supposed to be connected. The solder will melt and flow along the joint. You should also manually apply melted solder everywhere along the joint. As soon as the temperature lowers, the solder will solidify and the two pieces will be joined together.
6. Clean the Joint
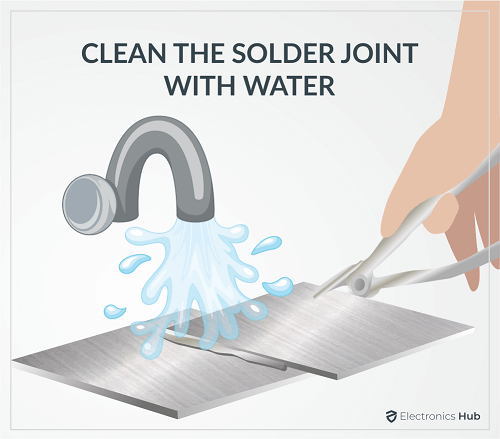 The acidic flux residue that remains after soldering is corrosive. Hence, it can corrode the metal pieces. Therefore, to avoid this, use water or isopropyl alcohol to remove any flux residue from the surface. Additionally, you can also scrub the area with a brush or sponge to remove the flux residue.
Conclusion
Soldering stainless steel is not as difficult as it sounds. If done correctly, it only takes a couple of minutes. The most important thing is to clean the surface of any contaminants and oxide before you apply the solder. It is also vital to clean any flux residue after soldering in order to ensure that the joint lasts long and does not corrode.
