Soldering has become one of the most reliable techniques to join two materials by melting solder. It is commonly used in soldering electronic components in PCBs. If you have soldered the components wrongly or if you want to remove the components, it can be quite difficult. This is because soldering creates strong joins and it is difficult to remove the solder.
So, you have to use special techniques to remove the solder. This process of removing solder is called desoldering. We already made a dedicated guide on how to desolder. Check that out for more info. There are different desoldering techniques you can use to remove the solder. The techniques vary based on the types of tools you use. Each technique also involves different levels of soldering proficiency.
Below is a complete list of different desoldering techniques you can use to remove the solder.
How to Remove Solder from Circuit Boards?
There are different methods to remove the solder from circuit boards. The tools you can use range from manual to machine-powered tools. For DIY desoldering PCBs, a simple desoldering braid or pump would suffice.
Below are the different techniques for desoldering circuit boards.
Grinding and Scraping
This is one of the most basic desoldering techniques. When we say “desoldering”, we mean removing the solder and not actual desoldering (using a soldering iron or hot air machine).
In this, you have to use a knife or scraper to remove the solder. If the amount of solder is too much, then you may get tired.
This takes more time than other desoldering techniques that we mentioned later. But, this is the best option if you do not have a lot of experience in soldering.
Machining and Milling
If you want to use a milling machine to drill away the solder, then you have to attach a microscope to the machine to increase the precision. It consumes less time than scraping. But, it requires a higher level of proficiency and experience.
Chemical Stripping
In this technique, you have to apply a chemical solvent on the board using a brush or swab.
When using this technique, ensure to cover the circuit board using some protective material. Otherwise, the solvent may damage the board.
This technique is only meant to remove solder from copper plates and other solder surfaces. The solvent breaks the solder which can then be easily removed.
Micro Blasting
If you want to remove solder from a large surface area, then Micro Blasting is the best option.
In this technique, you have to use a pencil-shaped tool to propel abrasive material on the large surface area that has to be desoldered. The abrasive material will remove the solder.
How to Remove Solder from Circuit Board Holes?
You can not use the same techniques you used for desoldering circuit board components to remove solder from circuit board holes. You have to use different techniques and tools to desolder circuit board holes.
Here are the different methods to remove solder from circuit board holes,
Desoldering Pump or Bulb
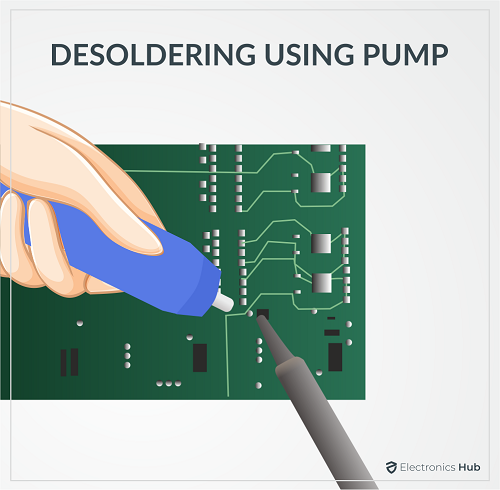 Also known as solder suckers, desoldering pumps are the most popular tools to remove solder from circuit board holes.
First, you have to preheat the board. Then, you have to squeeze the bulb and place the tip of the desoldering pump against the solder. Now when you release the bulb, it will suck the solder from the circuit board hole.
In some desoldering pumps, a plunger will be present instead of the bulb. You have to press the plunger instead of squeezing the bulb.
Drill
The other option to remove the solder from circuit board holes is by using a drill or pin vise.
In this desoldering method, you have to use a small steel bit with a diameter of fewer than 0.029 inches to drill the circuit board hole. If the diameter of the bit is bigger, you will damage the board.
Instead of a steel bit, you can also use bits made of carbon or cobalt.
Desoldering Wick
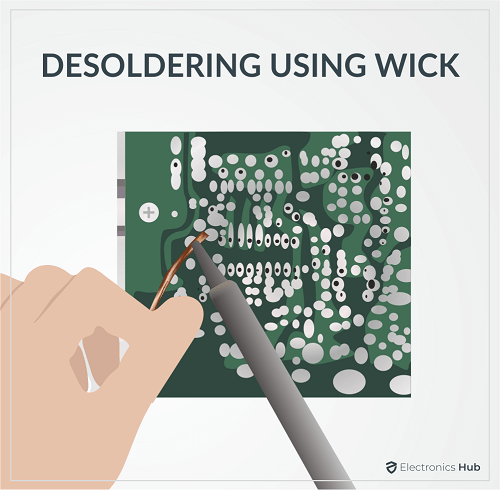 Also known as desoldering braid, this is another popular tool to remove solder from circuit board holes.
You have to intertwine copper coils and form a braid. They are also readily available in the market. Then, you have to heat the braid and keep the end of the braid on the solder. As copper is a good thermal conductor, it will suck the solder. Remove the end of the braid that has solder and repeat the process until you remove all the solder.
When using this technique, you have to be careful not to touch the braid. Always, hold the braid using a clamp or any other holder.
Combining the Methods
Instead of using a single method, you can also combine multiple methods to remove the solder. For instance, you can use a desoldering braid and desoldering pump together.
Besides, you can opt for electronic models of desoldering pumps. Instead of squeezing the bulb, you simply have to press a button. There are also some models that are dedicated to desoldering.
Removing Old Solder
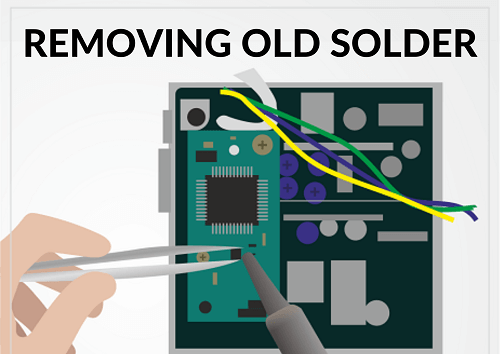 While removing new solder is easy, the same can not be said for old solder. As solder gets older, it becomes more difficult to melt it. It gets bonded well with the two materials.
To remove the old solder, first, you have to apply fresh solder to it. Then, you have to apply heat to them. When the fresh solder melts, the old solder also melts along with it.
You can use any one of the above-mentioned techniques to remove the old solder.
Removing Solder Flux
We use flux to prepare the metal surface for soldering. It cleans and removes any impurities on on the surface. This includes oxidation layers as well. Depending on the solder you have used, the flux may still be present after soldering.
There are different cleaning techniques available to remove the flux. But the technique depends on the type of flux and solder.
For removing no-clean flux, you can use distilled water or isopropyl alcohol. You can also use chemical cleaners specially available for cleaning flux. They come in aerosol cans.

After spraying on the flux, you have to remove the flux by using a stiff brush. If you have to remove the flux from cracks or holes, you can use dental picks. Once you have removed the flux, use a cotton swab to dry the area.
If the flux has become very hard, then you can use compressed air as well.
Conclusion
It all comes down to the type of tool and technique that you choose to remove the solder. Some tools require more skill than others. Besides, some techniques will damage the PCB and the components. So, you should also consider whether you would reuse the components or not while choosing the desoldering technique.
If you have any other queries or doubts, please let us know using the comments section. My team will help you out. You can also post your thoughts and opinions in the comments box.
