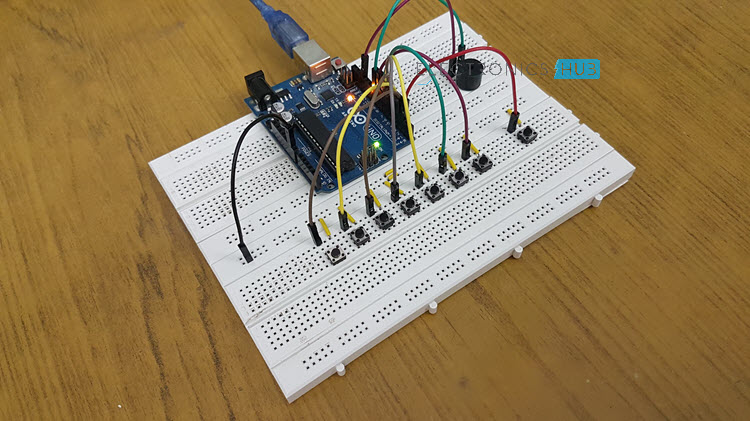
In this fun DIY project, I will show you how to make an Arduino based Piano. It is a simple project made using Arduino UNO, few push buttons and a Piezo Buzzer. A special feature of this project is that Arduino will record the last played set of tones and repeat those tones like a one time record and repeat feature.
To keep things simple, I haven’t used any display (like 16×2 LCD Display).
Introduction
We have seen some application oriented projects using Arduino like Heart Rate Monitor, Robotic Arm, Home Automation, etc. Sometimes, we make projects just for fun like 8x8x8 LED Cube, Hand Gesture Control of Computer, etc.
The Arduino based Piano project comes under the category of fun projects as you know, this project doesn’t have any real world applications (at least not directly) but can be used to understand certain features of Arduino (like its sound producing capabilities using the tone () function).
None the less, sounds and tones can provide a great audio feedback in our projects.
How to make Arduino based Piano?
Instead of asking how to make an Arduino based Piano, the correct question should be how to generate different tones using Arduino. We know that Arduino is capable of producing PWM signals.
I will be using this feature of Arduino to generate tones. The other way to generate tones using Arduino is to use the function tone () function.
Using tone () function, you can generate square waves of different frequencies but with fixed duty cycle (50%). Internally, the tone () function relies on the Timers of Arduino (or the ATmega328P Microcontroller, to be more accurate).
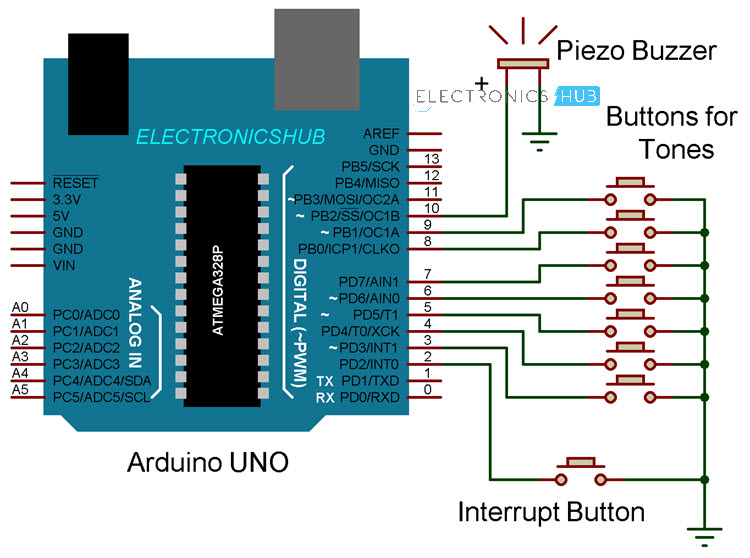
Circuit Diagram
The following image shows the circuit diagram for piano application using Arduino. As you can see from the circuit diagram, it is a fairly simple circuit.
Components Required
- Arduino UNO
- Push Buttons X 8
- Small Piezo Buzzer (or a small speaker)
- Connecting Wires
- Breadboard
- Power Supply
Circuit Design
The design of Arduino Piano circuit is very easy. First, connect a 5V Piezo Buzzer i.e. its positive terminal to Pin 10 of Arduino. It is necessary that you connect the Piezo Buzzer to one of the PWM capable pins of Arduino. The other end of the Piezo Buzzer is connected to GND.
Now, connect 7 Push Buttons to digital I/O pins 3 through 9 of Arduino. These pins act as the tone input pins. I have used the INTERNAL PULL UP feature of Arduino and hence I haven’t connected any external pull-up resistors to these pins.
All the other terminals of these push buttons are connected to GND. Finally, another push button is connected to Pin 2 of Arduino to act as an Interrupt pin. The other end of this button is also connected to GND.
I have used the on-board LED (LED connected to Pin 13) to indicate between regular tone play and recorded tone play.

Code
The code for the project How to make Arduino based Piano is given below.
Working
Make the connections as per the circuit diagram and upload the code to Arduino. Once the power to the circuit is turned on, Arduino is ready to accept the input from the buttons.
Each button is associated with a PWM signal in the code. When a button is pushed, that particular PWM signal is generated through the Piezo Electric Buzzer.
Now for the record and repeat mode, play a few tones using different buttons. With each button pressed, Arduino starts recording i.e. makes note of the sequence of the buttons, its on time and off time.
Once you are done with the tone, you can push the Interrupt Button. As soon as the Arduino enters Interrupt Mode, all the previously pressed tones are played back through the Piezo Buzzer.
During normal tone playback i.e. when the buttons are being pressed, the LED on pin 13 stays ON. During repeat mode, it stays OFF.
An important point to understand here is that I did not use the tone() function of Arduino. You can try to generate sounds of different frequencies using that function.
Conclusion
A fun DIY Project called Arduino based Piano is implemented here. This project can be helpful in understanding the sound capabilities of Arduino. Although I haven’t used the tone () function, you can implement the same using that function for more accurate results.

One Response
I wish to know from where did you get the push buttons and small piezo buzzer