You might have seen Hand Gesture Controlled Robots, where the motion of a robot is controlled by the gestures of the hand. Another interesting project based on a similar principle is an Arduino based Hand Gesture Control of your computer or laptop.
Human Machine Interface or HMI is a system comprising of hardware and software that helps in communication and exchange of information between the user (human operator) and the machine.
We normally use LED Indicators, Switches, Touch Screens and LCD Displays as a part of HMI devices. Another way to communicate with machines like Robots or Computers is with the help of Hand Gestures.
Arduino based Hand Gesture Control of Your Computer
Instead of using a keyboard, mouse or joystick, we can use our hand gestures to control certain functions of a computer like play/pause a video, move left/right in a photo slide show, scroll up/down in a web page and many more.
In this project, we have implemented a simple Arduino based hand gesture control where you can control few functions of your web browser like switching between tabs, scrolling up and down in web pages, shift between tasks (applications), play or pause a video and increase or decrease the volume (in VLC Player) with the help of hand gestures.

Before Proceeding…
The project Arduino based Hand Gesture Control of Computer is implemented using Python. So, before proceeding with this project, I suggest you to work on this simple project CONTROLLING ARDUINO’S ON-BOARD LED WITH PYTHON.
In this project, you can find the basics of how to use the Arduino with Python, installing Python on your computer, setting up the Serial Library (important for communicating with Arduino) and the project codes.
So, I assume that you have already installed Python and pySerial (library for communicating with serial ports) and also worked on the basic project of blinking Arduino’s LED with Python.
Principle behind the Project
The principle behind the Arduino based Hand Gesture Control of Computer is actually very simple. All you have to do is use two Ultrasonic Sensors with Arduino, place your hand in front of the Ultrasonic Sensor and calculate the distance between the hand and the sensor. Using this information, relevant actions in the computer can be performed.
The position of the Ultrasonic Sensors is very important. Place the two Ultrasonic Sensors on the top of a laptop screen at either end. The distance information from Arduino is collected by a Python Program and a special library called PyAutoGUI will convert the data into keyboard click actions.
Circuit Diagram
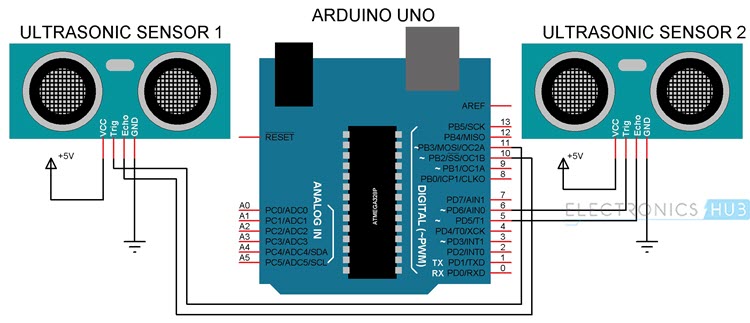
The circuit diagram of Arduino part of the project is shown in the following image. It consists of an Arduino UNO board and two Ultrasonic Sensors and you can power up all these components from the laptop’s USB Port.
Components Required
- Arduino UNO x 1 [Buy Here]
- Ultrasonic Sensors x 2
- USB Cable (for Arduino)
- Few Connecting Wires
- A Laptop with internet connection
Design of the Project
The design of the circuit is very simple, but the setup of the components is very important. The Trigger and Echo Pins of the first Ultrasonic Sensor (that is placed on the left of the screen) are connected to Pins 11 and 10 of the Arduino. For the second Ultrasonic Sensor, the Trigger and Echo Pins are connected to Pins 6 and 5 of the Arduino.
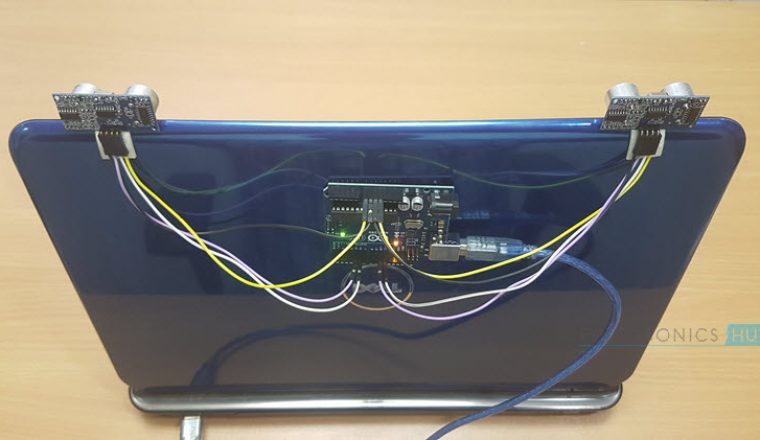
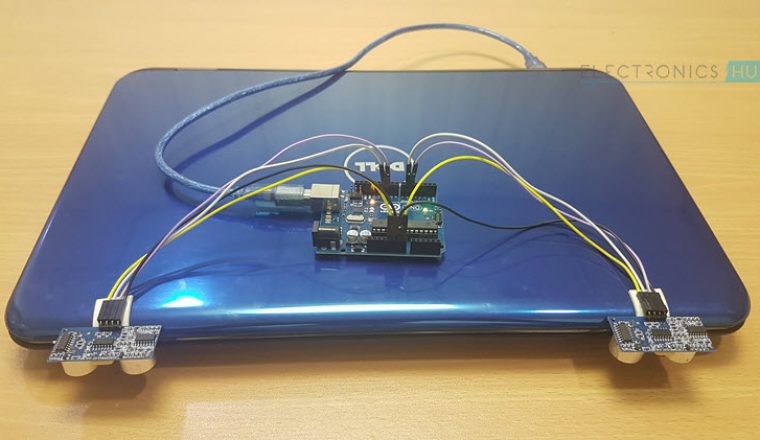
Now, coming to the placement of the Sensors, place both the Ultrasonic Sensors on top of the Laptop screen, one at the left end and the other at right. You can use double sided tape to hold the sensors onto the screen.
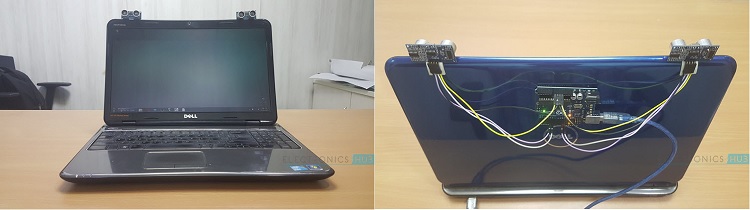
Coming to Arduino, place it on the back of the laptop screen. Connect the wires from Arduino to Trigger and Echo Pins of the individual sensors. Now, we are ready for programming the Arduino.
Programming Your Arduino to Detect Gestures
The important part of this project is to write a program for Arduino such that it converts the distances measured by both the sensors into the appropriate commands for controlling certain actions.
We have already seen a project called PORTABLE ULTRASONIC RANGE METER, where you can measure the distance of an object placed in front of an Ultrasonic Sensor with the help of Arduino.
A similar concept is used here to measure the distance of your hand in front of both the Ultrasonic Sensors in this project. The fun part starts after calculating the distance.
The hand gestures in front of the Ultrasonic sensors can be calibrated so that they can perform five different tasks on your computer. Before taking a look at the gestures, let us first see the tasks that we can accomplish.
- Switch to Next Tab in a Web Browser
- Switch to Next Tab in a Web Browser
- Scroll Down in a Web Page
- Scroll Up in a Web Page
- Switch between two Tasks (Chrome and VLC Player)
- Play/Pause Video in VLC Player
- Increase Volume
- Decrease Volume
The following are the 5 different hand gestures or actions that I’ve programmed for demonstration purpose.
Gesture 1: Place your hand in front of the Right Ultrasonic Sensor at a distance (between 15CM to 35CM) for a small duration and move your hand away from the sensor. This gesture will Scroll Down the Web Page or Decrease the Volume.
Gesture 2: Place your hand in front of the Right Ultrasonic Sensor at a distance (between 15CM to 35CM) for a small duration and move your hand towards the sensor. This gesture will Scroll up the Web Page or Increase the Volume.
Gesture 3: Swipe your hand in front of the Right Ultrasonic Sensor. This gesture will move to the Next Tab.
Gesture 4: Swipe your hand in front of the Left Ultrasonic Sensor. This gesture will move to the Previous Tab or Play/Pause the Video.
Gesture 5: Swipe your hand across both the sensors (Left Sensor first). This action will Switch between Tasks.
Based on the above mentioned gesture, the following Arduino Program has been written.
Arduino Code
If you observe in the Arduino Code, the gesture mentioned above have been converted into 5 Commands that are sent to the Serial Port. Using these 5 commands, you can write a Python Program to control certain Keyboard Functions in order to achieve the required task.
Python Programming for the Project
Writing Python Program for Arduino based Hand Gesture Control is very simple. You just need to read the Serial data from Arduino and invoke certain keyboard key presses. In order to achieve this, you have to install a special Python Module called PyAutoGUI.
Installing PyAutoGUI
The following steps will guide you through the installation of PyAutoGUI on Windows Computers. The module PyAutoGUI will help you to programmatically control the mouse and keyboard.
With the help of PyAutoGUI, we can write a Python Program to mimic the actions of mouse like left click, right click, scroll, etc. and keyboard like keypress, enter text, multiple key press, etc. without physically doing them. Let us install PyAutoGUI.
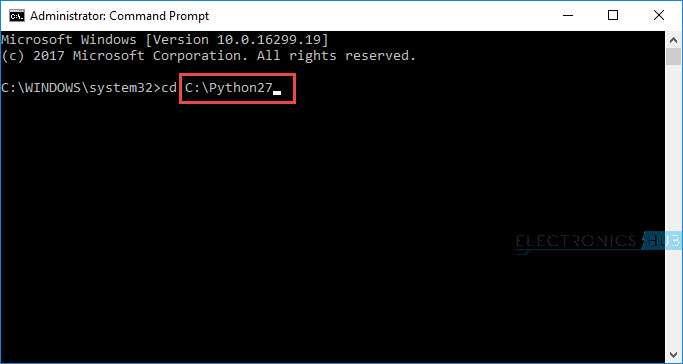
If you remember in the previous project, where we controlled an LED on Arduino using Python, we have installed Python in the directory “C:\Python27”.
Open Command Prompt with Administrator privileges and change to the directory where you have installed Python (in my case, it is C:\Python27).
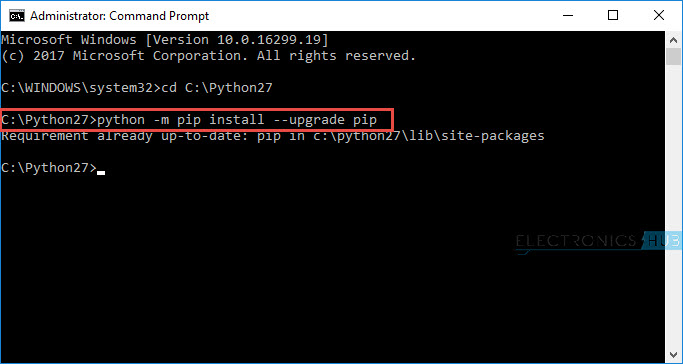
If you have installed the latest version of Python, then pip (a tool for installing packages in Python) will already be installed. To check if pip is installed or not, type the following command.
You should upgrade to the latest package of pip using the following command. If pip is already in its latest version, then ignore this step.
Or
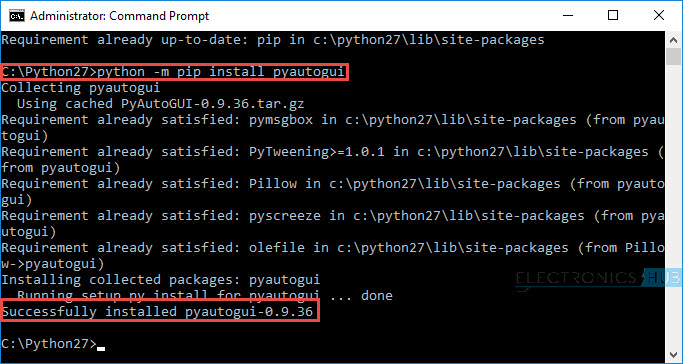
After upgrading pip, you can proceed to install PyAutoGUI. In order to install PyAutoGUI, type the following command.
Or
Python Code
If everything goes well till now, you can proceed to write the Python Code. If you observe the Arduino Code given above, the Arduino sends out five different texts or commands through Serial Port upon detecting appropriate hand gestures. These commands are
- Next
- Previous
- Down
- Up
- Change
Using these commands along with few functions in PyAutoGUI (like hotkey, scroll, keyDown, press and keyUp), you can write a simple Python Code that will execute the following tasks of keyboard and mouse.
- Data = “next” – – > Action = Ctrl+PgDn
- Data = “previous” – – > Action = Ctrl+PgUp
- Data = “down” – – > Action = Down Arrow
- Data = “up” – – > Action = Up Arrow
- Data = “change” – – > Action = Alt+Tab
The Python Code for Arduino based Hand Gesture Control of Computer is given below.
NOTE: We have used Google Chrome as Web Browser and VLC Player as Media Player. Also, we modified the hotkeys of VLC Player to suit our Python Program. The modifications are as follows.
- Keypress = Up Arrow – – > Action = Increase Volume
- Keypress = Down Arrow – – > Action = Decrease Volume
- Keypress = Ctrl+PgUp – – > Action = Play/Pause
Application of Arduino based Hand Gesture Control of Computer
- In this project, we have implemented Arduino based Hand Gesture Control of Your Computer, where few hand gestures made in front of the computer will perform certain tasks in the computer without using mouse or keyboard.
- Such Gesture based Control of Computers is already present and a company called Leap Motion has been implementing such technology in computers.
- This type of hand gesture control of computers can be used for VR (Virtual Reality), AR (Augmented Reality), 3D Design, Reading Sign Language, etc.

34 Responses
Hello, this was a nice project. But i would like to ask, is that possible to control the pointer of a mouse using only this? If so, how? Thank you.
well first of all tell me why do we need to use python can’t we directly do it with arduino code???
Hello, is this possible to control the movement of the mouse? and clicking like right and left click. Thank you.
Hi Friend,
do you have the same code for Python 3.4 ?
ya just add round brackets in print statements
can’t we make this project by using a single ultra sonic sensor ?
i am having some problem with the code
broooo take it for a walk first
Traceback (most recent call last):
File “C:/Python27/gc2.py”, line 4, in
Arduino_Serial = serial.Serial(‘com12’,9600) # Initialize serial and Create Serial port object called Arduino_Serial
File “C:/Python27\serial\serialwin32.py”, line 31, in __init__
super(Serial, self).__init__(*args, **kwargs)
File “C:/Python27\serial\serialutil.py”, line 240, in __init__
self.open()
File “C:/Python27\serial\serialwin32.py”, line 62, in open
raise SerialException(“could not open port {!r}: {!r}”.format(self.portstr, ctypes.WinError()))
SerialException: could not open port ‘com12’: WindowsError(2, ‘The system cannot find the file specified.’)
>>>
This is the error which i am getting,please help me to sort out this,
hope you will reply soon.
regards
puneet
Traceback (most recent call last):
File “C:/Python27/Gesture_python.py”, line 5, in
import serial # add Serial library for serial communication
ImportError: No module named serial
Traceback (most recent call last):
File “C:/Users/SalahEddine/PycharmProjects/untitled2/kk/lo.py”, line 1, in
import pyautogui
File “C:\Users\SalahEddine\PycharmProjects\untitled2\venv\lib\site-packages\pyautogui\__init__.py”, line 84, in
import pyscreeze
File “C:\Users\SalahEddine\PycharmProjects\untitled2\venv\lib\site-packages\pyscreeze\__init__.py”, line 168
yield Box(x, y, needleWidth, needleHeight)
SyntaxError: ‘return’ with argument inside generator
!!! ?
This is the error which i am getting,please help me to sort out this,
hope you will reply soon.
Is the project is wide range gesture using same sensor or any other sensor
Traceback (most recent call last):
File “C:\Users\Muneeb\Desktop\gesture project.py”, line 5, in
import serial # add Serial library for serial communication
ImportError: No module named serial
>>>
This is the error which i am getting,please help me to sort out this,
hope you will reply soon.
Where should I type the program in python or in arduino software?
i am not able to run the python module , it shows me an error saying something related to print incoming data please help me !!!!!!
i have debugged the solution for this problem
If someone else is facing the same problem the try debugging the same code after closing the serial monitor in Arduino IDE
Hi i have done with the cooding but when it comes to python once all done its showing that my incoming data is error can u pls help me with this urgently tq
I think you’re not getting install pyautogui directory or pyserial ? Do install this from command prompt!
Hy Dude! It’s working <3 thanks man and yes but there are some fluctuations when I was implement action of my hands. Otherwise It works fine..
Hello Sir
Can i use Arduino nano for this project.
Traceback (most recent call last):
File “/Users/davidebondielli/Desktop/gesture_python.py”, line 1, in
import serial #Serial imported for Serial communication
ModuleNotFoundError: No module named ‘serial’.
I have Elegoo, and the name of the port is different, so, this project can work with Elegoo?
redifinition of ‘const int trigpin1’…………………..this type of error is showing please help me bro
File “C:/Python27/gc2.py”, line 4, in
Arduino_Serial = serial.Serial(‘com12’,9600) # Initialize serial and Create Serial port object called Arduino_Serial
error serial number was dispalcing ..
pip install pyserial
Thanks for sharing! Excellent blog. I Look forward to read more on this blog.
Dude this is the single most satisfying project I ever worked on.Its a spectacular idea .Take a bow mate.
i have done everything in serial monitor of arduino i can see the results but on my laptop nothing is moving on the screen and also while upgrading pip it is showing no module install is there in c:\python………………..
can anyone please help me with that
install python
Can i use arduino nano??
sir can you please tell how to install pip on python 2.7.9
i have the same problems
Did you find the solutions
not yet
how to resolve this error add pyautogui library for programmatically controlling the mouse and keyboard.
Hello Sir!
Sir, I want to make this project and also add some additional features in this can you tell me can use Use case diagram, activity diagram and so n diagram in this? If no then explain the reason?