In this project, I will show you how to design and build a simple but effective circuit called Auto Intensity Control of Street Lights using Arduino. Since the concept of this project is to consumption of energy, using LEDs as the Street Lights would be the obvious choice.
Introduction
Street Lights have become an essential part of our lives as they are an important source of light at evening and night time. The main advantage of street lights is that they increase safety and prevents accidents and collisions.
I have already implemented a few street light based project like STREET LIGHT THAT GLOWS ON DETECTING VEHICLE MOVEMENT and AUTO INTENSITY CONTROL OF STREET LIGHTS USING PIC MICROCONTROLLER.
The main difference between the earlier projects and this project is the Microcontroller. There I have used 8051 and PIC microcontrollers while in this project, as the title Auto Intensity Control of Street Lights using Arduino suggests, I have used Arduino as the main controller.
What is Auto Intensity Control of Street Lights using Arduino?
Auto Intensity Control of Street Lights is a simple project where the intensity of the street lights is automatically controlled based on the sunlight conditions. Generally, street lights are turned on during evening time and will continue to glow till morning.
This might result is unnecessary usage of power as the lights will be glowing at full intensity all the times. But using the Auto Intensity Control of Street Lights using Arduino project, you can control the intensity based on the ambient lighting conditions.
As an additional power saving feature, I have used LEDs for street lights.
Concept behind Auto Intensity Control of Street Lights using Arduino
Before going into the circuit diagram, components and code, I want to talk a little bit about the idea behind the project Auto Intensity Control of Street Lights using Arduino. I won’t compare it with any other projects but just dive into the concept.
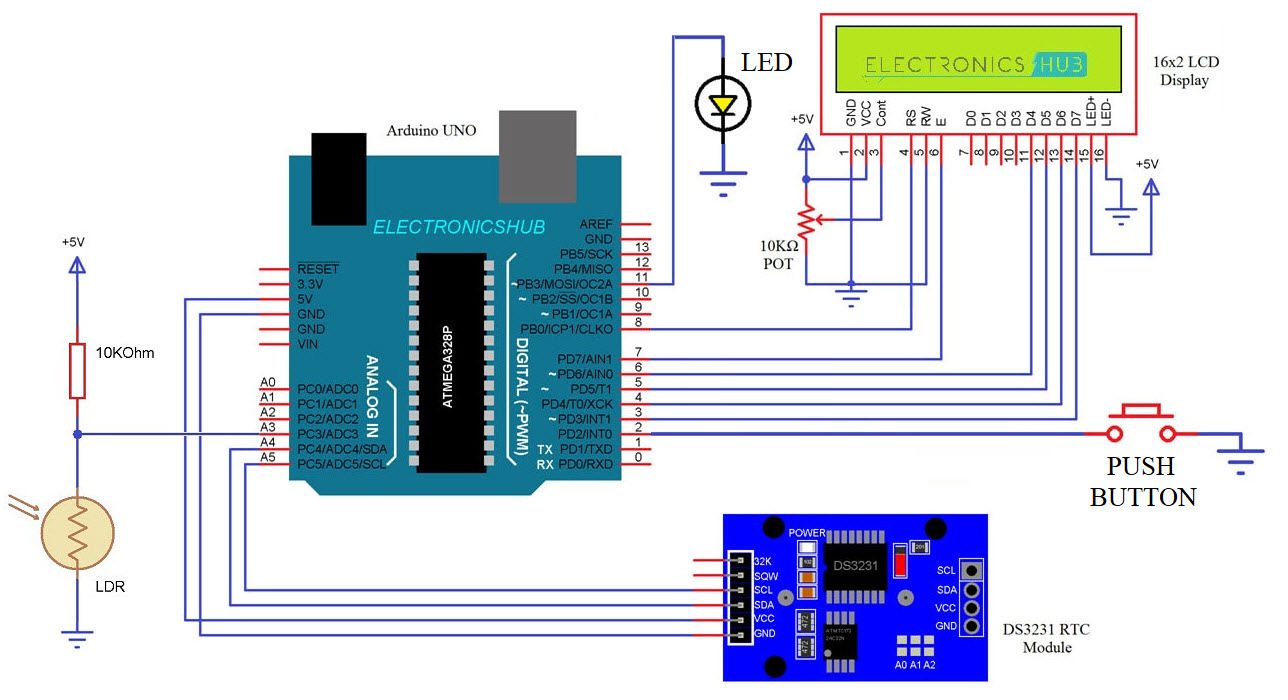
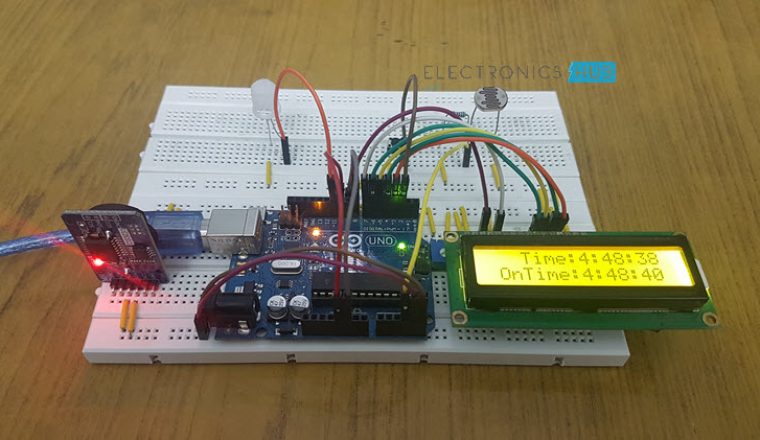
I have used a combination of RTC Module (DS3231) and LDR for controlling the street lights. This combination is not something new but the way it is implemented is.
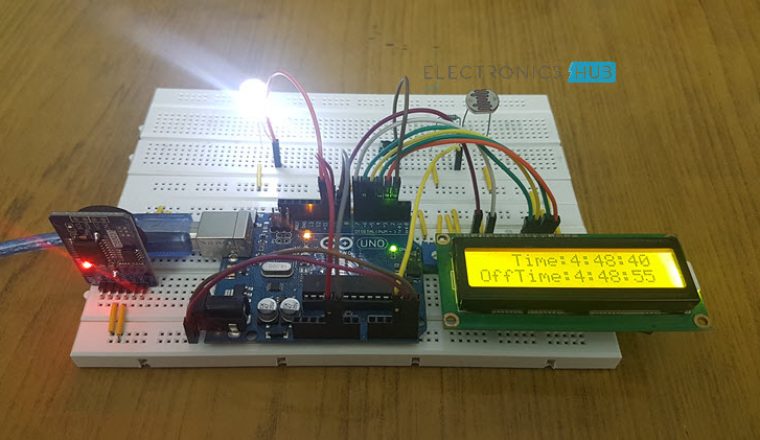
Basically, there are two modes of operation of this project: RTC Mode and LDR Mode. In RTC Mode, the street lights turn on automatically based on the ON Time set in the code and turn off based on the OFF Time.
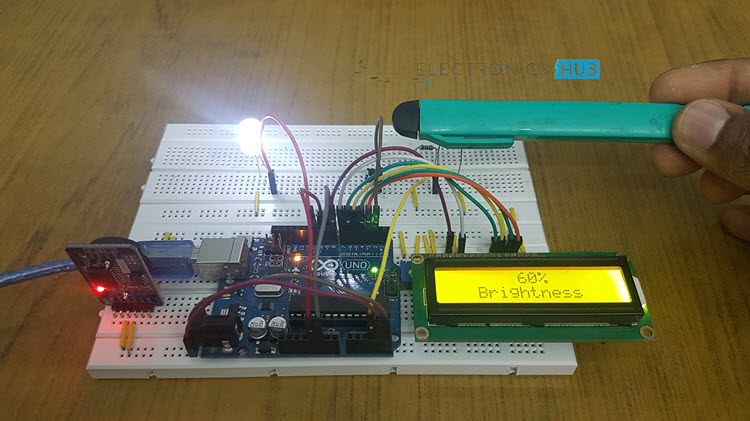
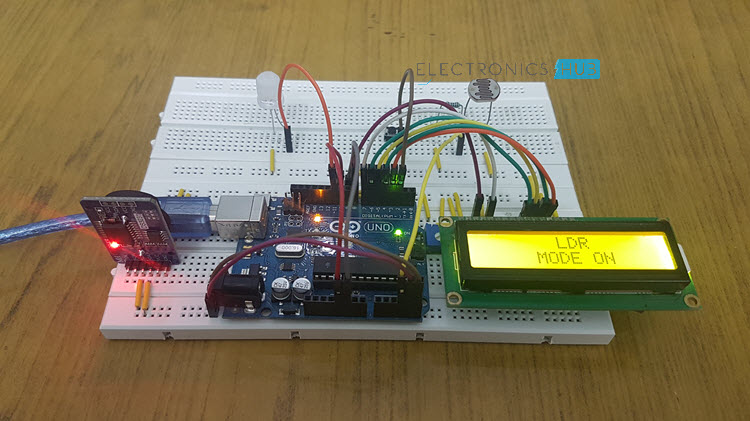
In the LDR Mode, the street lights have an intensity control based on the ambient light near the LDR.
Circuit Diagram
The following image shows the circuit diagram of the Auto Intensity Control of Street Lights using Arduino project.
Components Required
- Arduino UNO
- DS3231 RTC Module
- LDR
- 16×2 LCD Display
- LED
- 10KΩ Potentiometer
- 10KΩ Resistor
- Push Button
- Connecting Wires8051
- Breadboard
Circuit Design
First connect the SDA and SCL pins of DS3231 RTC Module to A4 (SDA) and A5 (SCL) pins of Arduino. A 10KΩ Resistor and an LDR are connected in a voltage divider format and its output is given to A3 pin (of Arduino).
The data pins of 16×2 LCD Module i.e. D4 – D7 are connected to 6, 5, 4 and 3 pins of Arduino respectively. The RS and E pins are connected to pins 8 and 7.
A Push Button is connected to Pin 2 of Arduino and an LED is connected to Pin 11. You can follow the rest of the connections from the circuit diagram.
Code
The code for the project Auto Intensity Control of Street Lights using Arduino is given below.
Working
After making the connections and uploading the code to Arduino, turn on the Power supply to the project. Initially, the Arduino runs in RTC Mode where there are two times set in the code: the ON TIME and the OFF TIME.
Arduino compares the ON TIME with the time from RTC Module and when they match, the LED is turned ON. After this, the Arduino waits for the OFF TIME and once the time from RTC Module reaches the OFF TIME, the LED is turned OFF.
During anytime of this operation, if the button (connected as an external interrupt to Pin 2) is pushed, the Arduino enters LDR Mode. In this mode, the Arduino reads the value of the LDR from A3 and based on the value, it adjusts the intensity of the LED.
In order to switch back to RTC Mode, all you have to do is push the button.
Conclusion
A simple project for saving power is implemented using Auto Intensity Control of Street Lights using Arduino. With slight modifications and enhancements, this project can be applicable for real time use.

One Response
the code does’t working