Even though Microsoft Excel is probably the best application to handle data for most users, it is still a little confusing in terms of its user interface. And those of you who are new to Microsoft Office will primarily have an issue with its gridlines which can make working with data a little confusing. Due to the same reason, we are here with a complete guide on how to remove gridlines in Excel given down below.
What are Gridlines in Excel?
Before we go ahead and remove gridlines in Excel, you should first learn about their importance and why they exist in the first place. So the gridlines are essentially the grey colored horizontal and vertical lines that spread across your working space in Excel. These lines are there to separate different cells while maintaining a uniform distance between all cells. As a result, while gridlines may make things seem a bit confusing, they are there to remove confusion while handling large amounts of data.
How to Remove Gridlines in Excel?
If you are not going to work with large amounts of data and just want to create a few small and basic spreadsheets, then removing the gridlines in Excel definitely makes sense. For the same, you can try out one of the following methods to remove gridlines in Excel:
1. Using the View Tab in Excel
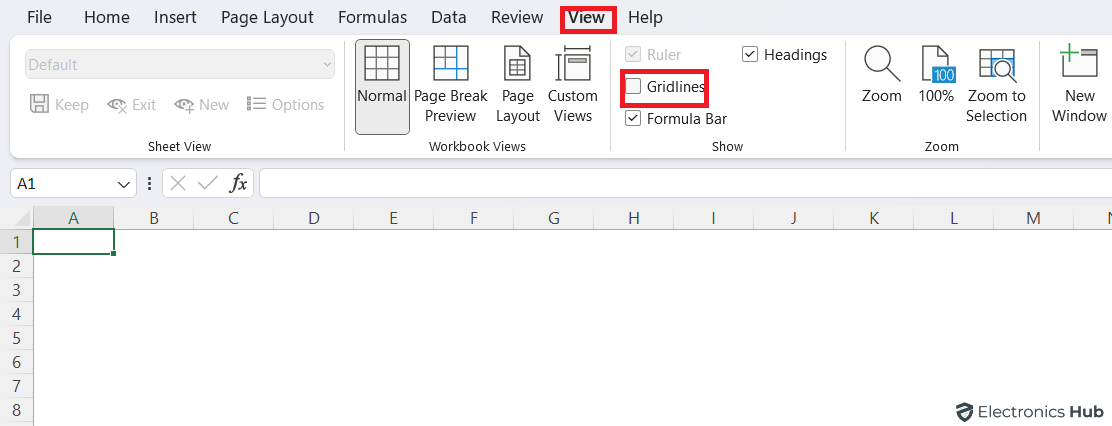
The View Tab present in Microsoft Excel allows you to change almost all kinds of user interface related options. This even includes removing the gridlines if needed as shown here:
- First, open the Excel sheet that you are working on.
- Now, go to the View tab and find the Gridlines option present under the Group tab.
- Here, uncheck the checkbox next to Gridlines to remove all gridlines from the current sheet.
- If you want to remove gridlines from all worksheets, you can group them together, remove their gridlines using this method, and then ungroup them.
2. Using the Page Layout Tab in Excel
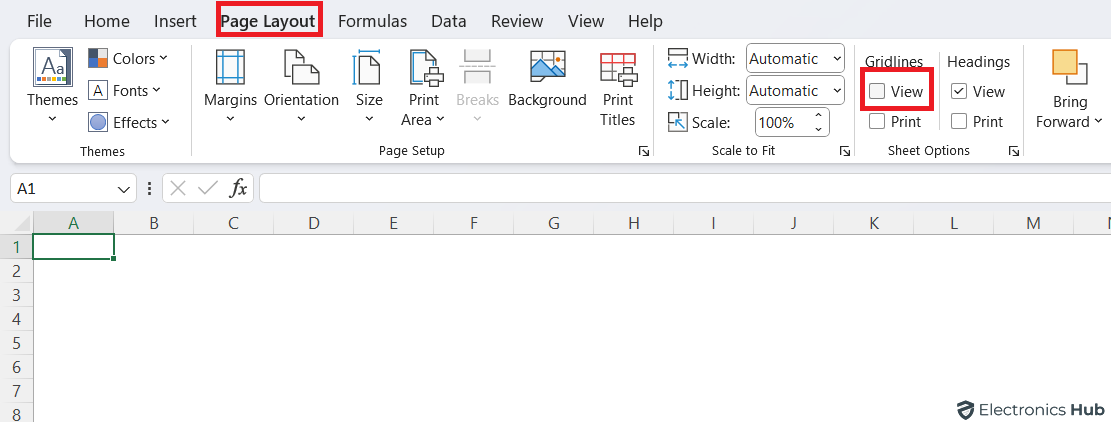
Another great way to change the user interface settings related to just the working spreadsheet in Excel is to use the Page Layout Tab. It also offers various user interface options as given here:
- You need to go to the Page Layout tab and look for the Gridlines option present in the Sheet Options menu.
- Now, uncheck the checkbox given next to the View option.
- Similar to the View Tab method, this one only applies changes to the current spreadsheet and not to all.
- For that, you will need to group them, make changes, and then ungroup them.
3. Removing Gridlines Using a Shortcut
Depending on your workflow, you may have to hide and unhide gridlines in Excel again and again which can be quite time consuming. Thankfully, this process can be made faster using keyboard shortcuts as shown here:
- Open Microsoft Excel and launch the spreadsheet you want to work on.
- Now, press Alt + W + V + G on your keyboard to remove gridlines in Excel.
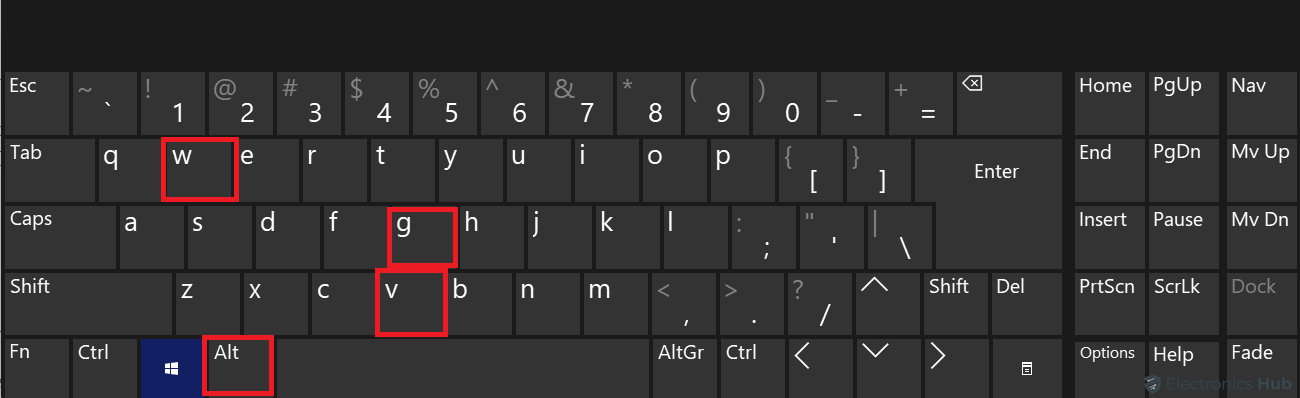
- You can press the same keyboard shortcut again to enable the gridlines again if needed.
4. Removing Gridlines by Changing Color
Some of you might want to permanently remove grid lines for everyone and not just you. If you want the gridlines to stay hidden even while sharing Excel files, then you should consider changing the color of the gridlines:
- Start by opening the spreadsheet you were working on.
- Now, press control + A to select all the cells.
- Then, open the Font menu under the Home Tab.
- Here, select the Fill Tool and select the color white which will make the gridlines disappear for everyone.
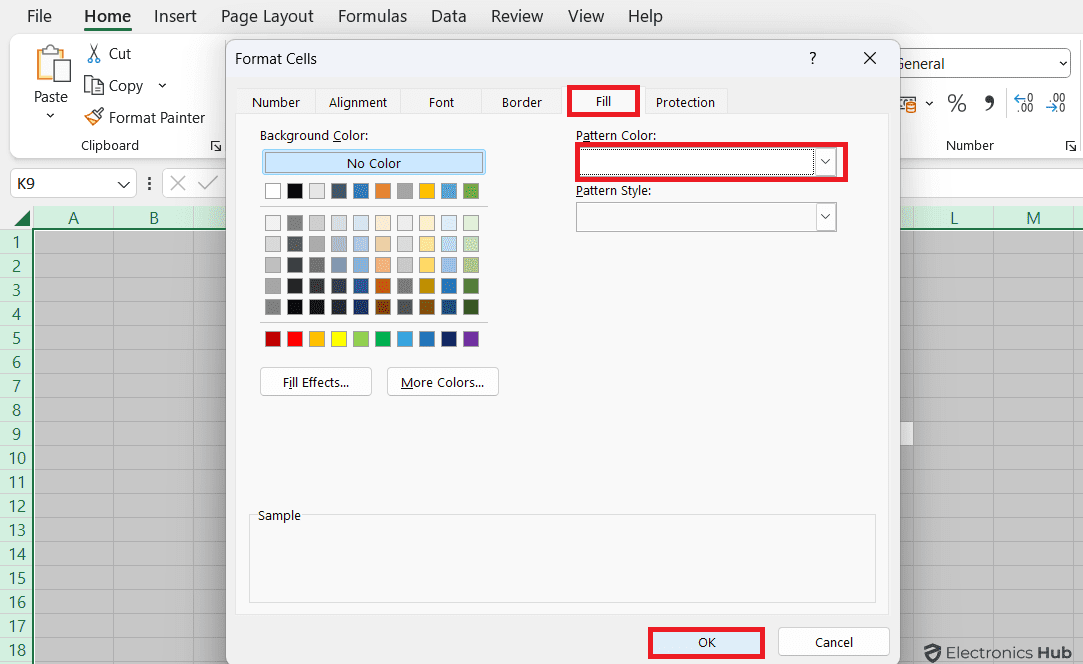
- If you want to revert this change, you can change the No Fill option in the Fill Tool when all the cells are selected.
5. Using the Border Feature
Apart from filling the complete cell with white, you may also want to have different colors for the cell while having different border colors. For this, you need to use the border feature of Microsoft Excel:
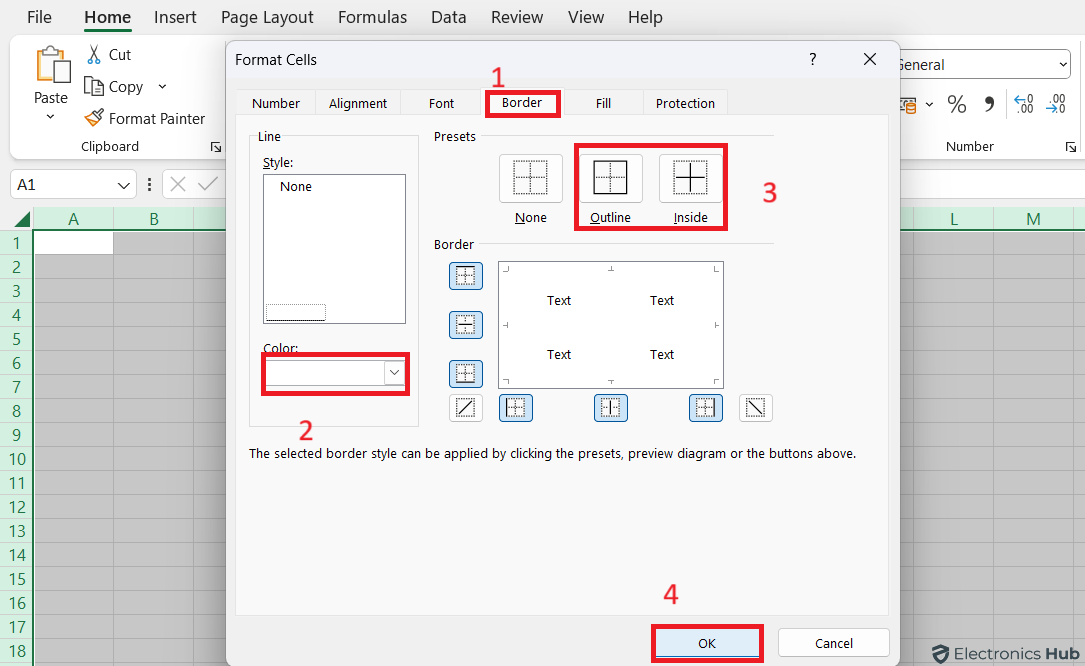
- First press control + A to select all the cells in a given spreadsheet.
- Then, press control + 1 and head over to the Border tab.
- Here, choose the white color and click on the Outline and Inside buttons.
- Finally, click on OK to save these settings and remove gridlines in Excel.
6. Using the Microsoft Visual Basic Application Feature
Microsoft is also known for its Visual Basic for being a great way of handling large amounts of data. Hence, it has also included some of the Microsoft Visual Basic functionality within Excel that can be used to remove gridlines:
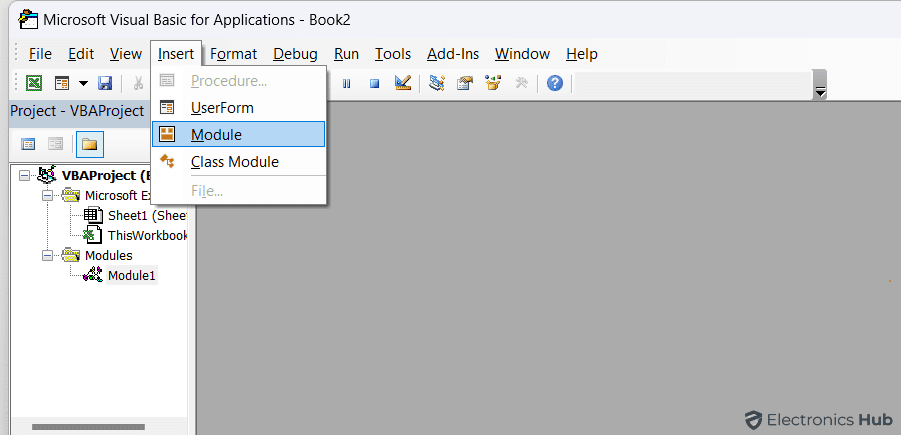
- Press Alt + F11 on your keyboard to open the VBA interface in Microsoft Excel.
- Now, select the Module option under the Insert menu.
- Here, you have to paste the following code and then press F5:
|
Sub Hide_Mesh() If ActiveWindow.DisplayGridlines Then ActiveWindow.DisplayGridlines = False Else End If End Sub |
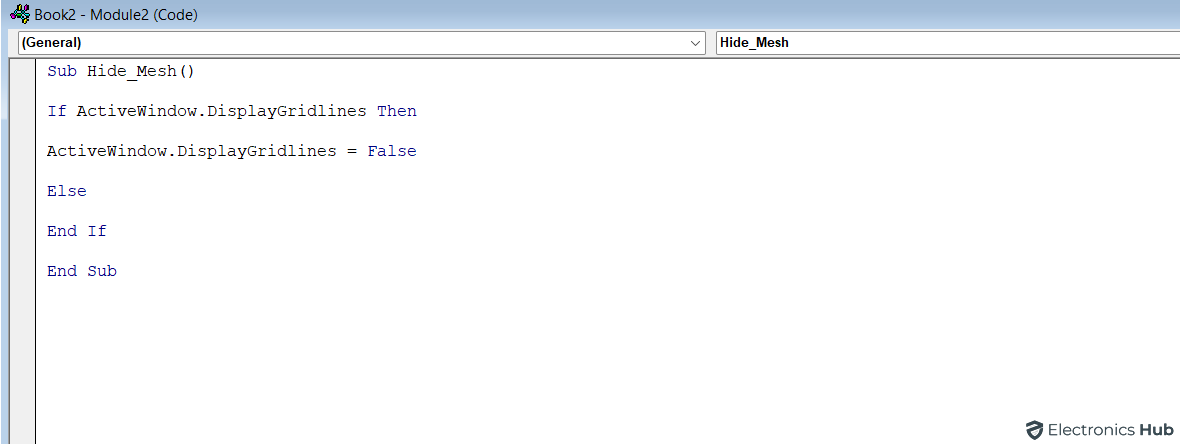
- Once you have pressed F5, you will find all the gridlines removed from the spreadsheet.
How to Add Gridlines Option to the Quick Access Toolbar?
If you keep toggling the gridlines in Microsoft Excel quite often and don’t want to use keyboard shortcuts for the same, then you can add the Gridlines option to the quick access toolbar:
- Open the Page Layout tab and find the Gridlines option.
- Then, right click on the Gridlines option and select Add to Quick Access Toolbar.
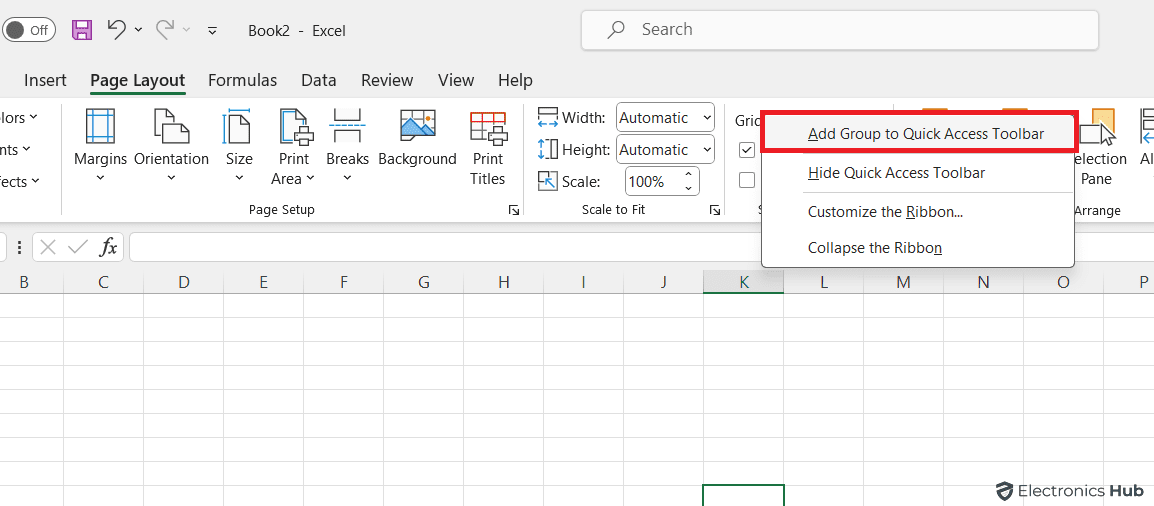
- You can then use the Gridlines option in the Quick Access Toolbar to quickly and easily toggle the gridlines in Excel.
How to Remove Gridlines in Excel for Printing?
Even if you remove gridlines in Excel, they will still appear when you print a spreadsheet. If you want to remove those as well, then you should try the following method:
- Head over to the Page Layout tab and find the Gridlines menu present under the Sheet Options section.
- Here, uncheck the checkbox given next to the Print option.
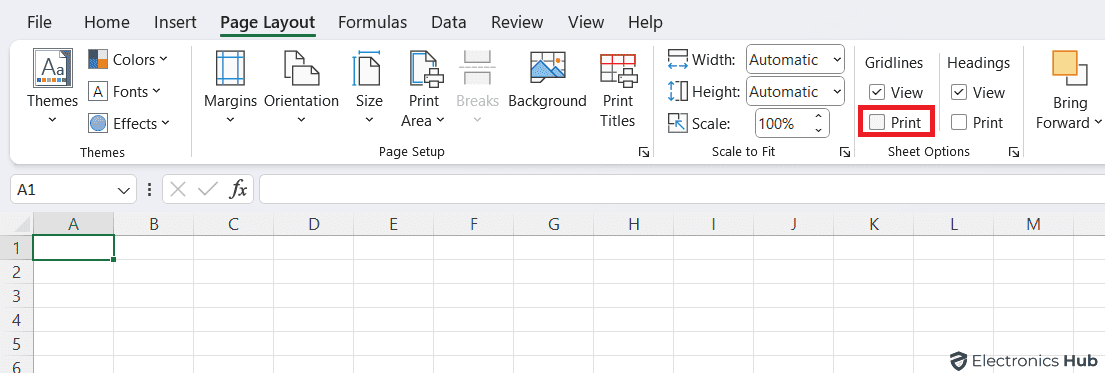
- After this, you can print your spreadsheet without getting the gridlines in the print.
Gridlines in Excel – FAQs
Ans: If you want to quickly get rid of gridlines in Microsoft while changing multiple settings, then you should do it from the Page Layout tab in Excel. In there, simply expand the Page Layout Commands and find the Gridlines section. Here, uncheck the view box next to the Gridlines option to get rid of all gridlines in Microsoft Excel.
Ans: Whenever you hide gridlines in Excel, you are only removing them from your own display or view mode. So, unless you have changed the color of the gridlines, once you share an Excel file with others, the gridlines may or may not appear depending on their viewing mode and Excel settings.
Ans: In case you don’t want to change any settings and just want to quickly hide gridlines, then you should use a keyboard shortcut to hide or unhide gridlines in Excel. To be more exact, you can press Alt + W + V + G on your keyboard to toggle gridlines in Excel. This means that you can hide or unhide gridlines in Excel using this same keyboard shortcut.
Ans: Those of you who not only want to hide or unhide gridlines in Excel but also want to change their color and appearance will need to access Excel settings. For this, go to File > Options > Advanced > Display options for this worksheet. Here, you will be able to adjust the color and the style of gridlines with ease.
Conclusion
Since Microsoft Excel is one of the most versatile applications for working on large amounts of data in a professional workspace, the user interface of the same can be a little confusing. And if you are new to Microsoft Office, you will notice that the whole workspace is divided using gridlines which can be quite jarring as compared to a Word document. Thankfully, you can easily remove gridlines in Excel using the guide given above. And if you have learned how to remove gridlines in Excel, then consider leaving your thoughts and suggestions in the comments section down below.
