Sharing your Wi-Fi password can feel tricky, especially when helping friends or guests connect quickly. This guide will show you easy ways to share your Wi-Fi password from different devices, like smartphones and computers. Whether you have an iPhone, Android, or PC, the steps provided will make it hassle-free. You’ll also get tips to keep your network secure while making it accessible to visitors. Let’s get started and make sharing Wi-Fi simple!
How to Share Wi-Fi Password?
Let’s start with the most popular operating system, Windows. Even though it’s popular, Windows can make some tasks tricky. For example, there’s no easy way to share a Wi-Fi password directly from a Windows machine.
To share a Wi-Fi password, you need to find it first (if you don’t remember it). Here are a couple of ways to do this:
Using Control Panel
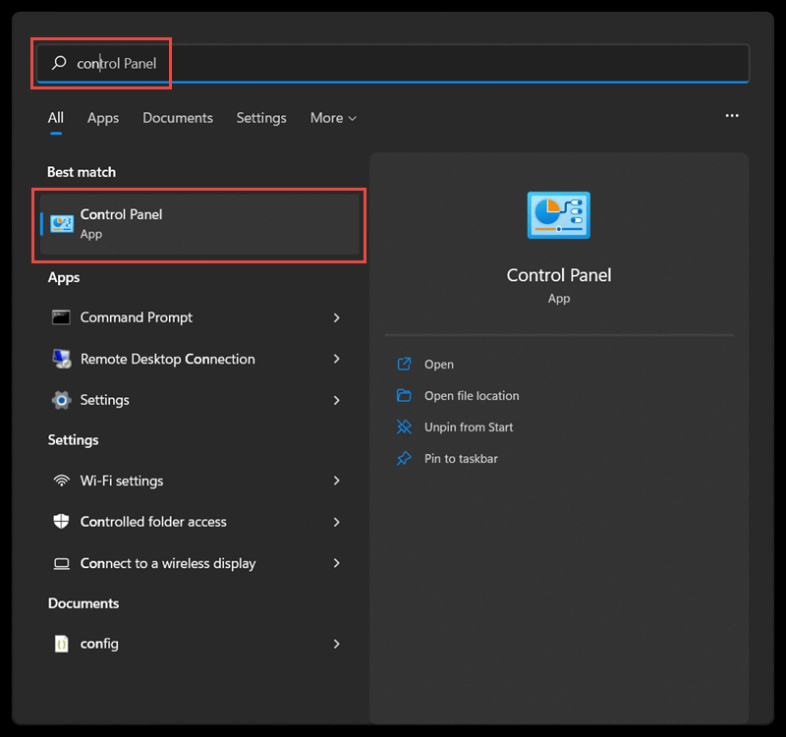
We’ll begin with an easy method. Press the ‘Windows’ key or click on the ‘Start’ button. In the search bar at the top, type ‘Control Panel’. From the search results, open the Control Panel app.
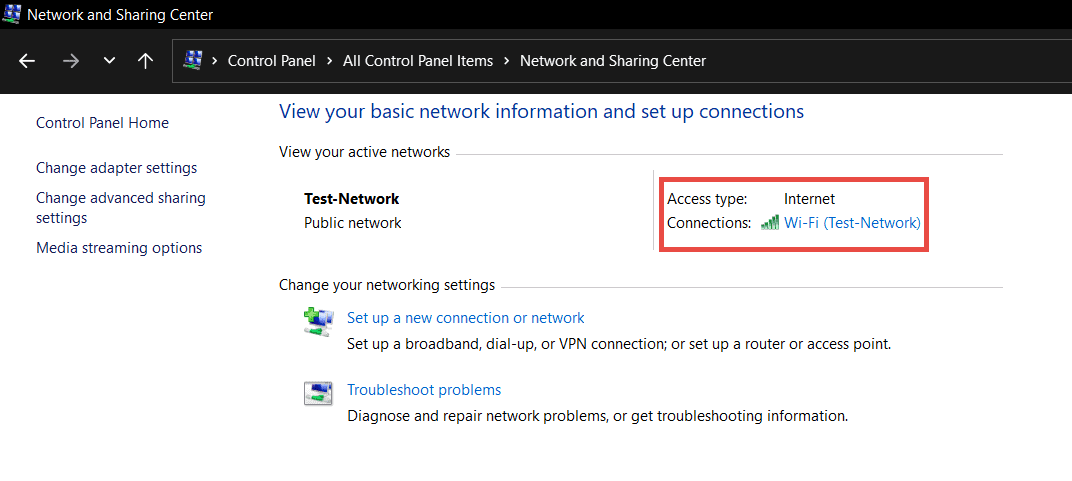
If the Control Panel view is set to ‘Category’, click on ‘View network status and tasks’ under the ‘Network and Internet’ section. If the view is set to icons (large or small), click on ‘Network and Sharing Center’.
In the Network settings, you will see your active network in the center. Next to ‘Connections’, you will see Wi-Fi and the name of your Wi-Fi network. In my case, it’s Wi-Fi (Test-Network). Click on this option.
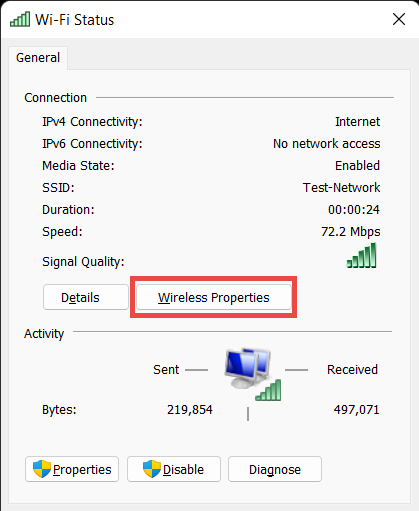
This will display the Wi-Fi status of the network. Below ‘Signal Quality,’ you will see ‘Details’ and ‘Wireless Properties’ buttons. Click on ‘Wireless Properties.’
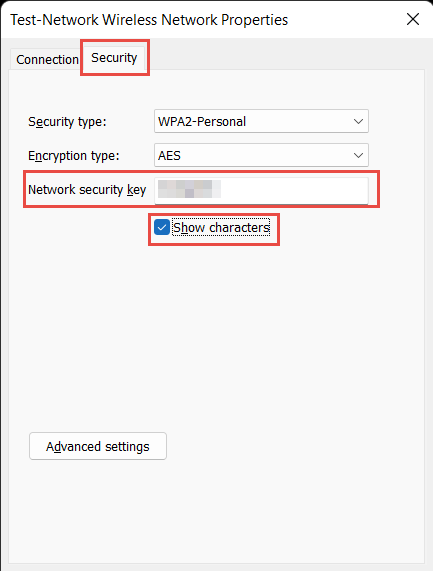
This action will open a new window with the wireless network properties. At the top, click the ‘Security’ tab. You can see all the security details of the Wi-Fi network here. In the ‘Network security key’ section, you’ll find the Wi-Fi password. To view it, check the ‘Show characters’ box.
You can use this method to view the password and you can share it with your guests.
Also Check: How To Create A Windows Password Reset Disk?
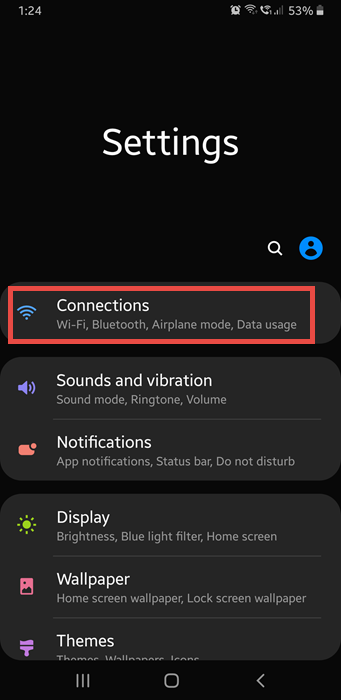
How To Share Wi-Fi Password On Android?
Things won’t be this difficult going forward. Next, we’ll see how to share a Wi-Fi password on an Android smartphone. This guide uses a Samsung phone, so the procedure is specific to that brand and software. However, a similar procedure applies to other Android smartphone brands as well.
Open ‘Settings’ and look for ‘Connections’.
Then, select the Wi-Fi Connection Settings.
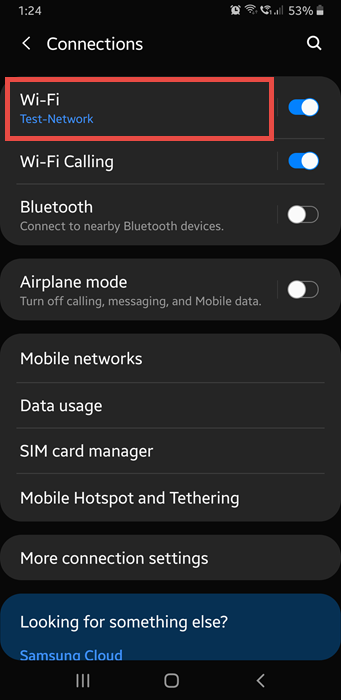
You can see the connected network on the top and also other available networks at the bottom. There is a cog wheel next to the Wi-Fi network your phone is connected to.
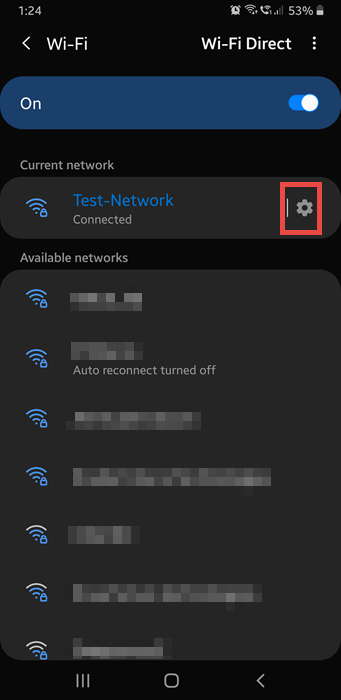
This will open the settings for that Wi-Fi network, including speed, security, and IP address. Below this information, you’ll see a ‘QR Code’ option. Click on it.
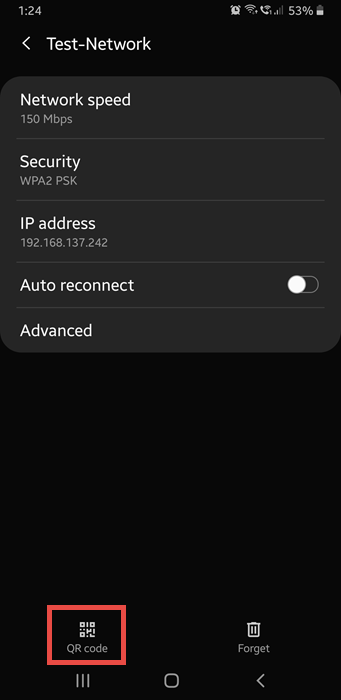
The phone will now show a QR code. You can have your friend or guest scan this code to connect to the Wi-Fi network. No app download is needed. Just search for ‘QR Code Scanner’ on Google, and you will find several web-based options to use.
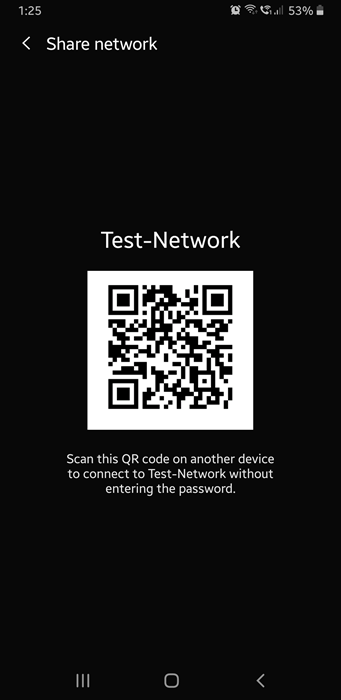
Some smartphones directly display the Wi-Fi password, near the QR Code.
How To Share Wi-Fi Password On iOS (iPhone And iPad)?
Sharing your Wi-Fi password on iOS is straightforward. Here’s a step-by-step guide to make it easy. Follow these simple steps to connect your friends and family to your network quickly.
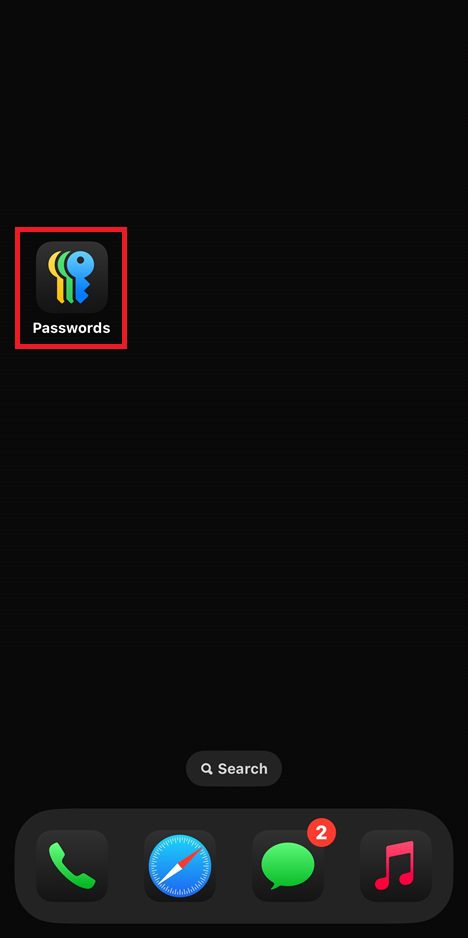
- First, Unlock Your iPhone.
- After that, search for the Passwords app. Tap on it to open.
- Then, Tap the Wi-Fi card.
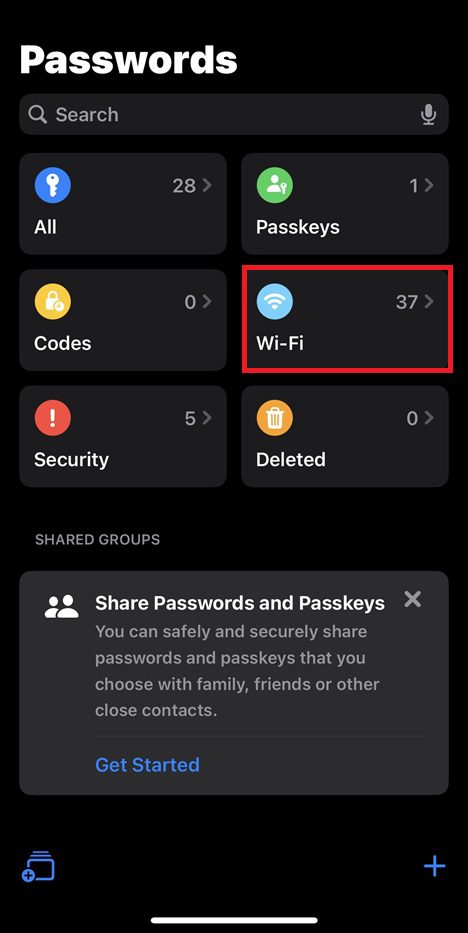
- Select the Wi-Fi network you wish to share.

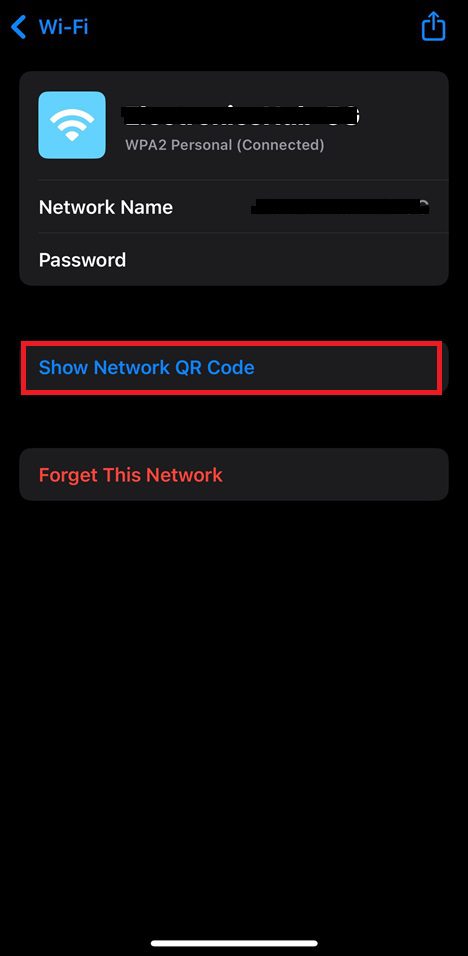
- Tap “Show Network QR code”.
How To Share Wi-Fi Password On MacOS?
Sharing your Wi-Fi password on macOS is easy and convenient. You can share it with friends and family without typing it out manually. Below we explain the steps to quickly share your Wi-Fi password.
- Make sure your Mac is unlocked.
- Verify that your Mac is connected to the Wi-Fi network.
- Check that you are signed in to your Apple ID on the Mac.
- On the other device, select the same Wi-Fi network.
- Wait for a Wi-Fi Password notification to appear on your Mac.
- Click “Share” on the notification to complete the process.
FAQs:
Wi-Fi Password Show and Wi-Fi Map are popular apps to find Wi-Fi passwords. They require root access or community-shared passwords to function. Always ensure legal and ethical use.
Yes, you can view saved Wi-Fi passwords on your device. On Windows, use Command Prompt. On macOS, use Keychain Access. On Android, rooted devices reveal passwords. On iOS, use iCloud Keychain.
To share Wi-Fi on a Samsung, go to Settings > Connections > Mobile Hotspot and Tethering. Turn on Mobile Hotspot, set up the network name and password, then connect devices.
To share your home Wi-Fi on Android, go to “Settings,” select “Network & Internet,” tap “Wi-Fi,” choose your network, and then tap “Share” to generate a QR code.
You can’t share your password on your iPhone due to Apple’s security measures, which protect your sensitive information from unauthorized access and potential breaches.
Conclusion
Whether you are home or visiting friends or family, you always want to have a reliable internet connection. For this, Wi-Fi is the only option. If your friends visit your place or you visited theirs, you want to share the Wi-Fi password so that you can connect to the internet.
All Wi-Fi Routers allow you to create a guest network so that you can easily share your Wi-Fi without compromising on safety and security. But if you haven’t created a guest network, then you have to share your main Wi-Fi password with your friends.
In this guide, we saw how to share Wi-Fi Passwords on Windows, Android, iOS, and macOS devices. We highly recommend creating a guest network.
