Soldering is an effective way to assemble electrical components on a PCB (printed circuit board). It creates strong and reliable joints. But what happens if you solder an incorrect component? Or if you want to re-use a soldered component for a different purpose or project? The answer is simple. You just have to remove the component using on of several methods, collectively known as desoldering. When desoldering, you have to choose the correct method and tool to remove the components. Only then, you will be able to re-use the components or take it out carefully without causing any damage to the board or the component. So, the obvious question is How to Desolder a Component?
This comprehensive guide explains the process of desoldering in detail and the different desoldering methods you can use to remove the components.
Check out the Best Desoldering Stations
What is Desoldering?
Desoldering is a fundamental process in electronics and soldering work. It involves the removal of solder from electronic components or connections, allowing for the disassembly, repair, or replacement of parts. One common reason for desoldering is to salvage components from old or damaged circuit boards for reuse. Another is to correct mistakes made during assembly or repair. To put it in simple terms, desoldering is the exact opposite of soldering. You undo everything that you did in the soldering process.
There are several tools to desolder effectively. These include soldering irons or soldering stations equipped with a desoldering pump or solder sucker. These tools heat the solder to its melting point, allowing it to be removed from the joint or connection. Additionally, desoldering wick, also known as solder braid, is frequently employed. This is a braided copper wire coated with flux, which wicks away molten solder when placed on a joint.
The desoldering process requires precision and care to avoid damaging the components or circuit board. It typically begins by heating the solder joint with a soldering iron until the solder becomes molten. We then have to apply the desoldering tool, whether a pump or wick, to remove the liquefied solder quickly.
Moreover, desoldering may involve cleaning the area afterward to remove any flux residue or debris left behind. This ensures that the area is ready for reassembly or further work. After desoldering, it is often necessary to inspect the components and connections for any signs of damage or defects that may have contributed to the need for desoldering in the first place.
Desoldering is a precise process essential in electronics and soldering work. It enables the removal of solder from components or connections, facilitating repair, replacement, or salvage operations. Utilizing appropriate tools and techniques is important to desolder effectively while minimizing the risk of damage to the components or circuitry.
Like soldering, desoldering is also an intricate process and requires some level of proficiency. You have to follow similar steps and adhere to strict safety measures as in the case of soldering.
Methods of Desoldering
There is more than one method of desoldering. Each one requires different tools and different levels of proficiency in soldering (or desoldering). Below is a comprehensive list of different methods you can use to desolder components.
Using a Soldering Iron
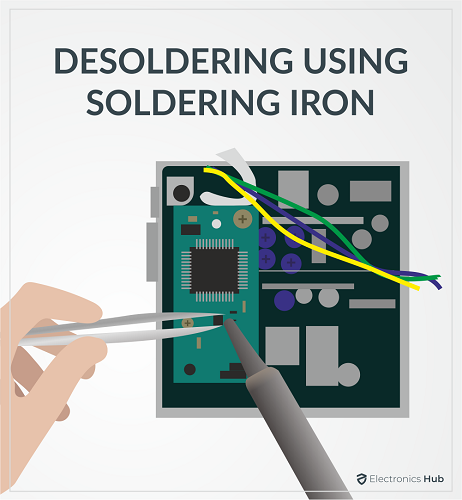 Soldering iron is the simplest and easiest method to desolder components. You do not need any other tools apart from the soldering iron and a pair of fliers.
Here is what you have to do,
- Put the Soldering Iron at an optimum temperature that can melt the solder.
- Heat the solder joint using the soldering iron until it starts to melt.
- Nudge the pins using the iron and move the solder away from the joints.
- Pull the components using pliers to remove them from the holes.
- While pulling the components, apply pressure at the tips instead of their bodies. Otherwise, the components may get damaged.
If you want to remove solder from holes, stick a safety pin inside the hole. This will suck the solder and help you to remove them easily.
Pros
- You only need a soldering iron to perform desoldering.
- You can reuse the desoldered components.
Cons
- If you use the soldering iron for too long, you may damage the component or the board.
Using a Soldering Wick
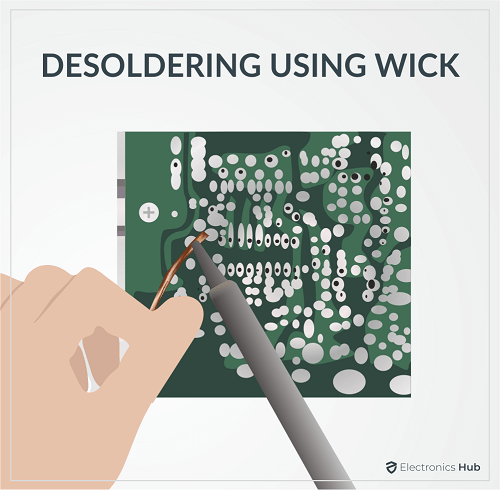 We can use the soldering wick method to remove unwanted solder after the process of soldering. Soldering wick is made by braiding and intertwining copper coils together. Hence, it is also known as a Desoldering Braid.
Copper wires are used to make the soldering wick because they are good conductors of heat. As solder is attracted to heat, the copper coils suck up the solder from the metal surface.
Some soldering wicks come with flux which makes it easier to remove the solder from the surface. If your solder wick does not have flux, you can dip the end of the wick into some flux to enhance the speed of solder removal.
Here is what you have to do to remove the solder with the help of a soldering wick,
- Intertwine a few inches of copper wires and form a braid.
- Apply some flux on the copper braid by dipping the end into flux.
- Place a portion of the solder wick on the joint you want to desolder.
- Keep a hot soldering iron at the tip of the solder wick and the desired pin.
- Wait for a few seconds until the solder melts and the solder wick sucks the melted solder.
- Take the solder wick and remove the portion of the wick that is covered with solder.
- Now, repeat the same process until you remove all the unwanted solder.
While handling the solder wick, ensure that you do not touch it using your hands as it will be very hot. Use a pair of pliers to hold and position it.
Pros
- The method is cheap, simple, and easy to use.
- The method is great for removing solder from flat surfaces.
- You can modify the size of the soldering wick depending on the amount of solder you want to remove.
- You can reuse the desoldered components.
Cons
- You can not reuse the soldering wick. You have to cut the portion covered in solder.
- As the soldering wick gets very hot, it can be difficult to position it against the joint.
- It is difficult to remove solder from through-hole components using this method.
Using a Desoldering Pump
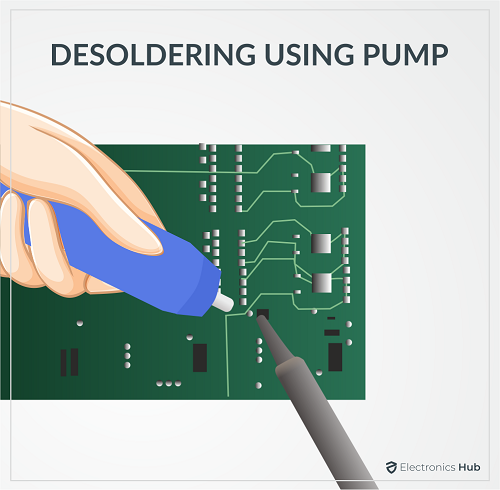 In this method, you use a desoldering pump to suck the solder. A desoldering pump is basically a small, high-pressure vacuum pump. Before using the pump to suck the solder, you have to heat and melt the solder.
Here are the steps to use the desoldering pump to remove the solder,
- Use a soldering iron to heat the solder until it melts.
- Squeeze the bulb or press down the plunger of the desoldering pump and place it on the molten solder.
- Release the bulb to suck up the solder.
- Some desoldering pumps will have a release button so that you do not have to keep squeezing the bulb.
- Remove the desoldered components.
- Repeat the same steps until you remove the excess solder.
Some desoldering pumps come with a soldering iron so that you do not have to get one separately. You can dispose of the solder in the desoldering pump by repeatedly squeezing and releasing the bulb.
Pros
- Desoldering pumps come in different styles and operating mechanisms for your ease of use.
- The method is great for removing solder from through-hole components and desoldering small components.
- You can reuse the desoldered components.
Cons
- Most desoldering pumps are large. So, you will find it difficult to get them into tight spaces.
Using a Heat Gun (Hot Air Machine/Re-work Station)
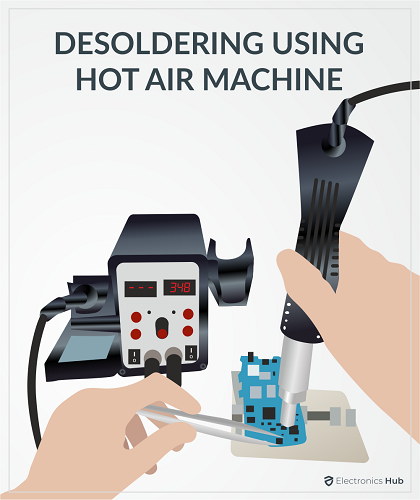 A heat gun works in the same way as a soldering iron. It heats up the solder so that you can remove the components. You can also use a hot air station instead of a heat gun. It is very effective but at the same, it is also expensive.
Here is how to desolder components using a heat gun,
- Turn on the heat gun.
- Hold the PCB firmly using a stand or pliers.
- Hold the tip of the heat gun against the solder until it melts.
- Remove the components using a pair of pliers.
When using the heat gun, ensure that you do not hold it against the board for too long. Otherwise, you will melt or damage the board.
Pros
- You can desolder and remove the components in a few seconds.
- You can reuse the desoldered components.
Cons
- As it heats the components very quickly, it damages the components in most cases and makes them unusable. In some cases, it also damages the board. If you are not careful, you can injure yourself as well during the process.
Using Soldering Pot
Desoldering with a solder pot is a method commonly employed in electronics and soldering tasks. This technique utilizes a heated pot of molten solder to remove solder from components or connections efficiently. It is particularly useful for desoldering multiple connections simultaneously or for larger components such as connectors or switches.
Here is how to desolder components using a soldering pot,
- Ensure the solder pot is clean and free of debris. Set the temperature to the appropriate level for the solder being used.
- Apply flux to the solder joints of the component to be desoldered. This helps in the removal process.
- Allow the solder pot to reach the desired temperature, ensuring it is adequately heated for efficient desoldering.
- Using tweezers or a specialized tool, carefully lower the component into the molten solder. Ensure all solder joints are submerged.
- Allow the component to sit in the molten solder until the solder joints liquefy. This usually takes a few seconds.
- Once the solder has melted, carefully lift the component out of the solder pot using tweezers or a tool. Exercise caution as the component will be hot.
- Hold the component above the solder pot to allow any excess solder to drip off.
- Check the desoldered joints for cleanliness and completeness. Ensure all solder has been removed from the joints.
- If there is flux residue or debris present, clean the desoldered joints using a suitable cleaning agent or brush.
- If there are multiple components to desolder, repeat the process for each one, ensuring proper preparation and handling each time.
- Dispose of any excess solder properly according to safety guidelines.
Pros
- Solder pots can desolder multiple connections simultaneously, saving time and effort, especially when dealing with large circuit boards or components.
- When desoldering with a solder pot, there is less physical stress on the components since they are not subjected to direct contact with tools, reducing the risk of damage.
- Solder pots are particularly useful for desoldering large components like connectors or switches, where using a soldering iron might be less practical.
Cons
- Solder pots can be more expensive to purchase compared to other desoldering tools like soldering irons and desoldering pumps, making them less accessible for hobbyists or small-scale operations.
- Desoldering with a solder pot may not be suitable for delicate or intricate components or connections where precise control over the desoldering process is necessary.
Using Compressed Air
You can use compressed air to desolder and remove components in two different ways. The first one requires a soldering iron. But the second one does not. In both methods, you have to use a compressed air gun to discharge compressed air and blast the molten solder.
When using the compressed air method, you have to wear safety glasses and other protective gear. As it blasts the molten solder, the solder chunks can hit your body leading to injuries.
Option 1: With a Soldering Iron
Here is how to use compressed air to desolder components with the help of a soldering iron,
- Use the soldering iron to heat the solder until it melts.
- Bring the tip of the compressed air gun close to the molten solder.
- Turn on the compressed air gun and blast the molten solder.
Pros
- This method is fun, quick, and easy.
- You can easily remove solder from through-holes by blasting air.
- You can reuse the removed components.
Cons
- The solder will fall all over the board and workspace, creating a mess.
- It can lead to injuries if you do not use protective gear.
Option 2: Without a soldering iron
As mentioned already, you do not need a soldering iron in this method. It is a more aggressive method than the previous one.
When you invert a compressed air can, it sprays out a freezing liquid solvent. This super-cools the solder making it brittle and easy to destroy.
Here is how to do it,
- Take a compressed air can and turn it upside down.
- Spray it on the solder and the joints. Wait for a few minutes.
- Pull the components using a pair of pliers.
If you do not have pliers, you can break the joint and then remove the components.
Pros
- You do not need a soldering iron or any other tool apart from a compressed air can.
- It is the only method that does not involve heating the solder.
Cons
- In most cases, the process will damage the components and you can not reuse them.
Safety Tips for Desoldering
Just like in soldering, you have to strictly adhere to safety precautions while desoldering as well. If not, it can lead to serious injuries.
Follow our safety tips to have a good and safe desoldering experience.
- Desolder in well-ventilated areas.
- Do not touch the tip or element of a soldering iron.
- Keep the soldering iron in its stand after use.
- Handle the components using a pair of pliers while desoldering.
- Do not touch the solder using your hands.
- Wear safety glasses, masks, and gloves.
- Avoid wearing loose-fitting clothes.
- Keep a first aid kit and fire extinguisher ready.
Frequently Asked Questions
For desoldering, you need to set the temperature of the Soldering Iron to greater than 260°C. The exact temperature depends on the solder mixture, number of components, number of layers in the board, and age of the board.
Desoldering wick, also known as desoldering braid, is used to remove unwanted solder by sucking it up. It is ideal to remove solder from flat surfaces.
When you have unintentionally soldered metals and electrical components on a board or want to use the components for a different purpose, then you have to desolder to remove them.
Also, if you are repairing a product and you want to replace a faulty or damaged component, you have to remove the existing components by desoldering it and then solder its replacement.
Use a damp cloth to clean the tip of the desoldering iron. This will remove oxides and other metal wastes. You can also use a dry cleaner that consists of soft metal shavings coated with flux to clean the tip.
Yes, it is very important to wear a mask while soldering. When you are soldering/desoldering, it releases toxic fumes that can irritate your skin and lead to irreversible damage. You have to use a mask that has a filtration unit to filter the toxic fumes. We suggest you to invest in a decent solder fumes extractor. You can make one yourself as a DIY Project.
Conclusion
If you have any further doubts or queries, let us know using the comments section. My team will help you out. You can also post your thoughts and opinions in the comments box.
