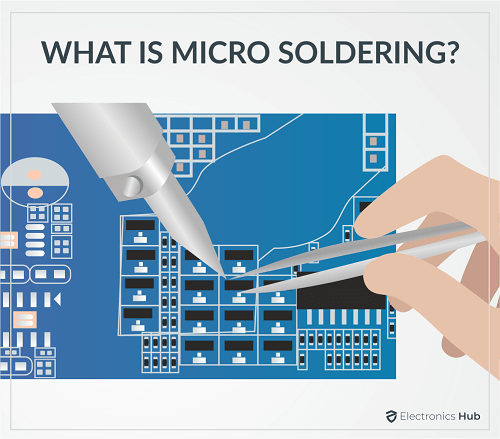
Soldering is the process of joining two metals by melting a filler material (known as solder). The filler material holds the two metals together. Using soldering, you can assemble electronic components on PCBs, connect disjoint electrical wires, and even join plumbing pipes. But, you can not apply the same technique to solder ultra-small electronic components such as resistors, capacitors, and ultra-fine wires, with dimensions in millimeters or even less. Some components, usually the Surface Mount or SMD Components used in a PCB are smaller than the size of a grain. That is where Micro Soldering comes into play. Micro soldering is the same as soldering, but the whole process is done on a smaller scale. The tools that are used to solder microelectronic components are smaller and the process is even more intricate.
Using micro soldering, you can connect small components that are micrometers in size. This size is almost 10 times thinner than human hair. The following article explains the types of tools and equipment used in micro soldering and the step-by-step process of how it is done.
Outline
ToggleWhat is Micro Soldering?
Micro soldering, a meticulous technique, involves soldering on a miniature scale, typically involving components and connections with dimensions measured in millimeters or even micrometers. It is a critical aspect of modern-day electronics repair, assembly, and manufacturing processes where precision is paramount with ever-shrinking components.
Similar to soldering, micro soldering also melts a filler material that joins two workpieces together. Unlike traditional soldering, which may involve larger components and joints, micro soldering deals with miniature components, often requiring specialized tools and techniques. From repairing delicate circuits in smartphones to assembling intricate components in medical devices, micro soldering finds applications across various industries.
The advent of technology has led to a decrease in the size of electronic components. With further technological advancements, their size will get reduced further. So, micro soldering is expected to play a crucial role in troubleshooting electronic devices and components in the future.
Micro Soldering Tools and Equipment
As mentioned already, micro soldering requires more precision than conventional soldering. To achieve that level of precision, you should equip yourself with the right tools and equipment.
Below are some of the most commonly used micro soldering tools and equipment.
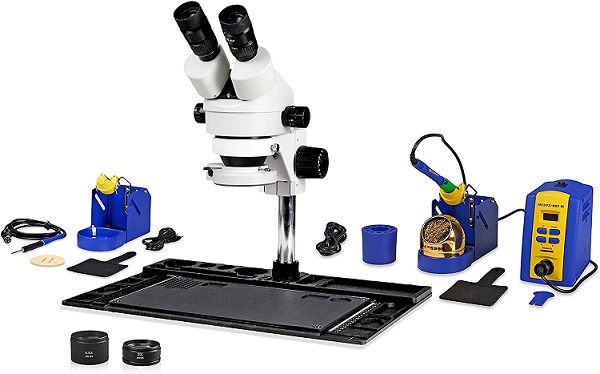
Microscope
For any repair job, you have to first examine the workpiece physically and closely. Only then, you will be able to know the extent of the problem. A good micro soldering microscope should have 0.5x to 10x optical zoom.
Besides, it should have an extended work distance and the ability to attach a camera. The camera will help you to take pictures and record videos for further examination.
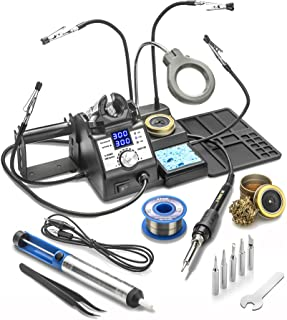
Soldering Rework Station
A rework station generally includes at least a soldering iron and hot air gun. If your rework station does not have a soldering pencil or a micro-tweezer, then you will have to buy them separately.
Also, we recommend you get separate stations for using a soldering iron and a hot air gun. Stations in which you can use both don’t tend to work well.
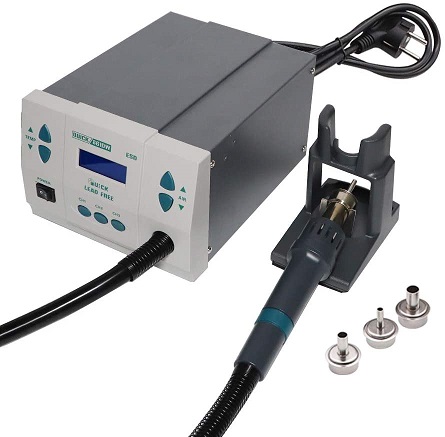
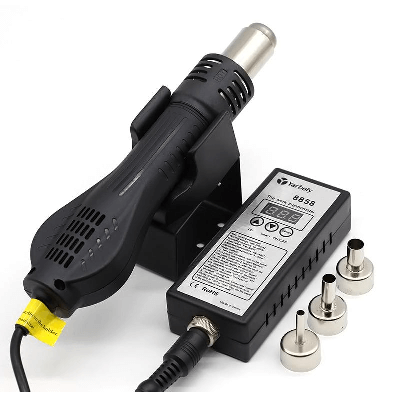
Hot Air Station
A hot air station uses heated air to heat the PCB board (or the solder on the board to be specific) that you will work on. It uses nozzles of different sizes to direct air and distribute the heat evenly throughout the board.
Soldering Iron
One of the primary tools is the soldering iron, which comes in various types suitable for micro soldering tasks. These can include pencil-style irons with fine tips or specialized micro soldering stations designed for intricate work. A soldering iron is what supplies heat to melt the solder. Once the solder melts, it will form a joint and connect two workpieces.
The tips of a micro soldering iron are much more thin and fine and the maximum temperature that it can reach will be slightly less than that of a regular soldering iron. When selecting a soldering iron for micro soldering, there are several features to consider, such as adjustable temperature settings, ergonomic design for comfort during prolonged use, and compatibility with fine soldering tips.
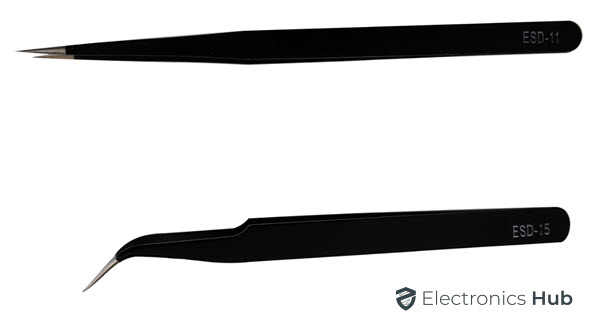
Tweezers
Tweezers are indispensable tools for micro soldering jobs, offering precision, accessibility, efficiency, and versatility. Unlike larger tools, tweezers offer a level of dexterity that is essential when working with tiny components on circuit boards. Their slender tips allow technicians to grasp and position components with great precision, minimizing the risk of damage to surrounding elements.
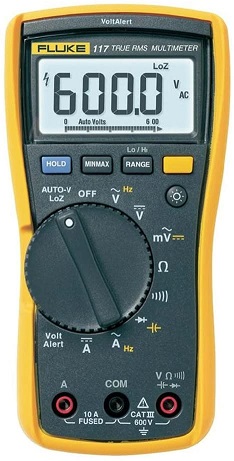
Multimeter
If you are repairing any electronics circuit or board, then you definitely need a multimeter. You can get a simple multimeter without any fancy settings. You will use the multimeter only to test continuity, voltage, resistance, and capacitance.
Micro Soldering Software
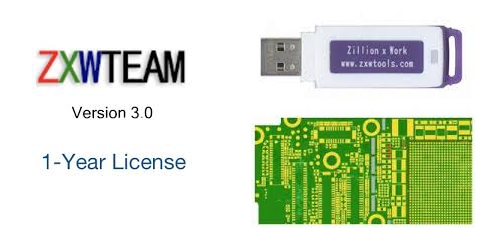
There are different micro-soldering software available in the market but the most popular one is ZXW Tools.
The latest version of the software is ZXW 3.0. It allows you to see which component is next without having to look at the drawings. While it is free to download and install the software, you have to pay an annual subscription to use it.
Tips on How to Micro Solder
While micro-soldering any electronic components, there are certain steps you will have to follow. Assume that you are going to fix a broken power connector. These are the steps you have to follow,
Step 1: Remove Defective Part
The first step is to remove the part that is not working. It can be a tiny SMD Component or slightly larger power connector. You can examine the part using a soldering microscope. After that, you can remove the part using either a soldering iron or a hot air gun.
Step 2: Preparation for Repair
Now, clean the surface with liquid flux and re-flow some solder so that it becomes easy for you to place and connect the new component.
Step 3: Preparing to Solder
Take a good quality solder, liquid flux, soldering iron or hot air machine. Make sure to take all necessary precautions before soldering.
Step 4: Secure the Component
In case you are working on tiny wires, use electrical tape over the wire (or any component) to secure it. Ensure that the wire or component does not move and is fixed in its place.
Step 5: Trim to Fit
Using the tip of your soldering iron, dab the area with liquid flux and solder the component in its place. After this, remove the tape and clear the flux. In case of wire, cut the wire to get the required length.
Step 6: Examine the Board with a Microscope
After you have completed the micro soldering, examine the board using a micro-soldering microscope to check if the soldering is intact.
There is it. You have replaced the defective electronic component with a new one using micro soldering.
Common Challenges and Solutions in Micro Soldering
- One common challenge in micro soldering is dealing with tiny components, which can be difficult to handle due to their small size and delicate nature. To address this challenge, technicians can use specialized tools such as fine-tipped tweezers or vacuum pens to manipulate components with precision.
- Working in a well-lit and organized workspace can help improve visibility and minimize the risk of misplacing or damaging components during handling.
- Using anti-static mats or wrist straps while handling components can help prevent electrostatic discharge (ESD) damage to sensitive components. Avoiding excessive force and minimizing contact with component leads can reduce the risk of mechanical damage during assembly or repair processes.
- Another significant challenge in micro soldering is heat management, particularly when working with sensitive components that can be easily damaged by excessive heat. To avoid overheating sensitive components, technicians can use low-temperature soldering techniques or employ heat sinks to dissipate heat away from delicate areas.
- Controlling the temperature of the soldering iron and using flux to facilitate solder flow can help minimize the time components are exposed to heat, reducing the risk of damage.
- During the soldering process, technicians must ensure that solder flows evenly and forms strong, durable joints without cold solder joints or solder bridges for reliable electrical connections and device functionality.
- Inspecting solder joints for defects, such as incomplete wetting or insufficient solder, is also important. Technicians can use visual inspection under magnification or solder joint testing equipment to verify solder joint quality.
Safety Precautions to Follow while Micro Soldering
There are safety precautions you need to follow while micro soldering. If not, the repercussions could be severe.
- Before starting to solder, protect your eyes using a safety goggles.
- Wear gloves while holding the soldering iron.
- Do not touch the tip of the soldering iron.
- Keep the soldering iron in its place after using it.
- Soak the cleaning sponge in water before you start soldering.
- Pull the plug from the socket when not using the soldering iron.
- Do not keep any electrical cables in the soldering station.
- Keep a first aid kit ready just in case.
Frequently Asked Questions
What tools are needed for micro soldering?
Several tools are essential for micro soldering, including a high-quality soldering iron with a fine tip, solder wire with a small diameter (typically around 0.3mm), flux for improving solder flow and adhesion, tweezers for handling small components, a microscope or magnifying glass for enhanced visibility, and a steady work surface with good lighting. Additionally, specialized equipment such as hot air rework stations and soldering stations with adjustable temperature control may be necessary for certain tasks.
How can I improve my micro soldering skills?
Improving micro soldering skills requires practice, patience, and attention to detail. Start by familiarizing yourself with the tools and techniques used in micro soldering, such as proper soldering iron temperature settings, soldering techniques (e.g., drag soldering, chip soldering), and component handling methods. Practice on scrap circuit boards or non-functional devices to gain confidence and refine your technique.
Can micro soldering be done at home, or is it best left to professionals?
Micro soldering can be performed at home by enthusiasts and hobbyists with the necessary skills and equipment. However, it requires a certain level of expertise and practice to achieve satisfactory results, especially when working on delicate electronic components. Beginners are advised to start with simple projects and gradually build their skills before attempting more complex repairs or modifications. For critical repairs or intricate tasks, seeking assistance from professional technicians with specialized training and experience in micro soldering may be advisable to ensure the integrity of the electronic device.
Conclusion
Since micro soldering requires more precision and miniaturized equipment, it is difficult to get micro soldering services. Besides, they also cost more. With our step-by-step process, you can micro-solder electronic components by yourself. But, you need to have some experience in soldering. Also, we highly recommend you follow our safety tips.
If you have any further queries or doubts, you can let us know using the comments section. We will help you out. You can also post your thoughts and opinions in the comments box.


