In this tutorial, we will learn about an exciting new device called the Raspberry Pi Pico, a Microcontroller board on RP2040 Microcontroller from Raspberry Pi foundation. We will learn about the RP2040 Microcontroller, its features and specifications, the Raspberry Pi Pico Board, its layout and specifications.
Raspberry Pi Pico
Over the years, the Raspberry Pi boards have become a must have tool whether you are a student, an electronics hobbyist, a robotics developer or a programmer. Vast support of hardware (as plug-in modules, cameras, HATs, etc.) and software (operating systems, libraries, etc.) has made the Raspberry Pi Computer a very important part of modern DIY Community.
But what if you just want to interface some sensors, light up some LEDs and control some motors? A $35 Raspberry Pi Computer is definitely an over-the-top approach for such requirement.
This is where Microcontroller boards like Arduino, STM32 Blue Pill or ESP32 come handy. Microcontrollers are the heart of modern embedded systems with excellent price to performance ratio.
Keeping this in mind, the Raspberry Pi Foundation developed RP2040, a Dual Core ARM Cortex-M0+ Microcontroller. Based on this microcontroller, they also introduced the Raspberry Pi Pico, a $4 Microcontroller Development Board for RP2040.
A Brief Note on RP2040 Microcontroller
The first important thing to learn is the RP2040 Microcontroller. All the previous Raspberry Pi boards like Raspberry Pi 3 Model B+, Raspberry Pi 4 Model B or the smaller Raspberry Pi Zero featured Broadcom Processors (BCM2835, BCM2836, BCM2711, etc.).
They are full-blown application processors capable of running a complete desktop operating system (usually, Linux based).
But Raspberry Pi Pico features RP2040, which is a Microcontroller designed by Raspberry Pi, a first in-house silicon from Raspberry Pi Foundation. Yes. You read it right. A Microcontroller designed and developed by Raspberry Pi; the company famous for its Single Board Computers.
RP2040 is based on Dual ARM Cortex-M0+ cores with clock frequency up to 133 MHz and is manufactured using a 40 nm node. It has a large on-chip memory, rich set of commonly used peripherals, a unique Programmable I/O (PIO) block, making it an easy choice for beginners and hobbyists.

Additionally, the Raspberry Pi Foundation has provided an excellent documentation, both for RP2040 as well as Raspberry Pi Pico Board. This and the choice of programming either in Python or C makes it even interesting.
The RP2040 MCU also has a MicroPython Port and UF2 Bootloader in ROM for easy uploading of the program.
Important Specifications
The following is a list of some important features and specifications of RP2040 Microcontroller.
- Dual ARM Cortex-M0+ Cores
- Clock frequency up to 133 MHz
- 264 KB of embedded SRAM
- 30 GPIO Pins
- Up to 16 MB of off-chip Flash Memory
- 4 channel ADC with 12-bit resolution
- Programmable IO
- Other Peripherals – 2 UARTs, 2 SPI Controllers, 2 I2C Controllers, 16 PWM Channels, USB 1.1 Controller and PHY
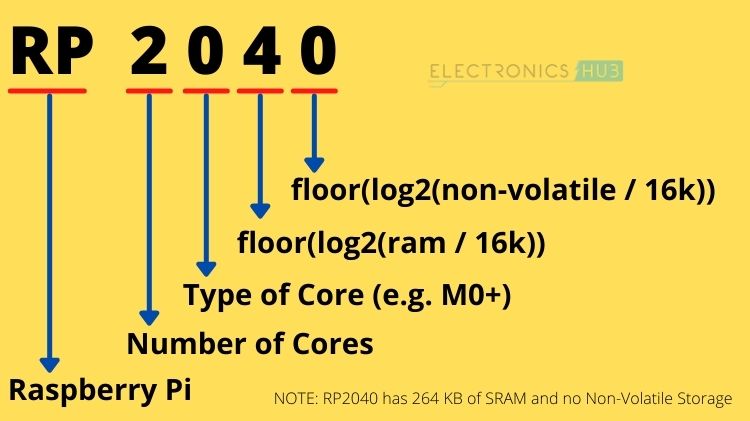
Meaning of RP2040
The name RP2040 has an interesting explanation. The letters “RP” stands for Raspberry Pi. Then there are four numbers. Let use see what each of these numbers mean. I am numbering 2 as number 1 in “2040” 0 as number 2 and so on.
- Number 1: Represents the Number of Processor Cores. Since it is a dual-core microcontroller, the value is 2.
- Number 2: Represents the Type of Processor Core. In this case it is ARM Cortex-M0+. So, the value is 0.
- Number 3: Represents On-chip RAM. The formula to get this value is: floor (log2 (ram / 16k)). As RP2040 has 264 KB of RAM, the value based on the formula is 4.
- Number 4: Represents On-chip Flash (Non-Volatile Storage). The formula to get this value is floor (log2 (non-volatile / 16k)). If there is no on-chip non-volatile storage, then the value is 0.
Introduction to Raspberry Pi Pico
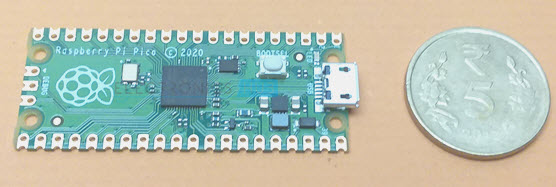
With this small introduction to RP2040 Microcontroller, we will now take a look at the Raspberry Pi Pico. It is the latest offering from Raspberry Pi Foundation. Raspberry Pi Pico is a low-cost development board for their RP2040 Microcontroller.
Raspberry Pi Pico is not a replacement for existing Raspberry Pi boards. In fact, they both are completely different classes of devices with the former being a Microcontroller Development Board while the latter being a series of Single Board Computers (SBC).
Using a regular Raspberry Pi, you can browse internet, edit documents, watch videos, play games and do many other tasks. But Raspberry Pi Pico isn’t capable of such tasks. Since it is a microcontroller development board, you can interface sensors, control LEDs, play with motors or implement other similar physical computing projects.
Features of Raspberry Pi Pico
The Pico is essentially a PCB with Microcontroller, micro-USB Port, some important components and castellated edges. PCB with edge castellations allow you to solder this board on another PCB. How is this useful?
Consider you are designing a product with RP2040 Microcontroller. If you use a bare microcontroller chip n your hardware, you have to design the power supply circuit, the clock circuit, the USB circuit etc. This is the minimum requirement for RP2040 to work.
Since the Pico already has all these circuitry on-board, you can use the Pico as a baseboard in your hardware and design only the essential part of the application like an LED Control Circuit or a Motor Driver Circuit. This approach reduces the effort of hardware engineer and also the time-to-market of your product.
Other important features of Pico are:
- RP2040 Microcontroller
- 2 MB of SPI Flash
- Type B Micro-USB port for power and programming
- 40 DIP style IO Pins with edge castellations
- 3-pin ARM Serial Wire Debug (SWD) interface
- 12 MHz Crystal oscillator
- Boot Selection Button
- One user LED (connected to GPIO 25)
- 3.3V Fixed Output Buck-Boost SMPS Converter
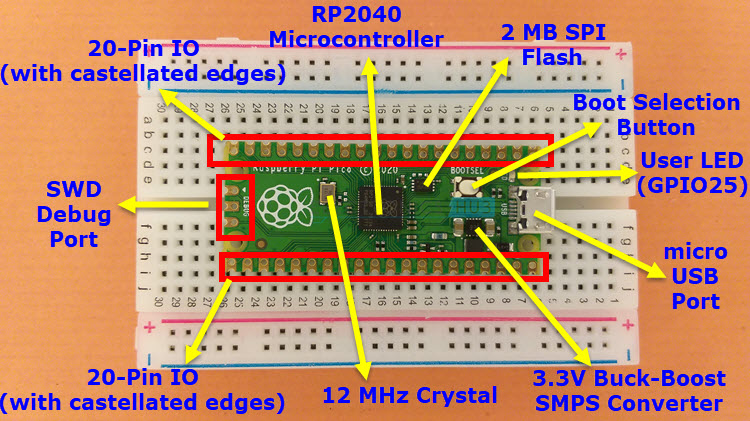
Board Layout
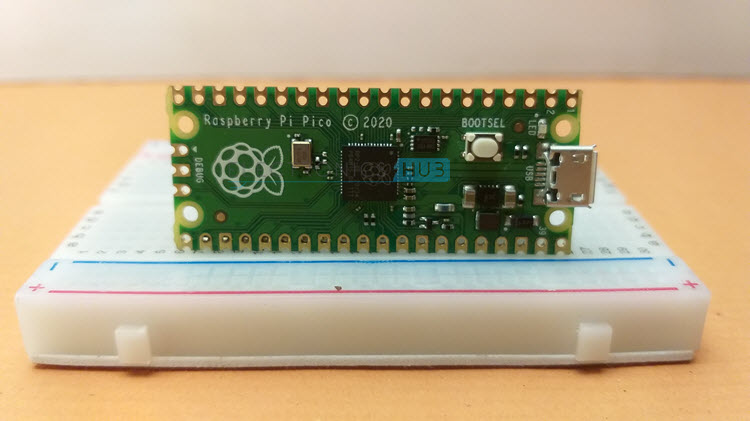
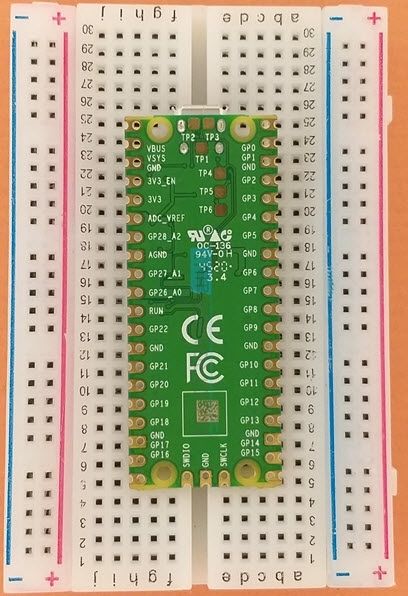
The following image shows the layout of Raspberry Pi Pico Board. As you can see, the 40 IO pins do not have headers but have holes to solder headers ourselves. Additionally, these 40 Pins and the 3 Debug pins also have castellated edges.
So, if you want to design a breakout board using Pico, then you can use these edges to solder the Pico very easily.
Another important (and slightly annoying) thing is the top of the Pico doesn’t have any pin labels. They are printed on the bottom of the board. So, you have to keep an image of the Raspberry Pi Pico Pinout Diagram at your disposal.
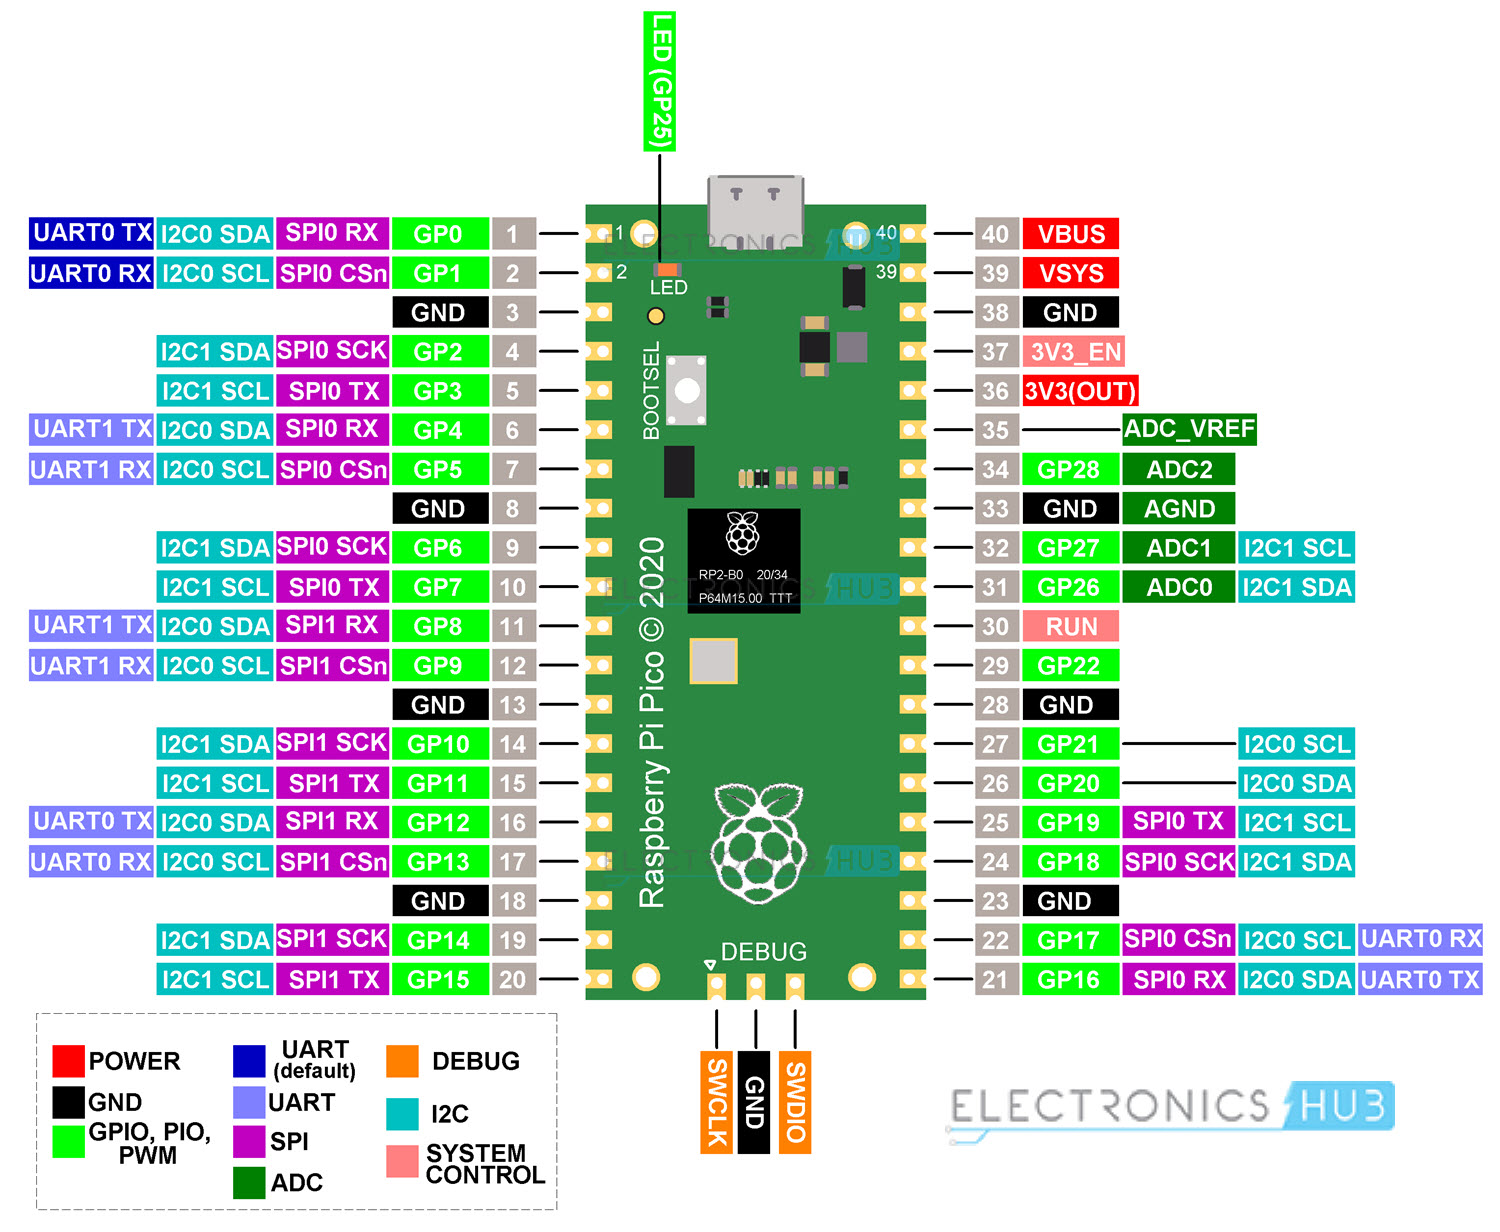
Raspberry Pi Pico Pinout
The following image shows the complete Raspberry Pi Pico Pinout information. There are 40-pin on the Pico (20 pins on each long edge) out of which, 26 pins are IO Pins and 14 are power and system related pins. Apart from these 40 pins, there are 3 more pins for SWD Debugging.
Testing MicroPython on Raspberry Pi Pico
Let us now test our Raspberry Pi Pico by downloading MicroPython firmware and writing a simple Blinky Python program. This is just to test our new Raspberry Pi Pico Board with MicroPython Programming.
I will make dedicated tutorials on Getting Started with MicroPython for Pico.
NOTE: I did not solder the IO header at this point as the Pico already has an on-board LED (connected to GPIO 25). And I am using Raspberry Pi to program Pico. But can use any operating system.
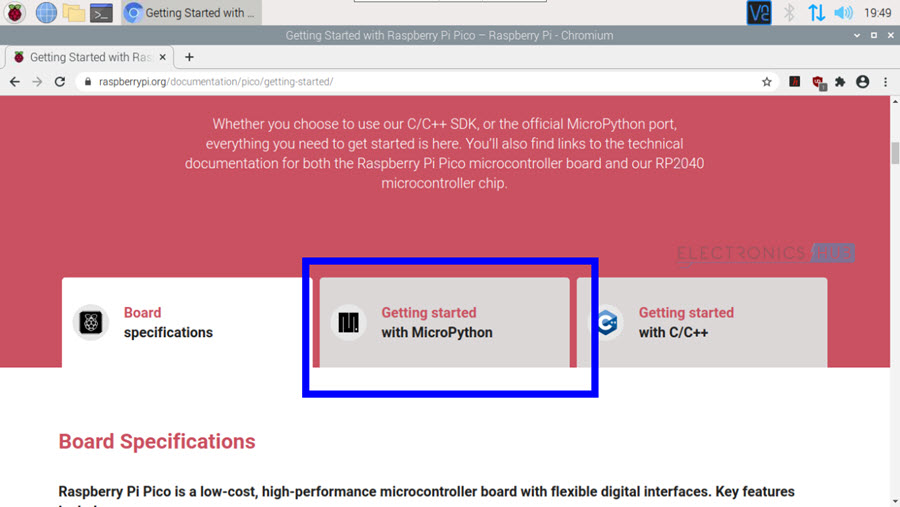
Download MicroPython
First, open the browser and go to the official Getting Started with Raspberry Pi Pico page. There is a tab called “Getting Started with MicroPython”. Click on it.
Some animation on what to do next is presented here. Read all the instruction carefully and the click on the “Download UF2 File” option.
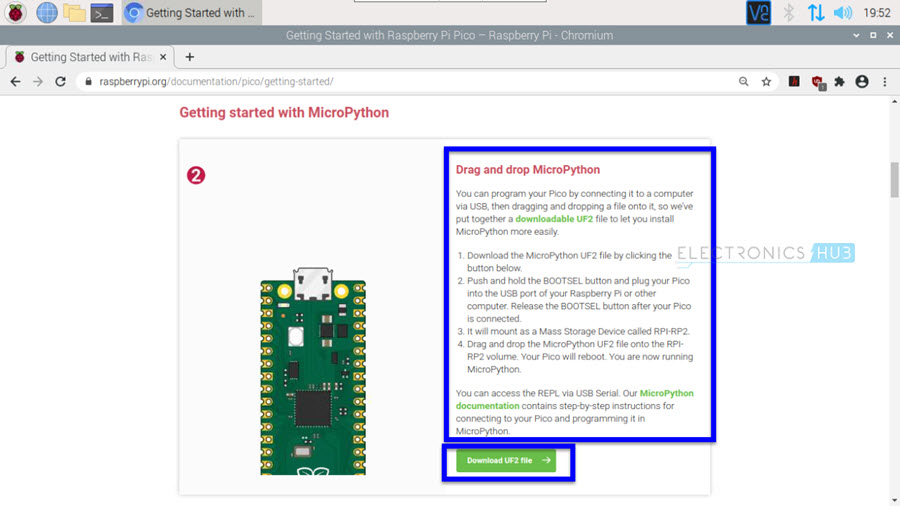
A .uf2 file is downloaded. Now comes the tricky (and annoying) part. First, connect the micro-USB cable to the Pico. Do not plug-in the other end of the USB cable to the computer (or Raspberry Pi) yet.
To put the Pico in to USB Flash Mode, we have to hold the BOOTSEL button down and plug the USB cable to the computer. If successful, the Pico will appear as a mass storage device “RPI-RP2”.
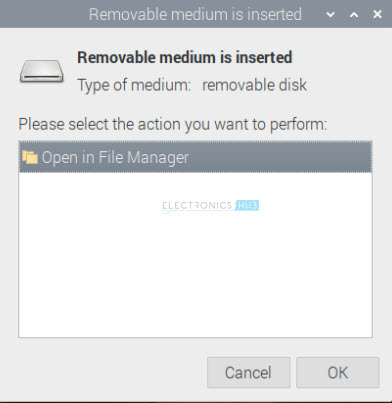
Now, go to the downloads folder and drag-and-drop the previously downloaded MicroPython Firmware .uf2 file into the Pico. The Pico will disappear. Now you are ready for some Python Programming.

Thonny Python IDE
Click on the Raspberry icon on the top left corner to open the applications menu. In the Programming tab, open the Thonny Python IDE.

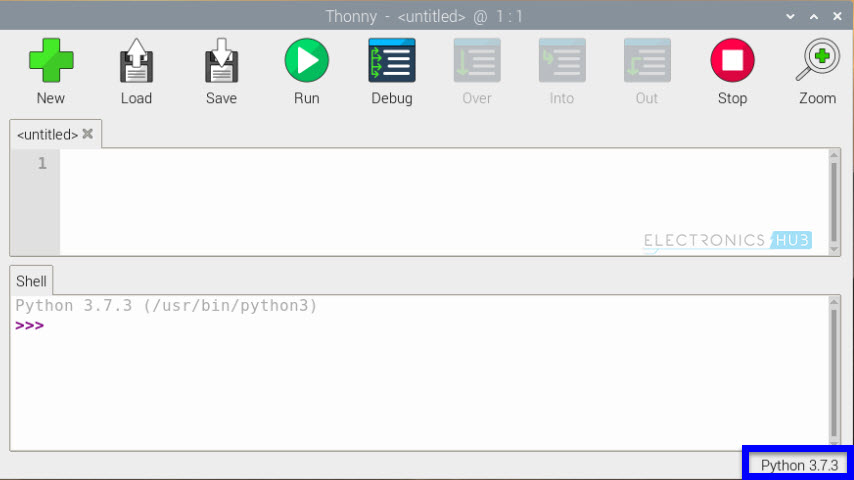
In Thonny, the first thing you have to do is select the Python Interpreter. By default, full version of Python 3.x.x will be selected as the interpreter. But since we want to run MicroPython on our Pico, click on the “Python 3.7.3” option at the bottom right of Thonny.
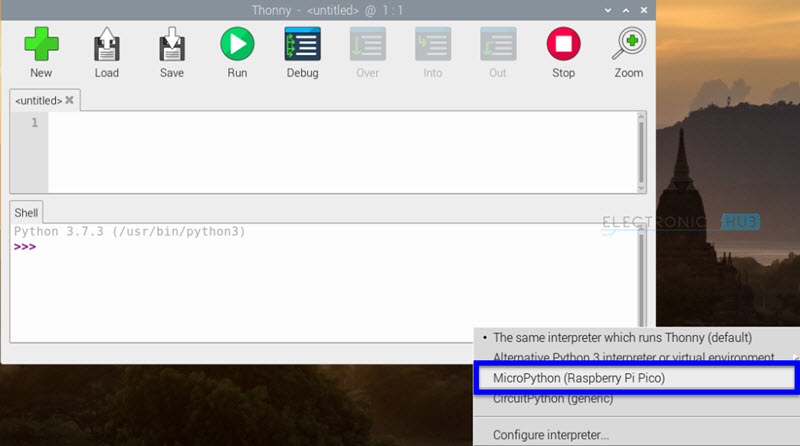
You will get a list of interpreters. Select MicroPython (Raspberry Pi Pico) option. That’s it. You are now ready to write Python Programs for your Pico.
In the Shell at the bottom, type the following and hit enter.
This is a command to the MicroPython interpreter in your Pico. Up on receiving the command, it will respond with the result by printing the text.

Now, let us proceed with turning the on-board LED ON and OFF. We will be using the “machine” module of the MicroPython Port, which is used to control the on-chip hardware. In the machine module, the Pin class is used to control GPIO Pins. We know that on-board LED is connected to GPIO 25.
Enter the following line one after the other in the Shell.
The led.value(1) will make the GPIO 25 HIGH and led.value(0) will make the GPIO 25 LOW.

Conclusion
This is a simple Getting Started with Raspberry Pi Pico tutorial where you learned about the RP2040 Microcontroller from Raspberry Pi, the Raspberry Pi Pico Microcontroller Board, its features and specification and also a simple MicroPython test program.
We are just getting started with Raspberry Pi Pico. I will make many projects and tutorials with this board starting with a complete tutorial on Getting Started with MicroPython as well as Getting Started with C on Raspberry Pi Pico. So, stay tuned.
