In this tutorial, we will learn how to Program Raspberry Pi Pico with MicroPython. We will learn what is MicroPython, how to install MicroPython on Raspberry Pi Pico and how to program Raspberry Pi Pico with MicroPython.
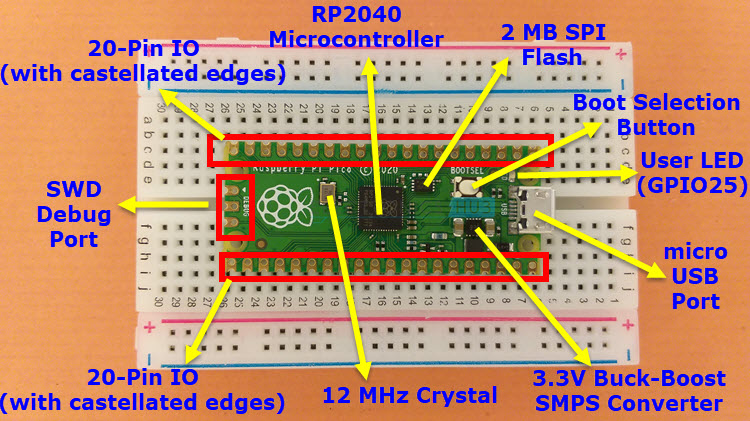
I made a Getting Started with Raspberry Pi Pico tutorial, in which I discussed the RP2040 Microcontroller, the Raspberry Pi Pico Development Board, Pinout of Raspberry Pi Pico. So, check out that tutorial before proceeding.
Programming Raspberry Pi Pico With MicroPython
If you are familiar with Computer Programming, then you probably would have heard of Python. Named after Monty Python (and not the snake), the Python Programming Language has become a popular choice among software developers since its initial launch in 1991.
Python was intended for developing applications for desktops, laptops and servers, that have a powerful processor and run an OS. But what if you want to write applications in Python for a small Microcontroller based embedded systems?
Microcontroller boards like Arduino and Raspberry Pi Pico have severe restrictions in terms of memory and processing power and cannot run Python the way big desktops and laptops do.
Here comes MicroPython to the rescue.
What is MicroPython?
MicroPython is a Python Language Interpreter that is developed for Microcontrollers and embedded systems. It was developed by Damien P. George and is written in C. MicroPython is a Python 3 compatible compiler and run time which can run on small microcontrollers.
Even though it is a subset of Python 3, it doesn’t include all the standard libraries of Python as it was developed for constrained systems. Only a few selected Python libraries are included while the remining are written for MicroPython itself (mostly for low-level hardware access).
If you are a software developer who has never worked on hardware, but you want to write applications for microcontroller based embedded systems (either personal or professional projects), then MicroPython is the answer.
Syntactically, MicroPython is very similar to Python. So, if you worked with Python, then working with MicroPython will be very easy (additionally, you get to control the hardware).
If you haven’t worked with Python (like myself), then do not worry. It is an easy language to learn.
What Computer to use?
The official Raspberry Pi Pico documentation is based on using a Raspberry Pi SBC as the host computer (either for MicroPython or C). If you are working with MicroPython, then you can use any computer (Windows, Mac or Linux) as you simply need to download an IDE called Thonny.
But if you are working with C, then I recommend you to use a Linux based system like a Raspberry Pi Computer (if you have one), as it is easy to download the SDK and write C Programs in Linux.
Also, if you are interested in debugging the code, then a Raspberry Pi will be useful as we can use some of the GPIO of Raspberry Pi to debug Raspberry Pi Pico.
NOTE: In this tutorial, I will be using a Windows system to demonstrate how to Program Raspberry Pi Pico with MicroPython. But you can apply similar steps in other OS as well.
How to Install MicroPython on Raspberry Pi Pico?
Download MicroPython Binary
Let us now get started with MicroPython on Raspberry Pico. The easiest and fastest way to run MicroPython on Raspberry Pi Pico is to download the prebuilt binary from the official Raspberry Pi Pico’s website.
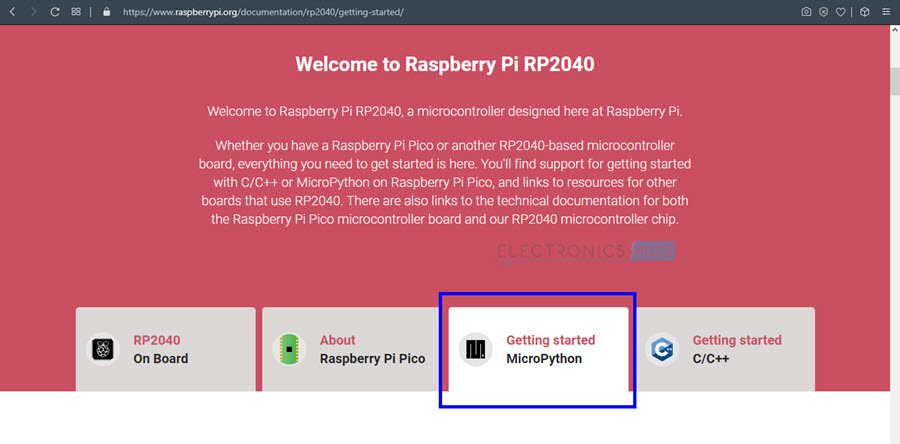
Go to the documentation page of Raspberry Pi Pico and click on “Getting Started MicroPython” tab.
The content below the tab changes according to the selected tab and when you click on “Getting Started MicroPython”, a text related to Getting started with MicroPython appears along with a small animation on how to install MicroPython on Raspberry Pi Pico.
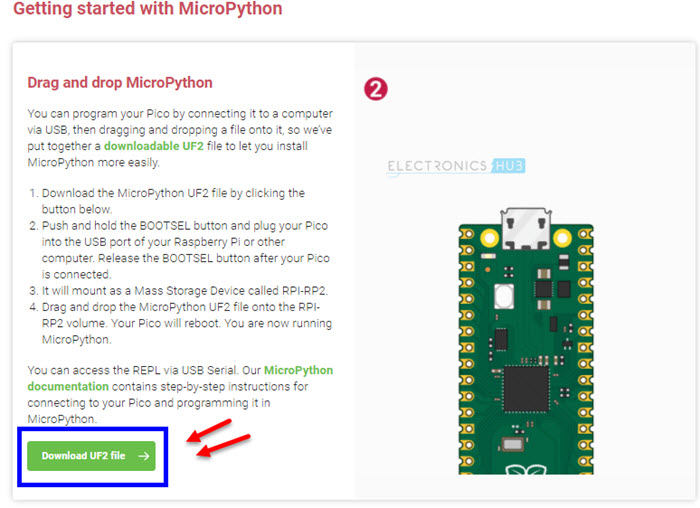
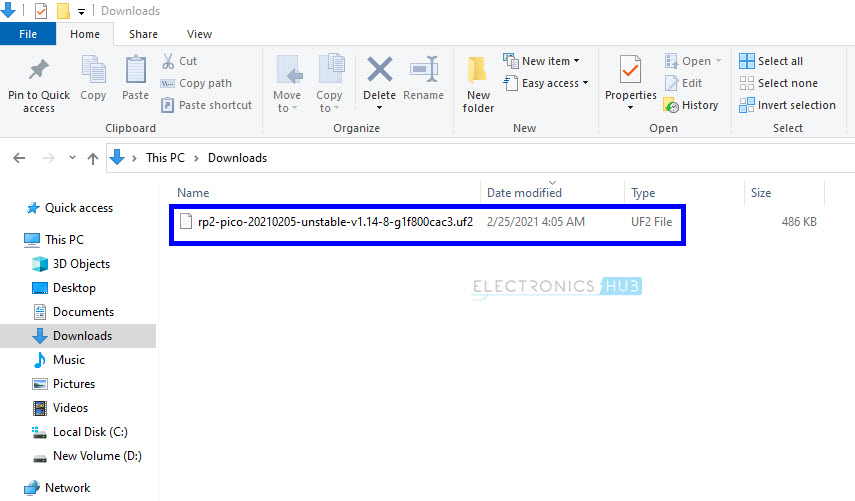
Read all the information and click on “Download UF2 file” option. A MicroPython Binary in the form of a .uf2 file will be downloaded.
Install MicroPython on Raspberry Pi Pico
After downloading the MicroPython Binary, we have to upload this firmware in to the Raspberry Pi Pico. For that, first we have to put the Pico in bootloader mode.
To do that, plug-in a micro-USB cable to micro-USB port of Raspberry Pi Pico. Now, hold the BOOTSEL button on the Pico and plug-in the other end of the USB cable to a USB port of the host computer (while holding the BOOTSEL button).
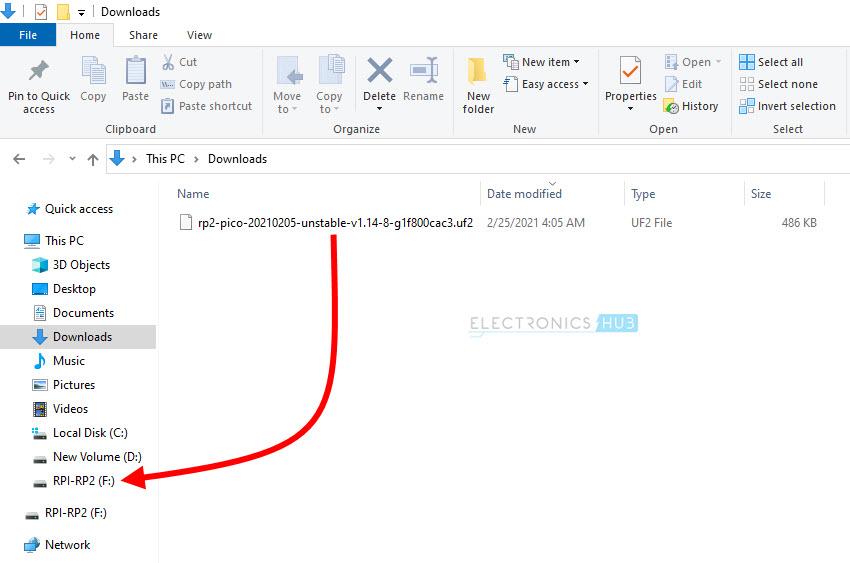
You can release the button after a couple of seconds when the Raspberry Pi Pico appears as a Mass Storage Device with name “RPI-RP2”. If you open it, you will see a text file and an HTML file.
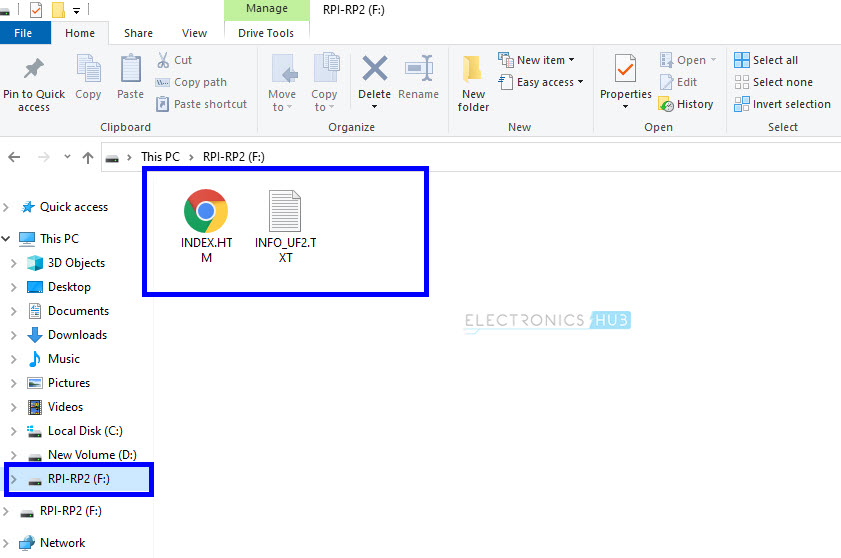
Now, go to the downloads folder and drag-and-drop the downloaded MicroPython UF2 file onto RPI-RP2 device. After copying, the Raspberry Pi Pico will restart and run MicroPython. The mass storage device will disappear after you copy the MicroPython UF2 file.
Your Raspberry Pi Pico is now running MicroPython. You are now ready to program Raspberry Pi Pico with MicroPython.
Downloading Thonny
If your host computer is either Linux or Mac, then you can communicate with Raspberry Pi Pico using terminal and Minicom. But in this tutorial, we will see how to program Raspberry Pi Pico using Thonny IDE.
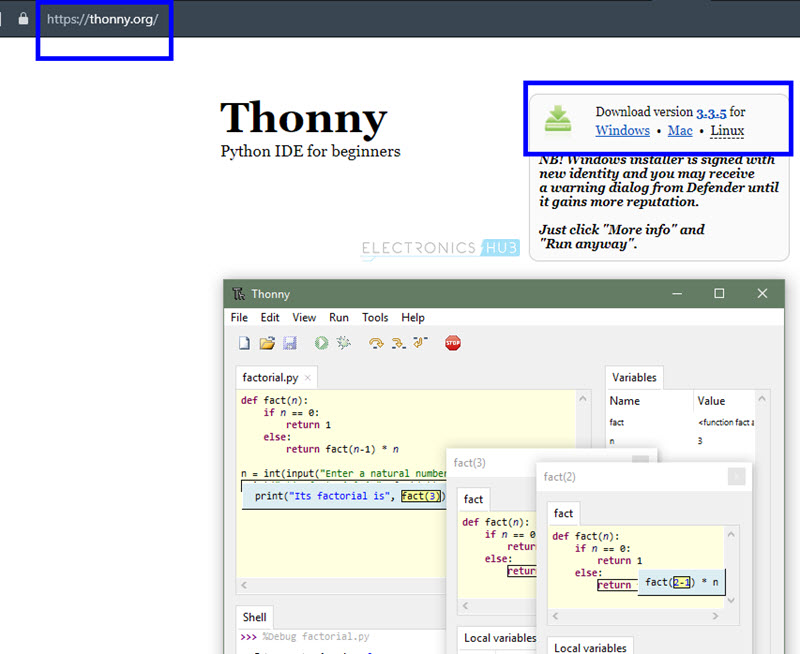
Thonny is a simple Python IDE available for Windows, Mac and Linux. The Raspberry Pi OS comes with Thonny preinstalled. Since I am using a Windows system, I downloaded the Windows version of Thonny. An executable called “thonny-3.3.5.exe” is downloaded.
Double click on the downloaded executable and install Thonny. There is nothing special with this installation and it is very straight forward. Optionally, you can select to create a desktop shortcut.
Configuring Thonny
After downloading and installing Thonny IDE, open it. Make sure that Raspberry Pi Pico is already plugged into the host computer. Thonny IDE is very simple. Its layout can be divided into four parts: Toolbar, Script Area, Shell, Interpreter.
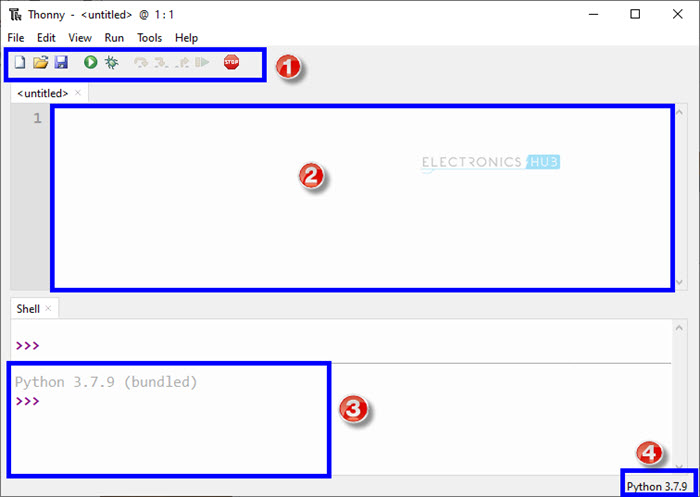
- The Toolbar: Contains icons for saving, running and stopping the programs.
- The Script Area: This is where you write the Python Programs.
- The Shell: The Python Shell is an interactive REPL (Read-Evaluate-Print-Loop) block where you can give individual commands to the interpreter and it will execute them.
- The Interpreter: Select the right interpreter from the bottom right of the IDE.
By default, Thonny IDE is configured to interpret Python 3.x.x.
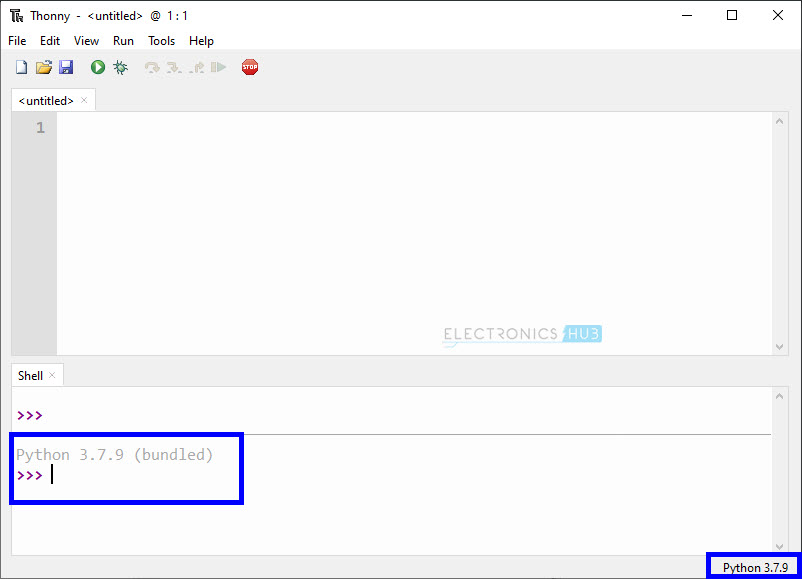
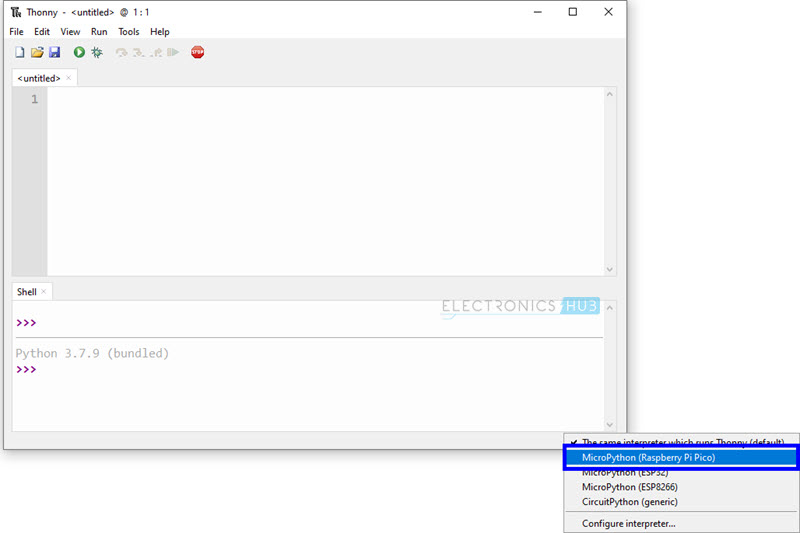
Click on Python 3.7.9 (or whatever the version is) and select MicroPython (Raspberry Pi Pico) interpreter. As soon as you select the MicroPython interpreter, the shell at the bottom changes to MicroPython.
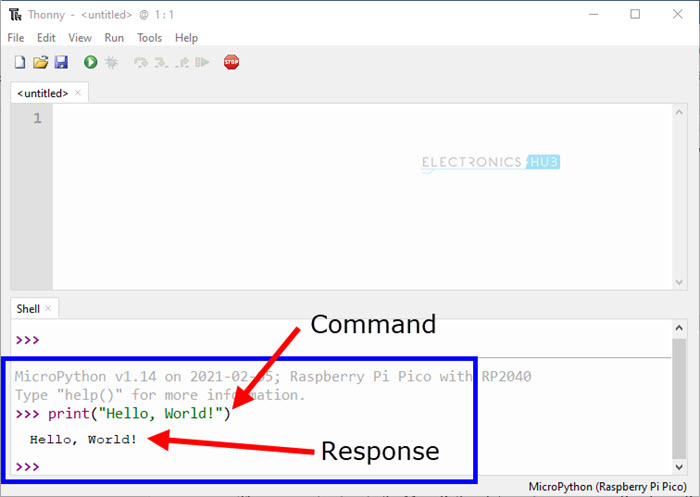
Since MicroPython supports interactive REPL, you can enter commands in the shell and Raspberry Pi Pico will execute them. Let us try this. We will start with Hello World of programs which is to print Hello World.
Programming Raspberry Pi Pico with MicroPython
In the Shell, type the following next to “>>>” symbol and hit enter.
This is an instruction to the MicroPython Interpreter running on Raspberry Pi Pico. Up on receiving this command, the MicroPython will respond with the message “Hello, World!” and prints it on the shell itself.
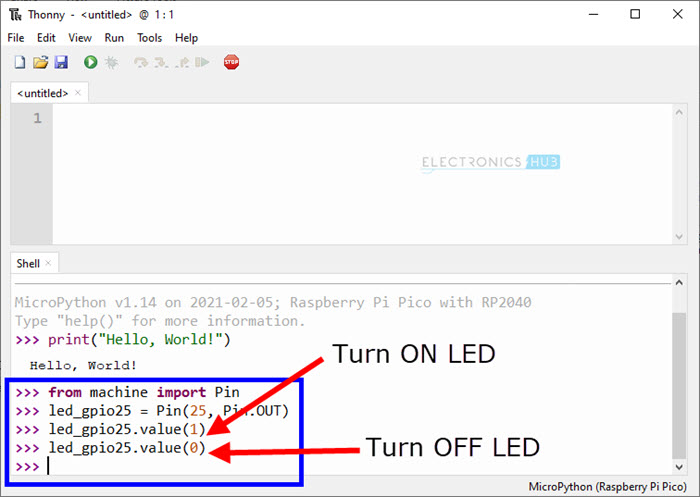
If you remember the layout of the Raspberry Pi Pico, an LED is connected to GPIO 25. We can try to turn this LED ON and OFF from the shell.
For that, first we have to import a special library called ‘machine’. The machine library in MicroPython is used to control the hardware of a board, Raspberry Pi Pico in this case. You can reset the microcontroller, put it to sleep, enable or disable interrupts, wake it from sleep using machine module.
Some of the classes of machine module are:
- Pin
- Signal
- ADC
- UART
- SPI
- I2C
- RTC
- Timer
- WDT
- SD
- SD Card
We will learn about all the modules and their classes as and when we use them. The MicroPython documentation is good place to begin with if you want to explore further on MicroPython Libraries.
Since we want to use the GPIO block, we can import the ‘pin’ class from the ‘machine’, which is used to control the IO pins of the Raspberry Pi Pico.
Next, we create an object of class Pin and set the GPIO number and its direction i.e., Input or Output.
To turn ON the LED, we have to set its value to 1.
Type the above lines one after the other in the shell. You can see the LED turned ON. To turn the LED OFF, set the value of the pin to 0.
Blink an LED
Executing commands from shell is good but what if you want to write a complete Python program? That is why you have the script area. Let us now see how can we write our first Python Program for Raspberry Pi Pico and Blink an LED.
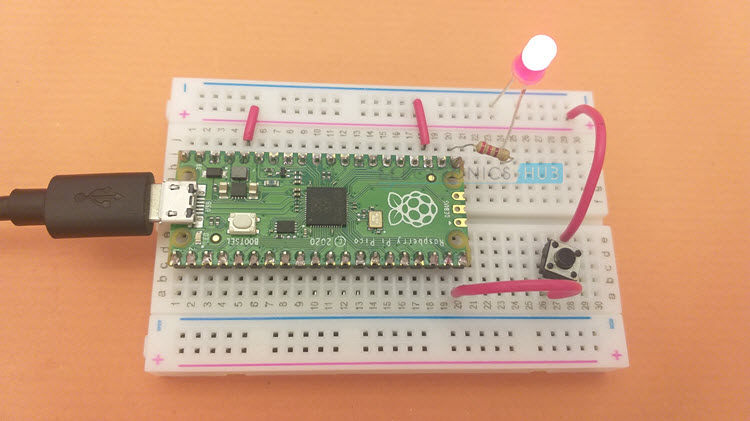
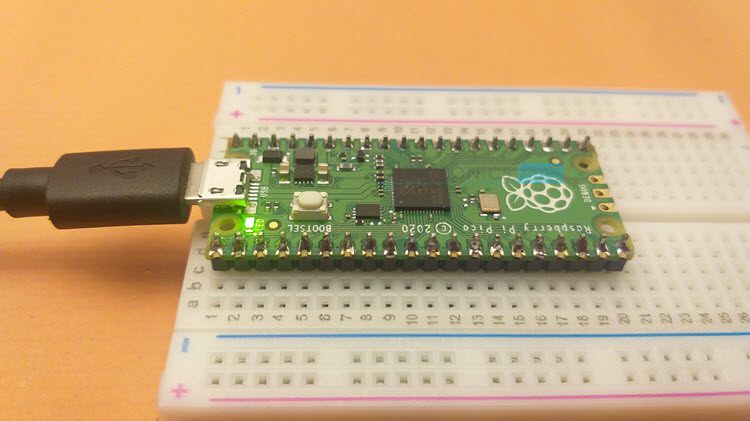
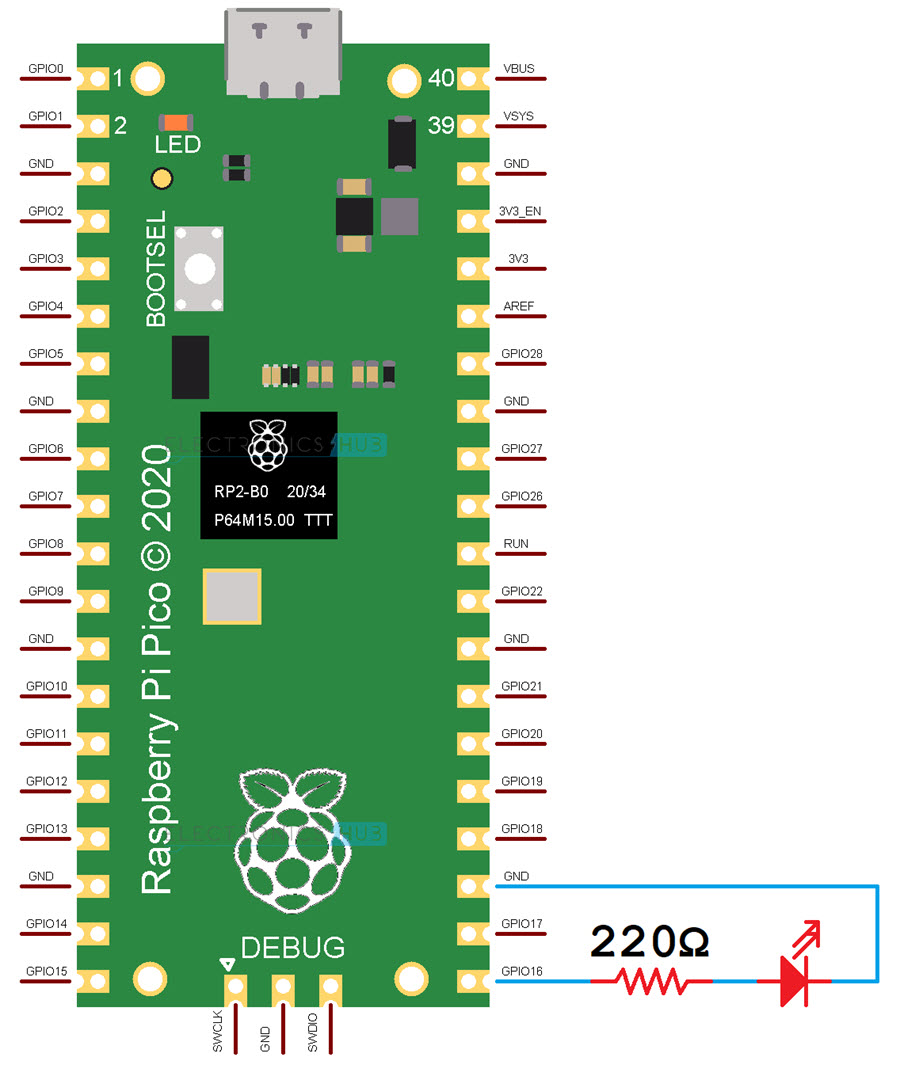
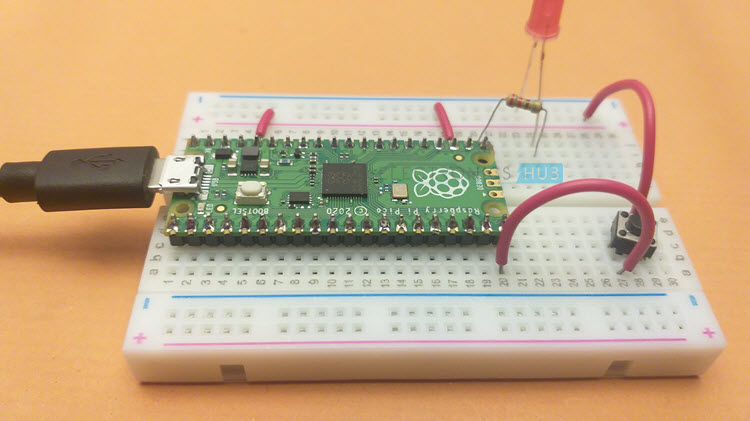
I connected a 5mm red LED to GPIO 16 of Raspberry Pi Pico with the help of a 220Ω current limiting resistor.
Now, in the script area type the following program. I commented the code for detailed explanation on what each line does. You can ignore the comments.
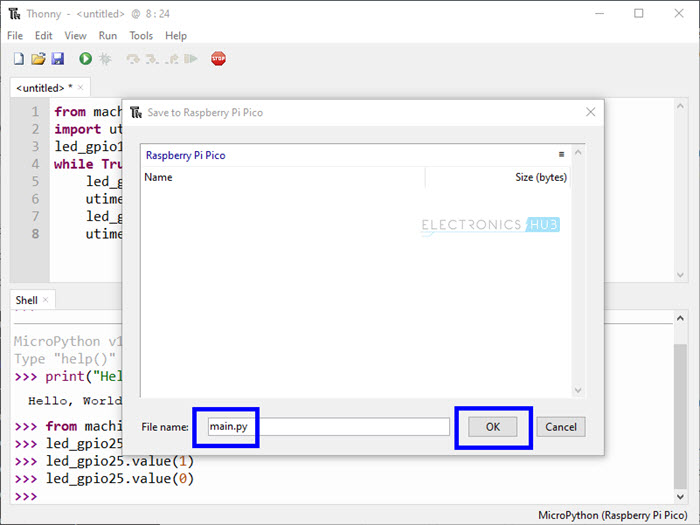
Click on save and select Raspberry Pi Pico, when asked.
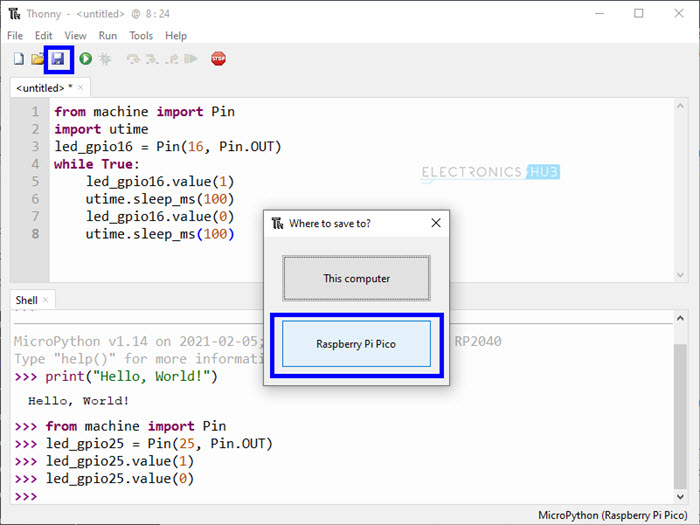
Give a name to the file and click on OK. I gave it as “main.py”.
Click on ‘Run’ icon and you can see the LED Blinking.
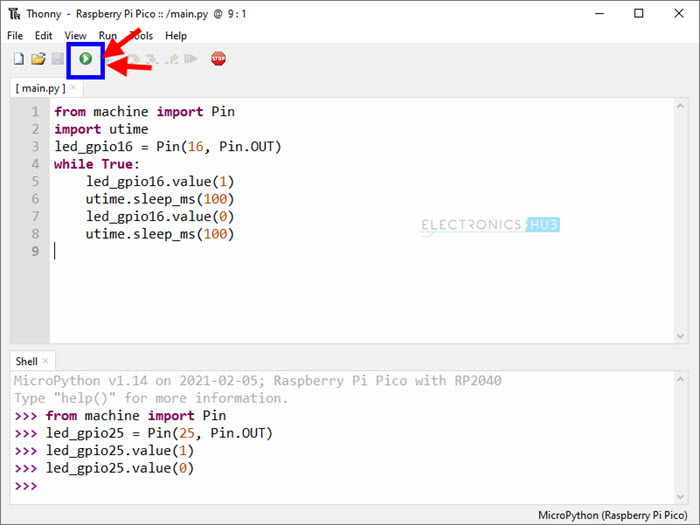
Instead of setting the value to 1 and 0, you can use the toggle function to reduce the code.

Reason for Naming main.py
When you reset any microcontroller (either power down completely and power it on or button reset), you expect the microcontroller to execute the program once again. If you want the same thing to happen in Raspberry Pi Pico, then you have to name the Python script as ‘main.py’.
You can provide any name for the Python program when saving like ‘blinky.py’ but it will not execute if you remove the power and reconnect it. For this, you have to name the Python Program as ‘main.py’.
Even if you have multiple Python Scripts in Raspberry Pi Pico, if there is a file named main.py, then MicroPython will execute that.
NOTE: I am not an expert in Python or MicroPython and I am still learning. This naming thing is what I experienced when working with Raspberry Pi Pico.
Read from Button
We have seen how to set Raspberry Pi Pico’s GPIO Pin as Output and Blink an LED. Let us now extend this by setting a GPIO Pin as an Input and connecting a Button to the GPIO Pin. We will read the status of the Button and toggle the state of the LED.
I used GPIO 15 as an Input Pin and connected a simple momentary push button to it. The other terminal of the button is connected to 3.3V. To get a clean reading from the button, I used PULL_DOWN option while configuring the button pin. So, normally the Pico reads LOW on the button pin but when I push the button, Pico reads HIGH on the button pin.
Conclusion
In this elaborate tutorial, you learned how to program Raspberry Pi Pico with MicroPython. You learned a little bit about MicroPython, how to Install MicroPython in Raspberry Pi Pico, Programming Raspberry Pi Pico with MicroPython and Thonny IDE, Blink an LED and also read a Button.

One Response
Disappointed there is no machine.rtc on the pico. Is there a way to run C program libraries (eg https://github.com/raspberrypi/pico-playground/tree/master/sleep/hello_sleep) that might allow sleep from micropython?