Arduino is one of the most popular microcontroller based electronics prototyping platforms available in the market. The area of applications of Arduino is huge ranging from simple LED driving circuits to complex internet based weather monitoring circuits.
One of the in demand concepts is communication between Arduino board and Android based smartphone or tablet. Even though Arduino can be configured to perform many complicated operations, it would be more beneficial if those operations are controlled using an Android phone.
Outline
ToggleHow To Connect Arduino Uno To Android via Bluetooth
In order to allow communication between Arduino and Android based smartphone, we need to use Bluetooth communication. Almost all Android based devices have built in Bluetooth communication module. Hence, we need to use an external Bluetooth Module for Arduino board.
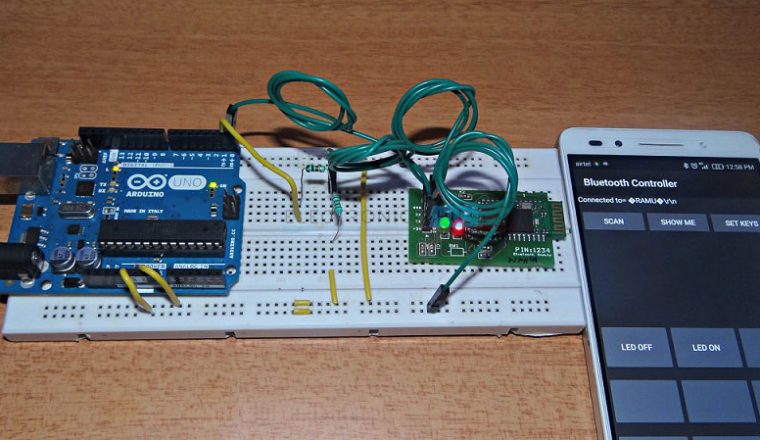
In this project, we are going to communicate with Arduino UNO board with Android based smartphone using Bluetooth communication in order to control an LED.
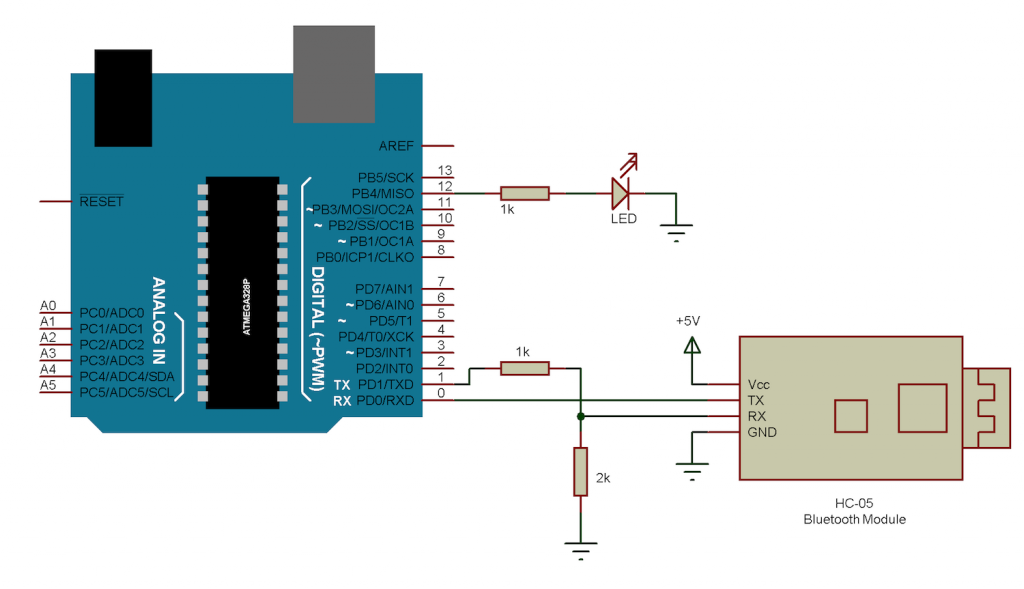
Connect Arduino Uno to Android via Bluetooth Circuit Diagram
Components
- Arduino UNO
- 1KΩ Resistor X 2
- 2KΩ Resistor
- LED
- HC – 05 Bluetooth Module
- Android based smartphone
- Connecting wires
Component Description
Arduino UNO:
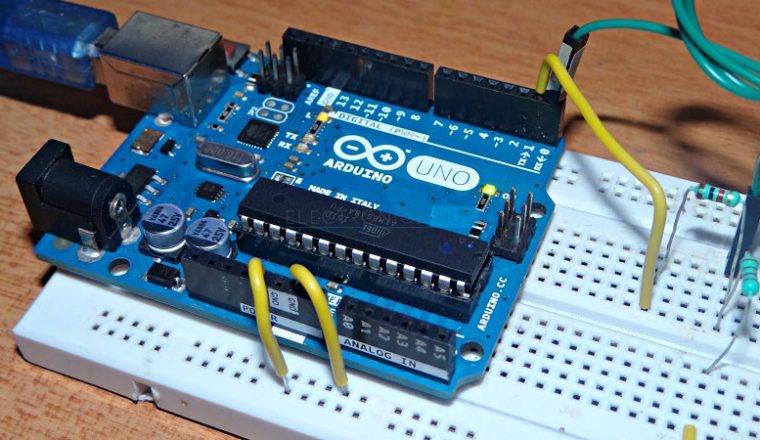
The Arduino board used in this project is Arduino UNO. It is an ATmega328P microcontroller based electronics prototyping board.
Bluetooth Module:
Bluetooth is one of the most commonly used wireless technology standards for exchanging data from fixed and mobile devices over short distances. Bluetooth based personal area networks (PANs) allows information exchange with high levels of security. Using Bluetooth technology, different electronic devices communicate with each other wirelessly.
Bluetooth is a free to use wireless communication protocol that can be used to send and receive date between two devices. The range of transmission of Bluetooth technology is typically less than that of Wi-Fi and Zig Bee. But still many low range devices like audio players, mobile phones etc. use Bluetooth as the main communication. Also, the range of frequency for Bluetooth is 2.41 GHz, which is same as that of Wi-Fi and Zig Bee.
There are two types of Bluetooth modules based on the way they work: Master Bluetooth Module and Slave Bluetooth Module. The main difference, as the names suggest is that a Master Bluetooth module can send or receive data from other Bluetooth modules whereas a slave Bluetooth can only listen to Master Bluetooth module.
Even though the communication between two Bluetooth modules is wireless, they need some protocol to share the transmitted data with other devices like Microcontrollers. The most commonly used protocol is UART.
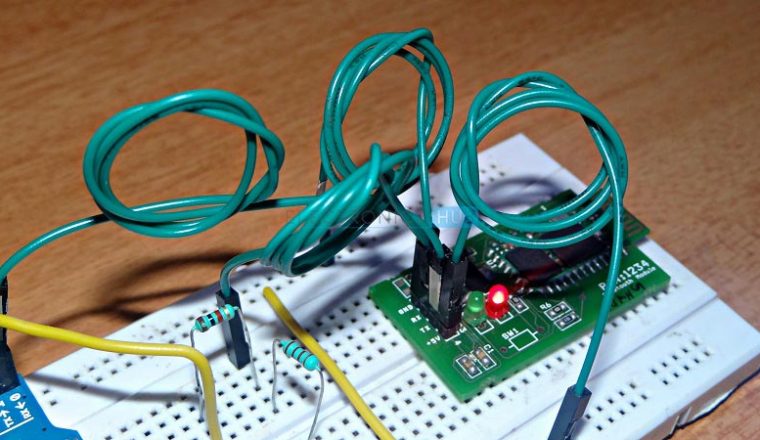
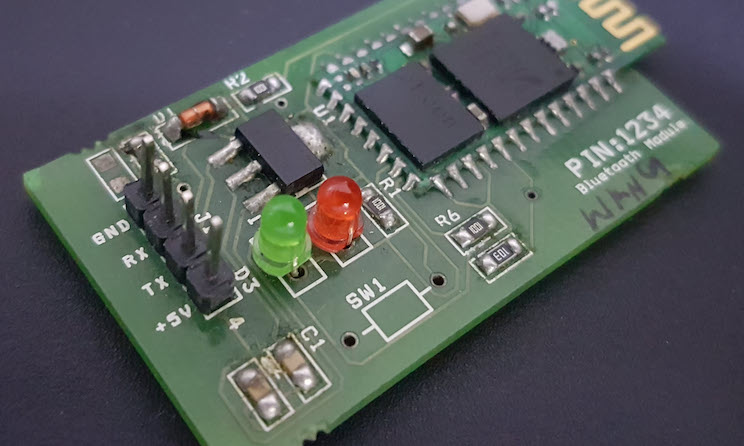
The Bluetooth module used in this project is shown in below image.
This Bluetooth module comes with 4 pins as seen in the image. VCC is connected to 5V supply, TX must be connected to the RXD of the microcontroller, RX must be connected to the TXD of the microcontroller and GND must be connected to ground.
The default baud rate of the Bluetooth module used here is 9600 bps.
Circuit Design
The circuit of the project is very simple. The Bluetooth module works on a supply of 3.3V. But, the module used here has on board 3.3V regulator. Hence, the Vcc pin of the module can be connected to 5V supply.
As the communication between the Arduino UNO and Bluetooth module is UART, we need to use the RXD and TXD (Pins 0 and 1) of the Arduino.
Before connecting the data lines, we mentioned already that Bluetooth module works on 3.3V. Hence, the data coming from Arduino to Bluetooth is connected using a voltage divider network consisting of a 1KΩ resistor and a 2KΩ resistor.
But the data coming from Bluetooth module, which is at a level of 3.3V is readable by Arduino UNO board. Hence, the TX pin of the Bluetooth is directly connected to RXD pin of the Arduino UNO.
Since, this is a simple project, we are going to control an LED using Bluetooth communication. And hence, an LED along with a current limiting resistor of 1KΩ is connected to Pin 12 of Arduino UNO board.
Working
The aim of this project is to allow communication between Arduino UNO and Android based phone to control an LED. The working of the project is explained here.
When the system is powered ON, the LED on the module starts blinking as it is waiting for a Bluetooth device to be paired.
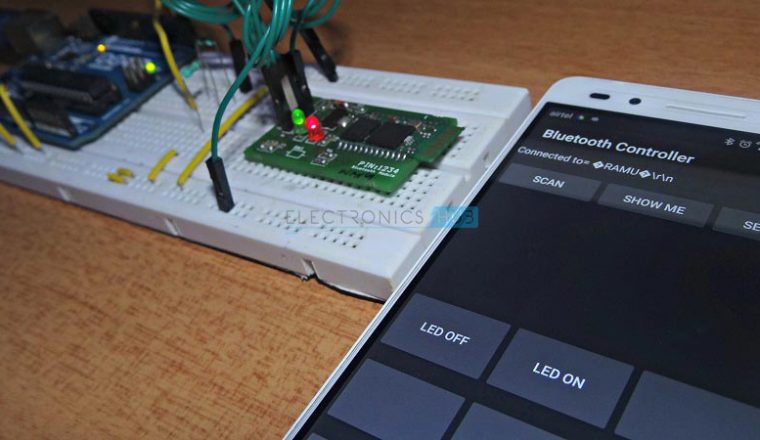
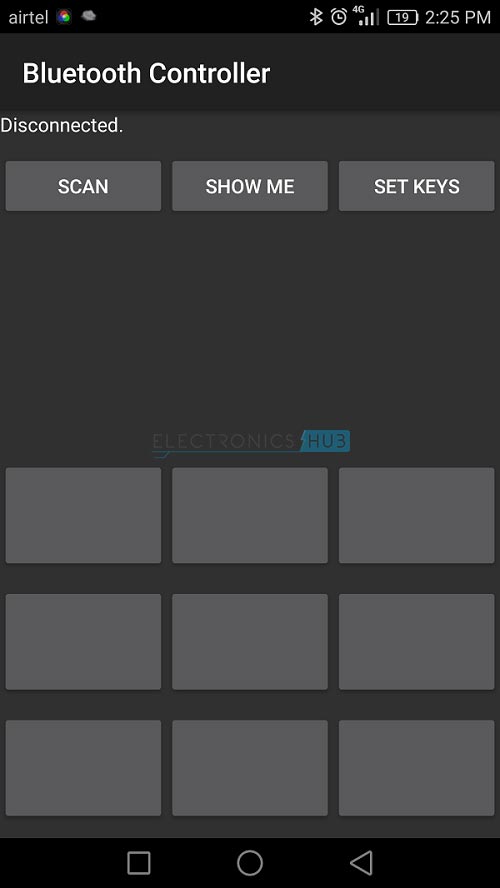
We are using “Bluetooth Controller” app for this project. Once the Bluetooth in the Android phone is turned ON and the app is started, the following screen will be opened.
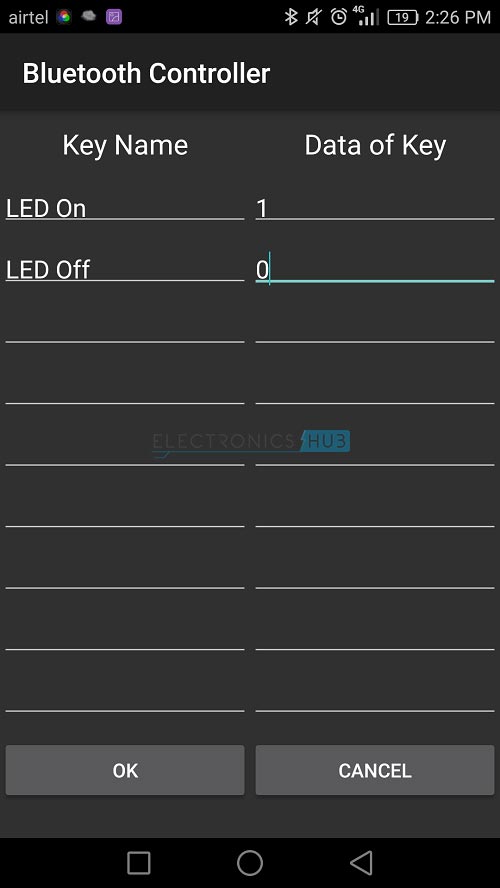
Here, we can set the data to be transmitted when a particular key is pressed by selecting “SET KEYS” option. Key 1 is named “LED On” and the data assigned to this key is “1”. Key 2 is named “LED Off” and the data assigned to this key is “0”.
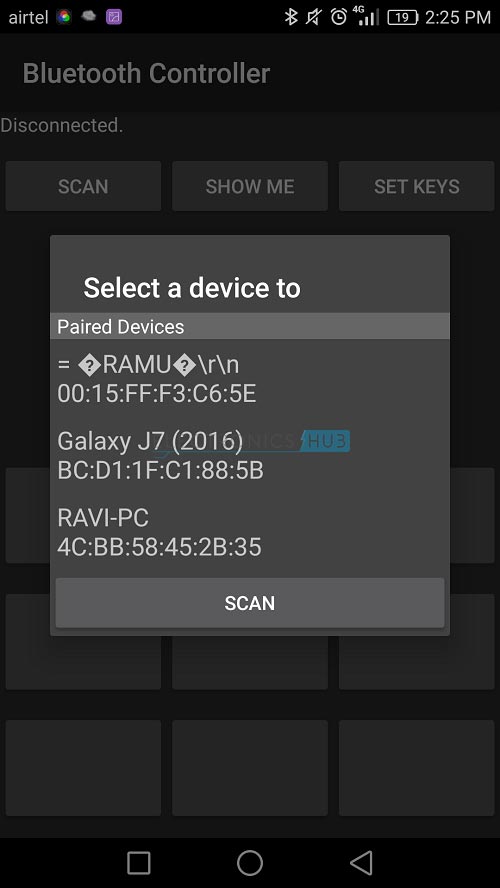
In order to pair the Bluetooth module, we need to press “Scan” and the list of available Bluetooth devices appear on the screen.
We need to select the appropriate device and the confirmation of connection can be seen on screen as it shows “Connected”.
Once the setup is done, we are ready to transmit the data to Arduino. When the key “LED On” on the phone is pressed, the LED connected to Pin 12 or Arduino will be turned ON. Similarly, when the key “LED Off” is pressed, the LED is turned OFF.
Note:
When connecting the Bluetooth module to an Android device for the first time, we might need to enter the PIN of the Bluetooth module. It is usually provided by the manufacturer and is usually “0000” or “1234”.
Applications
- Bluetooth based wireless control has numerous applications like data transfer, audio transmission, phone conversations etc.
- Controlling an Arduino board using an Android phone with the help of Bluetooth communication is very useful as it can be applied to various range of applications and the most important one is home automation.


5 Responses
hello sir ,
thnak u for this artical . this is very useful artical for mi.
but sir i have a request to u is , can u provide mi a code of “Bluetooth controller ” app.
if u provide mi such code then it will very helpful for mi in my academics project.
thnak u sir ,
replay as soon as possible
Hi, We have used the “Bluetooth Controller” app. You can install it.
Really the article is useful. Every thing is explained nicely. Only request you is to explain the programme/code in detail/instruction wise. Thank you
Hi everyone,
please let me know how to program the arduino uno using codes you sent. or is it pre- programmed?
I would like your assistance to build it.
thank you in advance for your answer.
Luckson
Hi, I must admit I know nothing about how all this works as i am older, and did not learn this stuff. I would love to. I would love to design a project but i need advice. If you would be willing to contact me i can rxplain my idea which is somewhat private. I woukd greatly appreciate guidance in area of equipment to use. Please email me so we can discuss if you can help.