A decade ago, working around electronics involved knowledge in physics and math, expensive lab equipment, a laboratory type setup and important of all, love for electronics. But the picture has changed over the decade or so where the above-mentioned factors became irrelevant to work around electronics except for the last part: love for electronics.
There are many reasons which made this possible like rapid growth in the field of information technology, lower cost of electronic components and equipment and widespread availability of the internet.
One such product which made use of the above specified and many other reasons and made electronics be able reach anyone regardless of their background is “Arduino”.
Since its introduction in 2005, the term “Arduino” has become very popular in the field of electronics.
What Is Arduino?
Arduino is an open-source prototyping platform in electronics based on easy-to-use hardware and software. Subtly speaking, Arduino is a microcontroller based prototyping board which can be used in developing digital devices that can read inputs like finger on a button, touch on a screen, light on a sensor etc. and turning it in to output like switching on an LED, rotating a motor, playing songs through a speaker etc.
The Arduino board can be programmed to do anything by simply programming the microcontroller on board using a set of instructions for which, the Arduino board consists of a USB plug to communicate with your computer and a bunch of connection sockets that can be wired to external devices like motors, LEDs etc.
The aim of Arduino is to introduce the world of electronics to people who have small to no experience in electronics like hobbyists, designers, artists etc.
Arduino is based on open source electronics project i.e. all the design specifications, schematics, software are available openly to all the users. Hence, Arduino boards can bought from vendors as they are commercially available or else you can make your own board by if you wish i.e. you can download the schematic from Arduino’s official website, buy all the components as per the design specification, assemble all the components, and make your own board.

Hardware and Software Of Arduino
Arduino boards are generally based on microcontrollers from Atmel Corporation like 8, 16 or 32 bit AVR architecture based microcontrollers.
The important feature of the Arduino boards is the standard connectors. Using these connectors, we can connect the Arduino board to other devices like LEDs or add-on modules called Shields.
The Arduino boards also consists of on board voltage regulator and crystal oscillator. They also consist of USB to serial adapter using which the Arduino board can be programmed using USB connection.
In order to program the Arduino board, we need to use IDE provided by Arduino. The Arduino IDE is based on Processing programming language and supports C and C++.
Types of Arduino Boards
There are many types of Arduino boards available in the market but all the boards have one thing in common: they can be programmed using the Arduino IDE. The reasons for different types of boards are different power supply requirements, connectivity options, their applications etc.
Arduino boards are available in different sizes, form factors, different no. of I/O pins etc. Some of the commonly known and frequently used Arduino boards are Arduino UNO, Arduino Mega, Arduino Nano, Arduino Micro and Arduino Lilypad.
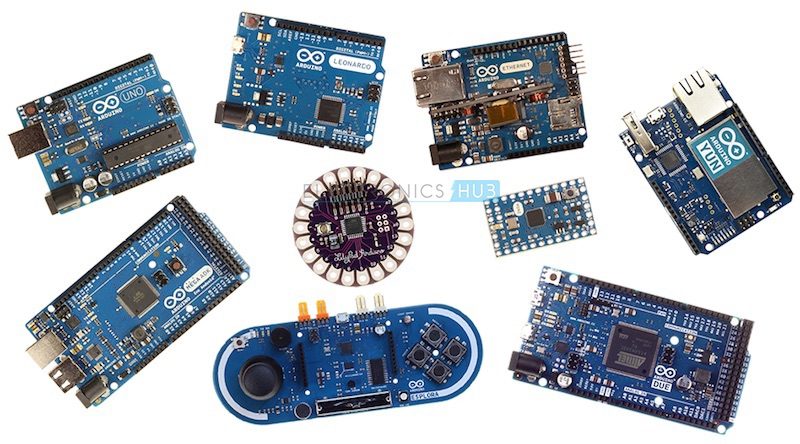
There are add-on modules called Arduino Shields which can be used to extend the functionalities of the Arduino boards. Some of the commonly used shields are Arduino Proto shield, Arduino WiFi Shield and Arduino Yun Shield.
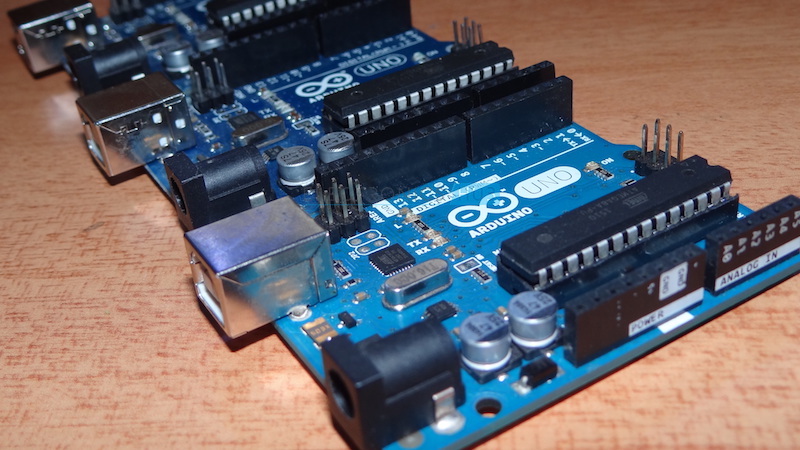
Arduino UNO
In this tutorial, we will be discussing the Arduino UNO board. Arduino UNO is a basic and inexpensive Arduino board and is the most popular of all the Arduino boards with a market share of over 50%. Arduino UNO is considered to be the best prototyping board for beginners in electronics and coding.
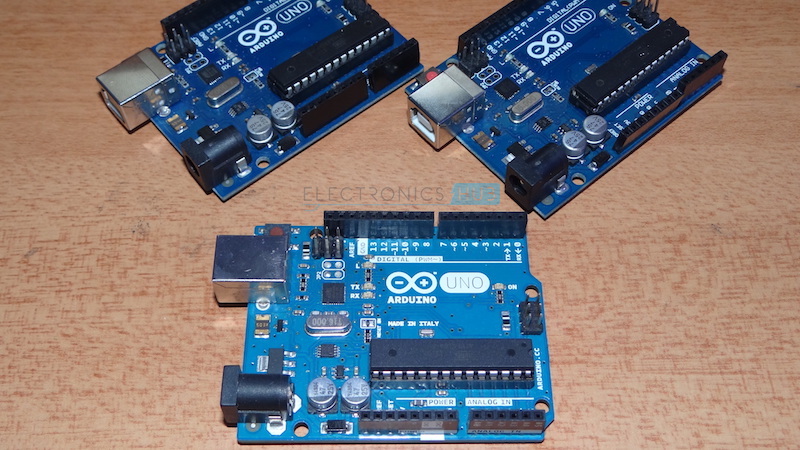
UNO is based on ATmega328P microcontroller. There are two variants of the Arduino UNO: one which consists of through – hole microcontroller connection and other with surface mount type. Through-hole model will be beneficial as we can take the chip out in case of any problem and swap in with a new one.
Arduino UNO comes with different features and capabilities. As mentioned earlier, the microcontroller used in UNO is ATmega328P, which is an 8-bit microcontroller based on the AVR architecture.
UNO has 14 digital input – output (I/O) pins which can be used as either input or output by connecting them with different external devices and components. Out of these 14 pins, 6 pins are capable of producing PWM signal. All the digital pins operate at 5V and can output a current of 20mA.
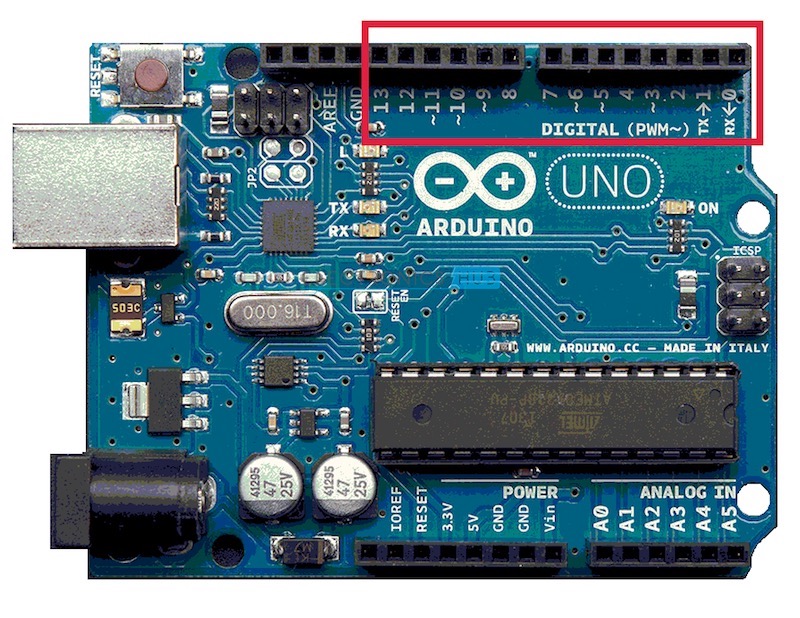
Some of the digital I/O pins have special functions which are describe below.
- Pins 0 and 1 are used for serial communication. They are used to receive and transmit serial data which can be used in several ways like programming the Arduino board and communicating with the user through serial monitor.
- Pins 2 and 3 are used for external interrupts. An external event can be triggered using these pins by detecting low value, change in value or falling or rising edge on a signal.
- As mentioned earlier, 6 of the 14 digital I/O Pins i.e. 3, 5, 6, 9, 10, and 11 can provide 8-bit PWM output.
- Pins 10, 11, 12 and 13 (SS, MOSI, MISO AND SCK respectively) are used for SPI communication.
- Pin 13 has a built-in LED connected to it. When the pin is HIGH, the LED is turned on and when the pin is LOW, it is turned off.
Arduino Uno has 6 analog input pins which can provide 10 bits of resolution i.e. 1024 different values. The analog pins on the Arduino UNO are labelled A0 to A5.
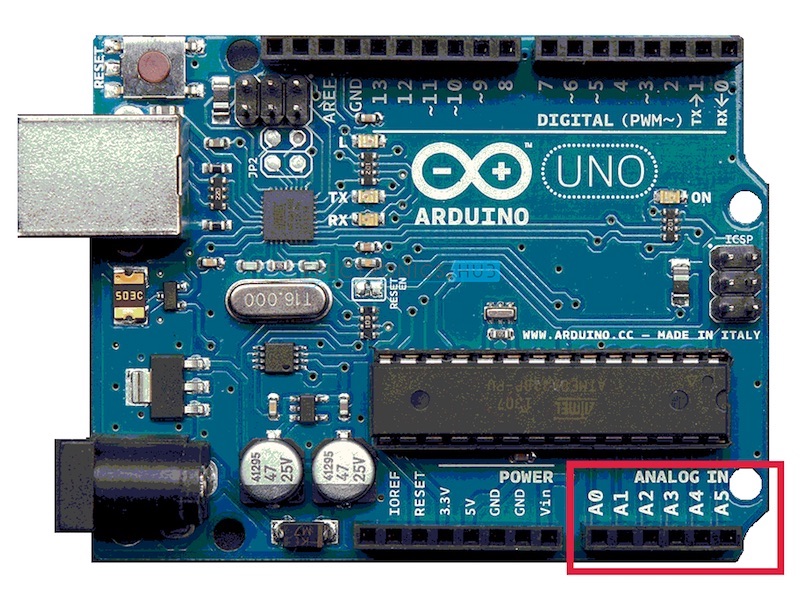
By default, all the analog pins can measure from ground to 5V. Arduino UNO has a feature, where it is possible to change the upper end of the range by using the AREF pin but the value should be less than 5V.
Additionally, some analog pins have specialized functionality. Pins A4 and A5 are used for I2C communication.
There are different ways in which we can power the Arduino UNO board. The USB cable, which is used to program the microcontroller, can be used as a source of power.
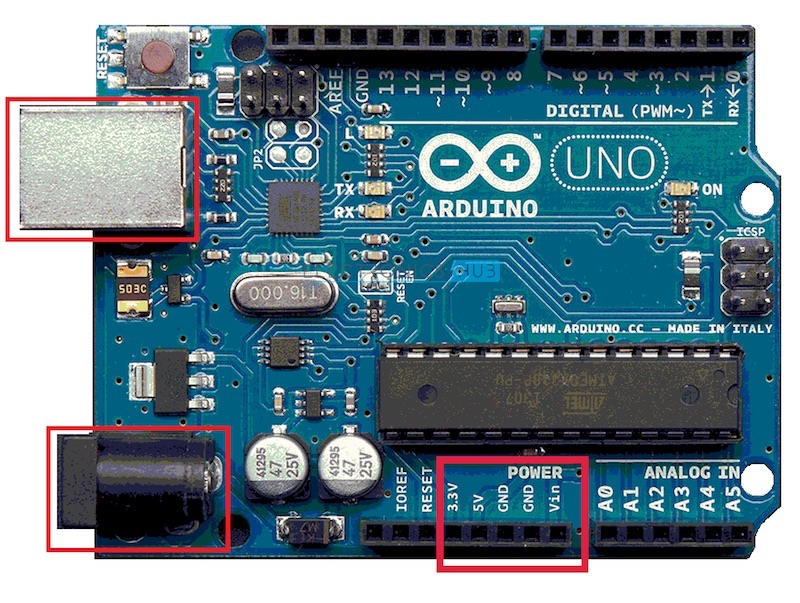
There is a power jack, using which an external regulated power supply in the range of 7V – 12V can be supplied. Additionally, the power can also be supplied from a battery through the VIN pin.
The UNO board has on-board voltage regulators for 5V and 3.3V, which can be used as power supply for small external devices like LEDs.
This is a brief introduction to Arduino and Arduino UNO board. In the next tutorial, we’ll see the installation and setup of the Arduino IDE.

2 Responses
hellooo
My name is Richmond Mensah. A student of the University of Education offering Information Technology currently
I’m in level 300
Please I want to embark on an IT project which will be an an embedded system.
An Arduino May be needed but my knowledge in electronics is know broad so how do I go about it
thanks for providing knowledge about arduino , i am satisfied.