Quadruped Robot – It is a four-legged walking robot which is a bionic replica of spider (Arachnid species) that uses their legs for movement and can perform some tasks either by human interaction or by its own.
Introduction
The main purpose of moving to legged robots is that they can handle irregular terrain with ease when compared with wheeled robots. It can be done by implementing crawl gait (pattern of movement) in which one leg will be in air and remaining three legs should be in contact with the ground while moving.
The crawl gait (which is also known as quadruped gait) can be converted into a program and embedded into microcontroller which instructs servo motor to move in desired positions.
Components for Quadruped Robot
- Arduino Uno microcontroller
- Arduino Sensor Shield V5.0
- mePed Robot V2 – Base Kit
- Wood kit containing all of the pieces that make up the main structure
- MG90S Metal gear servo motor – 8 pcs
- SG90 plastic gear servo motor – 1 piece
- Screws, nuts, spacers
- Sensors and modules
- IR sensor -2
- Ultrasonic sensor with Holder
- HC-05 Bluetooth Module
- Power supply
- 2000 mAh power bank for Arduino
- 1.2V 4*AA 1300 mAh rechargeable battery & 4*AA battery holder for sensor shield
- Connectors and cables
- Mini breadboard
- Jumper wires
- USB cable
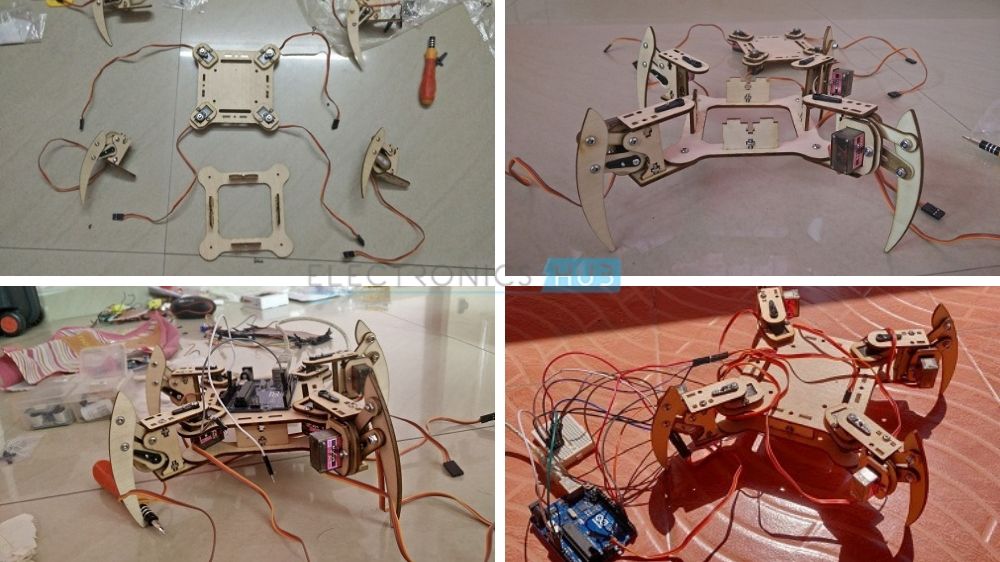
Assembly
- The body of the quadruped can be assembled with the help of mePed v2 Assembly Manual. Link to the manual –> “mePedAssemblyManual“.
- This manual involves legs assembly by fitting servo motors to it, body assembly and finally all four legs are attached to the body of the quadruped.
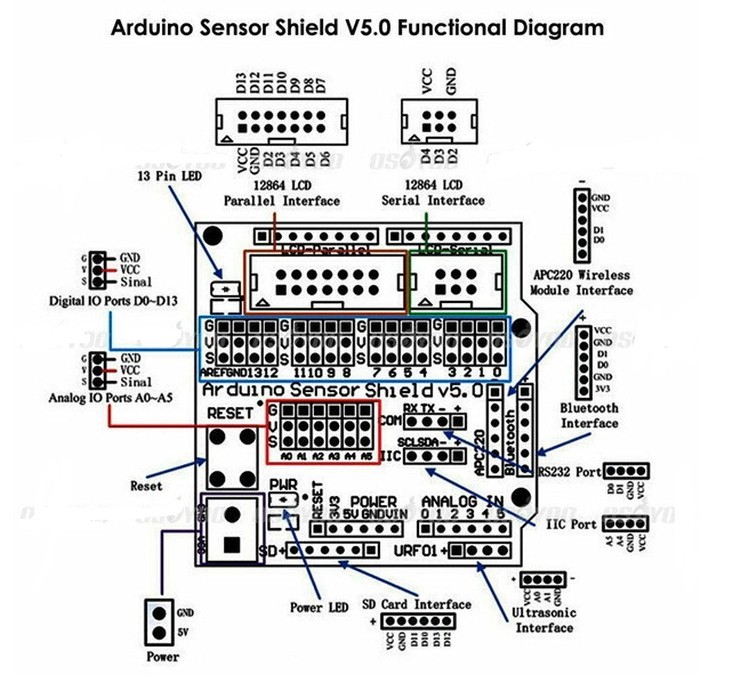
Sensor Shield
Once it is done, Arduino microcontroller can be mounted on it and the sensor shield is plugged into Arduino.
Without the sensor shield, the connection looks messy and it will be difficult to debug when something is not working.
Sensor shield simplifies the wire connection and thus all the sensors, servo motors and modules can be connected to it.
- A single servo motor with ultrasonic sensor is mounted at the front and IR sensors are attached facing downwards.
- Then the Bluetooth module is connected to sensor shield.
- Jumper wires are used to connect the sensors to the Arduino shield.
- Battery holder is placed at the bottom of the body.
Sensor Shield Connections
- 8 servos which are used as legs are connected to digital IO ports D0 to D7(D0 –D3 x-axis servos, D4-D7 y-axis servos)
- Single servo which is used to turn ultrasonic sensor is connected to D11
- Infrared sensors are attached to D9 and D12
- Ultrasonic trigPin is connected to D8 and echoPin is connected to D10.
- Hc-05 is connected to Bluetooth interface (Tx is connected to D0 & Rx is connected to D1)
- Battery holder is connected to the sensor shield power (GND, 5V)
- Power bank is connected to Arduino.
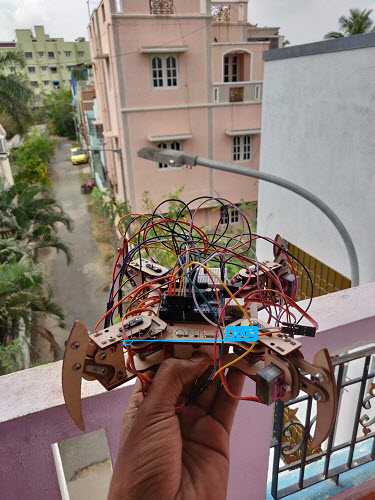
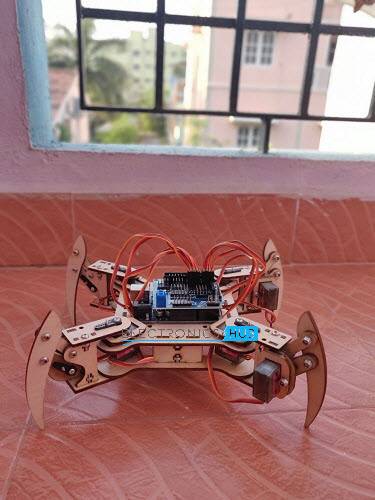
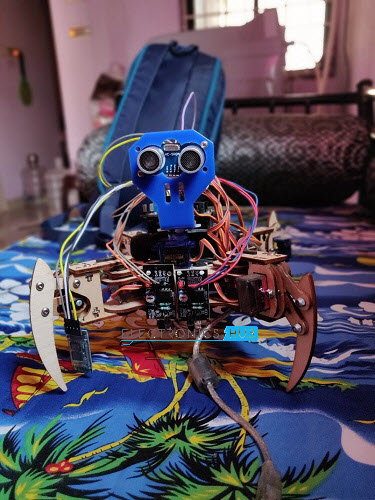
Fully Assembled Quadruped Robot with all the Sensors and motors.
Working and its Functions
Architecture
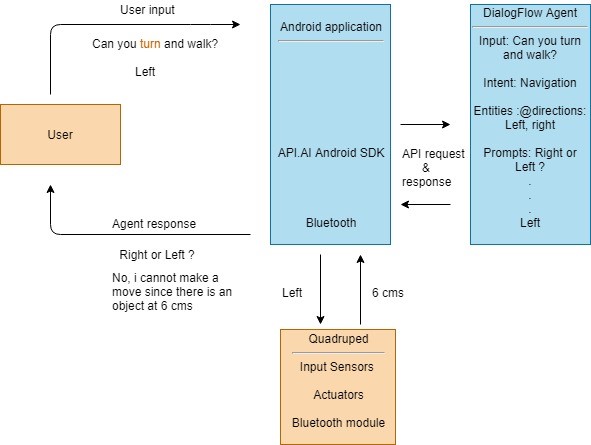
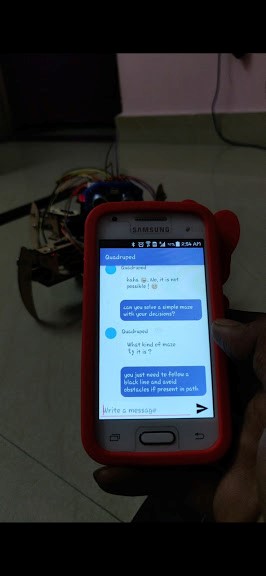
Sample scenario: User requests bot to turn left and walk
- User inputs “Can you turn and walk? ” in Android application
- API request is made to dialogflow agent with the help of API.ai Android SDK
- Agent will check whether input text matches with any of the training phrases (intents) and then extracts the required parameters (@directions:left,right) and prompts the user to provide those if it is missing in the input text.(direction is missing in the input, complete input : “Can you turn left and walk? ”)
- Then the extracted parameter(left) is sent as a response to app which in turn passes that parameter to Arduino microcontroller via Bluetooth
- Based on the received parameter, the corresponding function is invoked by microcontroller to check whether it can make a left turn with the help of ultrasonic sensor.
- Then the result (distance = 6 cm) is passed as response to android app which decides that it is not possible to make a turn, since there is an object nearby and informs the same to user.
Building the Chatbot
- A Chabot is a computer program which is used to make conversation with humans in order to assist them to perform some functionalities.
- NLP (natural language processing) algorithms are used in chatbots to derive a useful meaning from the natural languages.
Dialogflow – It is a natural language processing engine owned by google which is used to create a conversational bot that parses the user query and extract the relevant parameters.
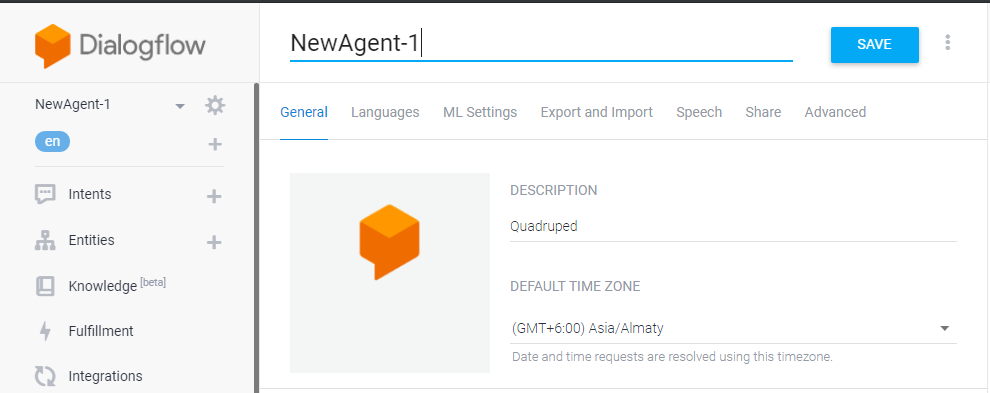
Agents
- Agents are natural language understanding modules that transform user requests into actionable data with the help of intents and entities
- Agent ‘NewAgent-1’ is created.
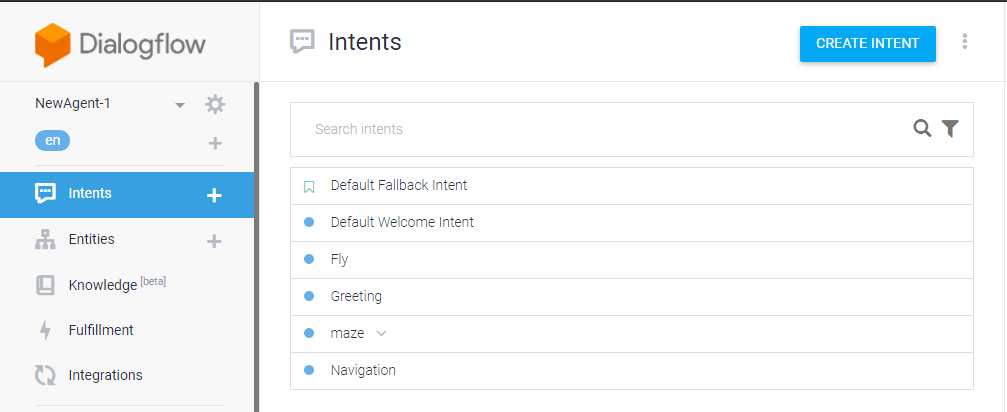
Intents
- Agent contains intents which are responsible for mapping user queries with appropriate responses. It is achieved with the help of Training phrases, Action and parameters.
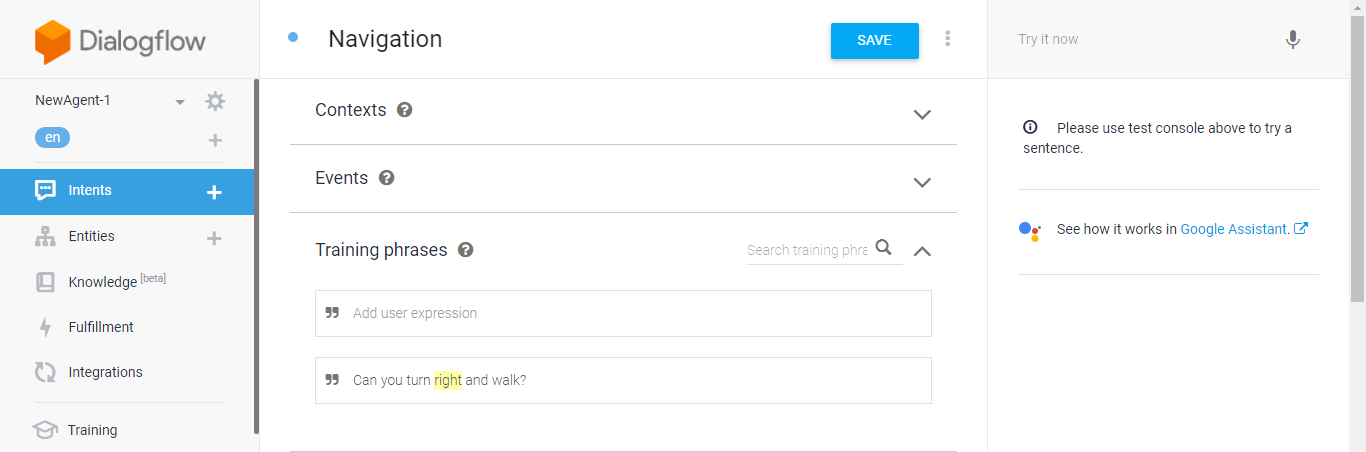
- New intent ‘Navigation’ is created.
Training phrases
- Training phrases act as sample user inputs.
- Multiple training phrases are created in order to increase the efficiency of the agent.
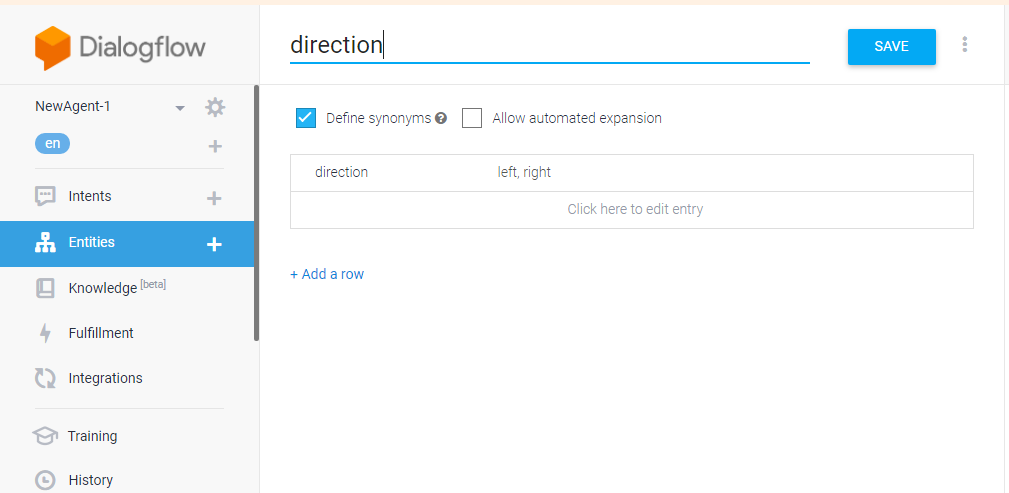
Entities
- Every training phrases may contain entity. Entities are the useful parameters which are extracted from the user input.
Entities – User defined & system defined
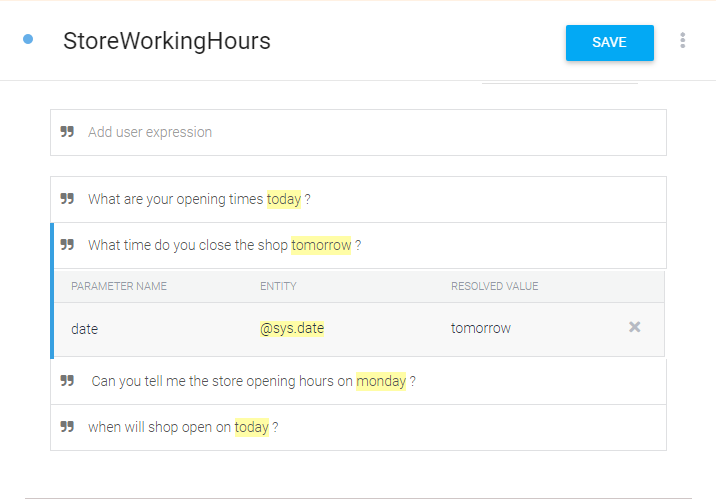
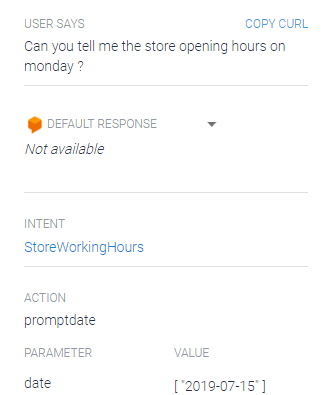
System entities
Dialogflow contains some predefined entities which can be used in training phrases.
Eg: @sys.date –today, tomorrow, Monday, etc
User/developer defined entities
- It allows us to create our own entities which are not covered under Dialogflow’s system entities.
Eg: Can you turn right and walk?
- User requests quadruped to turn and walk and it needs to know in which direction it should turn either right or left, which act as an entity in the input.
@direction: direction – left, right
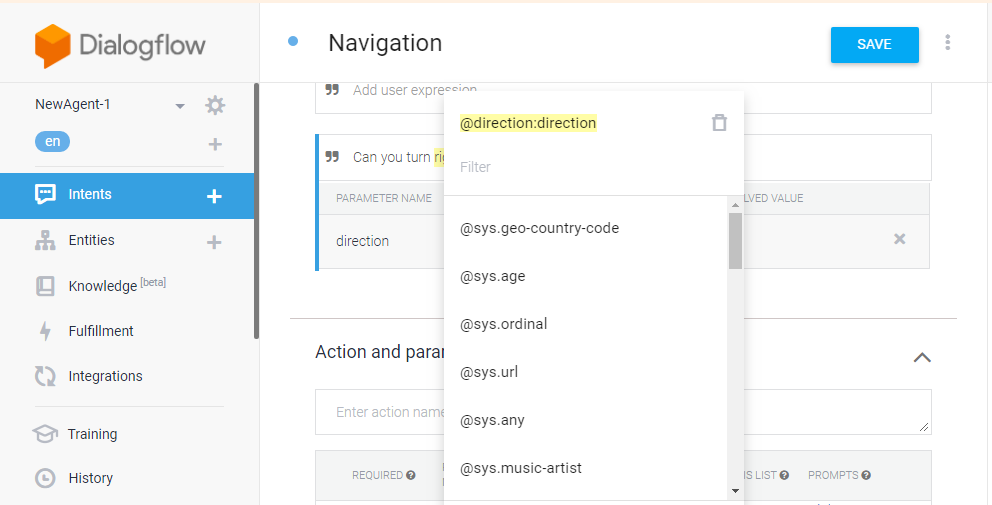
User defined entity ‘direction’ is created.
Action and parameters
Prompts & responses
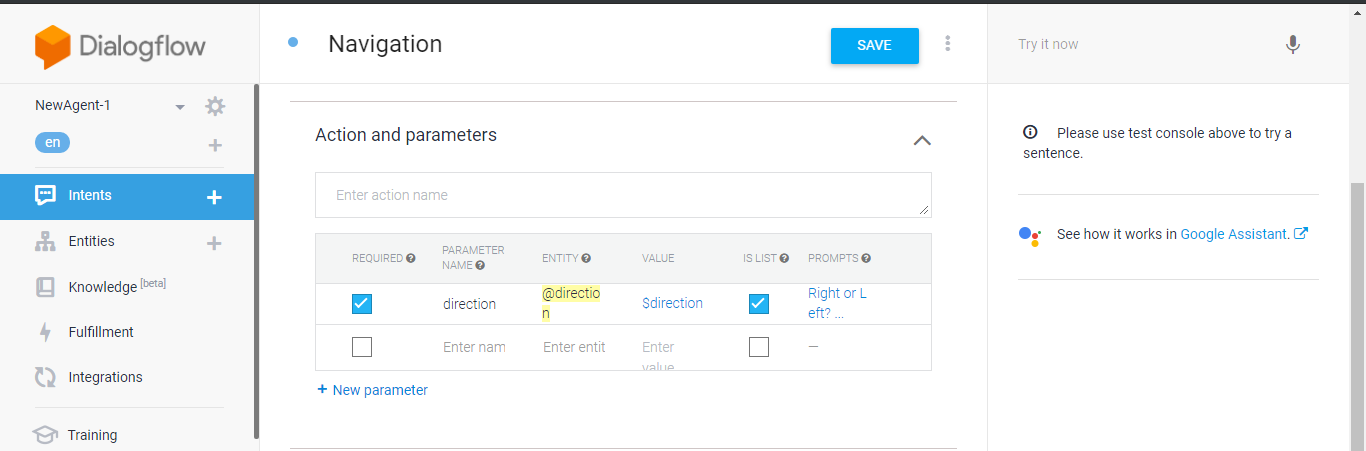
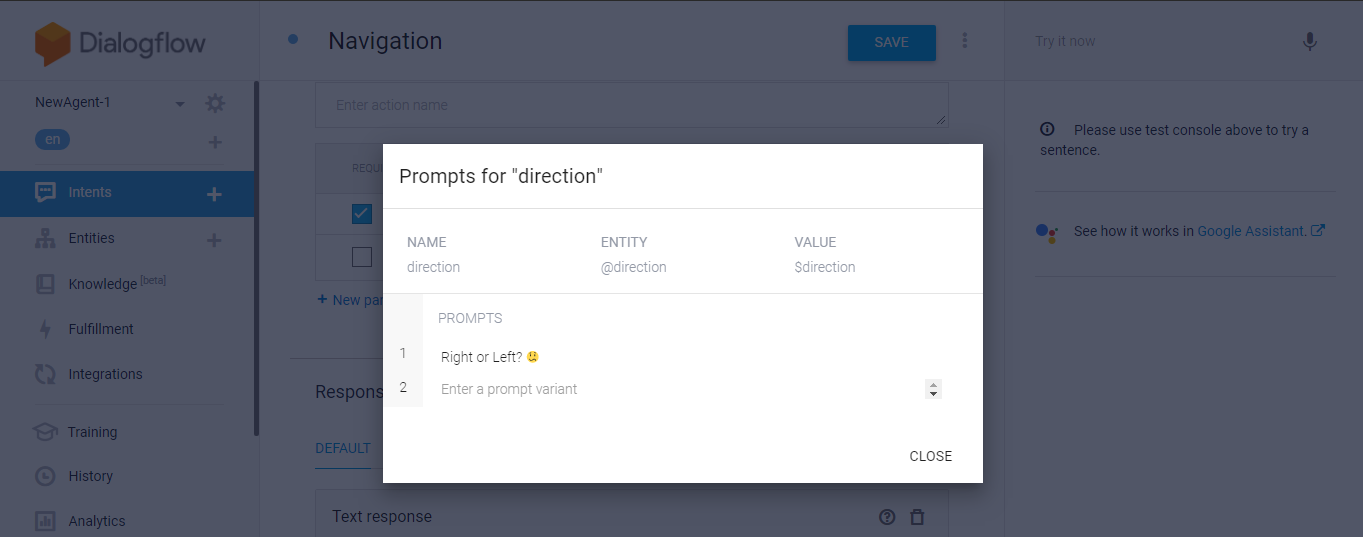
Prompts
Prompts are used to make sure that complete information is obtained from the user.
Eg: Can you turn and walk?
Missing information: direction(left, right)
Bot response: left or right?
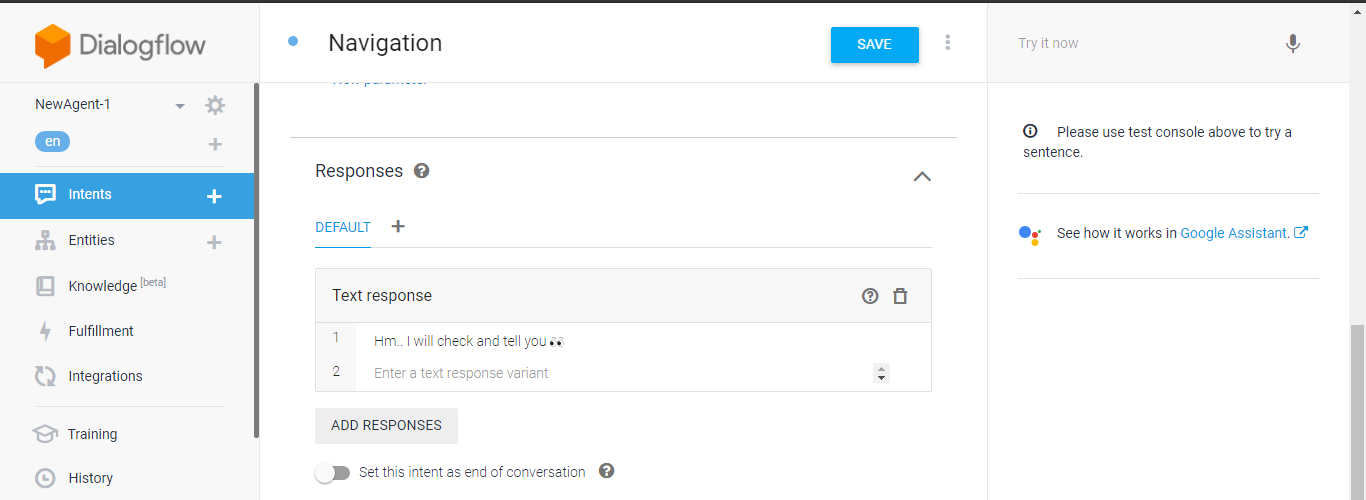
Responses
Then the corresponding responses are defined for the user query which will be displayed to them.
Similarly other intents fly, maze are created.
Intent: FLY
Training phrases: Can you fly?
Response : haha. No, it is not possible.
Building an Android Application
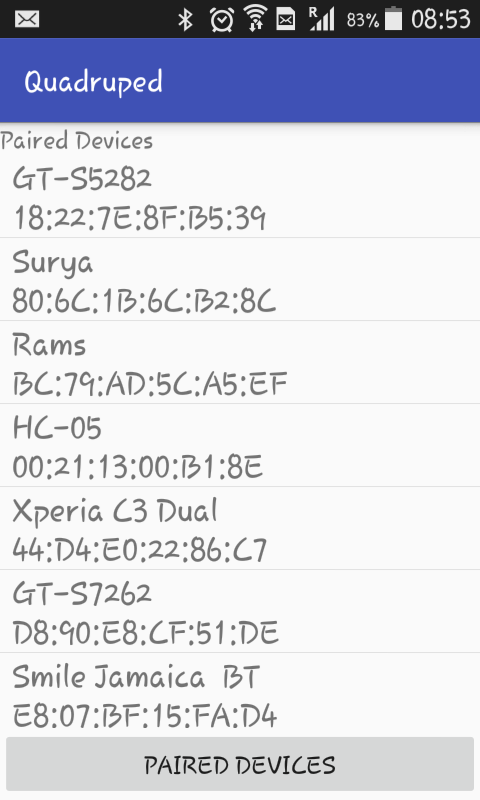
Designing the Bluetooth layout
This layout uses ListView to list paired Bluetooth devices when @+id/button is clicked
Connecting with paired devices
- Android platform includes support for the Bluetooth framework that helps to transfer data wirelessly between android device and Arduino.
- Android provides Bluetooth Adapter class to communicate with Bluetooth
- List of paired Bluetooth devices are retrieved and shown in listview and the device with which communication needs to be done is selected.
- Once the connection is successful, it will open chat layout where conversation between user & bot happens.
- Add the below permissions into the AndroidManifest.xml in order to allow app to access Bluetooth and internet.
<uses-permission android:name=”android.permission.BLUETOOTH” />
<uses-permission android:name=”android.permission.BLUETOOTH_ADMIN” />
<uses-permission android:name=”android.permission.INTERNET” />

Designing the Chat layout
This layout contains listview to display the conversation between user and bot and edit text at bottom where user makes the conversation.
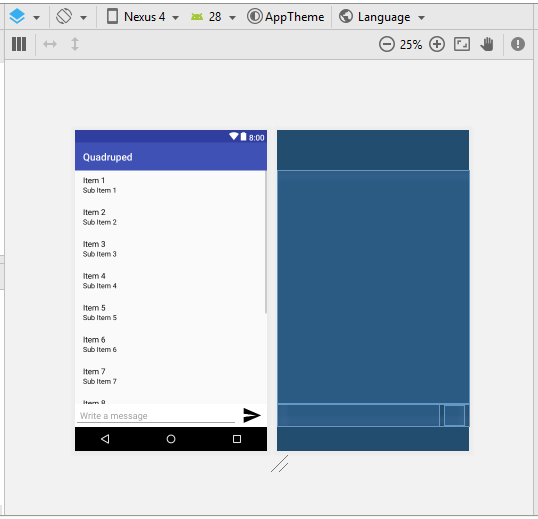
Two separate layouts are created, one for user and another for bot and then the corresponding layout is binded to the conversation list accordingly with the help of adapter class.
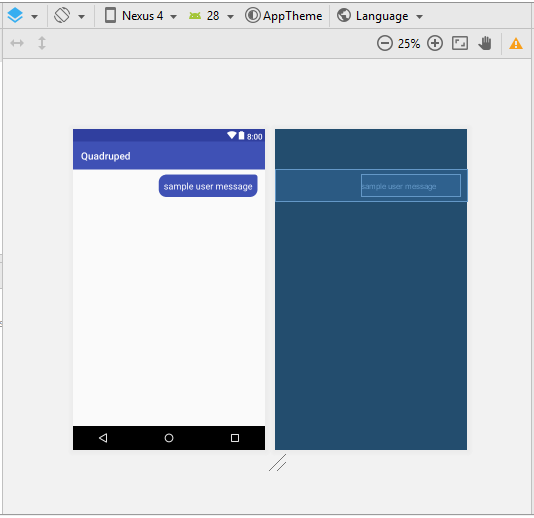
UserMessage Layout
User message appears at the right side of the screen.
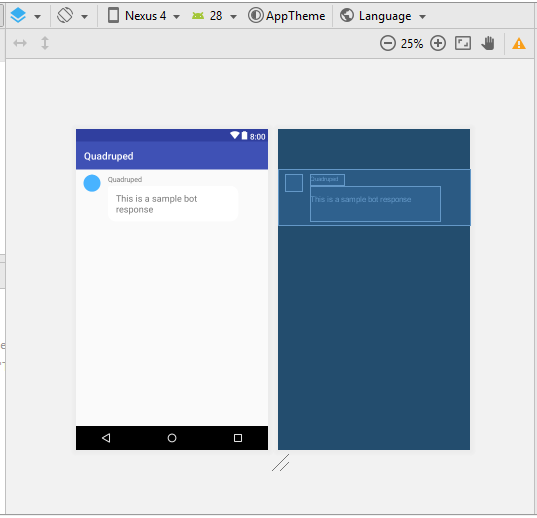
BotMessage Layout
Bot message appears at the left side of the screen.
Sending and Receiving Messages
- In order to implement natural language processing features in our app, we must add the API.AI SDK library to our project.
- Dependency needs to be added in build.gradle file. (OurApplication/build.gradle)
compile ‘ai.api:sdk:2.0.7@aar’
- Once user makes the conversation, the input text is sent as request to dialogflow engine where processing takes place and the response is sent back to app. Based on the response received, it will either asks quadruped to perform tasks(waveHello) or it will request to provide some data(checkDistance).
- The dialogflow request is an asynctask which will be executed in background.
Model Class
- This class is the bridge between the controller and the view.
- So when user ask for an information though View(UI), view goes to controller and controller notify the model. Then model give that information to controller and controller notify View about that information so the user can see that information.
- Message.java act as model class which holds conversation text and belongsToCurrentUser(either it belongs to user or bot) properties
Binding the Messages to listview
In Android, Adapter is a bridge between UI component and data source that helps us to fill data in UI component.
- UI component represents the listview which is used to list the conversation
- Data source represents the arraylist messages from which data is populated into listview
Android AsyncTask
Android AsyncTask is an abstract class provided by Android which is used to perform heavy tasks in the background and keep the UI thread light thus making the application more responsive.
Arduino Code for Chat Interaction
- The response obtained by app from dialogflow is processed and serial communication is done with arduino via bluetooth which instructs quadruped to perform tasks(waveHello(), tellNo()).
- And also if any additional data is required by app in order to make a decision, then it will request arduino to help (checkDistace() – quadruped needs to check whether any object is located nearby)
- Ultrasonic sensor is used to calculate distance of an object which is present in front of it.
Building the Maze Solver
It is done with the help of Line following & obstacle avoidance techniques
Quadruped uses IR sensors which has the ability to detect black lines and guides the robot to follow a certain path.
Working Principle
- Uses IR sensors (transmitter & receiver) to sense the line by emitting infrared radiations
- Output of sensor is an analog signal which depends on the amount of light reflected back from the surface.
- It returns 0 when the amount of light reflected from the surface is less (since black colour absorbs infrared radiations) and returns 1 when the amount of light reflected is more.
Obstacle Avoider
Quadruped uses ultrasonic sensors to detect obstacles in front of it
Working Principle
- Consists transmitter & receiver in which transmitter emits sound waves and receiver waits for the echo signal.
- Calculates time interval between signal transmission and reception of echo and determines the distance of the object from the sensor
- Servo motors are high torque motors which have a geared output shaft which can be programmatically controlled using Arduino to turn at certain degrees at a time. It is used for robot movement.
Line Follower Principle
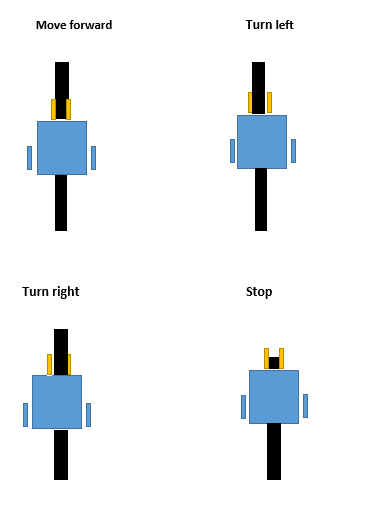
Case 1: when both sensors senses black line, then it should move forward (left sensor =0, right sensor=0)
Case 2: when left sensor senses black line and right sensor sensor senses white, then it should turn left
Case 3: when right sensor senses black line and left sensor sensor senses white, then it should turn right
Case 4: when both sensors senses white, then it should stop.
Quadruped Gait for Forward Movement
- Gait is defined as a pattern of movement of legs in order to reach a destination. Quadruped gait is one in which the body lifts one leg at a time and other three legs form a supporting tripod.
- In order to achieve quadruped gait, all we need to know is that when and at which position we need to move the legs and this is known as inverse kinematics.
- Inverse kinematics helps in defining values for servo motors in order to make the leg move to desired position.
- The below diagram represents forward quadruped gait.
- L(x,y) where L represents leg , x represents x-axis(horizontal) movement and y represents y-axis(vertical) movement.
- Stable position is 90 degree.

Maze
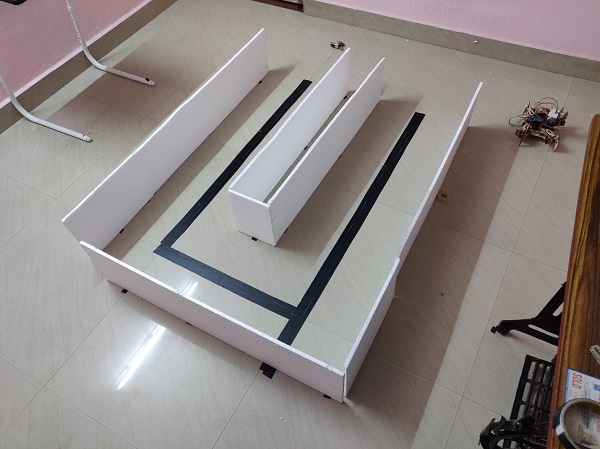
Task: Quadruped needs to follow the black line and it needs to avoid the obstacles
Arduino Code for Maze Solver
- The quadruped gait is converted to algorithm by combining line follower and obstacle avoider technique in order to build a maze solver.
- The forward movement gait is slightly modified to make a turn when either quadruped deviates from the line or any obstacle is detected.
Conclusion
Thus, a quadruped robot is designed in such a way that humans can interact with it using android chatbot to perform some tasks. The movement of servos is achieved by Inverse kinematics algorithm.
The Arduino Quadruped robot will be able to move on a guided path sensing the black line with its automatic obstacle avoiding feature makes it efficient to reach any destination as desired.

One Response
All the best da ?