In this tutorial, we will see how to install and setup Visual Studio Code for Programming Raspberry Pi Pico in Windows System. We will learn how to install the necessary toolchain on the Windows, download and install VS Code, download the Raspberry Pi Pico SDK and build a demo project from Visual Studio Code in Windows.
What Tools We Need to Install?
Programming Raspberry Pi Pico from a Windows System is a little bit different (or at least the initial setup part) as you have to download and install all the necessary tools one-by-one instead of simple commands as we did in a Linux (Raspberry Pi OS) system.
Before installing Visual Studio Code, you have to download the following tools:
- ARM GCC Compiler
- CMake
- Build Tools for Visual Studio Code
- Python
- Git
After installing these tools, we can install the Visual Studio Code, configure it and start Programming Raspberry Pi Pico in Windows System.
ARM GCC Compiler
We will begin our setup process for Programming Raspberry Pi Pico in Windows with downloading and installing the GCC Compiler for ARM Cortex Processors. Go to the download page of GNU Arm Embedded Toolchain, scroll down and download the latest version of Windows executable.
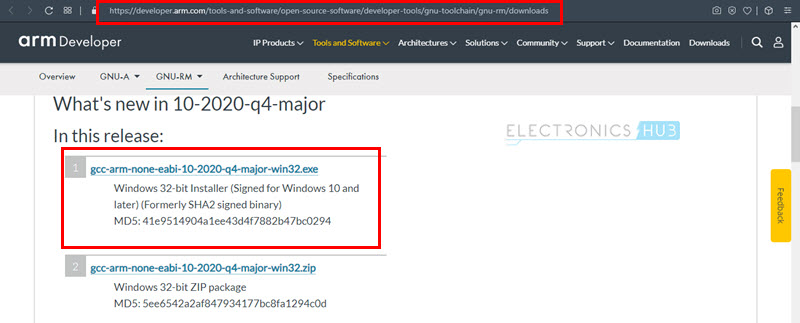
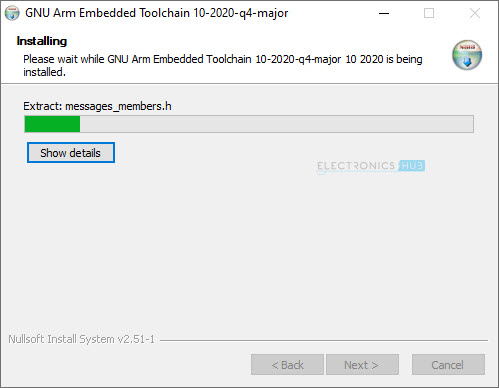
After downloading, open the downloads folder and double click on the executable to begin the installation process. The installation is very simple and you can simply follow the onscreen instructions.
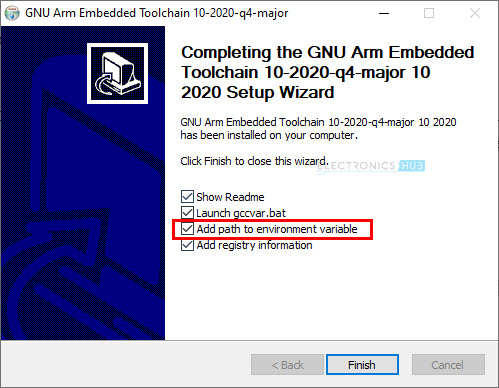
On the final step, make sure that you check the “Add path to environment variable” option.
CMake
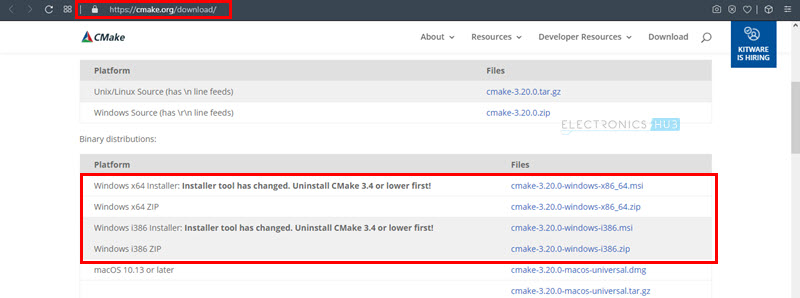
The next important tool we are going to download and install is the CMake. Go to the official CMake download page and in the ‘Platform’ section under Binary distributions, download the 64-bit Windows Installer (.msi file).
I am sure, most of the Windows computers are 64-bit systems but in case you are struck with a 32-bit machine, download the ‘i386’ Installer.
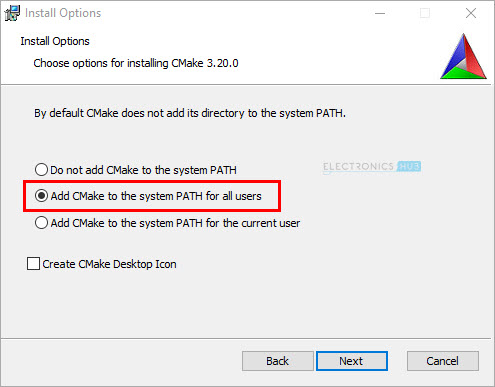
Double click on downloaded installer file to begin installation. Again, the installation process is very simple. When asked by the CMake installer, select the option “Add CMake to system PATH” option.
Build Tools for Visual Studio Code
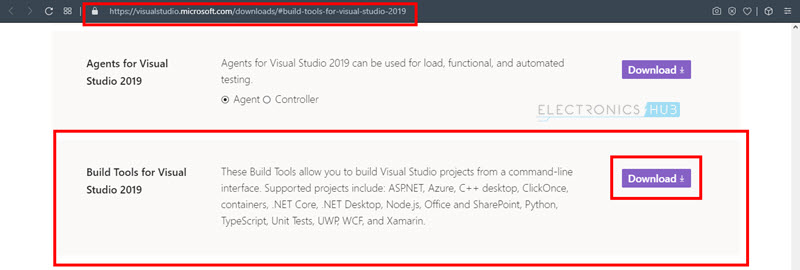
Next, we will download and install Build Tools for Visual Studio 2019. This tool is important for using command line interface. In the official download page, expand “Tools for Visual Studio 2019”, scroll down and download “Build Tools for Visual Studio 2019”.
A small executable will be downloaded. Double click on this executable to begin installation process. When the installer begins, you will get a window to configure the installation options. Select “C++ Build Tools” and on the right, make sure that “Windows 10 SDK” is selected (important).
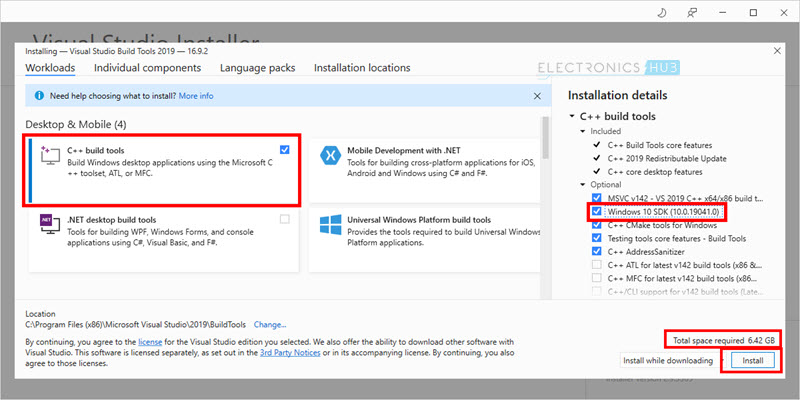
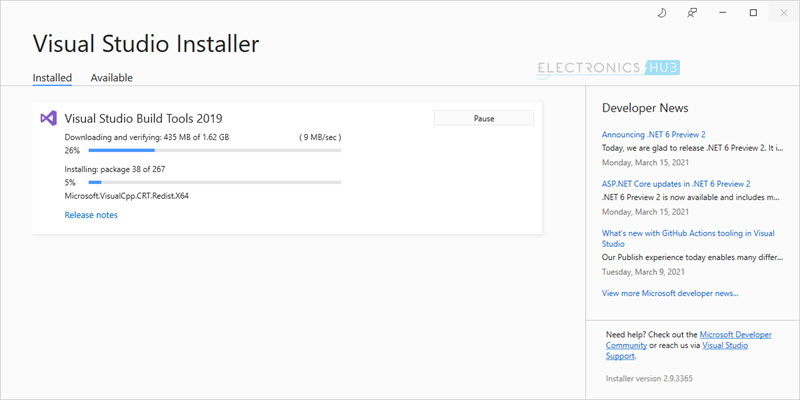
After selecting the necessary options, click on install. It is a significantly large install (around 6.5 GB). So, grab a cup of coffee, sit back and wait for installation to complete.
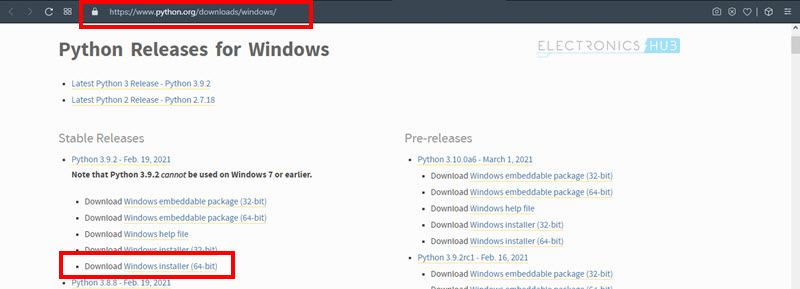
Installing Python
In order to program Raspberry Pi Pico using VS Code, you need to install Python in your computer. Go to the Python download page and click on Windows Installer (64-bit). At the time of writing this tutorial, the latest version of Python was 3.9.2.
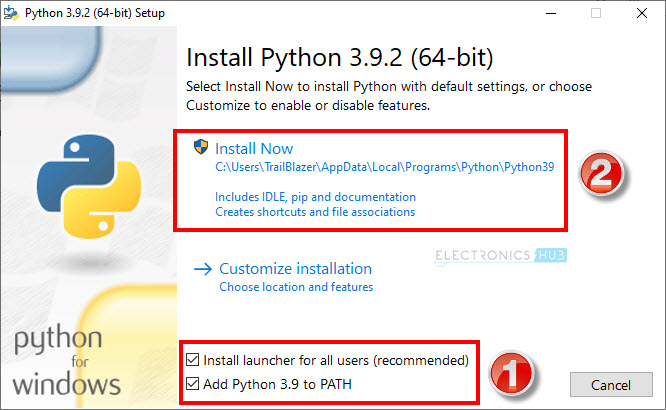
Double click on the executable file, which was “python-3.9.2-amd64” in my case to begin the installation procedure. In the first screen itself, you get a “Install Now” button. But before clicking on that make sure to check the “Add Python 3.9 to PATH” option at the bottom. Now you can click on the “Install Now” button.
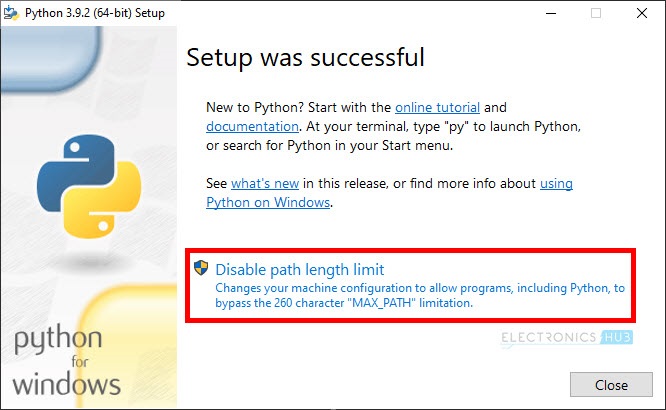
Once the Python installation is complete, you will get a “Setup was successful” message. In the same screen, select the “Disable path length limit” option and then click on close.
Git
The last tool we have to install is Git. Go to the Git download page and download the “64-bit Git for Windows Setup” executable file.

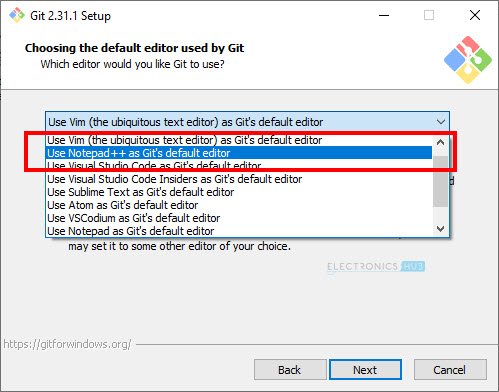
Once you begin the installation, it will ask you to select a default editor for Git, make sure that Vim is not selected. I chose Notepad++ as the default editor.
After this, there are some important options you have to change. I will mention all the settings which are necessary and the remaining are assumed to be default.
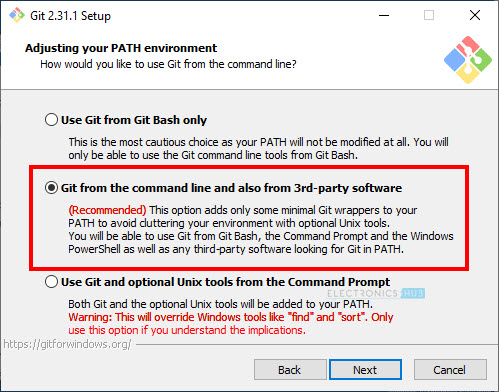
Select “Git from the command line and also from 3rd-party software” option.
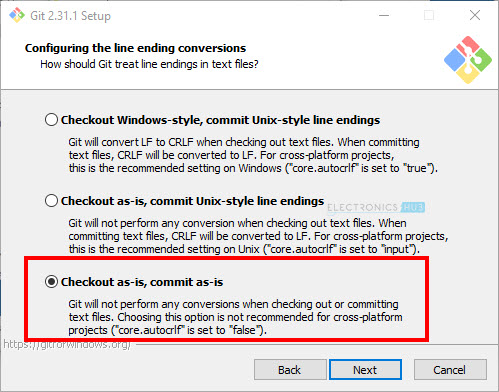
Then select, “Checkout as-is, commit as-is” option.
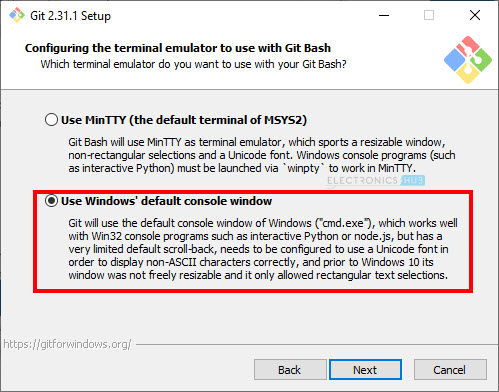
Select “Use Windows’ default console window” option.
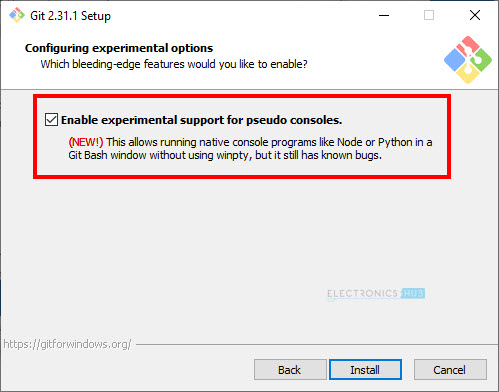
Finally, check “Enable experimental support for pseudo consoles” and click on install.
Download Pico SDK and Examples
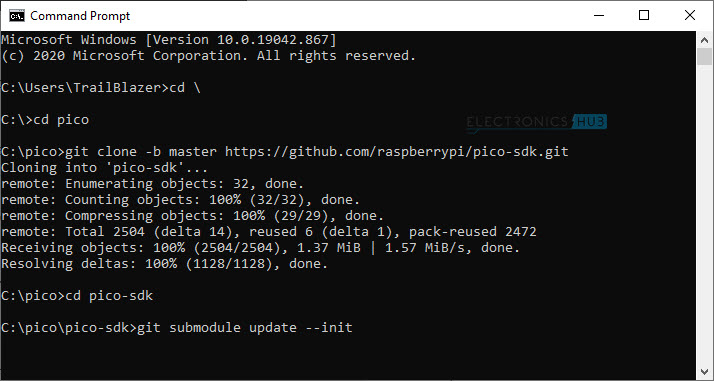
After installing all the tools mentioned above, we are now ready to download the official Raspberry Pi Pico SDK and also the examples. I created a folder called “pico” in C drive. You can use any directory to download the SDK.
Open the command prompt in your Windows system and change to the directory where you want to download the SDK and Examples (in my case, it is C:\pico).
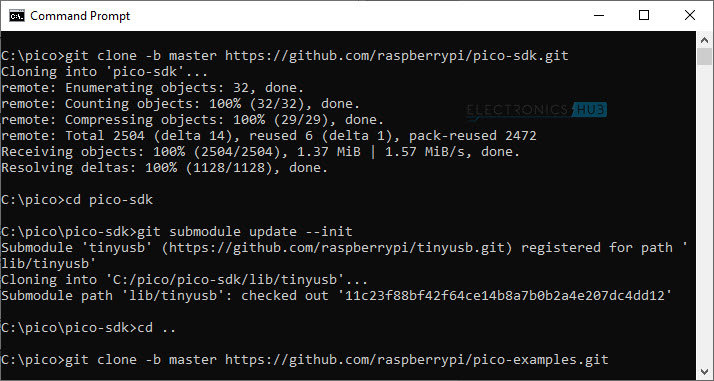
First, clone the ‘pico-sdk’ using the following command.

Open the ‘pico-sdk’ directory and add the tinyUSB submodule (important to use USB).
Now, go back to the previous directory and download ‘pico-examples’
Programming Raspberry Pi Pico from Command Line
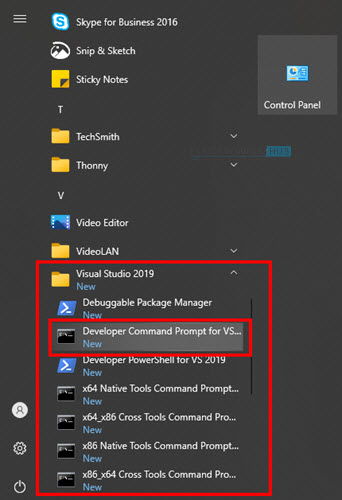
To test the tools and start with our first build, let us see how to program the Raspberry Pi Pico for Windows’ Command Prompt. Click on start button and scroll down to “Visual Studio 2019”, expand it and click on “Developer Command Prompt for VS 2019” option.
Change to the ‘pico’ directory where you downloaded the SDK and examples. Set the path for SDK using the following command.
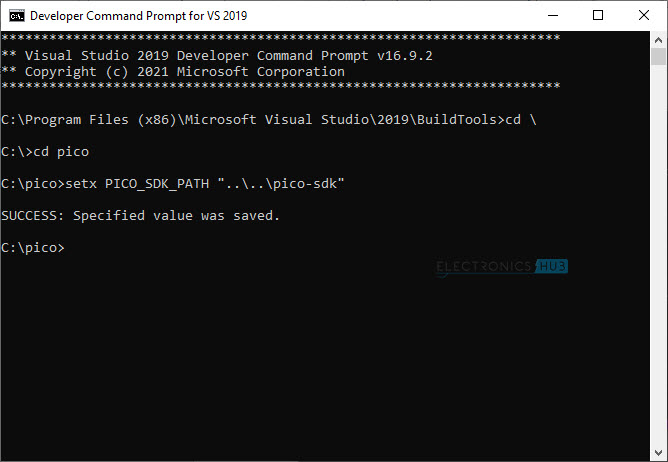
Once the path is set, exit from the command prompt (by typing exit) and restart the same command prompt (Developer Command Prompt for VS 2019). This will ensure that the command prompt has correct path set.
Now, in the pico folder, create a ‘build’ directory and change to the build directory.
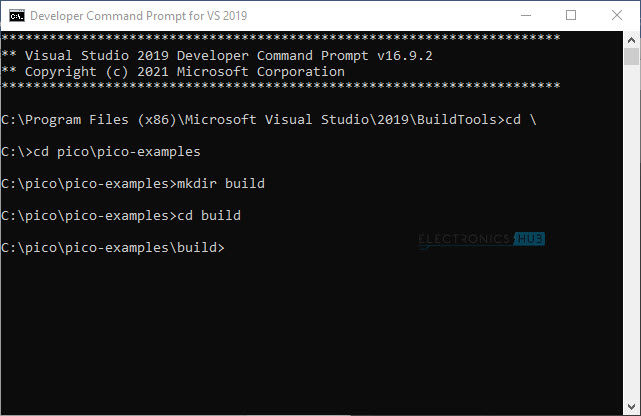
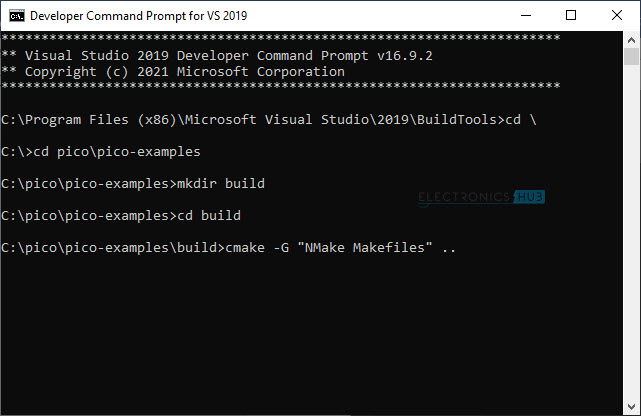
We can now start using CMake to build the Makefiles. Use the following command.
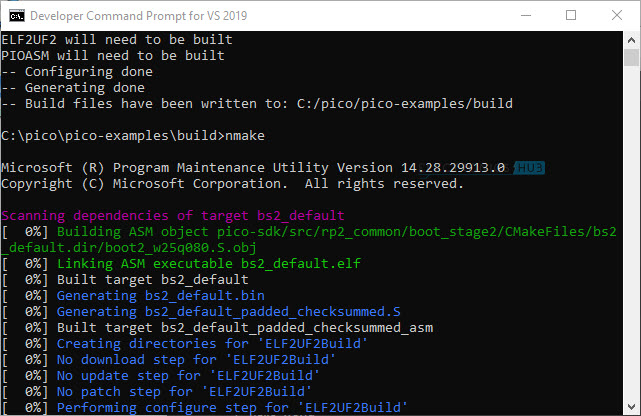
After this, we can now build our projects using nmake command.
NOTE: If you simply use ‘nmake’ command, it will build for all the projects and will take some time. Alternatively, you can specify the project you want build in the nmake command.
Browse to the specific project in the build folder, where you can find the executable in different formats like .elf, .uf2, etc. To upload the program to Raspberry Pi Pico using drag-and-drop method, use the .uf2 file.
Installing Visual Studio Code in Windows
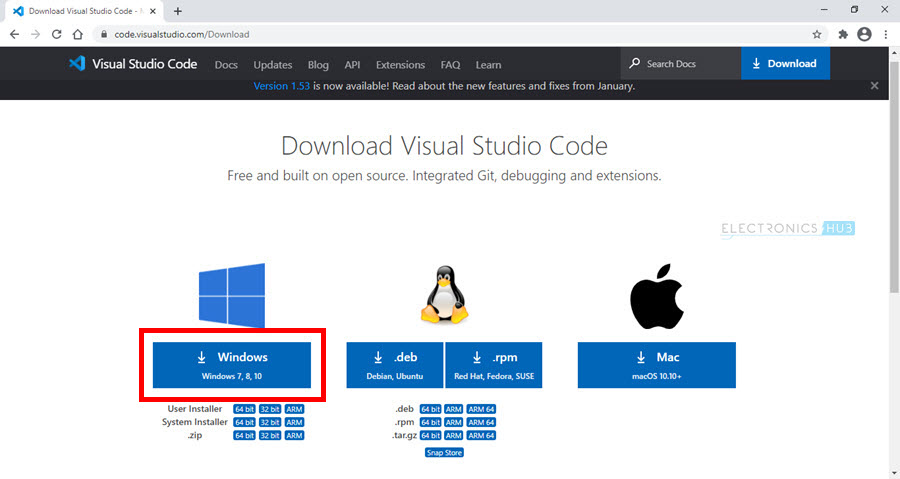
We are now ready to install Visual Studio Code and begin Programming Raspberry Pi Pico in Windows from VS Code. Go to the downloads page of Visual Studio Code and click on the “Windows” download option. This will download the 64-bit installer.
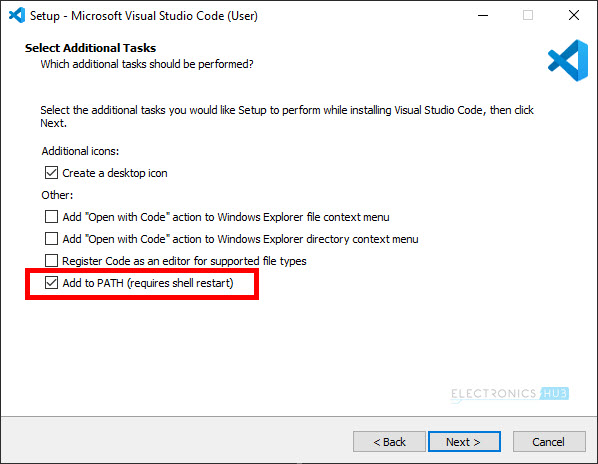
Begin installation buy double clicking on the installer and follow the instructions. When asked, check the “Add to PATH” option.
The remaining instructions are very simple. Do not launch the Visual Code yet. After installation, open the “Developer Command Prompt for VS 2019” like we did in the previous section.
Type “code” and hit enter to launch the Visual Studio Code with all the correct settings and environment variables.
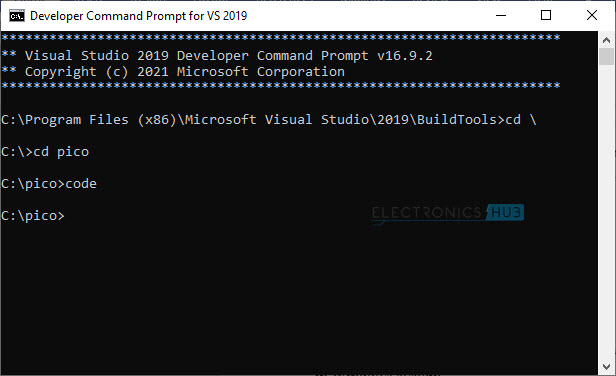
NOTE: This is the correct way to launch Visual Studio Code for Programming Raspberry Pi Pico in Windows system. Before proceeding further, delete the contents in the ‘build’ folder as there is a conflict in the text editor.
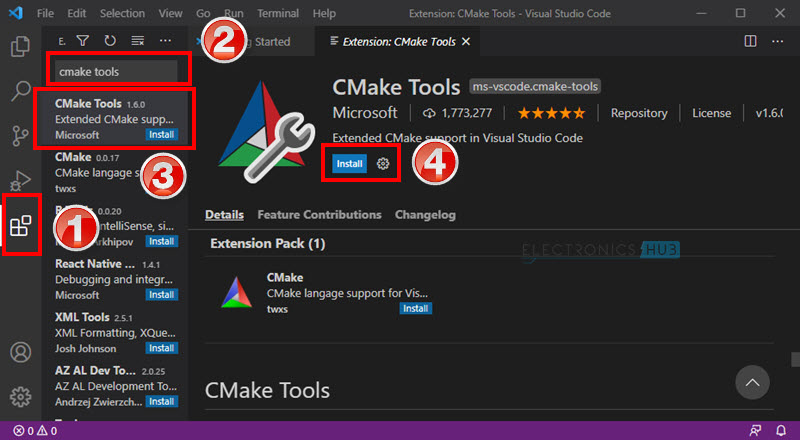
First thing we need to do after launching VS Code is to install CMake extension. On the left side bar, select ‘Extensions’ and search for ‘CMake Tools’. From the results, select CMake Tools and click on install.
Now, on the left bottom corner, click on ‘Settings’ icon and select Settings.
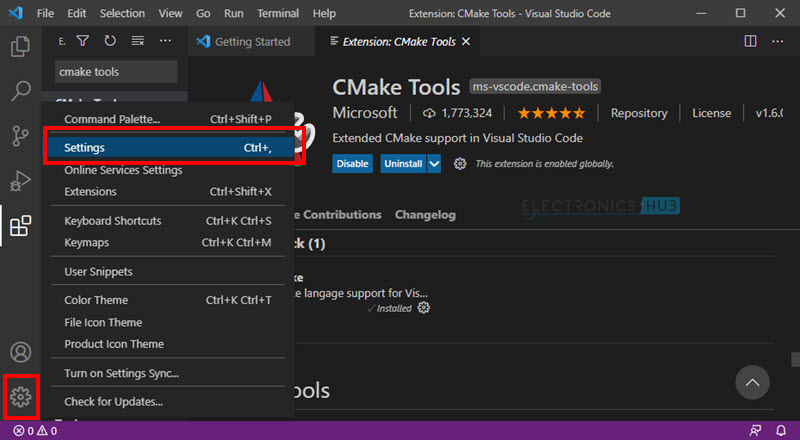
Expand the ‘Extensions’ option and select ‘CMake Tool configuration’ option. On the right, scroll and select ‘Cmake: Configure Environment’ and set Item as ‘PICO_SDK_PATH’ and Values as ‘..\..\pico-sdk’.
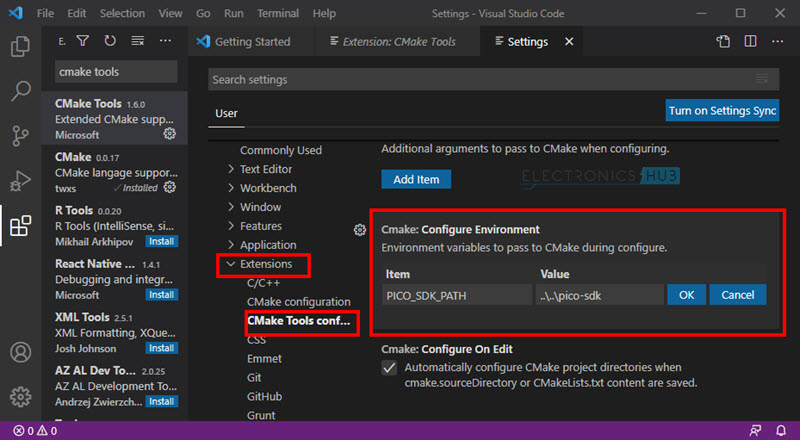
Scroll down further until you find ‘ Cmake: Generator ’. Enter ‘ NMake Makefiles ’ in the space below. You can close the settings window.

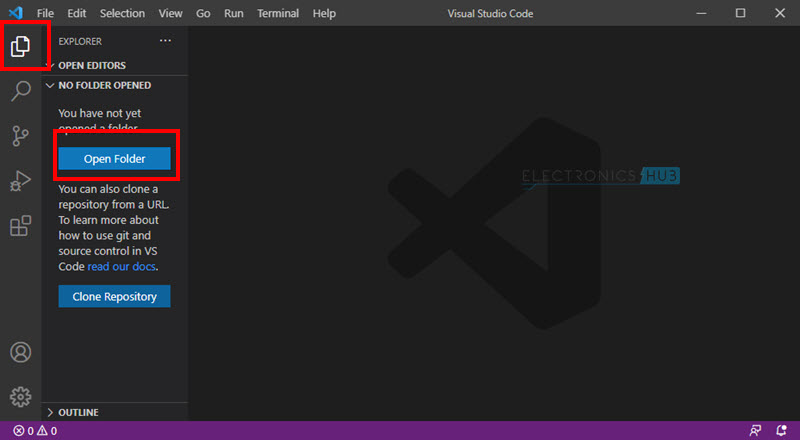
Now, select ‘Explorer’ tab on the top left and click on ‘Open Folder’ option. Browse to c:\pico\pico-examples\ and select the folder.
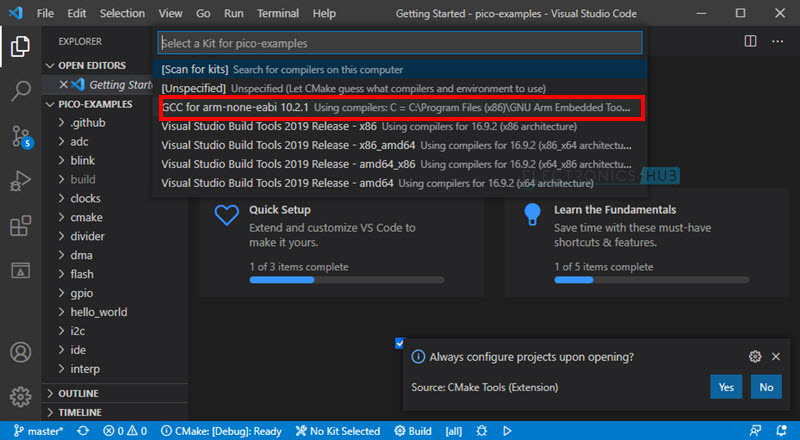
CMake will ask you to configure the project. Select yes and then choose “ GCC for arm-none-eabi ” option.
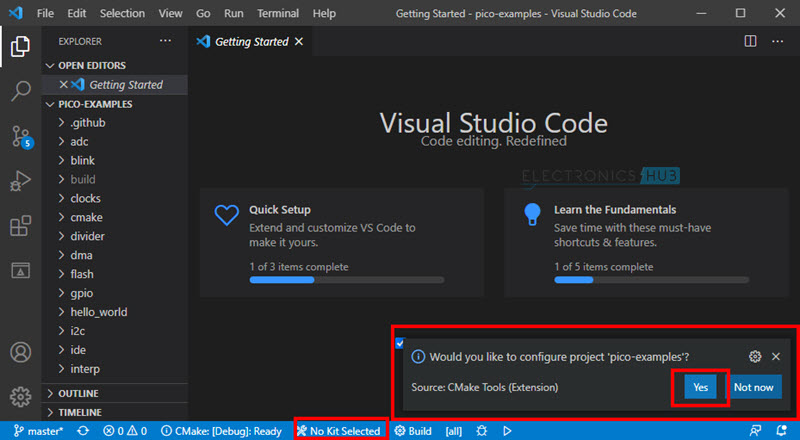
If you missed this selection, use the ‘No Kit Selected’ from the bottom blue status bar.
Now, the CMake tool will start building the Makefiles for all the projects. You can build the projects by selecting the ‘Build’ option from the bottom blue status bar. Next to this ‘Build’ option, you can select the particular project you want to build to.

Uploading the code to Raspberry Pi Pico is the same as before.
Conclusion
A complete step-by-step beginner’s guide on programming Raspberry Pi Pico in Windows System. You learned what are the necessary tools you have download and install, how to configure those tools during installation or after installation, how to download Pico SDK and examples, build projects from Windows Command Prompt and also how to Program Raspberry Pi Pico in Windows using Visual Studio Code.

8 Responses
big thumb up for this guide, crystal clear!
THANKS! An elaborate tutorial for beginners.
Hello, thank you for this great tutorial. Small precision about CMaker, it is absolutely necessary to take the version 3.20.X. Otherwise some compilation, such as the program “hello_usb”, does not compile for reasons long enough to explain here. Apart from that, it’s a very good work, thanks again.
PS: The info is dated October 2021, there may be a correction at the time of reading the guide.
Did you have compilation problem for version 3.21.x ?
Had the same problem; fails using cmake-3.22.x works with cmake-3.20.6.
Really comprehensive and productive work done.
Does this step apply for raspberry pi 3 and 4
Great intro…
!!! Launch VS Code from Developer Command Prompt !!!
I obv. missed this bit and took me a while to solve