In this project, I will show you how to make a simple Music Player using Arduino and a Micro SD Card Reader / Module. Using this project, you can play audio files (of specific format) that are stored on a microSD Card using Arduino Uno or Mega.
Introduction
Making your own Music Player using Arduino Uno is an exciting little project. This project doesn’t necessarily need to be a powerful music player but rather to check the ability of the Arduino Uno or any other Arduino boards to play audio files with the help of supporting library files, thanks to the outstanding work of Arduino Community.
Once you have a circuit using Arduino Uno, a microSD Card Module (Adapter), a microSD Card and speakers or headphones, you can implement several sound effects in your projects, which are not possible under normal circumstances.
Guide to Interface SD Card Module with Arduino
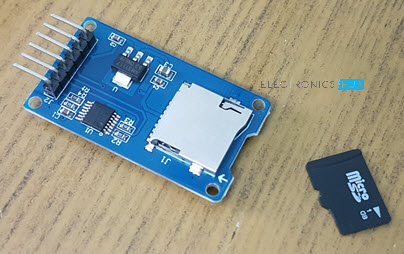
As mentioned earlier, the main components of the Arduino based Music Player project are Arduino board and SD Card Module / Adapter. The audio files stored in a microSD card (more about audio files later) are read by Arduino with the help of SD Card Module and played through a speaker.
So, it is very important that you understand how to interface an SD Card Module with Arduino and read / write data from / to a microSD Card.
I have already implemented a tutorial on how to interface an SD Card Module with Arduino Uno. Check out that project first and if possible, try to implement it before proceeding with this project.
Arduino SD Card Module Interface
Circuit Diagram
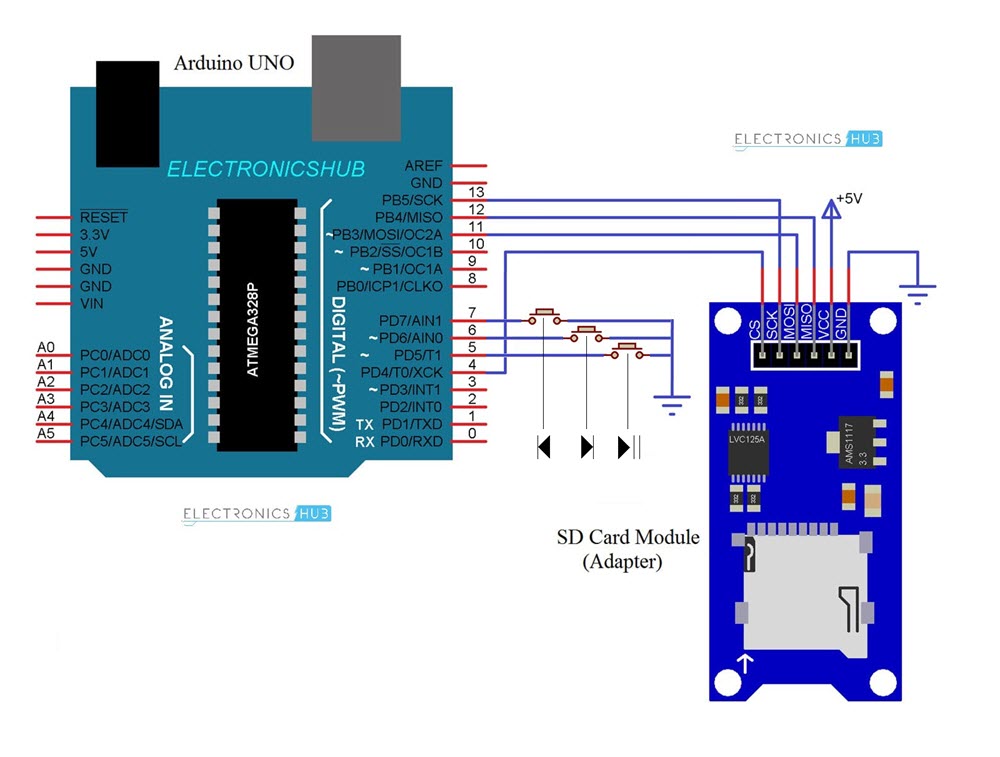
The following image shows the circuit diagram of the project. Note that the circuit diagram shows only the connections between Arduino Uno and SD Card Adapter and three buttons connected to Arduino, which control the playback functions like Play / Pause, previous track and next track.
Additionally, a speaker is connected to Arduino, but it is not shown in the circuit diagram. The connections between Arduino and the speaker (or headphones) are the positive connection of the speaker / headphone is connected to Pin 9 of Arduino and the negative pin is connected to GND.
Components Required
- Arduino UNO (or any Arduino Board)
- SD Card Adapter / Module
- microSD Card
- Small Speakers
- 3 x Push Buttons
- Breadboard
- Connecting Wires
Circuit Design of Music Player using Arduino
As mentioned earlier, the speaker is connected to Pins 9 and GND (not shown in the circuit diagram). Additionally, we need to connect SD Card Module and 3 Push Buttons.
Since the interface between Arduino UNO and SD Card Module is through SPI Communication, the connections the connections are as follows.
The CS Pin of SD Card Module is connected to Pin 4. Chip Select (CS) pin can be connected to any Digital I/O Pin but the rest of the SPI Pins of SD Card Module must be connected to corresponding SPI Pins of Arduino.
SCK or SPI Clock Pin of SD Card is connected to Pin 13 of Arduino. The MOSI and MISO pins of SD Card Module are connected to Pins 11 and 12 of Arduino UNO respectively.
The power pins i.e. VCC and GND are connected to +5V and GND of Arduino.
Additionally, I have used 3 push buttons to control the music playback. Play / Pause Button is connected to Pin 5, Next Track Button is connected to Pin 6 and Previous Track Button is connected to Pin 7 of Arduino. All these buttons are configured with internal pullups in the program.
Preparing Audio Files and PCM Library
WAV Files
Before proceeding further, there are a couple of things you need to take care of. The first one is to convert your audio / music files to WAV format i.e. they should be .wav files. This is because, the supporting libraries, which I will mention next, support only PCM Audio in WAVE File Format (.wav).
So, your first step is to convert your mp3 files to .wav files. For this you can use any audio converter software, the convert option in VLC Media Player or any online tools. I will be using an online tool called ONLINE-CONVERT.com. It supports multiple files like archives, audio, documents etc.
Go to the Audio converter option in the website and select “Convert to WAV” option or simple use this URL: Online Music Converter.
Upload the mp3 file and in the optional settings, set the following:
- Change bit resolution: 8 Bit
- Change sampling rate: 16000 Hz
- Change audio channels: mono
- PCM format: PCM unsigned 8-bit
After making the above-mentioned changes, click on start conversion and the converted file will be downloaded automatically.
PCM Library
The second important thing is to add a special library called TMRpcm developed by TMRh20. You can download it directly from the official GitHub page or you can add it directly in the Arduino IDE.
In Arduino IDE, go to Tools Manage Libraries… and search for “TMRpcm” and click on install.
NOTE: This project also requires SPI and SD libraries. These are built-in libraries.
Code
Working of Arduino based Music Player
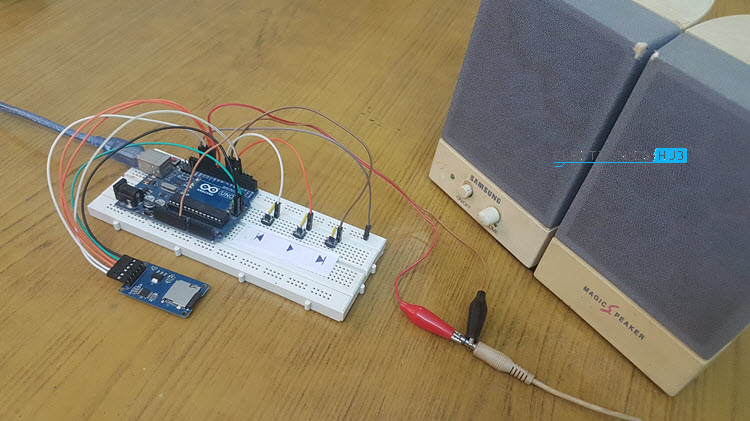
After making the hardware connections as mentioned earlier, getting audio files ready, setting up the Arduino IDE (install libraries), you are ready to implement you own music player using Arduino.
First, format the microSD Card as FAT using any formatting software like SD Memory Card Formatter and copy all the WAV audio files to the card. Insert the card into the slot on the SD Card Module and make all the necessary connections (if not made already).
Connect Arduino UNO to computer and in the Arduino IDE, use the above given code. In the code, make necessary changes i.e. in the void song () function, replace the file names with the song names in your SD card.
I have named all my audio files as song1.wav, song2.wav, etc. and used the same names in the function. After making necessary changes, upload the code.
By default, the first song (i.e. song1.wav for me) will play automatically once the Arduino is reset. You can use the Play / Pause Button to well, play or pause the current track. Use Next Button to play the next track and Prev Button to play the previous track.
Conclusion
- A simple DIY Project called Music Player using Arduino is implemented here, where you can play audio files using Arduino UNO.
- This project supports WAV Audio files and also control the playback of the audio.
- You can use an additional Amplifier like LM386 IC to boost the output power.
- Using this project, you can implement audio effect in your Arduino Projects.
