In this project, we will learn how to measure voltages using Arduino by interfacing a Voltage Sensor with Arduino. Using this Arduino Voltage Sensor interface, you can measure voltages up to 25V.
Warning: If you are using the same Voltage Sensor Module, then make sure that its input voltage (voltage to be measured) is restricted to 25V.
Outline
ToggleIntroduction
We have already seen how to measure external voltages using Arduino in the project DIGITAL ARDUINO VOLTMETER.
If you want to measure external voltages using Arduino, you have to make use of the Analog Input pins of the Arduino Board. If you recall a little bit about the Arduino Analog Pins, their input voltage is limited to 5V i.e. you can measure up to 5V directly using the Analog Input Pins of the Arduino.
But what if you want to measure voltages that are greater than 5V? You cannot directly use the Analog Input Pins of the Arduino as you might fry the ATmega328P IC on the Arduino UNO board (or the relevant Microcontroller IC depending on the Arduino Board you are using).
Here comes the Voltage Sensor Module to the rescue. Using this Voltage Sensor Module, you can measure voltages up to 25V.
Output Video
A Brief Note on the Voltage Sensor Module
The Voltage Sensor is a simple module that can used with Arduino (or any other microcontroller with input tolerance of 5V) to measure external voltages that are greater than its maximum acceptable value i.e. 5V in case of Arduino.
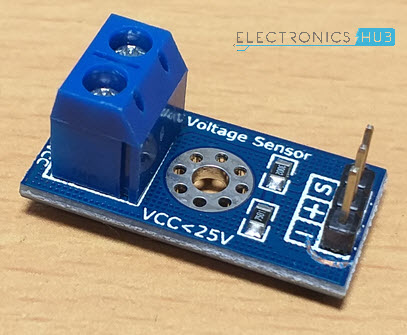
Following is the image of the Voltage Sensor Module used in this project.
Pins of the Voltage Sensor
Before going into the details of the Voltage Sensor like its functionality and schematic, let me give you an overview of the available Pins of the Voltage Sensor Module.
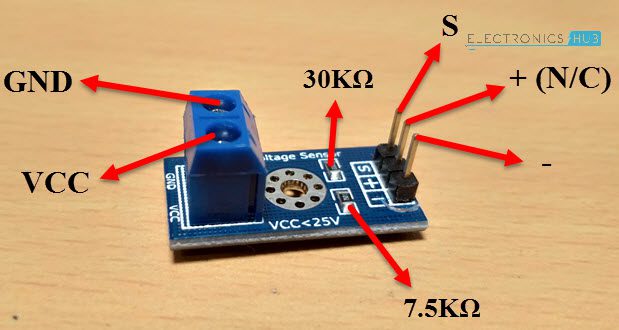
Basically, a 25V Voltage Sensor, like the one used here, has 5 pins in total. Two of them are on the two-pin screw terminal and three are male header pins.
The Screw Terminal pins are marked as VCC and GND and they must be connected to the external source of voltage i.e. the voltage that needs to be measured.
Coming to the three male headers, they are marked as S, + and –. The S pin is the “Sense” pin and it must be connected to the Analog Input of the Arduino. The “–” pin must be connected to the GND of the Arduino. The pin marked as “+” is not connected to anything (it is an N/C Pin).
The following image shows the pins of a Voltage Sensor Module.
- VCC: Positive terminal of the voltage to be measured (0-25V)
- GND: Negative terminal of the voltage to be measured
- S: Analog Input of Arduino
- +: Not connected (N/C)
- –: GND of Arduino
Schematic of Voltage Sensor
Now, let us talk about the important thing about the voltage sensor: its schematic. The Voltage Sensor is basically a Voltage Divider consisting of two resistors with resistances of 30KΩ and 7.5KΩ i.e. a 5 to 1 voltage divider.
The following image shows the schematic of the Voltage Sensor Module with an input voltage limit of 25V.
Make your Own Voltage Sensor
Using a pre-built voltage sensor module is very easy and if you don’t have one then you can easily build one yourself. All you need are two resistors.
If you want to make your own voltage sensor that can measure voltages up to 25V like this Voltage Sensor Module, then you have to get a 30KΩ and a 7.5KΩ resistor.
Interfacing a Voltage Sensor with Arduino
Now that we have seen a little about the Voltage Sensor, let us now proceed with Interfacing a Voltage Sensor with Arduino and measure some external voltages.
The Arduino Voltage Sensor Interface is pretty straight forward. Connect the voltage to be measured to the screw terminal of the Voltage Sensor, connected the output of the voltage divider to the Arduino. That’s it.
After interfacing the Voltage Sensor with Arduino, you can either view the results on the serial monitor of the Arduino IDE or on a 16×2 LCD Display. I have gone with the LCD Display.
Circuit Diagram of Arduino Voltage Sensor Interface
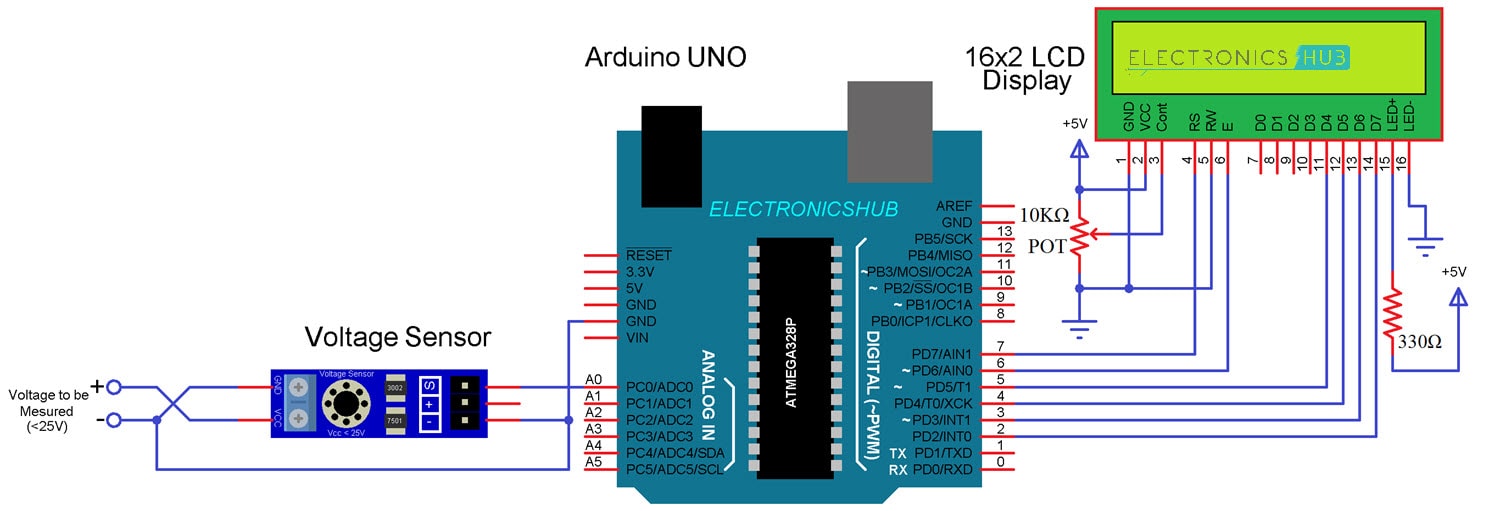
Following image shows the circuit diagram of Interfacing a Voltage Sensor with Arduino.
Components Required
- Arduino UNO [Buy Here]
- Voltage Sensor Module (for < 25V)
- 16×2 LCD Display [Buy Here]
- 10KΩ Potentiometer
- 330Ω Resistor
- Connecting Wires
- Mini Breadboard
Circuit Design
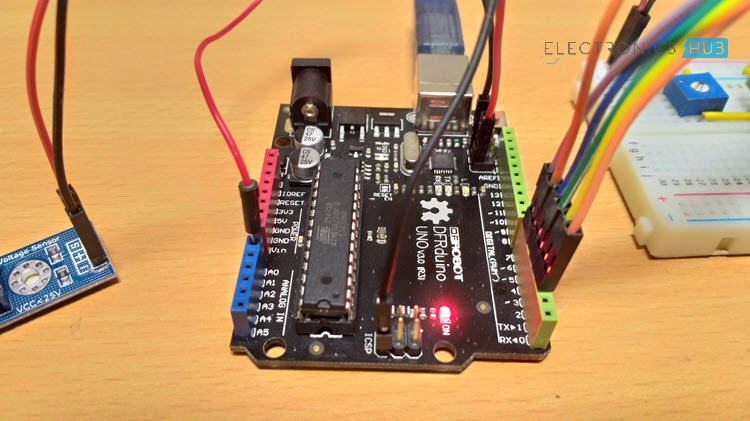
First, connect the “S” and “–” pins of the Voltage Sensor to A0 (Analog Input) and GND of Arduino respectively. Then connect the external voltage pins (voltage to be measured) to the screw terminal (check for polarity).
Coming to the LCD, Digital I/O Pins 7 and 6 of Arduino UNO are connected to RS and E while the Pins 5 through 2 of Arduino UNO are connected to D4 through D7 respectively.
Code
Working
I think the working of the project might be understood by now. Since the Voltage Sensor module is basically a voltage divider circuit, you can calculate input voltage using the formula
Vin = Vout * (R2/(R1+R2))
Here R1 = 30000, R2 = 7500 and Vout can be calculated from Analog Input of Arduino by using Vout = (analogvalue * 5 / 1024).
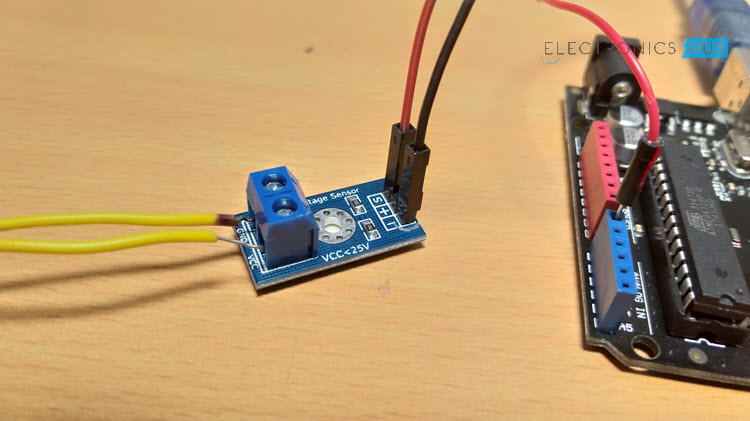
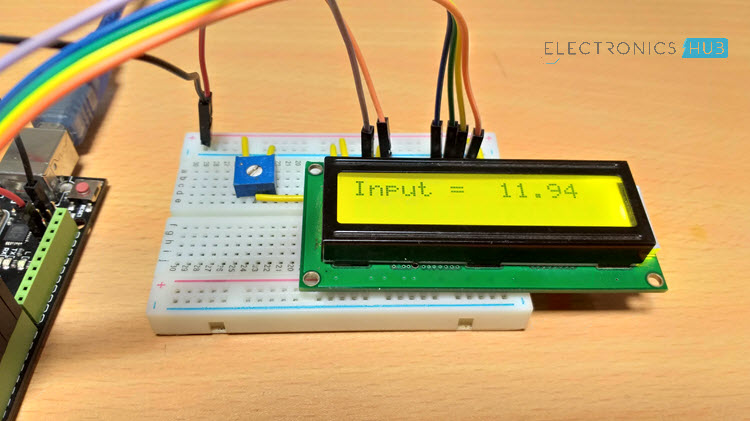
I have implemented the same in the code. When I connected a 12V external supply as input to the Voltage Sensor, the calculated voltage is 11.94V, which is accurate enough.



10 Responses
How I can I display four parameters VOLTAGE ,CURRENT,LIGHT INTENSITY and TEMPERATURE together in the LCD at the same time???I am facing problem with the coding part….please help
I am also doing the same work, please someone should help
same question
and can we use both voltage and current sensors with the same arduino
you could use a 16×4 display, this wou;d give you four lines on the display
lcd.setCursor(0,0);
lcd.setCursor(0,1);
lcd.setCursor(0,2);
lcd.setCursor(0,3);
Hi …. If I reduce the 30k and 7.5k resistances to 3k and 0.7K, can I get milivolt sensor ?
Sensing mv depends on the microcontroller you are using(arduino).
because precision of reading analog voltage depends upon the ADC resolution of microcontroller.
moreover there is another thing you can do, you can display voltage up to 3 or four decimal places by just writing a line of code:-
display.print(variable,3);
I must be missing something.
how do you power the arduino?
Using USB Cable or VIN Pin or DC Barrel Jack.
The reason you’re seeing less than 12V on a known 12V source might be because the analogRead() function returns a value between 0-1023, so you might want to add a 1 to the value before dividing by 1024
can I make three voltages to two voltages Park transformations by the arduino