In this project, we will learn about Flex Sensors, how a Flex Sensor works, how to interface a Flex Sensor with Arduino and finally control devices like LED and Servo Motor with Flex Sensor and Arduino.
A Brief Note on Flex Sensor
We have seen several Types of Sensors like Light, Temperature, Humidity, Proximity, Infrared, Heartbeat, Tilt, Flame etc. in various Electronics Hub projects. But there is one sensor which I haven’t discussed or brought up until now. It is the Flex Sensor.
What is a Flex Sensor?
A Flex Sensor or sometimes called as Bend Sensor is a device that measures the amount of bend or angular deflection. Usually, a Flex Sensor is made up of a variable resistive surface and the amount of resistance is varied by bending the sensor.
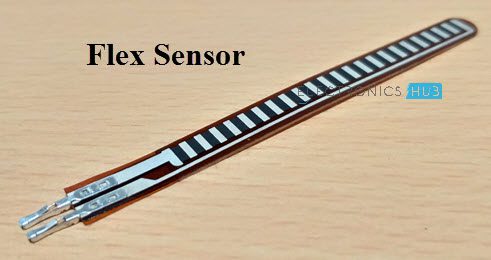
The Flex Sensor used in this project is shown in the following image. It is about 0.6cm wide and 8cm long (including the two connectors).
Since a flex sensor is basically a resistor (whose resistance varies depending on its bend), it has two terminals (or leads).
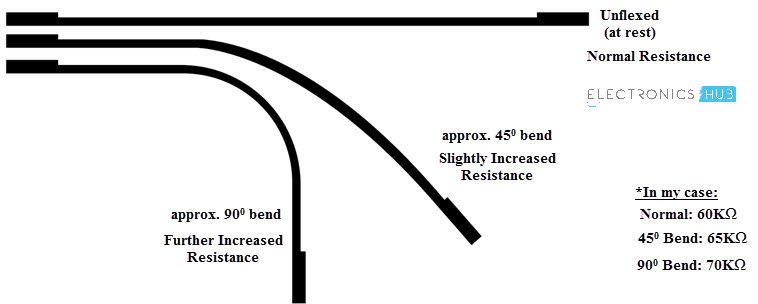
Coming to the variable resistance part, an unflexed sensor i.e. a flex sensor as rest, exhibits a normal resistance value. In my case, the normal resistance of the Flex Sensor is around 60KΩ.
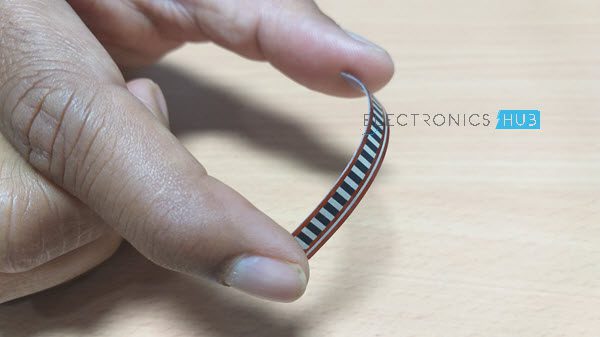
When I bend the sensor as shown in the following image, the resistance increases with the increase in the bend angle.
At a bend angle of approximately 45o, the resistance of the flex sensor has increased to 65KΩ and when I continue to bend it at an angle of 900, the resistance further increases to 70KΩ. If I further bend it towards a complete 1800 angle, the resistance of the flex sensor shoots up to around 75KΩ.
NOTE: The resistance values mentioned here are specific to the Flex Sensor which I am using and they are not universal.
Types of Flex Sensors
Depending on the type of resistive material used on the surface of the Flex Sensor, there can be different types of Flex Sensors. Some of them are:
- Carbon Resistive Flex Sensor
- Capacitive Flex Sensor
- Fiber optic Flex Sensor
- Conductive ink Flex Sensor
The Carbon Resistive Type Flex Sensor, which is sometimes called as Velostat Flex Sensor, is the commonly used Flex Sensor by DIYers and hobbyists.
Basic Flex Sensor Circuit
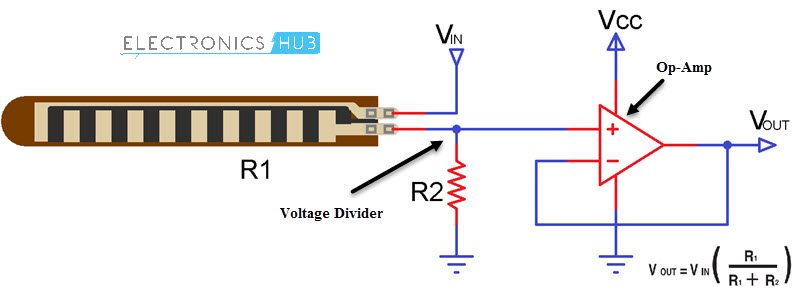
Since the underlying concept of Flex Sensor is a variable resistor, you can easily guess the Basic Flex Sensor Circuit that can be implemented. It is a simple voltage divider circuit.
The following image shows the basic flex sensor circuit consisting of a voltage divider (formed by the flex sensor itself and a 10KΩ Resistor) and an Operational Amplifier (Op-Amp).
Interfacing a Flex Sensor with Arduino
Now that we have seen a little bit about what a flex sensor is and how a flex sensor works, we will now proceed to interfacing a flex sensor with Arduino UNO board.
I will design two simple circuits using Flex Sensor and Arduino, wherein the first circuit is just a basic hook-up guide of Flex Sensor with Arduino.
In the second circuit, using a similar Arduino Flex Sensor Interface, I will control a TowerPro SG90 Servo Motor. So, lets get started.
Components Required
- Arduino UNO
- Flex Sensor
- TowerPro SG90 Servo Motor
- 10KΩ Resistor
- LED
- 1KΩ Resistor
- Mini Breadboard
- Connecting wires
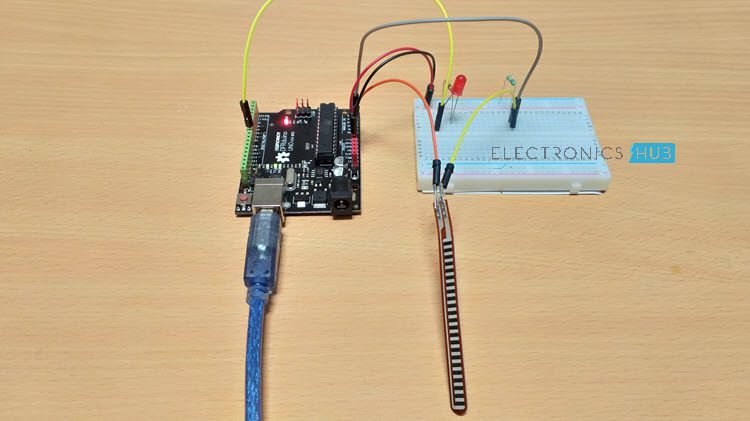
Arduino Flex Sensor Hook-up Guide
The following image shows the first of two circuits I am going to implement. It is a simple Arduino Flex Sensor Hook-up circuit.
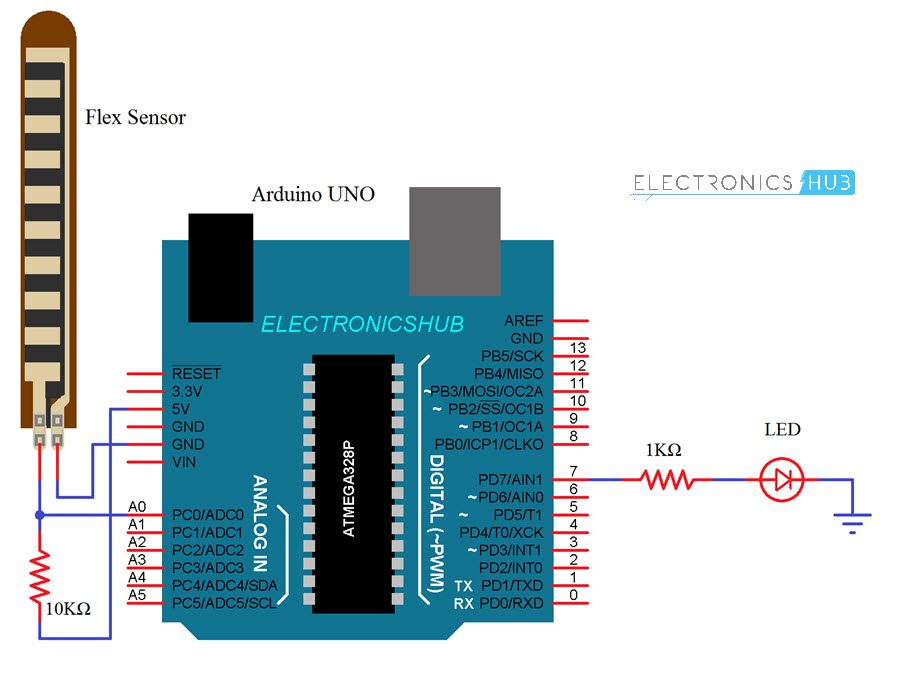
Circuit Design
As I have already mentioned in the Basic Flex Sensor Circuit part that a flex sensor is nothing but a variable resistor and it can be configured in a voltage divider fashion along with another resistor to measure the analog voltage.
One end of flex sensor is connected to GND while the other end is connected to Analog Input A0 of Arduino. A 10KΩ resistor is connected between A0 and +5V. This connection means that the flex sensor and the 10KΩ resistor for a voltage divider.
Just to show some output, I have connected an LED (along with its current limiting resistor of course) to Digital I/O Pin 7 of Arduino UNO.
Code
The following code is used to read the analog data from the Flex Sensor and display it on the serial monitor of Arduino. Additionally, if the value exceeds a certain value, the LED connected to Pin 7 will be turned ON.

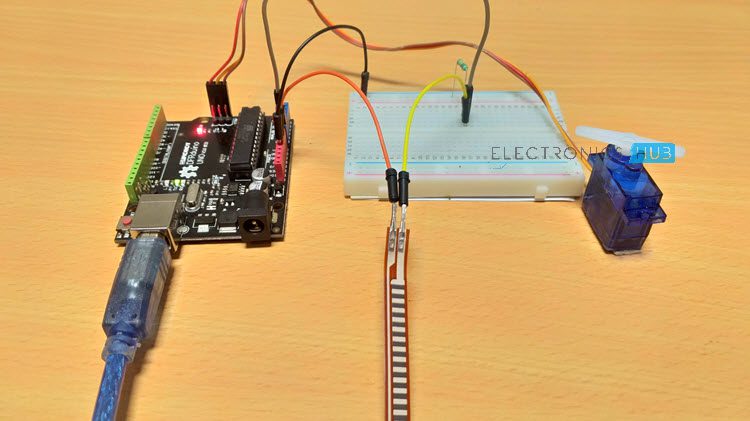
Control a Servo using Arduino and Flex Sensor
In the second circuit, which can be considered an extension to the first one, I will control a TowerPro SG90 Servo motor using the data obtained after interfacing Flex Sensor with Arduino.
The following image shows the circuit diagram of Servo Motor control using flex sensor and Arduino

Circuit Design
The Flex Sensor part of the circuit is same as the earlier circuit. Additionally, the servo motor (or rather its control pin – orange or yellow wire) is connected to Digital I/O pin 11 of Arduino UNO.
Code
The code for controlling a servo motor using flex sensor and Arduino is given below. Using this code, depending on the bend of the flex sensor, the servo motor will change its angle.
Applications of Flex Sensor
Flex Sensors can be implemented in a variety of shapes and sizes. They can be used in applications where accurate measurement of motion or angle of a device is to be measured.
Some of the applications of Flex Sensor are mentioned below:
- Angular Displacement Measurement
- Robotics
- Automotive
- Medical Instruments
- Industrial Controls
- VR Equipment (VR – Virtual Reality)
- Computer Peripherals
- Motion Control
- Physical Therapy
- Musical Instruments
- Fitness Devices
