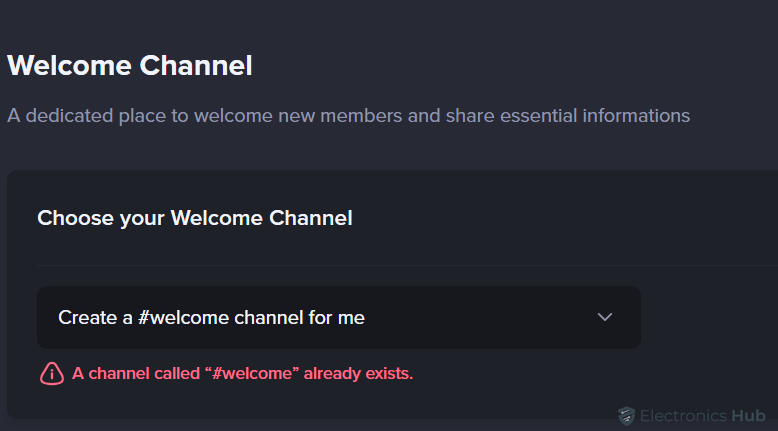
Setting up a welcoming space is the cornerstone of community building, and in the vibrant world of Discord servers, crafting a warm reception for new members is essential. This guide focuses on creating that inviting atmosphere through a dedicated welcome channel in your Discord server. Whether you’re a seasoned community moderator or exploring ways to engage newcomers, this article complements our series of Discord starter guides. From fostering a sense of belonging to ensuring a smooth onboarding experience, a well-designed welcome channel sets the tone for your server. Join us as we delve into the steps required to create a welcoming hub that introduces newcomers to your community’s essence and ethos.
Outline
ToggleWhat is a Discord Welcome Channel?
A Discord Welcome Channel serves as the initial point of contact for new members joining a server. It’s a designated space, either a single channel or a group of channels, created specifically to introduce newcomers to the server’s guidelines, purpose, and expectations. This channel plays a pivotal role in providing essential information such as server rules, community norms, and an overview of what the server offers. Essentially, it acts as a primer, ensuring that new members have a clear understanding of the server’s structure and ethos before venturing into other channels. The automated welcome message displayed in this channel helps set the tone and assists newcomers in acclimating to the community’s dynamics. Crafting a tailored welcome message aligns with the server’s specific activities or schedules, ensuring that newcomers feel informed and welcomed into the server environment from the outset. Understanding and familiarizing oneself with the Welcome Channel serves as a vital step in engaging effectively within the Discord community.
How To Make A Discord Welcome Channel?
Creating a Discord Welcome Channel involves a few simple yet impactful steps. These steps ensure that your server’s new members receive a warm and informative introduction. Let’s dive into the detailed process of setting up a welcoming hub within your Discord server to enhance the onboarding experience for newcomers.
Create a Channel
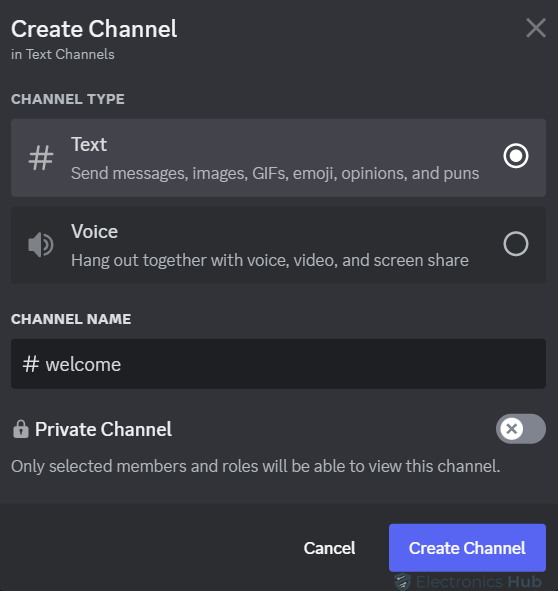
To initiate the process of setting up a welcome channel on Discord, the first step is to create a dedicated channel for new members. Here’s a straightforward guide on how to accomplish this:
- Access Your Server: Once you’re within your Discord server, position yourself in the server interface where you’d like to add the new welcome channel.
- Create a Channel: Right-click on either the channels list or your server’s name or Simply press the “+” icon next to channels.
- Choose ‘Create Channel’: From the context menu, select ‘Create Channel.’ Alternatively, you can click on the plus icon next to a channel category to initiate the channel creation process.
- Name Your Channel: Upon selecting ‘Create Channel,‘ you’ll be prompted to enter a name for your channel. Opt for a name that clearly signifies its purpose, such as “Welcome” or “Introductions.”
- Select Channel Type: Ensure that the channel type is specified as a text channel. This is crucial for providing written information and communication within the welcome channel.
Setup Welcome Channel
1. Adding a Welcome Message to Your Discord Welcome Channel:
Once you’ve successfully created and customized your welcome channel, the next crucial step is to incorporate a welcoming message. Here’s a concise guide on how to add a welcome message to ensure new members feel greeted and informed:
Adding a Welcome Message Manually:
- Once your welcome channel is set up, simply type a welcoming message into the channel and hit enter. This message serves as the first point of interaction for new members, introducing them to the server’s atmosphere.
- Consider adding prompts in your welcome message to encourage new members to introduce themselves. You can ask them to share their names, locations, and what brings them to the server. This fosters a sense of community and engagement from the outset.
- Make your welcome message even more informative by embedding relevant links. Whether it’s links to server guidelines, additional resources, or community events, providing these details in your welcome message adds value.
- To ensure that your welcome message remains visible and easily accessible, consider pinning it to the top of the channel. Hover over the message, click the three dots on the right side, and select ‘Pin Message.’ This keeps the welcome message prominently displayed, even as new messages are sent.
Adding a Welcome Message Using Bot:
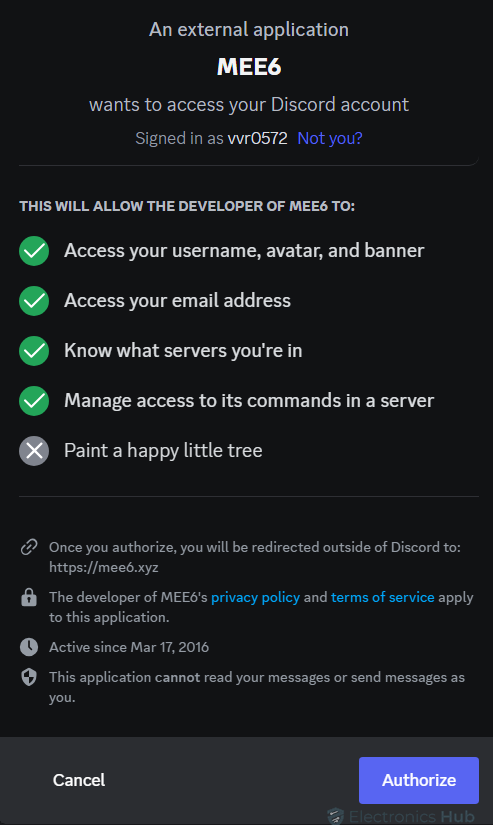
Alternatively, you can utilize a bot, such as MEE6, to automate and customize the welcome message process. Here’s how:
- Visit the MEE6 website and click ‘Add to Discord,’ then authenticate and authorize the bot to join your server.
- Head to the MEE6 Dashboard and navigate to ‘Server Management.’
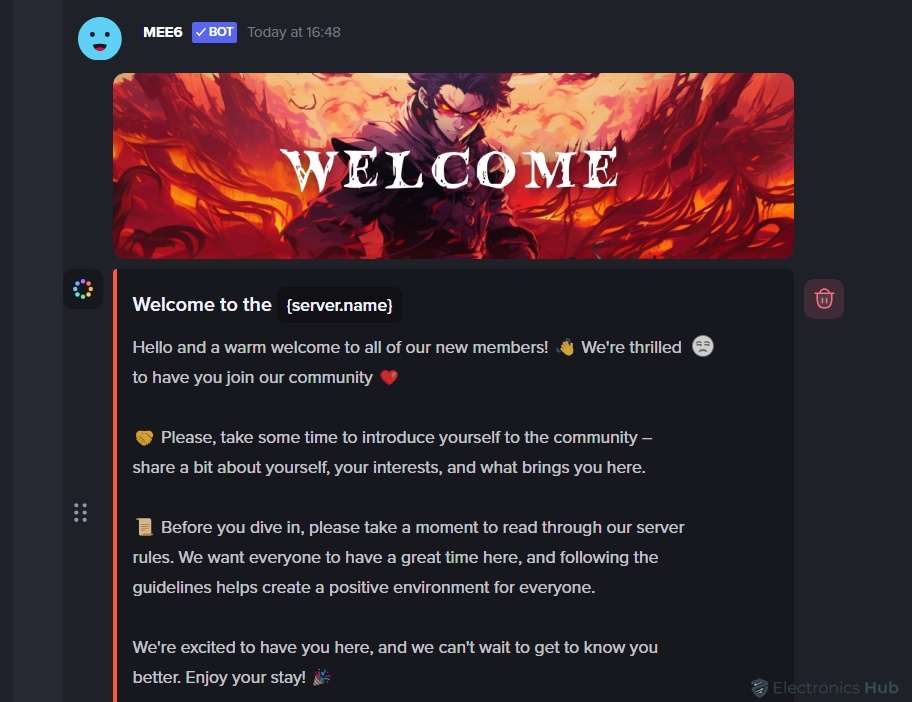
- Enable the ‘Welcome’ feature, then customize the message to your liking, incorporating rules or a personalized greeting for new members.
- Choose the specific channel where the welcome message should be sent.
- Ensure to save the changes made to the server settings within the MEE6 Dashboard for them to take effect.
By following these steps, you’ve not only created a welcoming environment but also added a personal touch to your Discord welcome channel. Invite members, share the link, and observe how the welcome message functions in building a vibrant and inclusive community.
2. Create a Welcome Screen
Expanding beyond the welcome channel, setting up a welcome screen can significantly enhance user navigation and engagement within your Discord server. Here’s a concise guide on creating a welcome screen to aid new users:
- Begin by clicking on your server name to activate the dropdown menu. From this menu, select the gear icon for server settings.
- Within the server settings, scroll down to locate and select “Welcome Screen.”
- Once in the Welcome Screen settings, you’ll find options to personalize it according to your server’s essence.
- Write a concise yet informative description of your server to provide newcomers with an overview of its purpose and community atmosphere.
- Additionally, you can recommend specific channels for new users to explore, offering them a guided path to relevant areas within the server
By following these simple steps, you’ve successfully created a welcome screen that complements your welcome channel, enhancing the new user experience and facilitating easier navigation within your Discord server.
Make A Discord Welcome Channel – FAQs
Ans: While not mandatory, a welcome channel is highly advisable as it provides a warm introduction for new members, sets the tone for the community, and communicates essential information.
Ans: Yes, absolutely! You can personalize the welcome message, embed links, add prompts for introductions, and make it reflect the community’s values.
Ans: Encouraging introductions, asking questions, or providing prompts for new members to share about themselves can foster engagement. Additionally, pinning the welcome message to keep it visible and easily accessible can help.
Conclusion
Crafting a welcoming Discord experience hinges on a dedicated Welcome Channel. This guide outlines the steps to create one, from setting the channel name and type to adding a personalized welcome message. Consider using bots like MEE6 for automation and further customization. Extend the welcome with a Welcome Screen, offering a server description and recommended channels for exploration. By implementing these steps, you’ll foster a sense of belonging and ensure a smooth onboarding journey for your Discord community’s newest members.

