Is your inbox like a never-ending to-do list? Between social updates, promotional offers, and work correspondence, staying on top of your email can feel like an impossible feat. Imagine an inbox where important messages stand out and the distractions are neatly organized. Using Gmail filters can make this possible.
In this blog post, let’s learn about some of the best Gmail filters that turn your clogged inbox into an organized space, saving you time and reducing email stress.
What Are Gmail Filters?
Gmail filters are like automated filing assistants. They scan incoming emails based on criteria you set, like sender address, keywords in the subject line, or specific labels. Once a filter identifies an email, it can take predefined actions. You can automatically label emails for easy categorization, archive them to declutter your inbox, or even delete low-priority messages.
Why Use Gmail Filters?
- They save you time by eliminating manual sorting.
- Keeps your inbox focused on important emails.
- Eliminates stress by bringing order to the email chaos.
Also with a few well-crafted filters, you can transform your chaotic inbox into a streamlined system.
Best Gmail Filters To Organize Your Inbox
Gmail filters are a powerful tool to tame your inbox and keep things organized. Here are some of the best filters you can set up: pen_spark
1. Get rid of newsletters and commercial emails
We all have our fair share of newsletters that we subscribe to (or maybe even a few too many). You can easily set up a filter to label or archive emails with “unsubscribe” or “promotion” in the subject line.
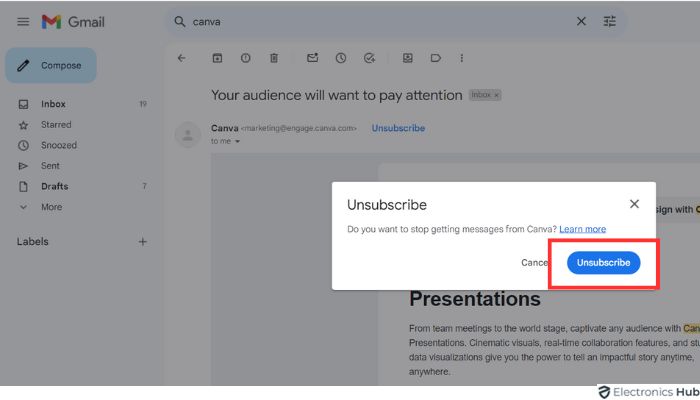
You can also make a special label for “Newsletters” to keep them all in one place.
2. Silence the social media swarm
Social media platforms love bombarding you with notifications. Silence the noise by creating filters to automatically archive or skip the inbox for emails from specific social media sites.
3. Silence the calendar noise
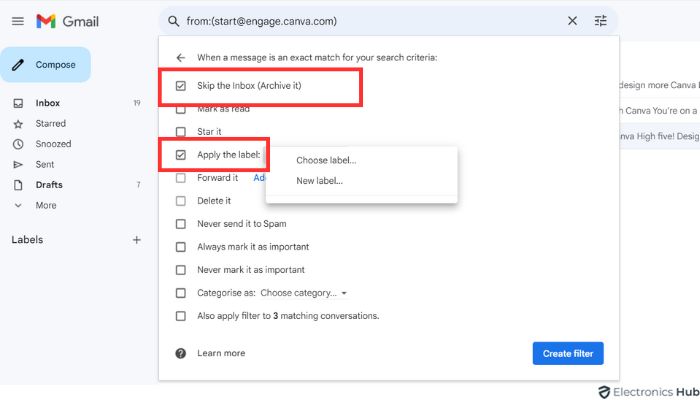
Put an end to those pesky event confirmations clogging up your inbox. Create a filter for emails with “invite.ics” or “invite.vcs” in the attachment field and your email address in the “To” field. Choose to “Skip the Inbox” (archive) and apply a label like “Calendar” to keep them organized.
4. Address unknown senders
Create a filter to sort out emails from unknown senders. You have the option to either save them for later or flag them as spam if they seem suspicious.
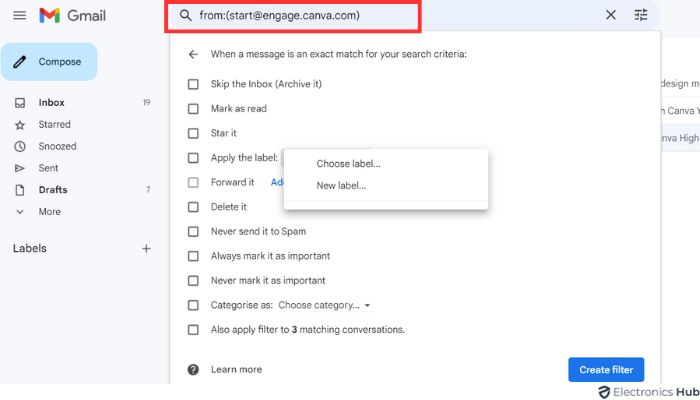
5. Automatically address specific senders
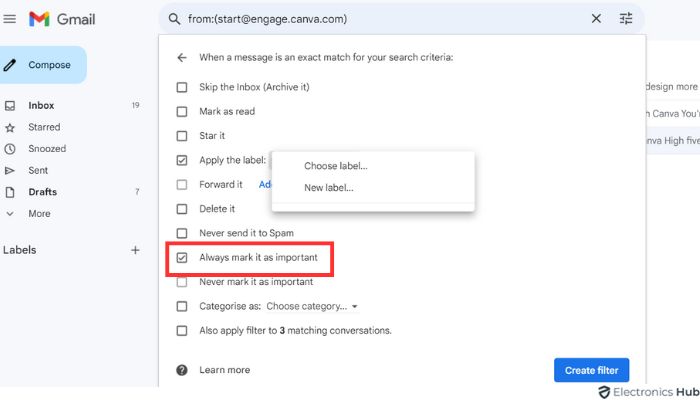
Do you have emails from a boss, client, or family member that require immediate attention? Create filters for these senders and choose “Mark as important” or “Apply label” (create a label named after the sender) to ensure these emails stand out.
6. Prioritize work from play
Set up a filter to sort emails from your work domain and label them as “Work.” This helps you focus on work emails when needed.
7. Auto-empty the spam
You can easily set up a filter to delete spam emails after a specific time. Just be careful to avoid deleting any important emails by mistake.
- Hover to the Gmail search bar and click on the filter icon.
![]()
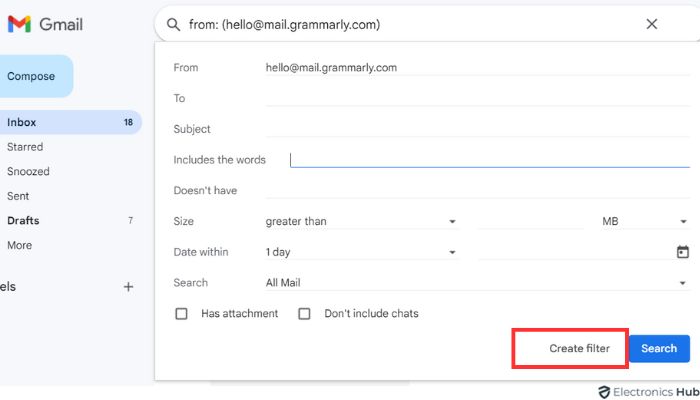
- Now, from the drop-down menu, move to the “Include the Words” option and type “Spam” in it.
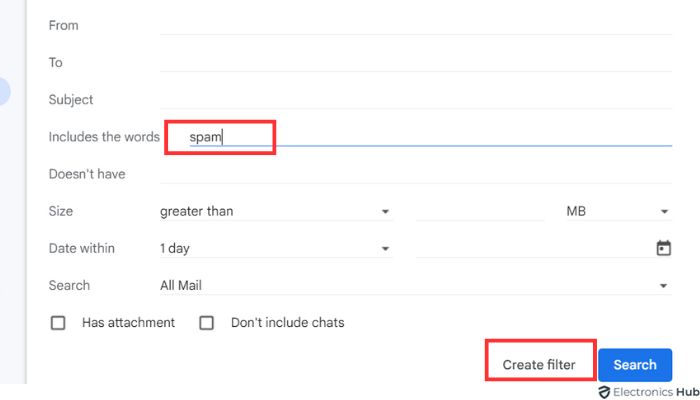
- Click on the “Create filter” option.
- Choose “Delete it” and confirm the filter creation.

8. Combine search operators
Use search operators like “from,” “to,” “cc,” and “bcc” to find emails that meet specific criteria. For instance, a filter with “from: manager AND (important OR urgent)” can highlight crucial messages from your boss.
9. Set up nesting filters
Create nested filters for even more precise organization. For example, a filter for “from: client” can have a sub-filter for emails with “project X” in the subject line, automatically labeling them for a specific project.
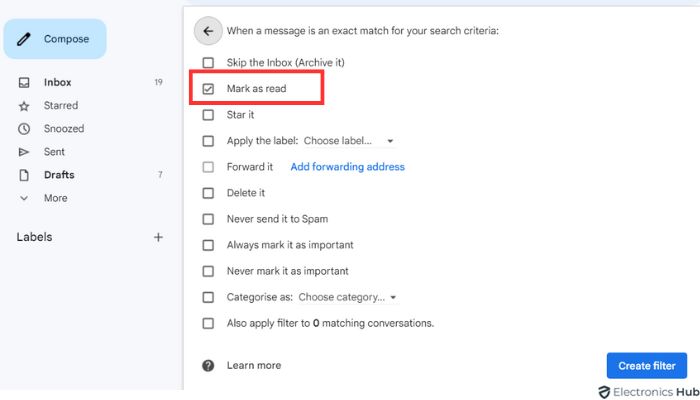
10. Mark emails as read
The emails you receive in your Gmail account must be useful and relevant to you. With the ‘mark emails as read’ option, you can easily prioritize important emails and disregard the ones that aren’t relevant.
How To Create Gmail Filters?
There are three different ways to create filters in Gmail. Regardless of the method you use, the filter creation form will look the same.
Using an Existing Email
1. Open the email you want to create a filter for, click the three dots, and select “Filter messages like these.”
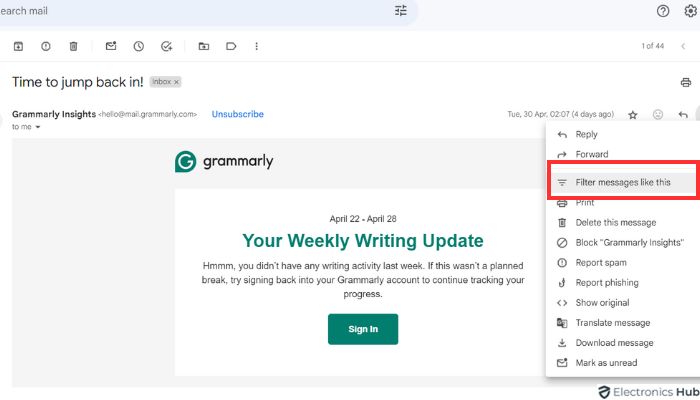
2. Feed the details and click “Create filter.”
3. Choose the desired action and confirm.
Using the Gmail Search Bar
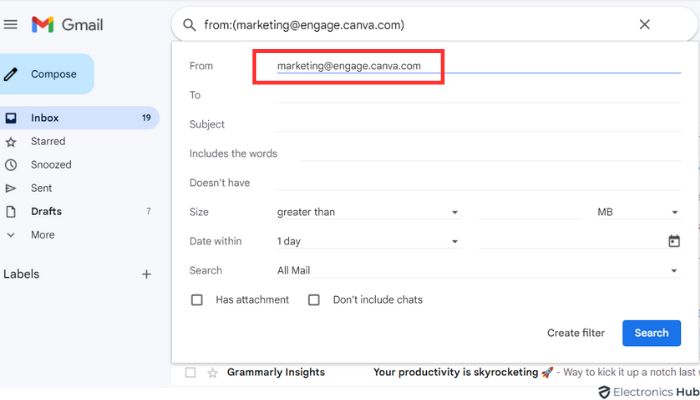
1. Locate the search bar and click the “Show search options” menu.
2. Enter your desired filtering conditions and click “Create filter.”
3. Select the desired action and confirm the filter.
Using Gmail Settings
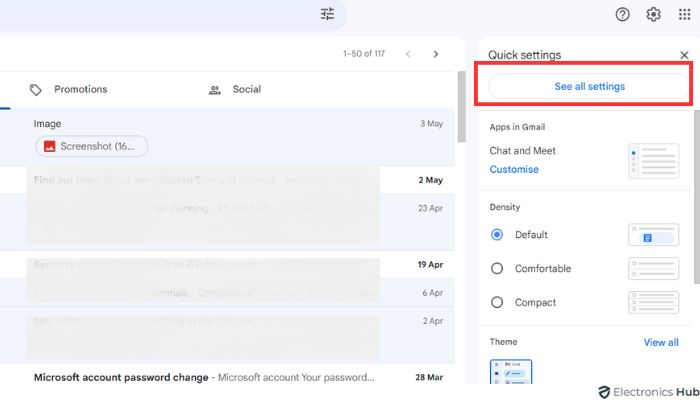
1. Find the settings icon and click on “See all settings.”
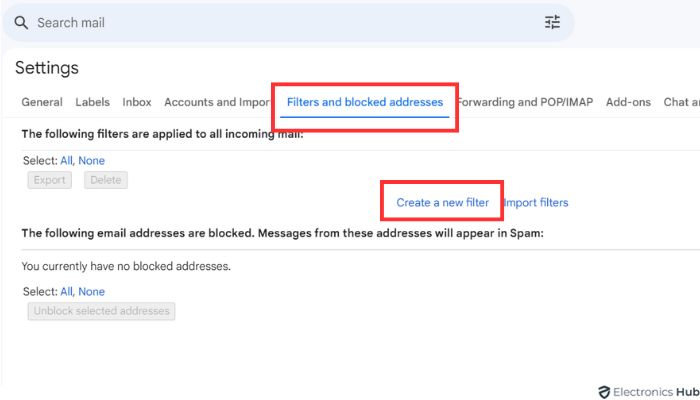
2. Select “Filters and Blocked Addresses” and create a new filter.
How To Edit Gmail Filters?
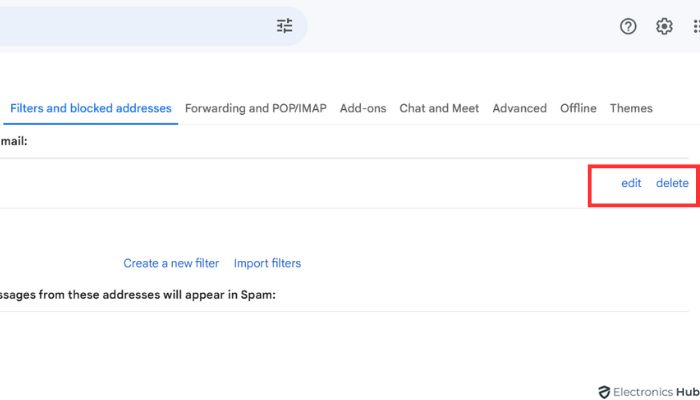
Once after creating a filter, you can either edit (or) delete it. To do so, find the settings icon at the top right corner and click on it. Select “See all settings” and tap the “Filters and Blocked Addresses” tab. Under this, you can find the complete list of filters you have created. You’ll see two options next to each filter: Edit and Delete. Select the filter you’d like to update or remove.
How to Export and Import a Gmail Filter?
Exporting a Filter
1. Access Gmail settings by clicking the gear icon in the top right corner.
2. Select “See all settings” and navigate to the “Filters and Blocked Addresses tab.”
3. Tick the checkbox next to the desired filter(s). To export all filters, scroll down and select the checkbox next to “All”.
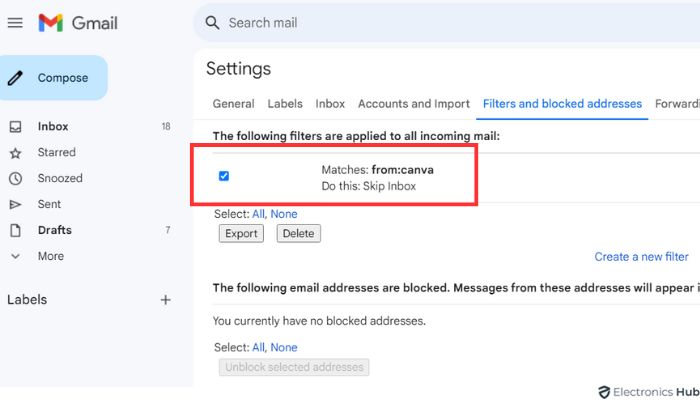
4. At the bottom of the filter list, click “Export.”
5. A zip file of your filters will automatically download to your computer’s hard drive.
Importing a Filter
1. Repeat the steps to access the “Filters and Blocked Addresses tab” in settings.
2. Scroll down and click “Import filters.”
3. Click on “Choose file.”
4. Select the filter file from your system and click “Open.”
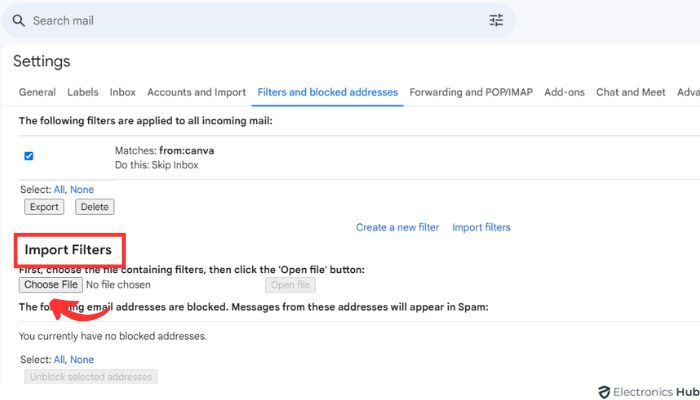
5. Click “Create filters” to import the settings from the chosen file.
Also Check:
- How To Find And Access Gmail Contacts?
- Why Is My Gmail Not Receiving Emails?
- How to Create Gmail Labels and Organize Them?
- How To Find Old Emails Quickly In Gmail?
FAQs:
Ans: You can create as many filters as you want in Gmail. But it’s best to keep the number manageable, ideally under 100, for optimal performance.
Ans: Of course yes. Filters can be set up to sort emails with or without attachments.
Ans: When creating a filter, you have the option to apply it only to future emails (or) include matching emails already in your inbox.
Ans: Gmail’s advanced search filters aren’t available on mobile apps.
Conclusion
Finally, setting up a well-organized inbox with filters requires some initial effort and customization. Don’t be afraid to experiment, tweak your filters, and create new ones as your needs evolve. With a little planning and using these powerful filters, you can turn your cluttered inbox into an efficient mailing system.
So, what’s holding you back? Take control of your inbox and reclaim your tranquility of mind with the magic of Gmail filters!
