In this project, we interface Arduino with Python and implement a simple project on controlling Arduino with Python Programming Language.
Arduino is one of the most powerful open source electronics prototyping platform built around AVR Microcontrollers. Python, on the other hand, is one of the most widely used open source high level programming languages.
Using Arduino with Python
Combining Arduino and Python will open doors to a wide range of ideas, projects and combinations. One such application is the Internet – of – things or IoT, which requires features like Communication Interfaces like Serial, graphical user interfaces, web interfaces, data storage and many other.
Python has a huge collection of libraries that are open source and easy to use, which makes Python Programming Language the most suitable language for IoT Applications.
Here, in this project, we will see how to install Python IDE on your computer and also how can we use control Arduino with Python Programming Language.
Downloading Python
The first step is to download the Python IDE from the official website. The installation procedure and steps mentioned in this project are relevant only for Windows 7 Operating System (might be similar to Windows 10). The setup procedure for Python on other operating systems like MAC OS and Linux will be different.
Python can be downloaded from the Python’s official website. Before downloading the Python IDE, we must know that there are two variants of Python: Python v2 and Python v3. Python v3 is the future version of Python and is still in its developing stage.
Python v2, on the other hand, is a legacy version with a huge library support, communities and forums. So, we will be downloading the Python v2.x (x being the latest version).
Also, majority of the libraries are compiled for 32-bit version of the Windows. Hence, even if your system is a 64-bit one, we recommend installing a 32-bit version of Python v2.
At the time of implementing this project, the latest version of Python is Python 2.7.14. You can download the 32-bit version of Python 2.7.14 from this link.
Installing Python on Your Computer
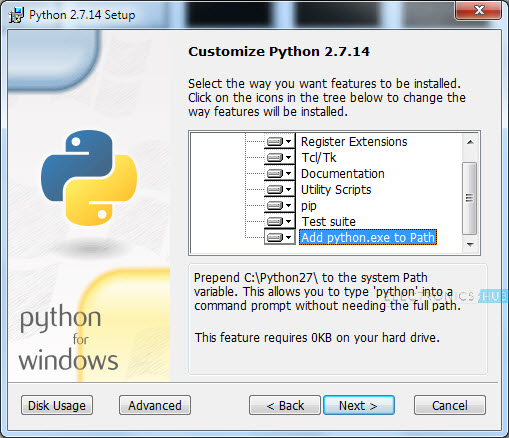
After downloading the installation file, proceed with installation by double clicking it. Select “Install for all users” and click on next. Do not change the default installation directory, which is “C:\Python27\” and click on next.

Next, select the “Add python.exe to path” option in the Customize Python 2.7.14 area. This will automatically add the Python directory to the Windows System Path. If you skip this step, you can add the directory to the path manually. Proceed and finish the installation.
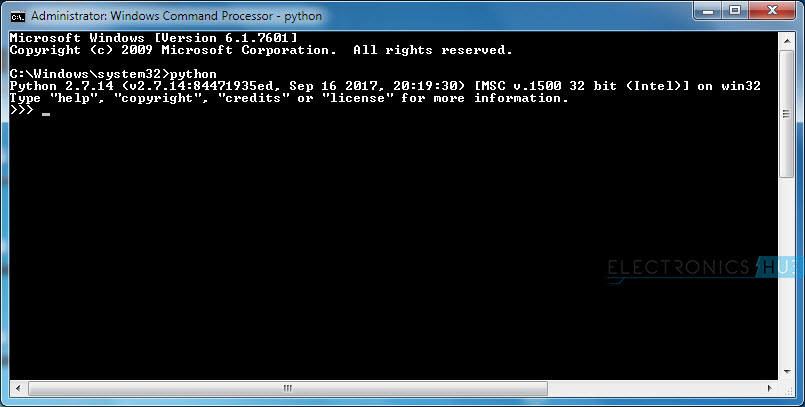
Python is successfully installed on your computer. If you have set the system path (either manually or while installing path), you can check if the Python is successfully installed or not.
For this, run the Command Prompt with Administrator rights and just enter “python”. If python is successfully installed on your computer, you will get a response corresponding to the Python Version and type of installation (32-bit version).
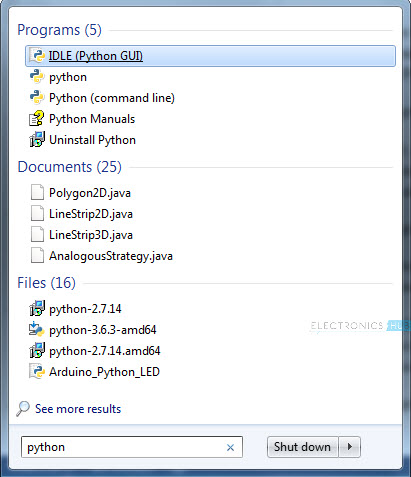
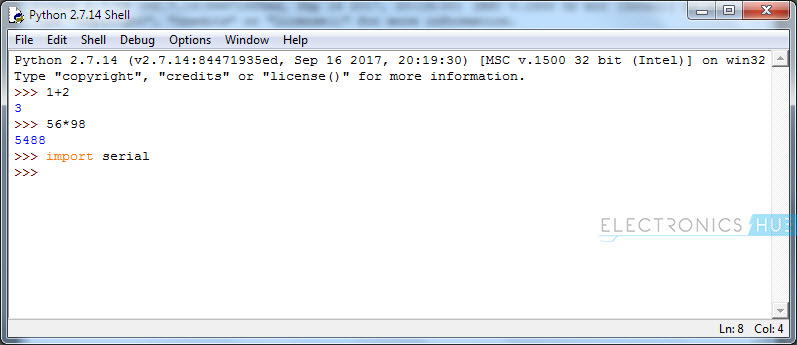
At this point, you can start using the Python IDE by searching for “Python” in the Start Menu of Windows 7. You will get IDLE (Python GUI) option. IDLE stands for Integrated Development and Learning Environment, a GUI based Python IDE.
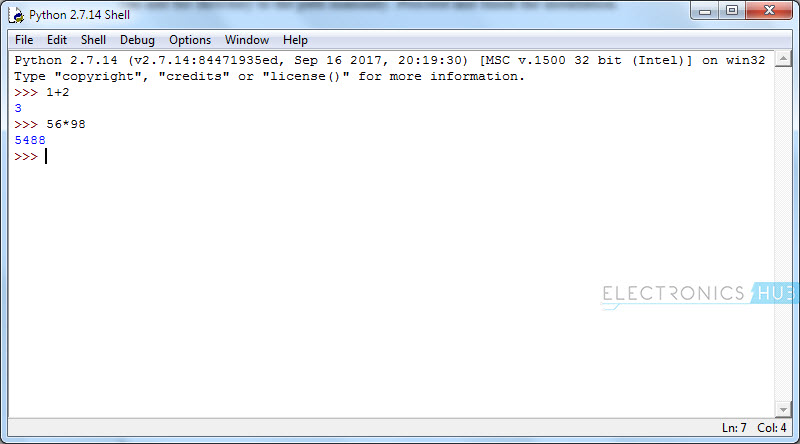
Selecting it will open the Python Shell, which lets you use the Python interpreter in an interactive mode i.e. you can type commands and see the results instantaneously. For example, simple math operations can be performed just like that.
Getting pySerial
In order to access the Serial Port of the Computer through Python, we are going to need a library called pySerial. pySerial is a Python Serial Port Extension that provides access to the Serial Port for Python running on different Operating Systems like Windows, Linux, Mac OS (OSX), etc.
In our project, we will be using pySerial to Read and Write data to Arduino through Python. In order to download the pySerial, use the attached link.
This link will download pySerial-3.4 (the latest version at the time of implementing this project) in a .tar extension file.
Extract the contents of the file to any folder like “C:\pyserial-3.4”.
Here are the 10 BEST ARDUINO STARTER KITS FOR BEGINNERS.
NOTE: Location is important, as we have to navigate to this location and install the pySerial.
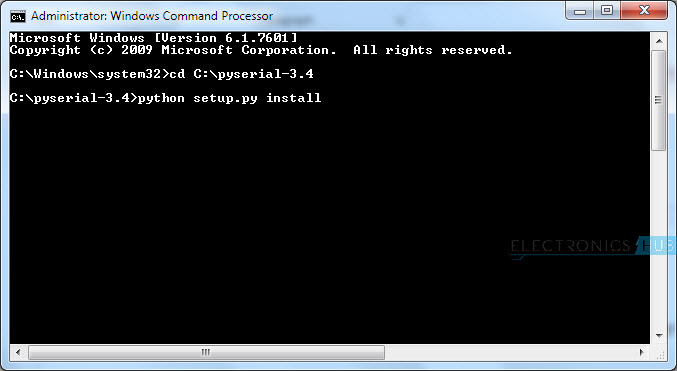
Now, run the Windows Command Prompt with Administrator privileges and navigate to the folder where pySerial is extracted to. (In my case, I’ve extracted it to C:\pyserial-3.4).
In order to install pySerial, type the following command in the command prompt and hit enter.
After successful installation of pySerial, you can check if it is integrated to Python or not by entering the following command in the Python IDLE.
If everything goes well, you will not get any error.
Interfacing Arduino with Python
Now that we have successfully installed Python and pySerial, we will continue with interfacing Arduino with Python. For this, we will be controlling the on-board LED on the Arduino using Python i.e. we will toggle on the Arduino’s on-board LED using Python Programming Language and IDE.
For this, we will first write a simple program for Arduino. The idea behind the program is as follows: Arduino UNO, which is connected to a computer, checks for the Serial Data and depending on the data received from the Serial Port, it will either turn ON or OFF the LED.
The Arduino program for Interfacing Arduino with python is as given below.
Arduino Code
If you look at the code, it is pretty straight forward. The Arduino will read the data from the Serial Port and if the Data is 1, it will turn ON the LED and if the Data is 0, it will turn OFF the LED.
Now, we will take a look at the Python Code. First, open the Python IDLE and create a new file by clicking on File – – >New File. This will open an empty text editor.
Python Code
Start writing the code in the editor (copy and paste it from the above code) and when you are done save the file using File – – > Save or Ctrl+s. This will ask you to enter a name for the file. Give an appropriate name and save the file at a convenient location.
The extension for Python Programs is “.py”. This will be automatically assigned to the file when you are saving it.
NOTE: Grouping Instructions in Python is very important. Refer to any Python Tutorials for Beginners for more information.
After saving the file, we can run the file by selecting Run – – > Run Module in the editor window.
Controlling Arduino with Python
Upload the Arduino Code to the Arduino UNO. Note the COM Port to which it is connected. The same COM Port number should be given in the Python Code.
After uploading the code to Arduino, launch the Python Program. The Python Shell will be opened with message saying “Connection Established” and “Enter 1 to ON LED and 0 to OFF LED”.
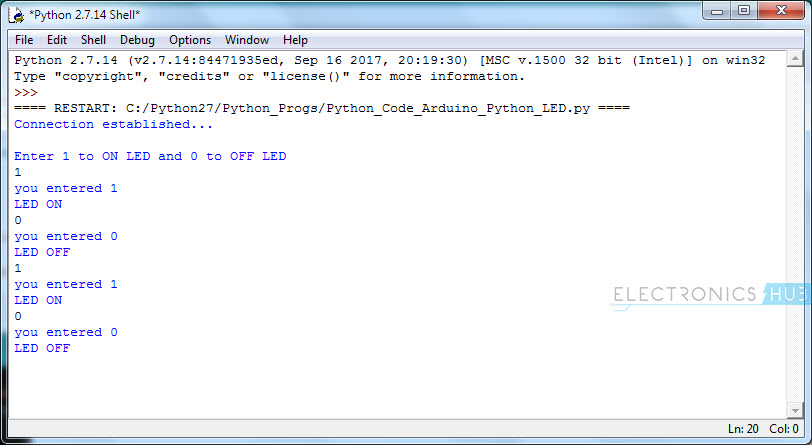
You can enter 1 or 0 in the Python Shell and the LED on the Arduino will be correspondingly turned ON or OFF.
In this project, we have seen how to install Python, how can we interface Arduino with Python and controlling an LED on Arduino with Python.

12 Responses
Thank you very much! Your tutorial was easy to follow.
Thank You. It helped me a lot.
awesome tutorial, to get started. thanks for your job!!!
how can i get the arduino code and python code ?
why i can’t run module, it said “Invalid Syntax”
I also get the invalid syntax for the Arduino_Serial
Excellent tutorial, thank you it was very helpful.
Why it is showing ‘invalid systax’ while doing run module…..Please give any solution to this…
why i can’t run module
Why it takes alot of time to establish the connection between arduino uno and python
What if i have to toggle pin say PIN 3 in HIGH an LOW ..how do i make python command arduino to work on pin3 .. please use a bit less generic examples
awesome