In the previous tutorial, we have seen how to install the Arduino IDE, configure or install the required USB drivers and also the basic setup of the IDE for the Arduino board to be recognized by the IDE. In this tutorial, we will continue with the Arduino IDE by exploring its features, understanding the basic operation and uploading our first program to the Arduino UNO board.
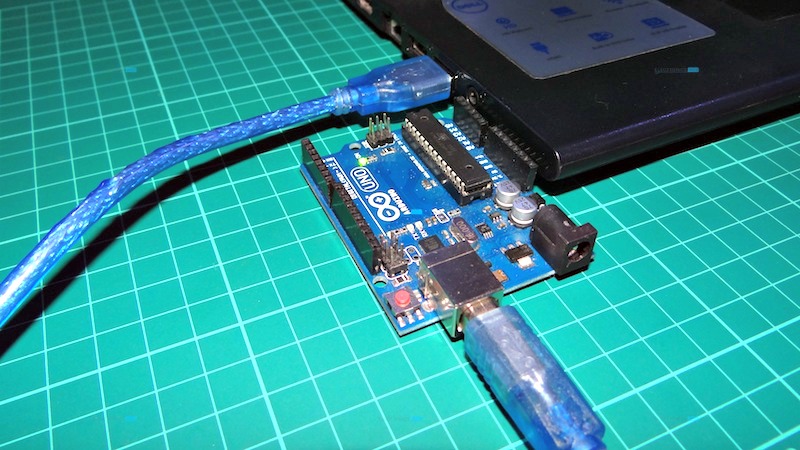
Before proceeding further with the tutorial, connect Arduino UNO board to the computer via the USB cable as shown in the below image and select the appropriate board and COM port if it is not done already. There is no need for any external power supply to the Arduino board as it draws the necessary power from the USB connection.
How To Program Arduino?
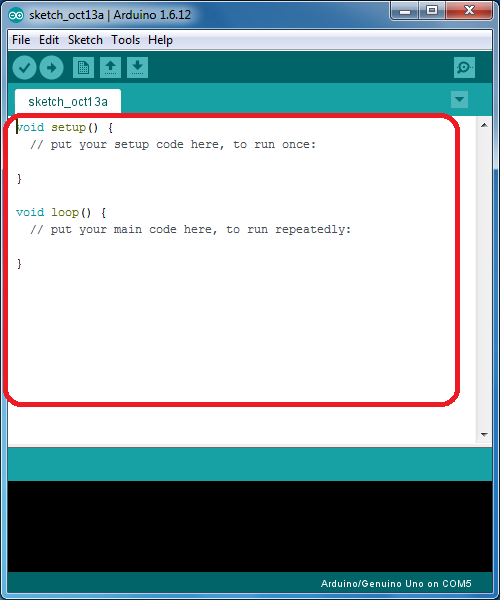
The programs in Arduino environment are called as Sketches. In the Arduino IDE, the white space highlighted in the image below is called as Text Editor. This space can be used for writing all the code for our Arduino boards.
Before jumping out with excitement and writing our own program, we will first check out an example sketch provided in the Arduino IDE. For this, we need to go to the “File” menu and go to the “Examples” tab. In the drop down menu of the Examples tab, we can see a list of properly categorized examples like Basic, Analog, Digital, Communication etc.
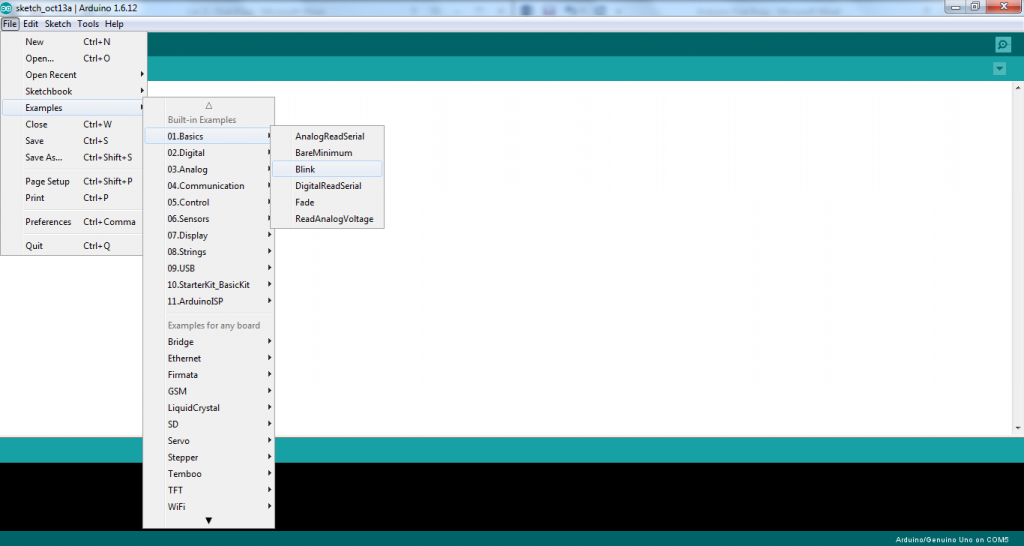
As a beginner or first time user, use the Basic examples and in that select the “Blink” sketch. A new window will be opened with Blink sketch in it. Using the Blink sketch, we are going to turn ON the LED connected to 13th pin of the Arduino for one second and turn it OFF for one second in a repetitive fashion i.e. we are going to blink the LED continuously.
Whenever we are beginning with electronics and microcontrollers in particular, the first project or program we implement is blinking an LED as blinking an LED in electronics is considered the equivalent to the Hello World in C.
At this point of time, we will directly upload the sketch without going deeper in to the programming part of the project. In order to upload the sketch to the Arduino board, we need to make use of two icons in the Arduino IDE: first is the “Verify or Compile” and next is “Upload”. These icons are highlighted in the image below.
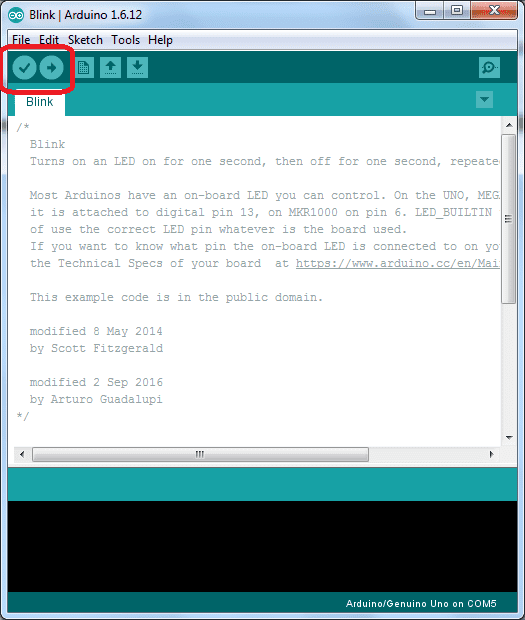
The first icon with a Check mark is the Verify or Compile icon. Using this icon, we can check whether the written sketch is correct or not in terms of syntax and shows the compilation errors, if there are any. We upload the sketch only if the compilation is successful without any errors. Alternatively, we can use a keyboard shortcut Ctrl + R to verify or compile the sketch.
The part at the bottom of the IDE is called as Message window. It displays the status of the compilation, error messages and the details of the errors. If we compile the sketch using the first icon, we can see the status of the compilation and Done Compilation message in the message window.
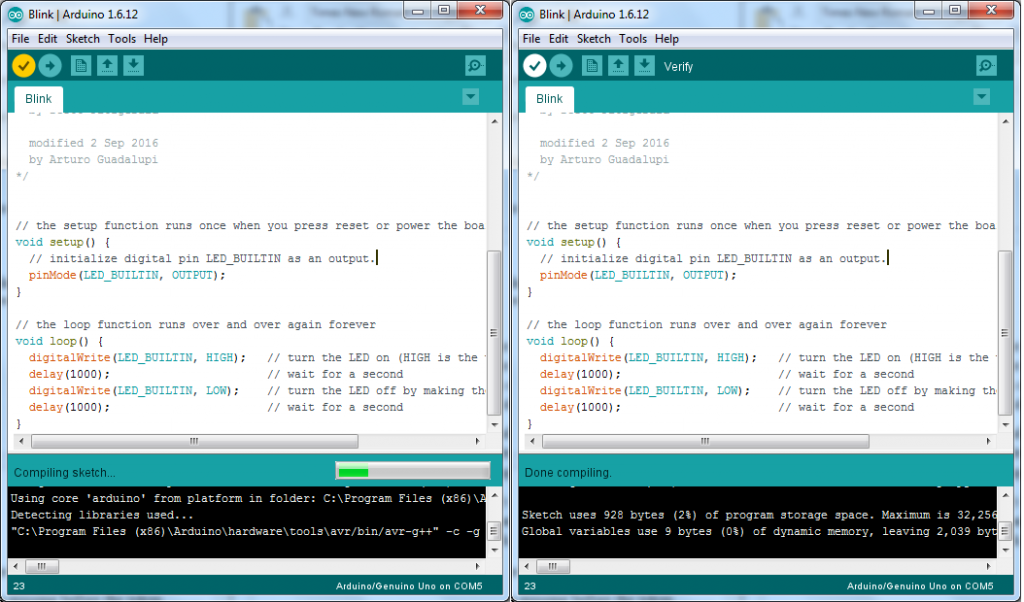
If there is an error in the sketch like a missing semicolon or an unclosed bracket, the compilation stops at that point and the message window points out error along with its type and location. Using this, we can correct the error.
The second icon adjacent to the Verify icon is the Upload icon. Once the compilation of the sketch is successful, then we can upload the sketch using this icon. There is a keyboard shortcut Ctrl + U to upload the compiled sketch. Whenever we click on the Upload icon, the sketch is compiled before uploading.
As our sketch is compiled successfully without any errors, we can continue with uploading the sketch. When we click the upload icon, the sketch start uploading and the microcontroller on the Arduino board gets programmed.
During this time, the TX and RX LEDs on the Arduino UNO board blink as an indication that the data is being transmitted via the serial port. Once the sketch is successfully uploaded, we can see a message in the message window as Done Uploading.
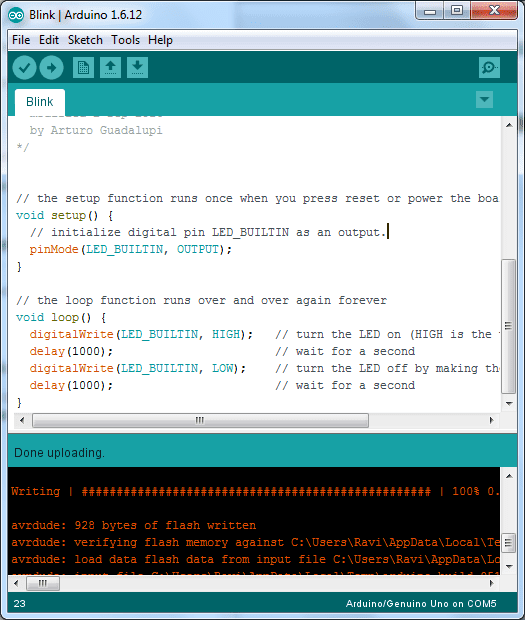
The message window also displays some other details like amount of flash memory utilized by the code, time taken to upload etc.
As the sketch is uploaded successfully, the LED on the Arduino Board, which is connected to its 13th pin, will start blinking with a gap of one second (or as per the sketch written).
In this tutorial, we have seen how to upload our first sketch to Arduino UNO board and also understand some basic features of the Arduino IDE. In the next tutorial, we will analyze the same sketch and understand the sketch, its components and modify some parameters to understand them better.

2 Responses
very good illustration for beginners.
Thanks..
how can i get some summary about how to program arduino?