Capturing screenshots on your HP laptop is easy with various methods at your disposal. To take a screenshot on your HP laptop, just press two keys at once: the Windows key and the Print Screen key. This quickly saves your screenshot in the Pictures folder. For more precision, if you wish to capture only a specific window, combine the Alt, Windows, and Print Screen keys.
Another efficient method is employing the Snipping Tool. Access it by pressing the Windows and R keys together, typing “Snipping tool”, and hitting Enter. When you open the Snipping Tool, you get choices to pick exactly what part of your screen you want to capture.
Here, you will find the best methods to capture a screenshot in general. Stick until the end to find out various different methods that allow you to take a screenshot on an HP laptop.
How To Take Screenshot On HP Laptop?
There are many different names given to a screenshot that are screengrab, screencap, screen capture, and many more. But essentially, taking a screenshot simply means capturing the contents present on the screen at a particular time and storing it in an image format for further use.
In order to take a screenshot on an HP laptop, you will have to use some of the common screenshot methods that are present by default in Windows OS, assuming you are running the Windows operating system. It is a very easy process and you can definitely save the contents of your screen within minutes. Even if you come across time-sensitive content, we have a method that will instantly save the image without wasting another second.
These are some of the many processes you can follow to take a screenshot on an HP laptop.
1. Take a Screenshot Using Windows Shortcuts
a. Capture the Whole Screen with “Prt Scn”
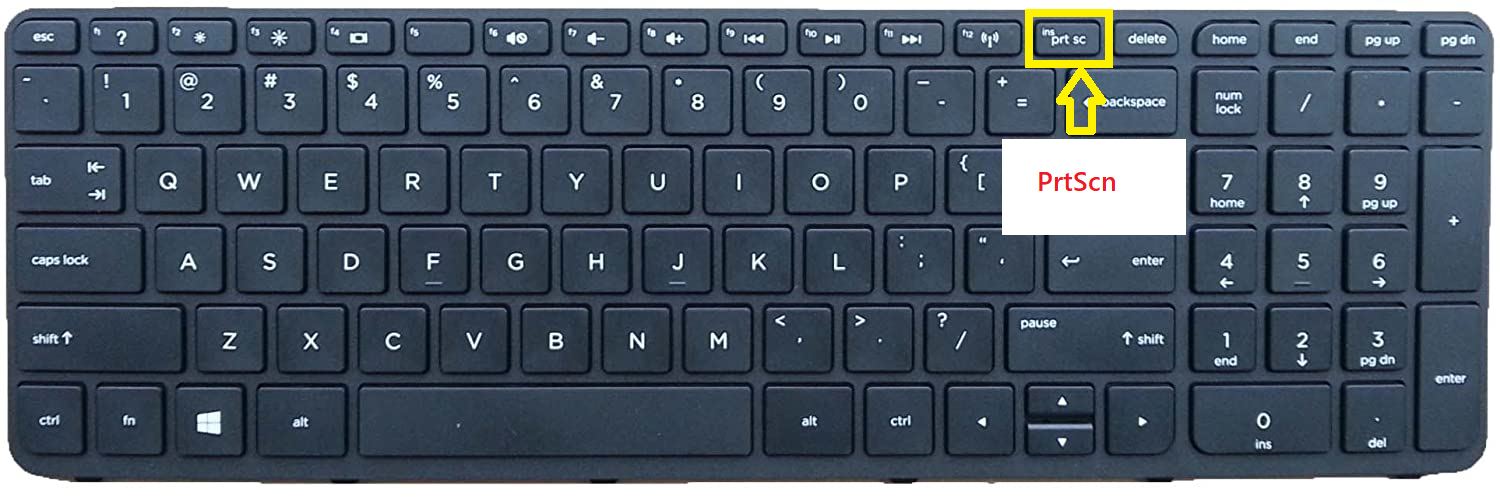
If you take a look at the keyboard that you are using right now, you will probably find a dedicated button called “PrtScn” or “PRT SC” in the case of laptop keyboards. This button on the keyboard serves only one function which is to take the screenshot on your HP laptop or desktop computer. To be specific, it can only capture full-screen screenshots.
If you want to capture full-screen screenshots on your HP laptops, follow these methods:
- Open the content which you need to save as an image file.
- Once the content is on the screen, make sure there is no window or cursor blocking it. The content will be stored identically to how it appears on the screen.
- Once the content is ready to capture, simply press the “PrtScn” or “PRT SC” button once.
- This will create a copy of the content on your clipboard.
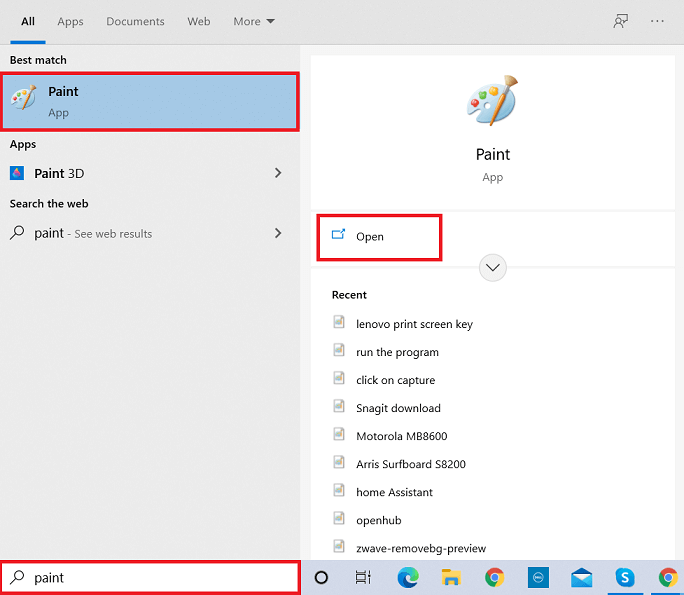
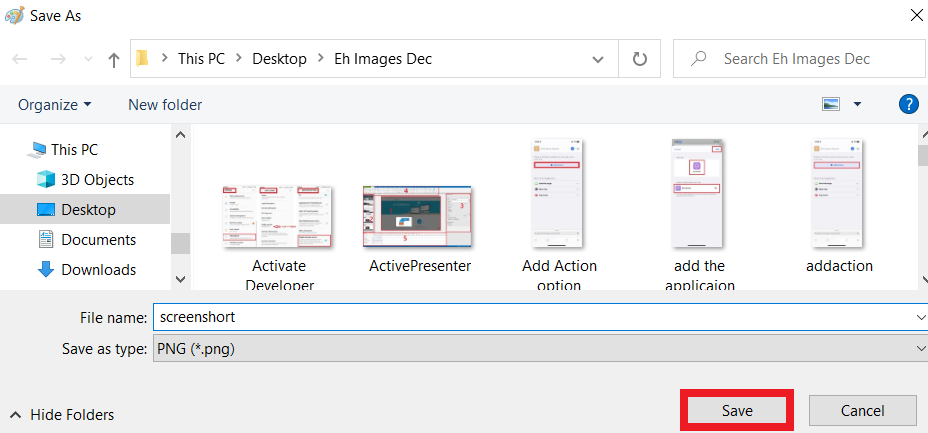
- Now, open any document editor or program where you can paste the image. MS Paint also works for this method.
- Press “Ctrl+V” to paste the captured image.
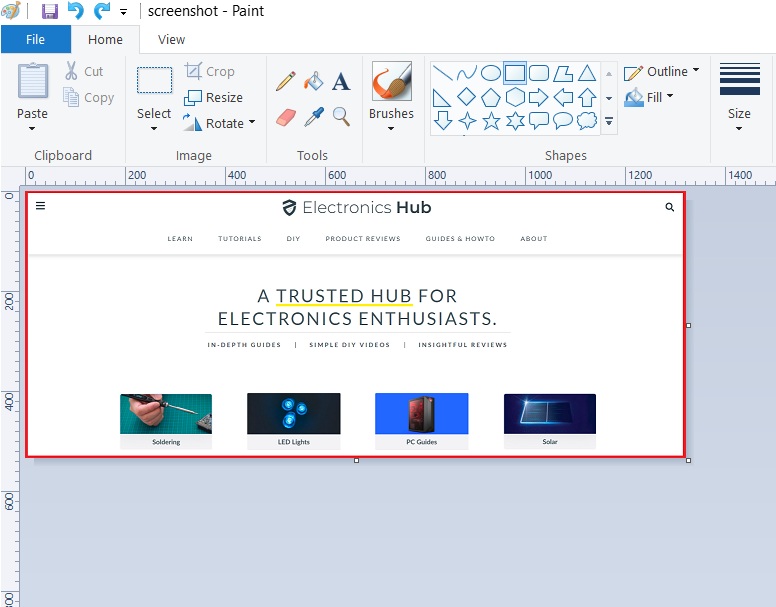
- Now, you can save the image as it is, or edit it further in the same MS paint window.
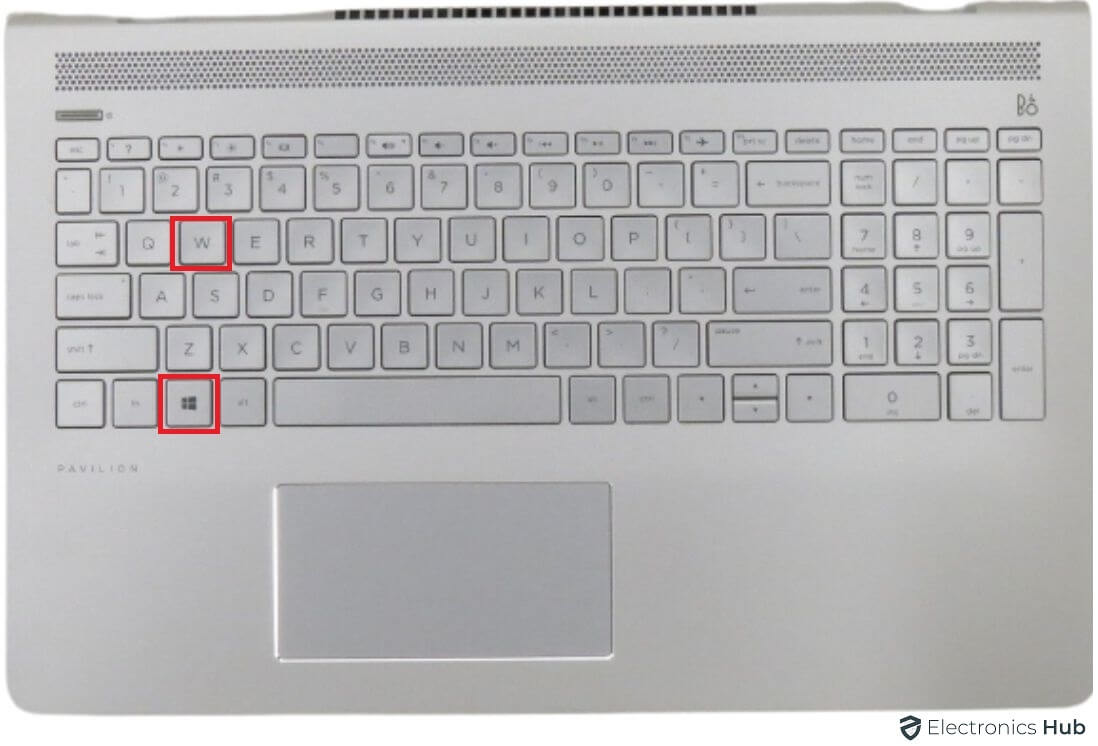
b. Capture the Whole Screen with “Win + PrtScn”
As you may have noticed, the above-mentioned “PrtScn” method is a bit slow and cannot be used for time-sensitive content. Hence, this is a faster way of capturing screenshots on an HP laptop.
- Get to the screen which you wish to save as a screenshot.
- Once you are on the screen, simply press “WinKey” + “PrtScn”.

- Now, your screen will blink once. This is the indication of successful image capture.
- If the screen did not blink, press the keys again.
- Once you take a screenshot by this method, it is automatically saved in the default screenshot directory.
- In windows, the default location for screenshots is :
C:\Users\[your username]\Pictures\Screenshots - Once you get to this folder, you will find additional folders which categorize the screenshots with respect to their source for faster access.
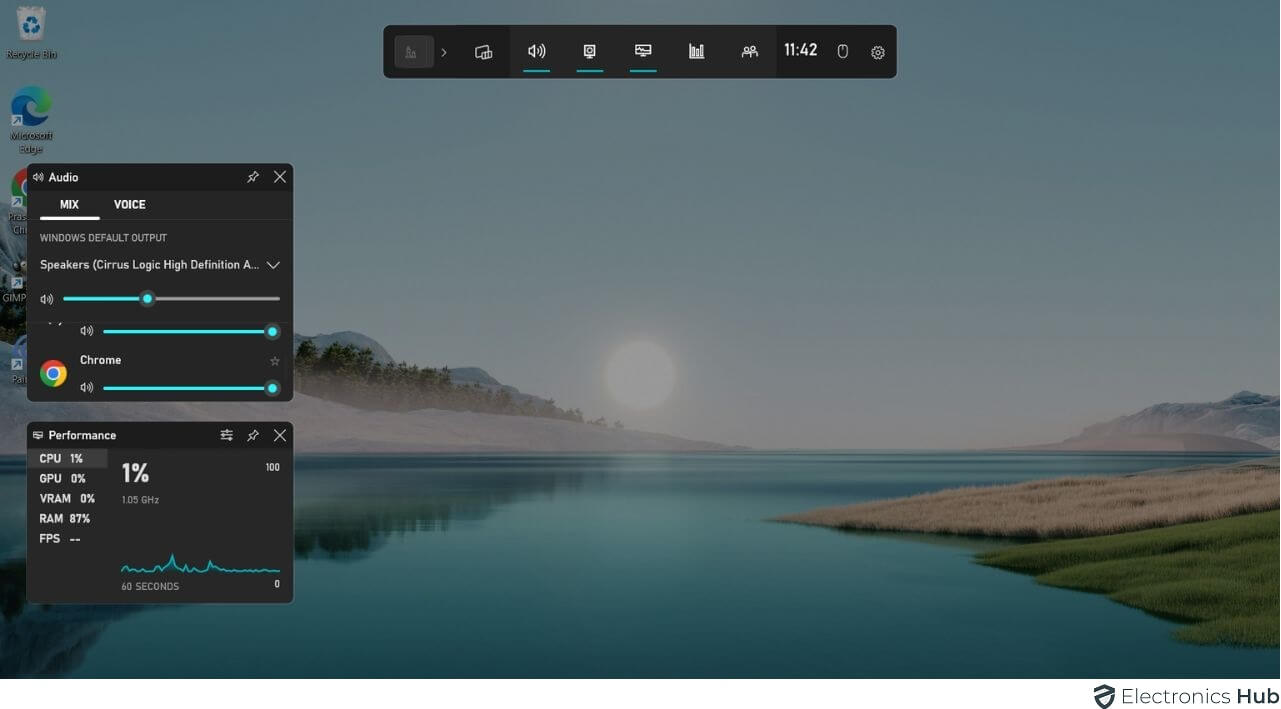
c. Capture the Whole Screen with “Win + G key”
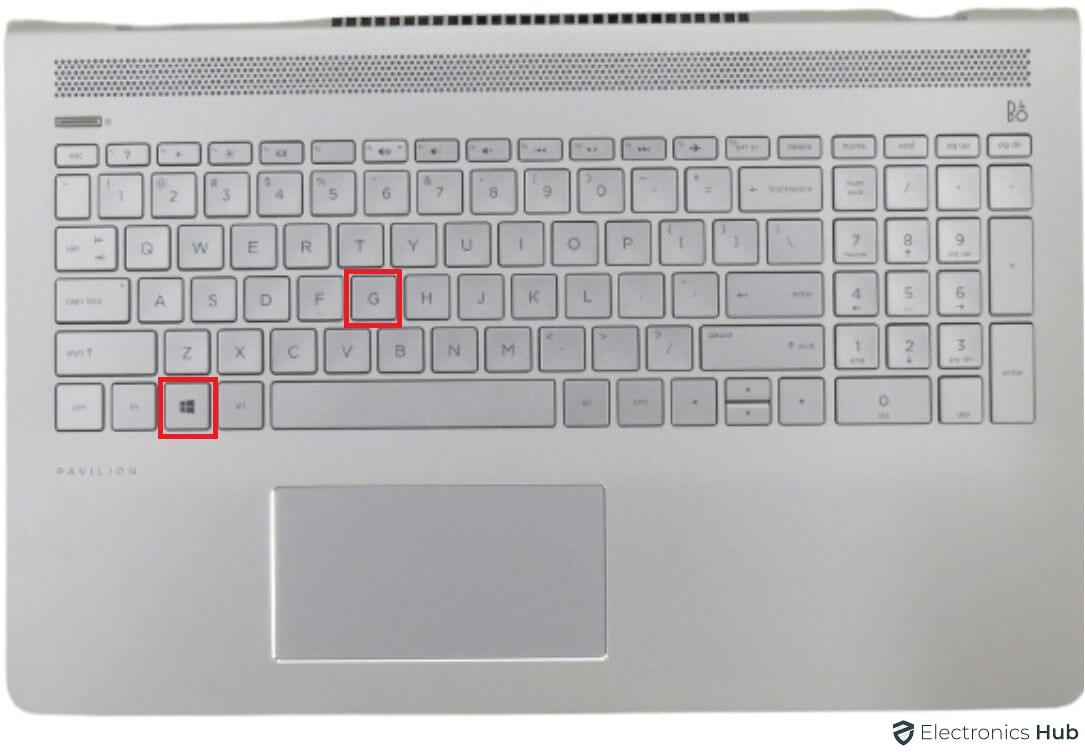
- Press the Win + G keys to open the Game Bar.
- In the top menu bar, click the Capture button (it looks like a camera icon).
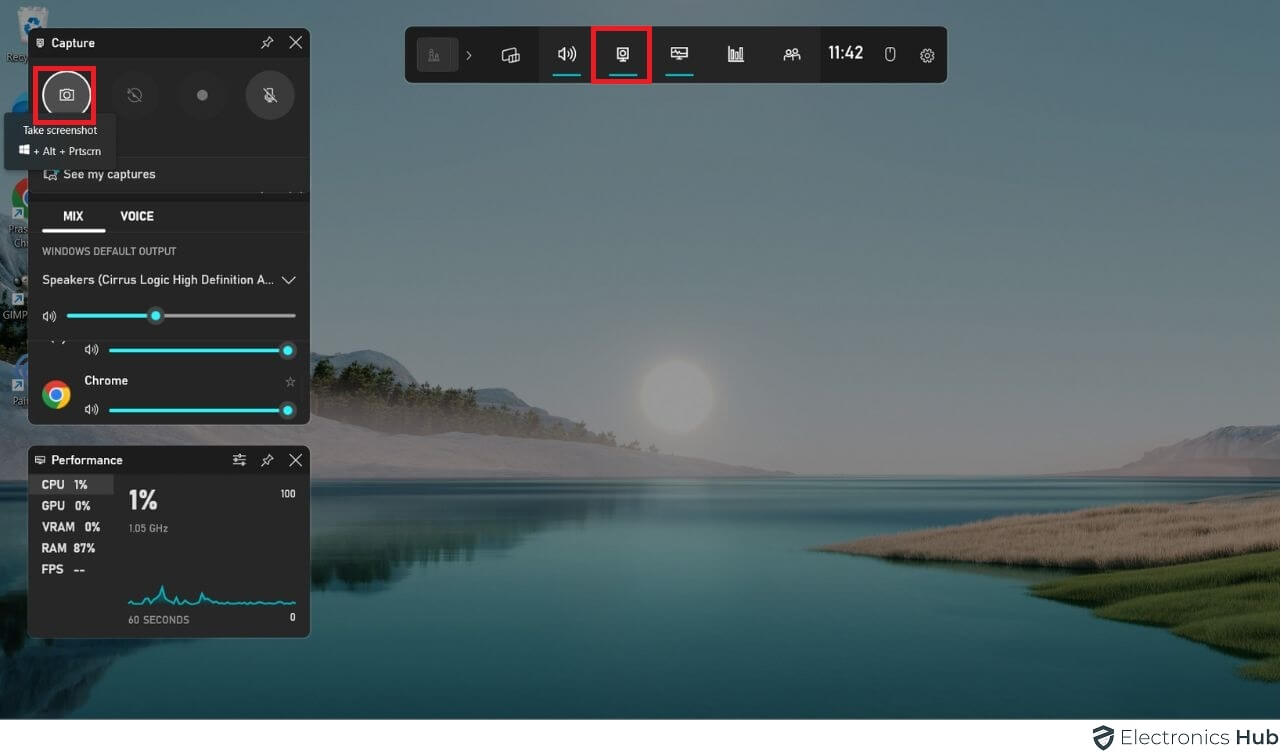
- Click the camera icon once more to capture the screenshot.
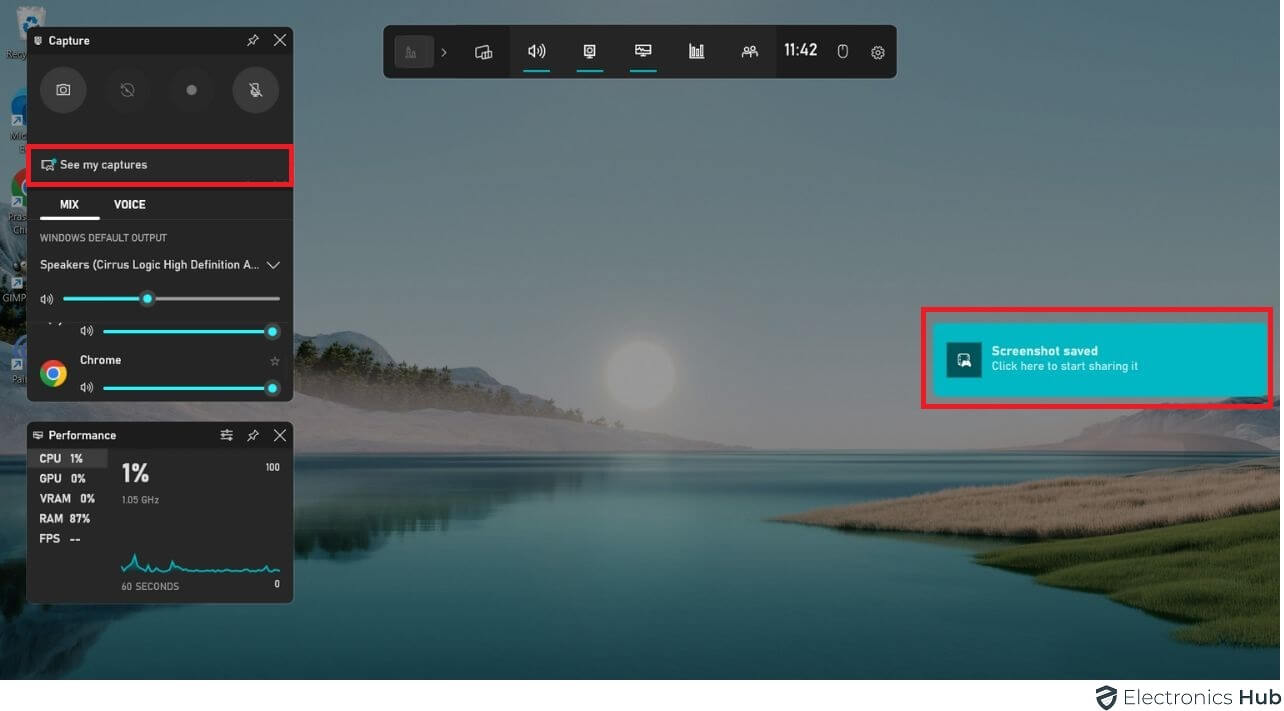
- Your screenshot will be automatically saved in the Captures folder on your computer.
d. Capture the Whole Screen with “Win + W key” (Windows 10)
- Open the window you want to screenshot.
- Press “Windows + W” keys together.
- A pop up will appear on the screen as given.
- Select the type of screenshot with the given tools.
- The screenshot will appear on the screen.
- Save or share it.
e. Capture Partial Screen with “Win + Shift + s”
In many cases, the content that you wish to save somewhere on the screen. But by taking a fullscreen screenshot, you capture the unnecessary part of the frame as well which you need to edit out before you can use the image.
To avoid that, you can use the following method to take a partial screenshot on an HP laptop.
- Open the screen of the frame that has the content which you wish to save.
- Now, press the “Shift” + “WinKey” + “S” key combination in order.
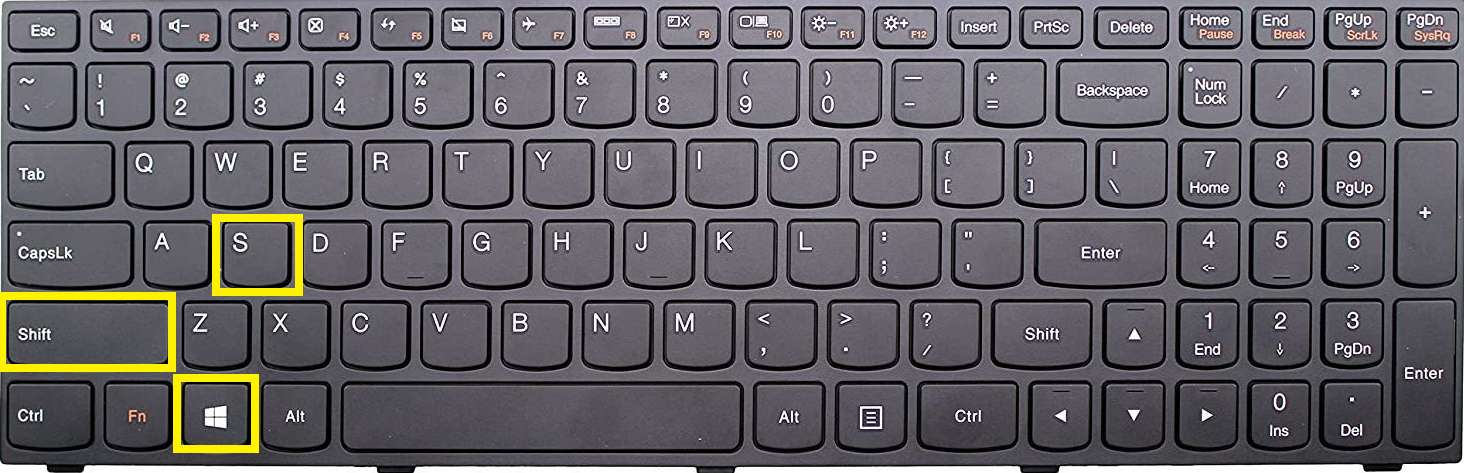
- This will dim the current screen and put a layer of another display on top of it which is basically a screenshot tool.
- Your cursor will also turn into a “+” icon so that you can crop the image precisely.
- To capture the screenshot, simply click and drag through the screen to create a window that covers the essential content.
- As soon as you let go of the left-click, the window will disappear and the cropped image will be saved in your clipboard.
- You can now paste the image anywhere you want to save it or edit it further.
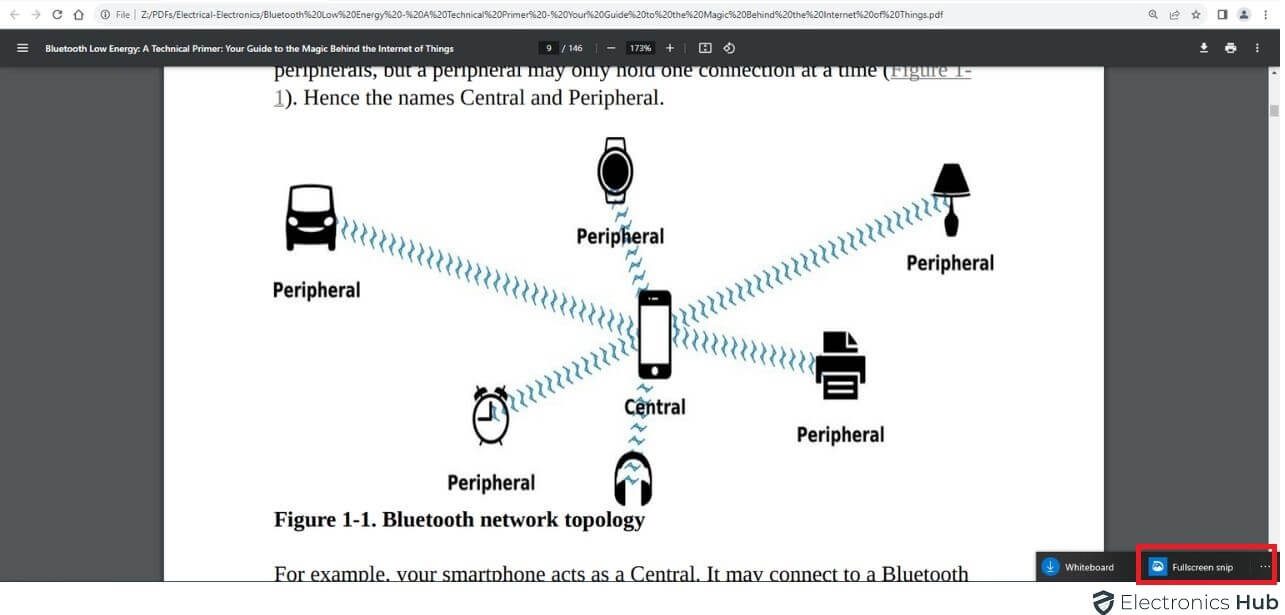
- On top of the screenshot tool, you will find a few options that allow you to make a freehand crop, fullscreen snip, or a window snip for better accuracy.
f. Capture an Active Window with “Alt + Prnt scn”
- Press the Alt + PrtScn keys simultaneously.
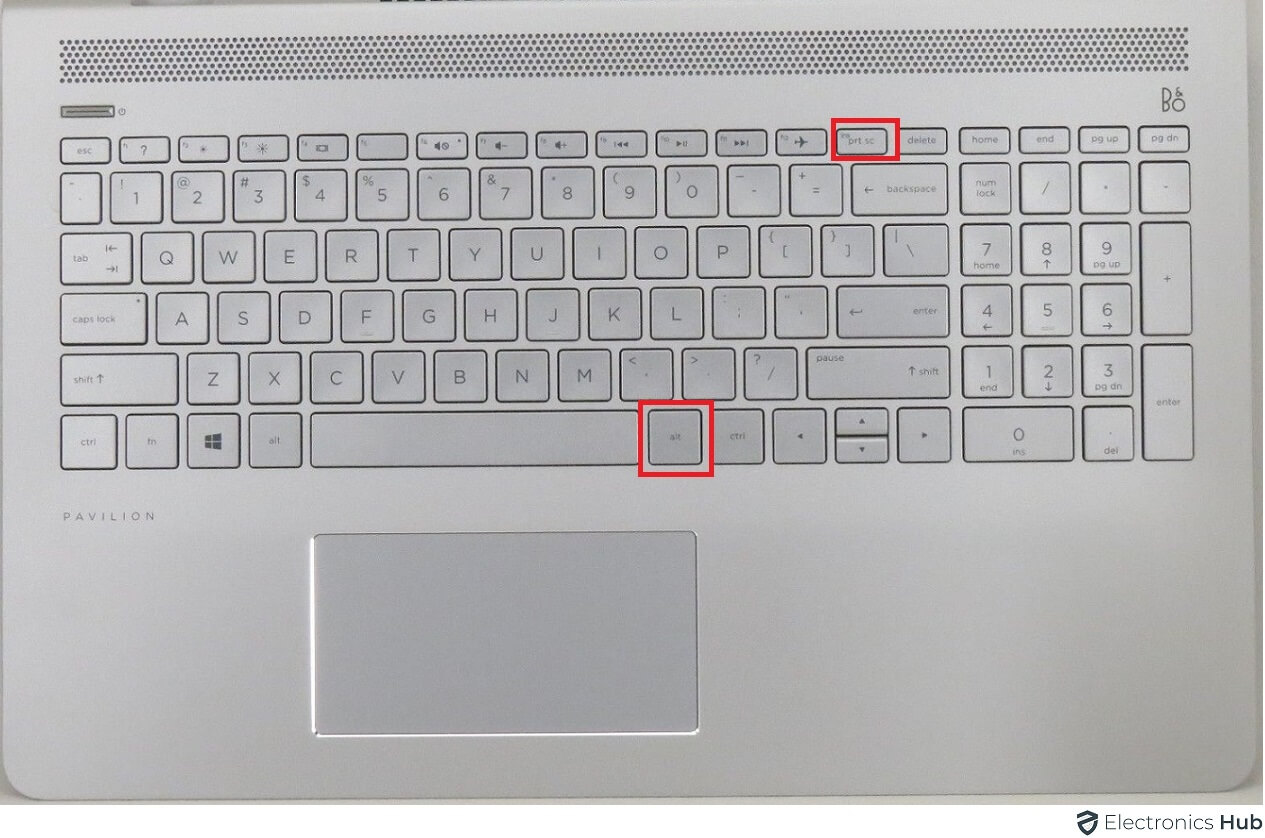
- The screen will briefly dim to indicate the screenshot has been captured.
- Next, open the Pictures folder on your computer.
- Locate the screenshot within the Screenshots subfolder.
- You can now conveniently view and edit the screenshot using an image editing program or share it as needed.
2. Take a Screenshot Using Built in Tools
a. Take Screenshot With “Snipping Tool”
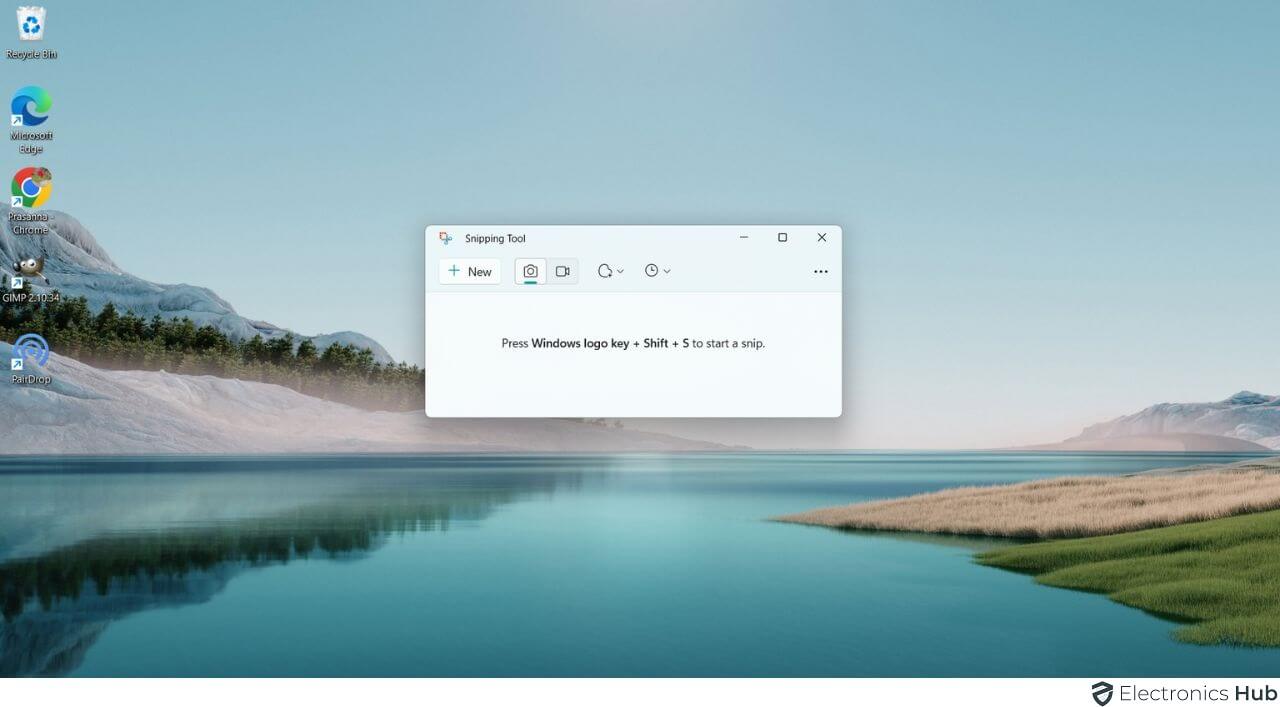
Other than the shortcut methods provided above, Windows 10 also has a dedicated tool for taking a screenshot called the “Snipping Tool”. As it is basically a program designed to specifically capture screenshots, it offers many additional methods and options for taking a screenshot. Here’s how you can use the snipping tool on an HP laptop.
- To open the Snipping Tool, simply search the term in the Windows search bar.
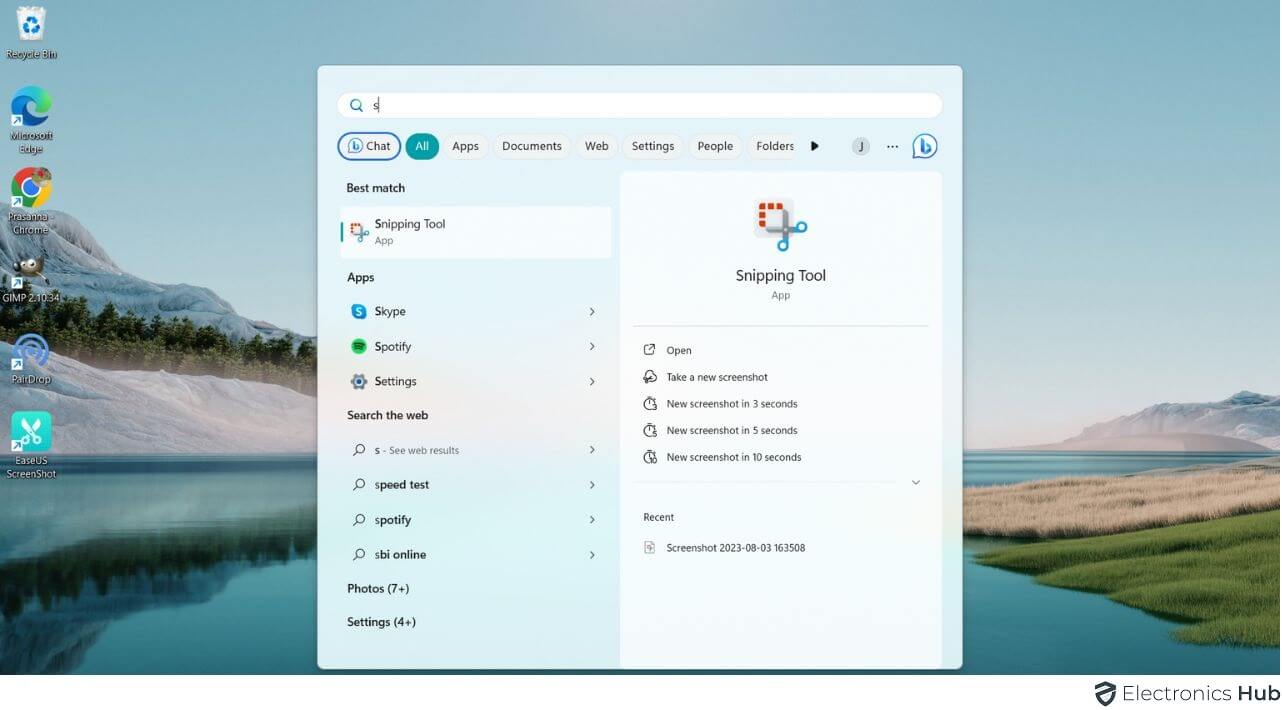
- Click on the scissor icon to open the Snipping Tool.
- Once the Snipping Tool window is open, simply click on “New” or press “Ctrl”+ “N” to start taking a new screenshot.
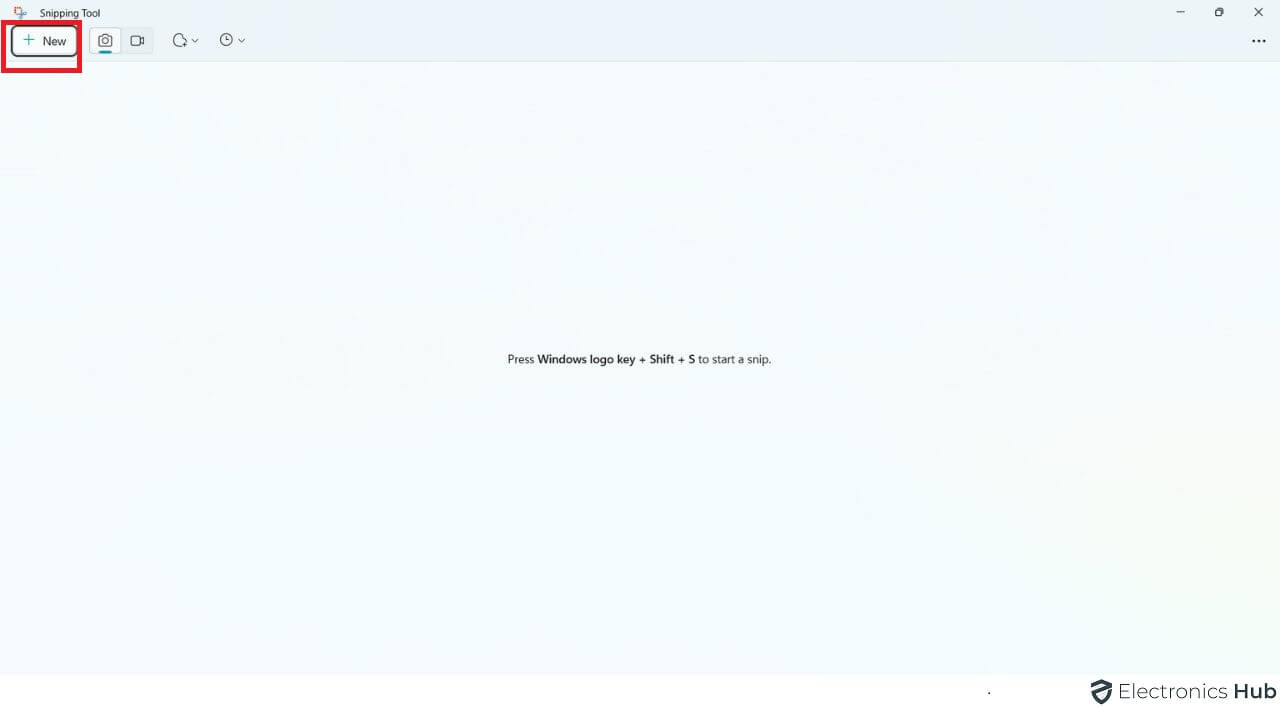
- As you click on it, you will notice a white blur on other windows where you can crop and save the screenshot which you want to capture.
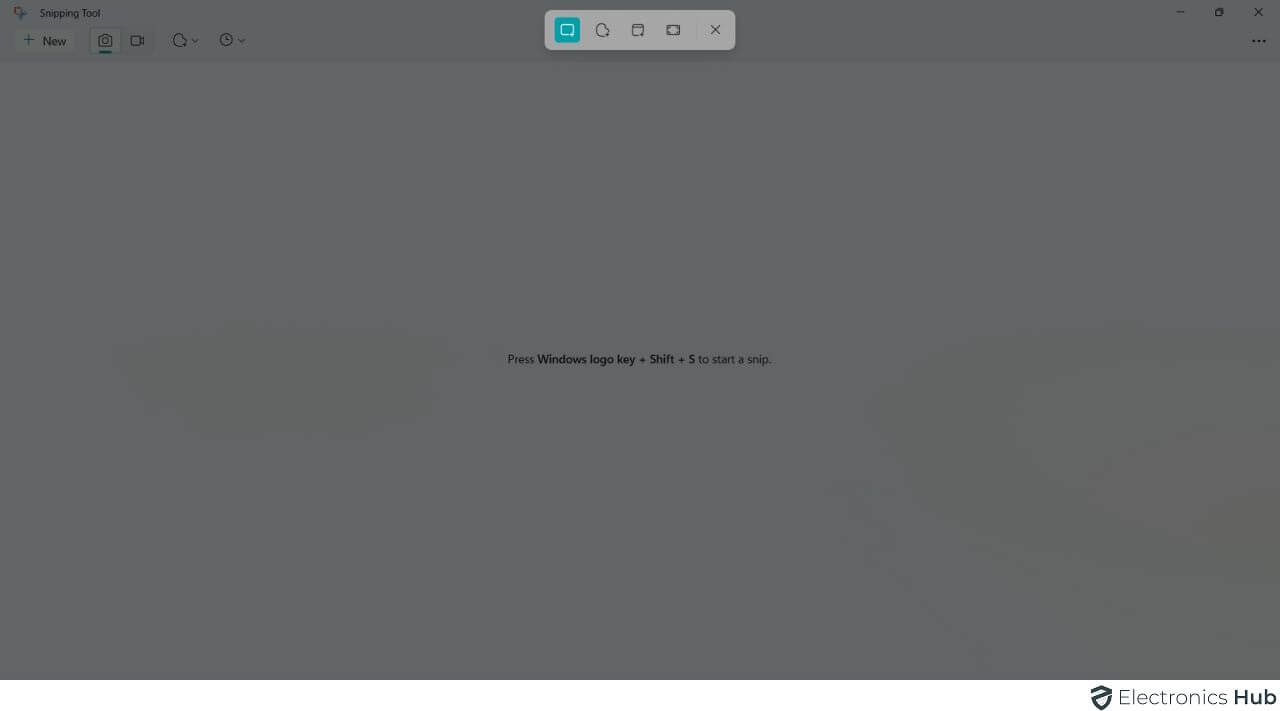
- Once you finish cropping the frame, the tool will instantly pick up the screenshot and open it in a dedicated image editor within the app itself.
- Here, you can add remarks or send the image directly via mail.
- Before taking the screenshot, you can also browse the tool for additional features such as various capture modes
- Delays between the crop and screen capture.
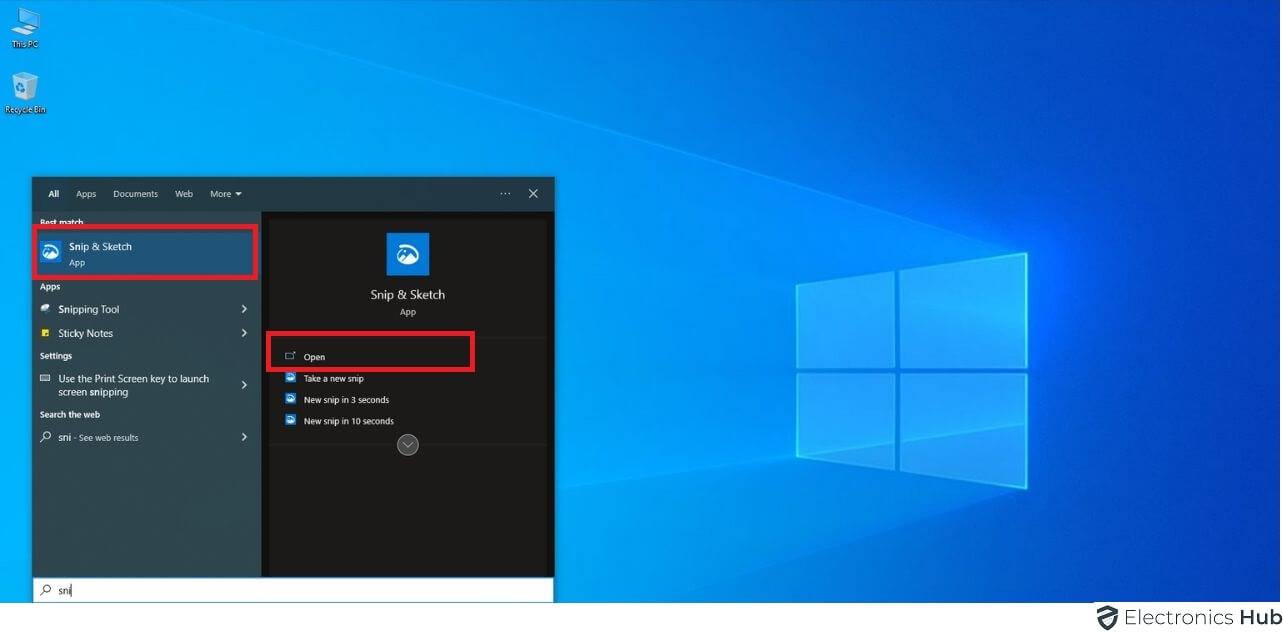
b. Capture a Screenshot with “Snip & Sketch” (Windows 10)
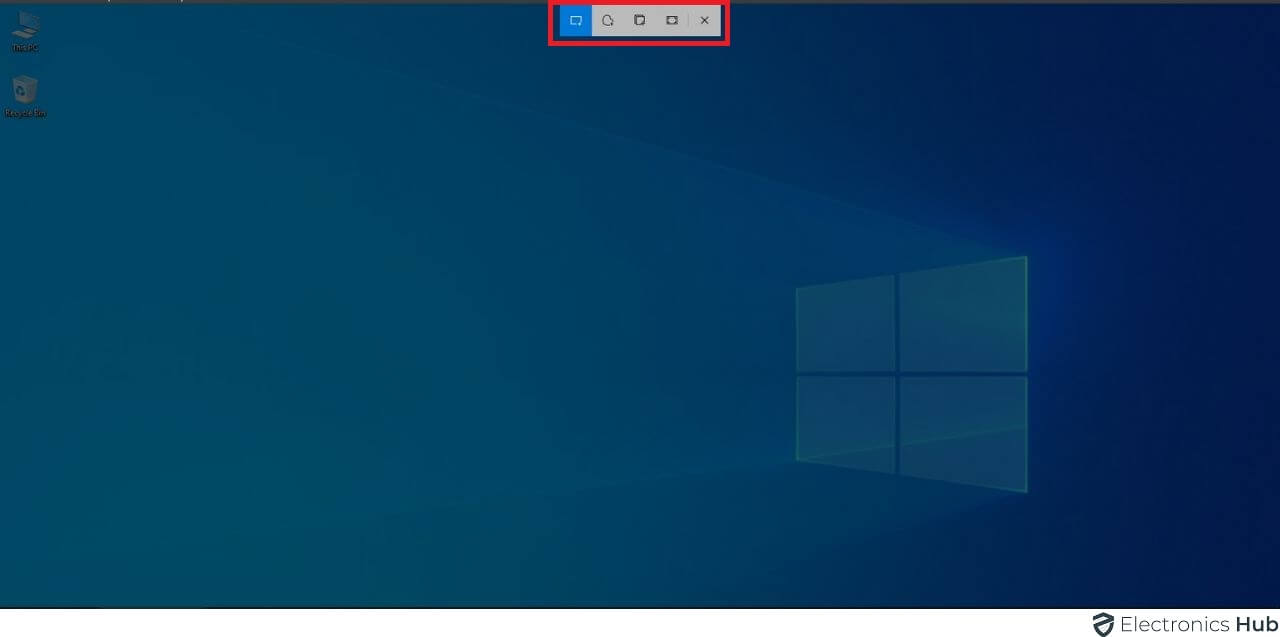
- Press the Windows key, Shift, and S to open the Snip & Sketch tool.
- Choose the desired snip type:
- Rectangular: Drag the cursor to select an area.
- Freeform: Create a custom shape.
- Window: Click on the specific window.
- Full screen: Press Enter.
- The Snip & Sketch tool will capture the screenshot.
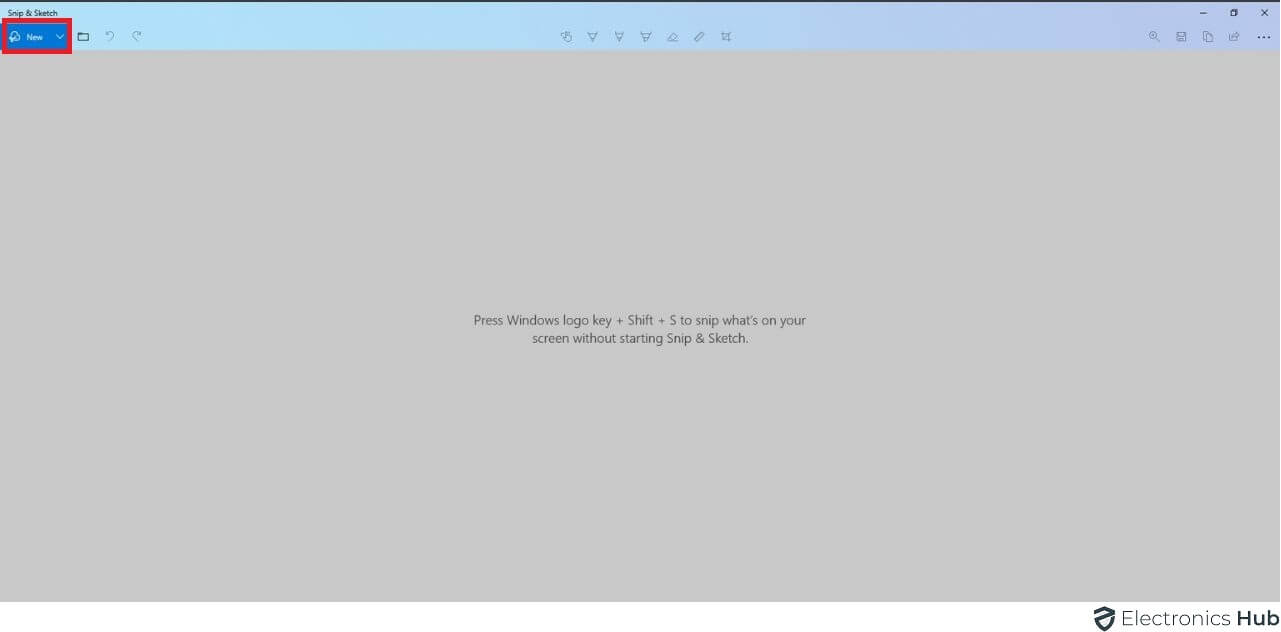
- A preview of the screenshot will open in the Snip & Sketch tool.
- Save, share, or edit the screenshot as needed directly within the tool.
3. Take a Screenshot with Third Party Apps
a. Take a Screenshot with “Snagit”
Just like most other programs, Snagit is a 3rd party program designed to replace the default screenshot programs and offers many additional features that are missing from the default one. For example, you can capture images as well as videos from your screen with the help of Snagit software. You also get to control how the software works when you are taking a screenshot.
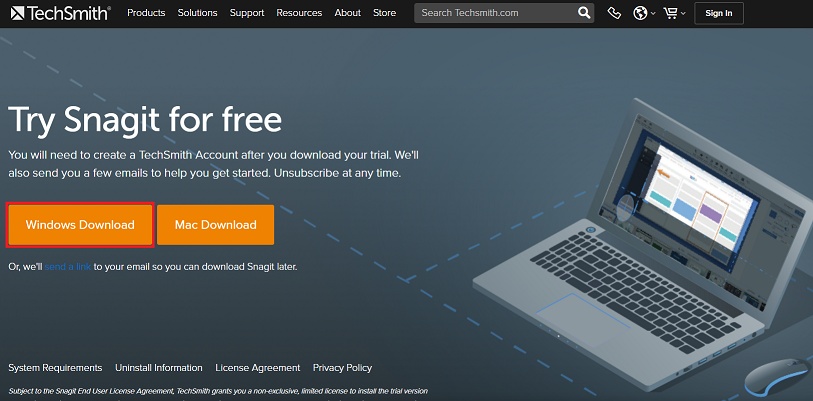
Snagit offers pretty basic controls which are easily accessible by everyone. The program features a giant red button that triggers the capture mode. After that, it is pretty similar to default Windows programs as you need to capture the section by cropping the display. You can also set up a few presets in the app as well as get access to an in-app editor for post-processing the captured screenshot.
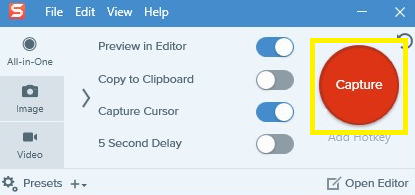

Snagit is a premium software and offers a free trial period. In that, you can test the software and check whether it is ideal for your requirements or not before purchasing it.
b. Take a Screenshot with “GIMP”
- Download and install GIMP on your laptop.
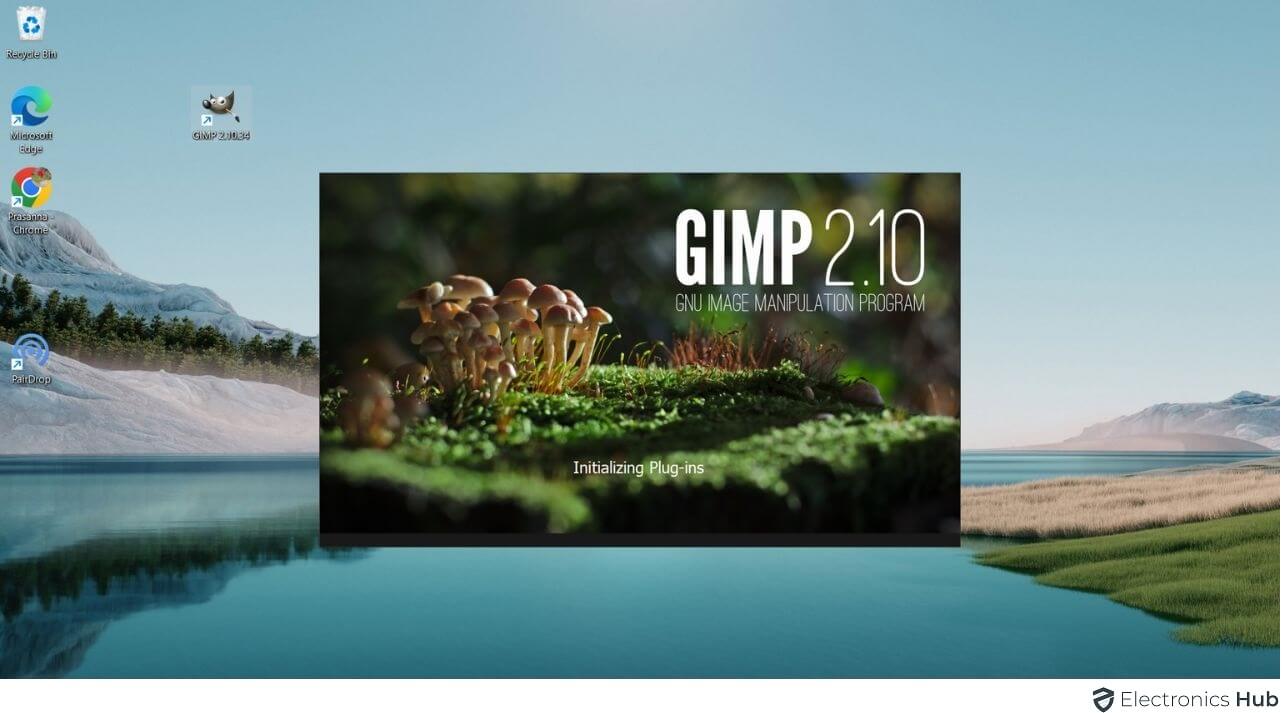
- Open what you want to screenshot.
- Launch GIMP.
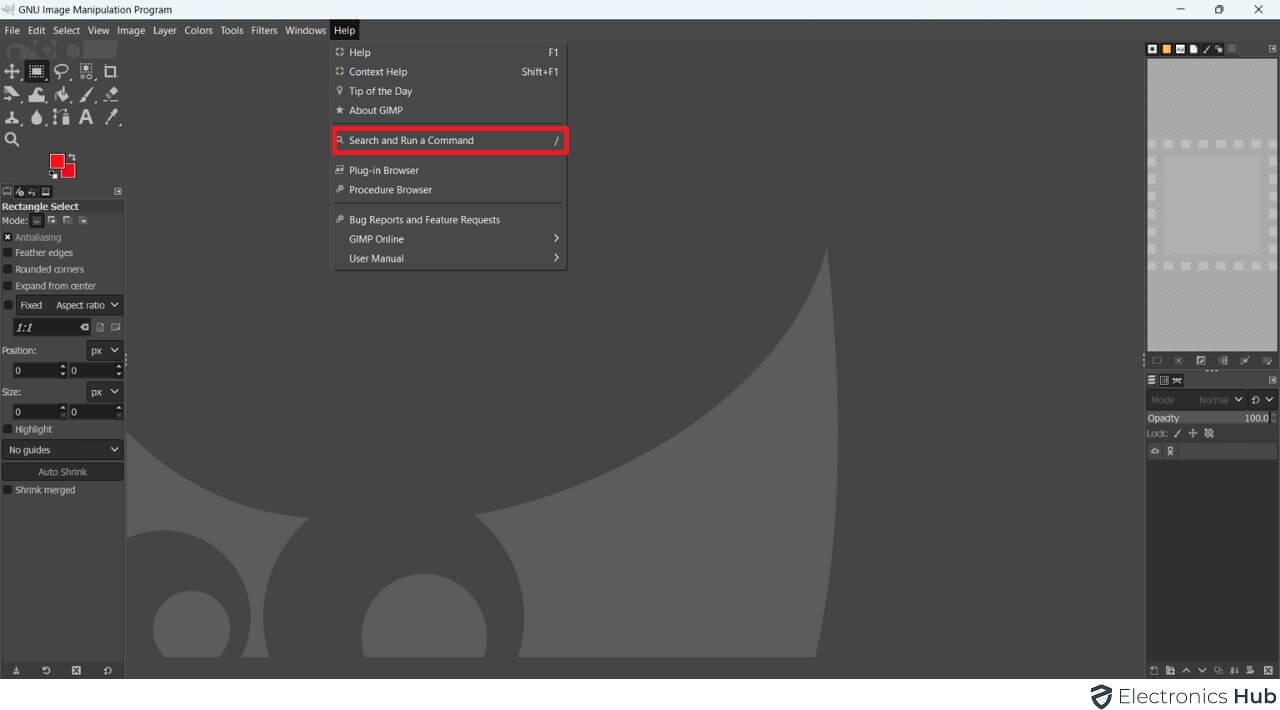
- Go to Help > Search Bar > Screenshot.
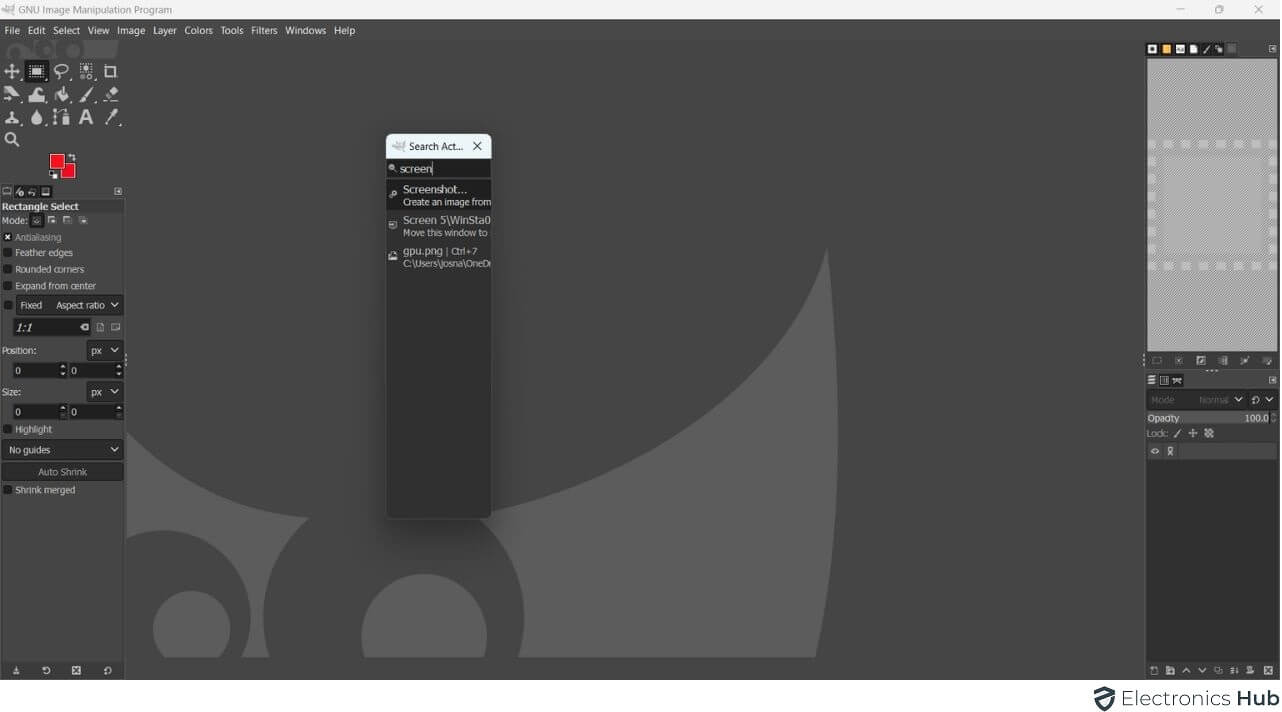
- Choose what you want to capture: whole screen, active window, or a specific area.
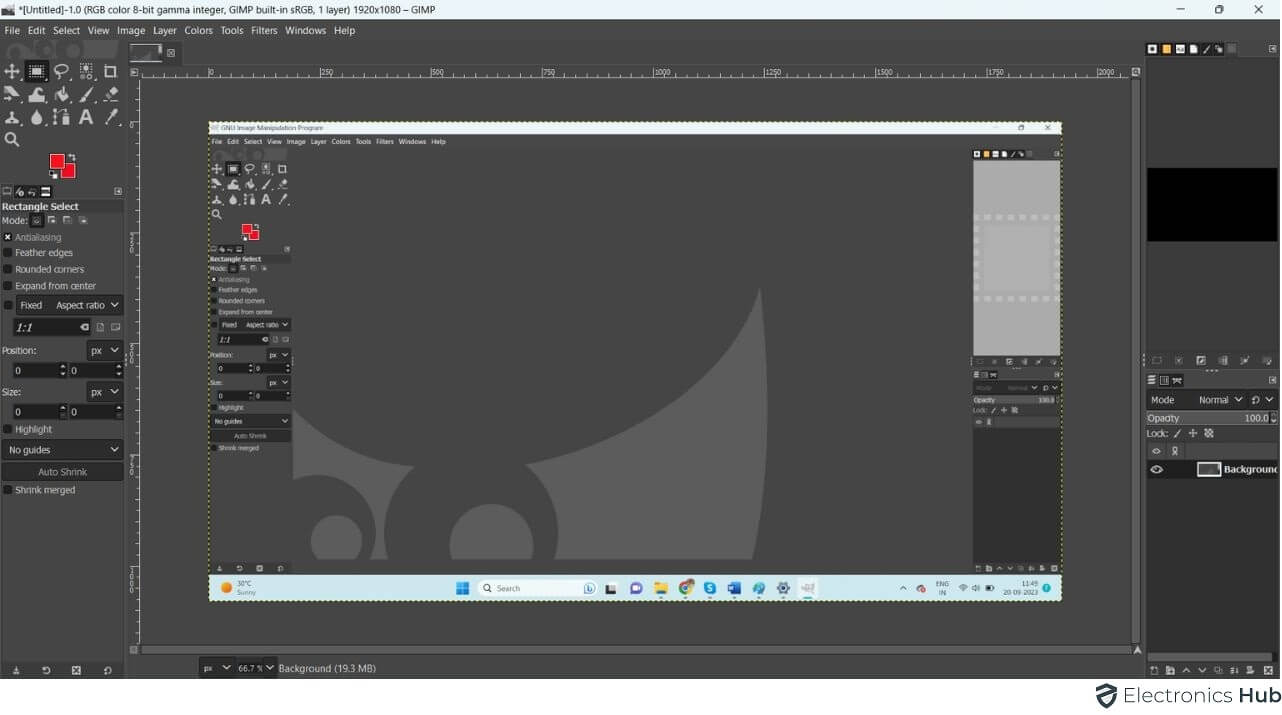
- Click Capture.
- The screenshot opens in GIMP.
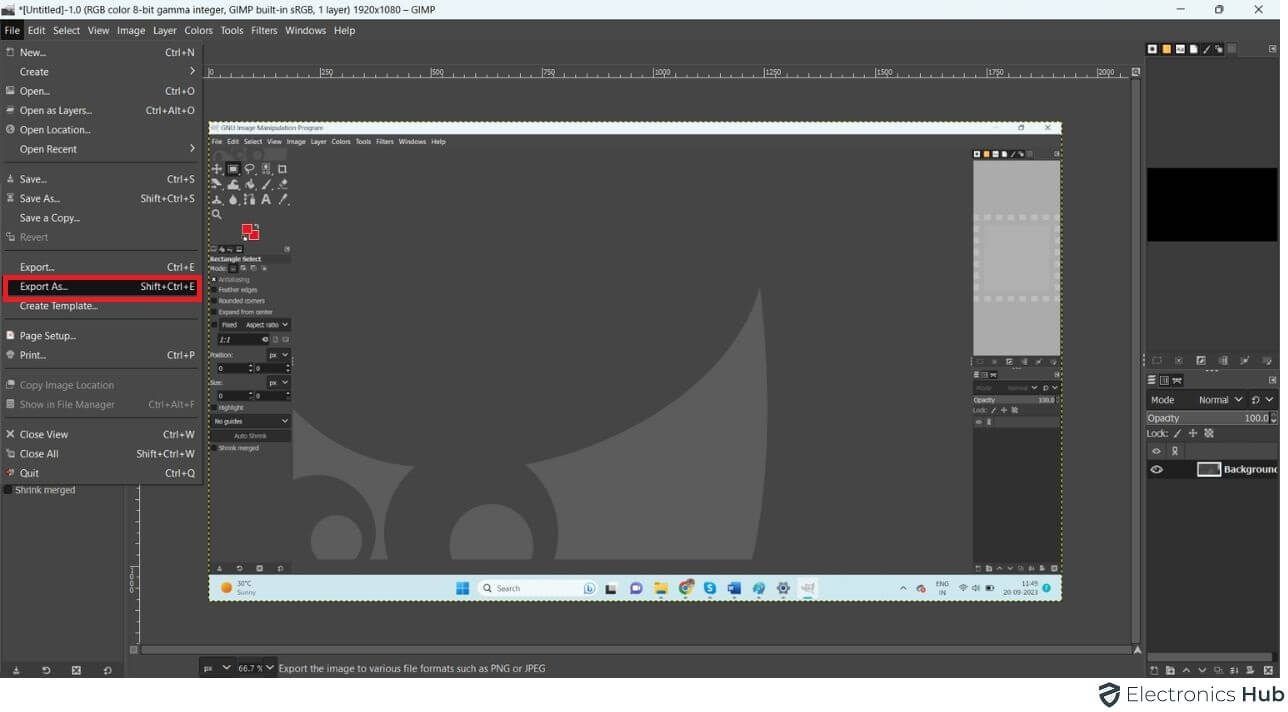
- Save, share, or edit it in GIMP as needed.
c. Take a Screenshot with “Easeus Screenshot”
- Download and install the EaseUS Screenshot app on your laptop.
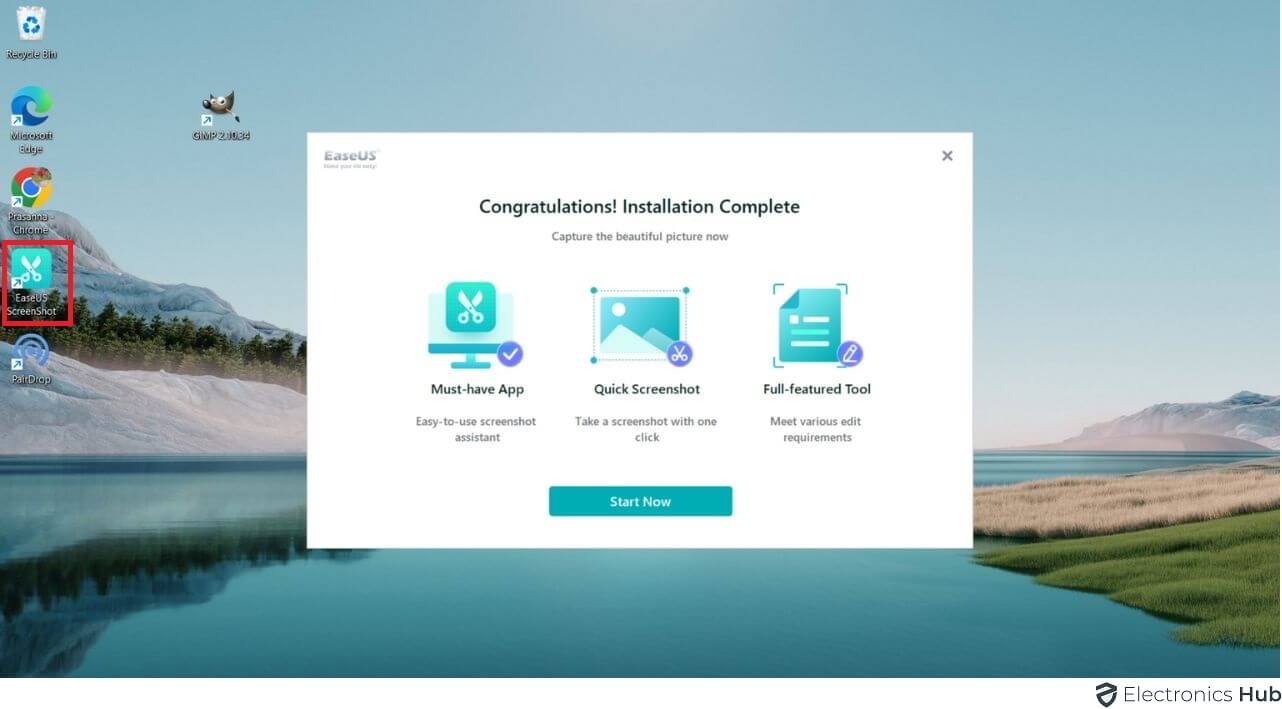
- Open the web page or app you want to capture.
- Launch EaseUS Screenshot.
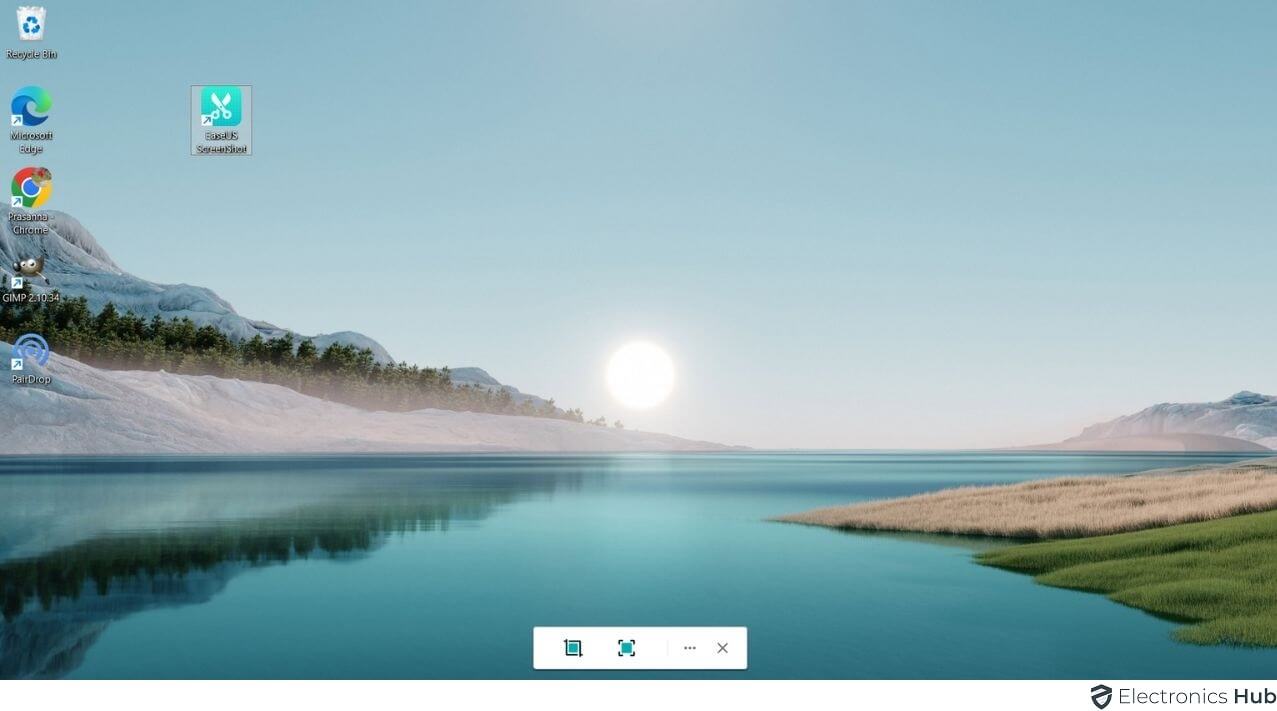
- Choose your screenshot type:
- Full screen
- Window
- Region (select an area)
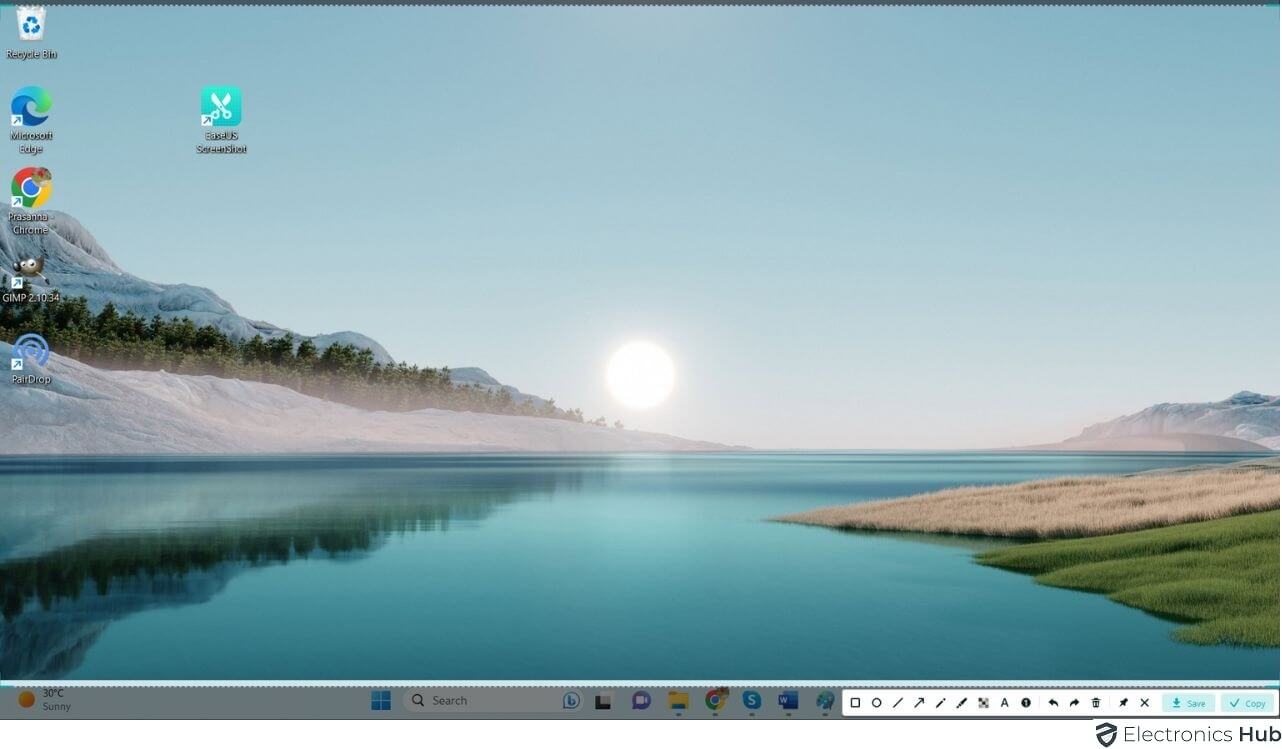
- Click Capture to take the screenshot.
- The screenshot is saved to your computer by default, or you can save it to a different location or share it on social media.
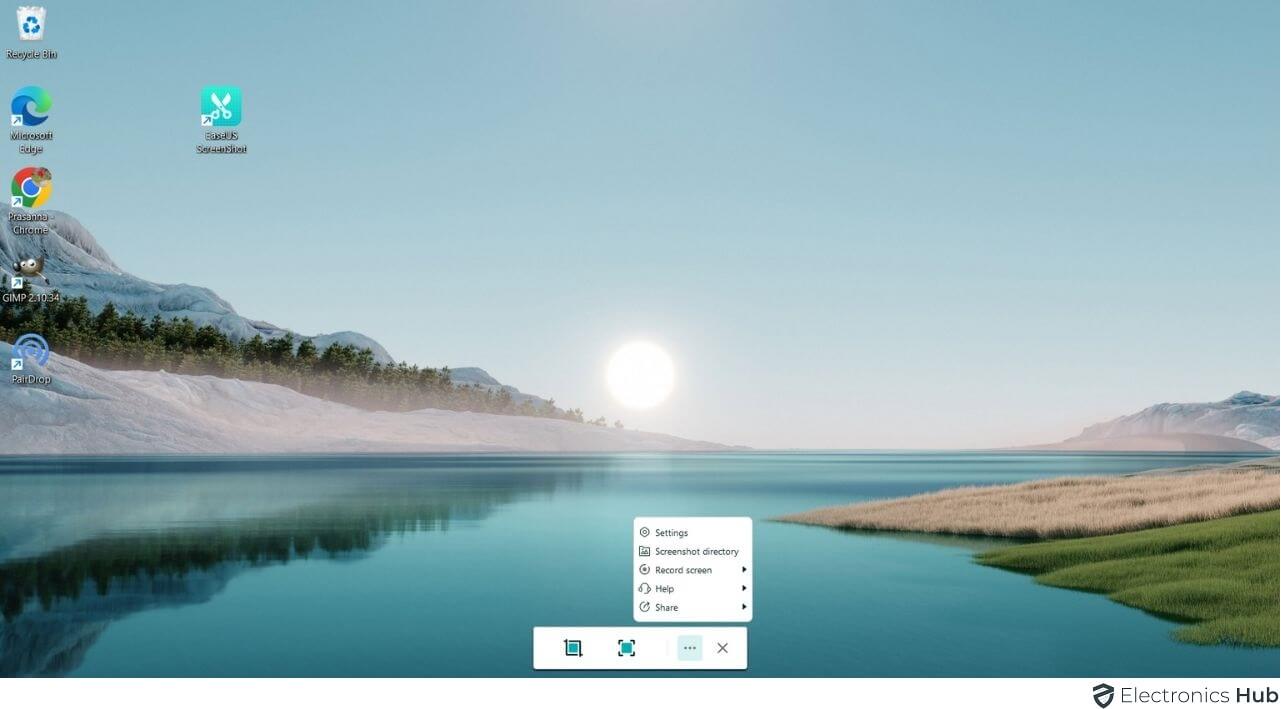
d. Take a Screenshot with “Tweakshot Screenshot”
- Download and install TweakShot Screenshot on your laptop.

- Open the web page or app you want to capture.
- Launch TweakShot Screenshot.
- Choose your screenshot type:
- Full screen
- Window
- Region (select an area)

- Webpage (captures entire web pages)
- Click Capture to take the screenshot.
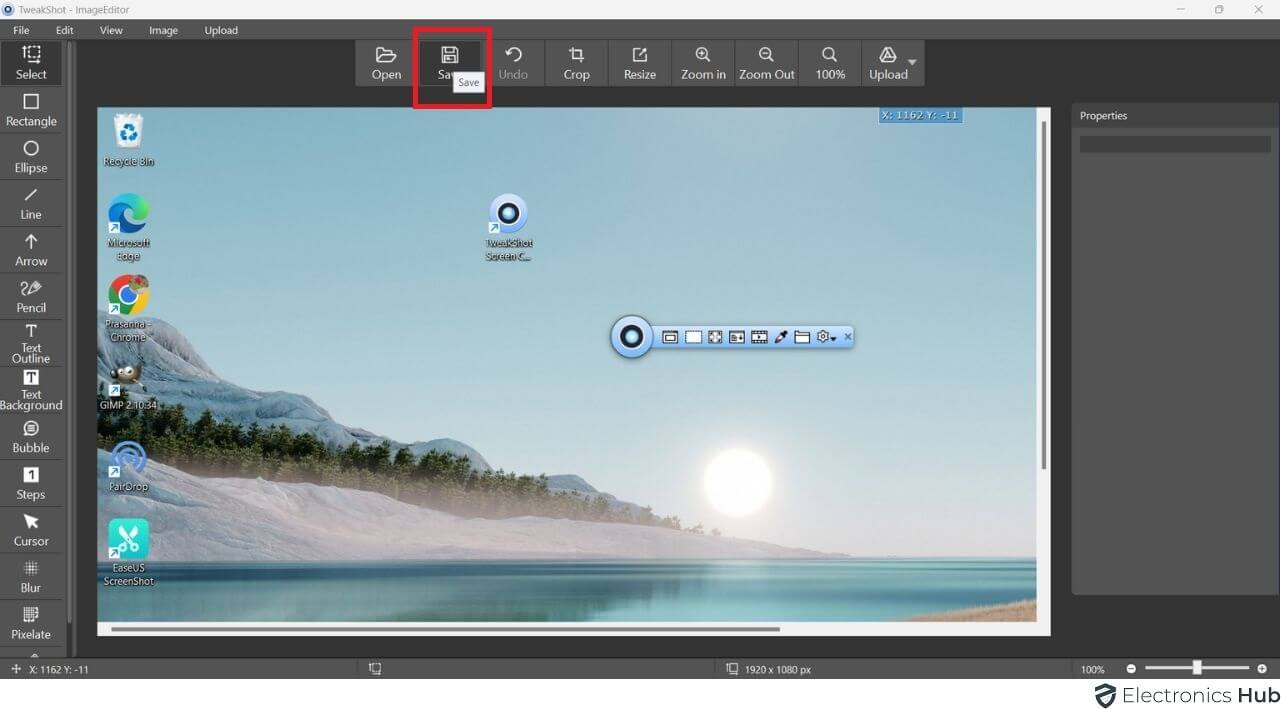
- The screenshot is saved to your computer by default, or you can save it elsewhere or share it on social media.
Screenshot on HP Laptop – FAQs
Ans: To take a screenshot on an HP laptop, you can press the “PrtScn” (Print Screen) key. This will capture the entire screen.
Ans: Yes, you can capture the active window by pressing “Alt + PrtScn.” This captures only the window currently in focus.
Ans: You can quickly open “Snip & Sketch” by pressing “Win + Shift + S” and then selecting the area you want to capture.
Ans: “PrtScn” captures the entire screen, while “Alt + PrtScn” captures only the active window. This allows you to take screenshots of specific windows or dialog boxes.
Ans: You can capture screenshots of videos or DVDs playing on your HP laptop by pausing the video and then using the standard screenshot methods. However, some video playback software may prevent this.
Ans: To capture a screenshot of a scrolling webpage, you can use browser extensions like “Full Page Screen Capture” or dedicated screen capture software that offers scrolling capture functionality.
Ans: If your laptop doesn’t have a dedicated “PrtScn” key, you can often use “Fn + Windows + Spacebar” to capture the entire screen or “Fn + Windows + Shift + S” for region capture.
Conclusion
In conclusion, taking screenshots on your HP laptop is a versatile process with multiple methods at your disposal. The built-in Windows tools, like the Print Screen key and Snipping Tool, offer straightforward options for capturing your screen or specific areas. For those seeking more advanced features and capabilities, third-party software tools like Snagit, GIMP, EaseUS Screenshot, and TweakShot Screenshot provide added functionalities.
These include capturing scrolling web pages, annotating screenshots, and direct social media sharing. The choice of method ultimately depends on your specific needs and preferences. You can choose the easy built-in tools or fancier third-party ones for taking screenshots on your HP laptop. Either way, it’s flexible and suits your needs.
