Want to make mailing labels quickly from Excel? Printing labels from Excel can be a time-saving and efficient way to generate mailing labels for a variety of purposes. Whether you’re sending out invitations, shipping packages, or organizing files, utilizing Excel’s data alongside Microsoft Word’s mail merge feature streamlines the process. Let’s explore the steps to seamlessly print labels from Excel, ensuring accuracy and professionalism in your labeling tasks.
Outline
ToggleHow To Print Labels From Excel?
Printing labels from Excel can make mailing easier and ensure accuracy. However, Excel doesn’t support direct label printing. Yet, you can do it with Microsoft Word’s mail merge. This feature helps transfer Excel data to Word for printing labels.
Step 1: Prepare Label Data In Excel For Printing
Before using the Microsoft Word mail merge tool to print labels, you need to prepare your label data in Excel. Here are the key points to keep in mind during data preparation:
Note: If you’ve already prepared your data, you can skip to the next step.
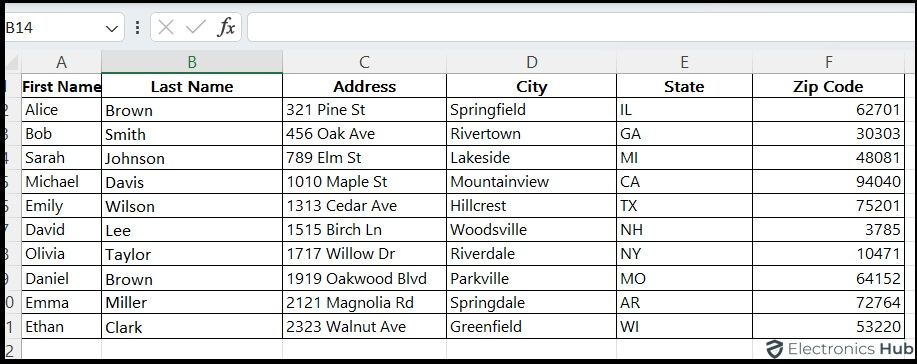
- Ensure your data is well organized within an Excel spreadsheet. The first row should contain clear and concise column headers, such as “First Name,” “Last Name,” and “Street Address.”
- For this demonstration, we’ll assume your spreadsheet holds columns for separate names as First Name and Last Name, Street Address, City, State, and Zip Code.
- Each row in your spreadsheet should represent the information for a single recipient.
- Guarantee the Zip Code column is formatted as a number. Select the entire Zip Code column and change the format to “Number.”
- Once your data is prepared, save your Excel spreadsheet for future reference.
Step 2: Use the Word Mail Merge Tool to create labels
Once your Excel workbook file is prepared, it’s time to use the Mail Merge feature in Microsoft Word to create and print labels.
- Launch Microsoft Word and create a new blank document.
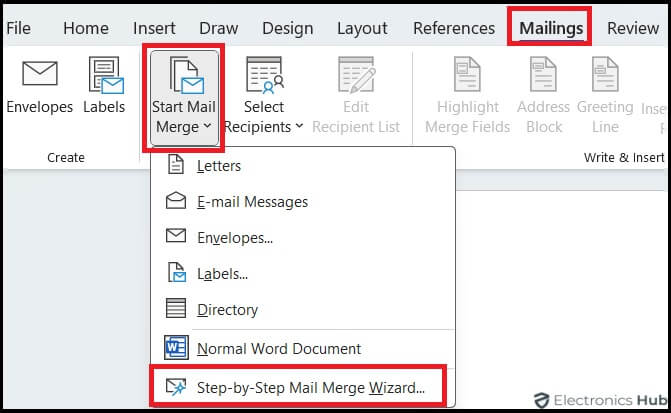
- Navigate to the Mailings tab in the ribbon. Click on Start Mail Merge and choose Step-by-Step Mail Merge Wizard.
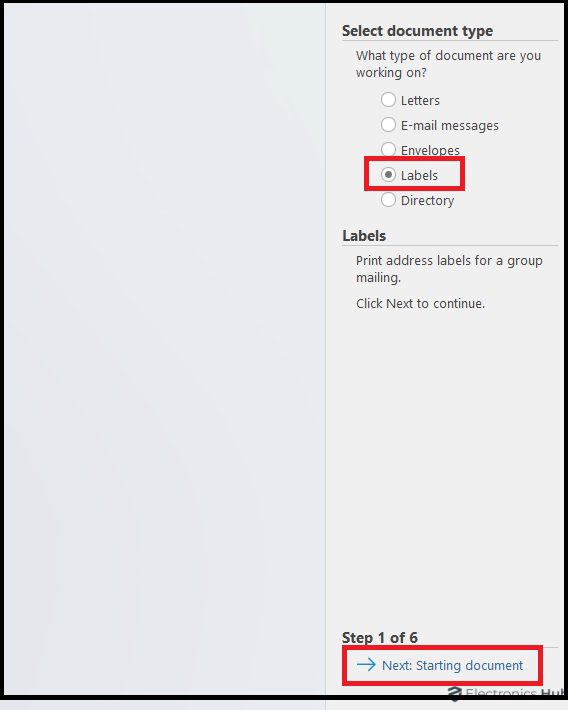
- In the Mailings menu, select Labels as the document type.
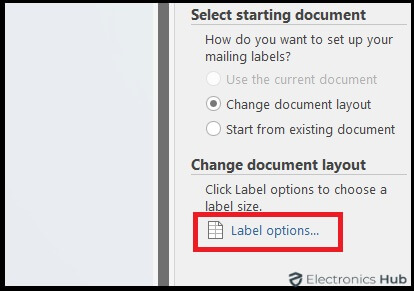
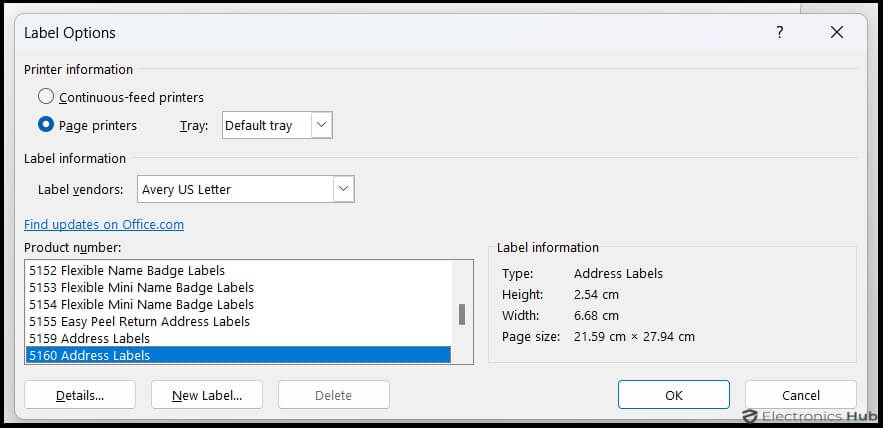
- Click on the “Starting document” and then select “Label Options”. Here, you can choose the layout of your labels based on the vendor and product number matching your specific label sheet.
Here, we’ll choose “Avery US Letter” for Label vendors and “5160 Address Labels” for Product number (common and widely available). However, feel free to select the options matching your specific label brand and type.
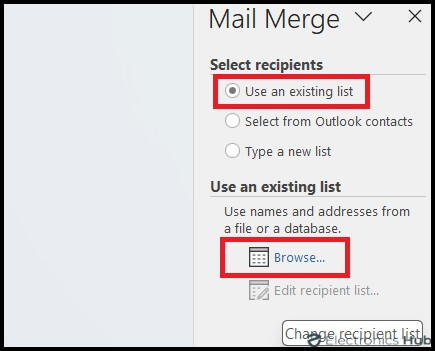
- Next click on “Select recipients.” and choose “Use an existing list”.
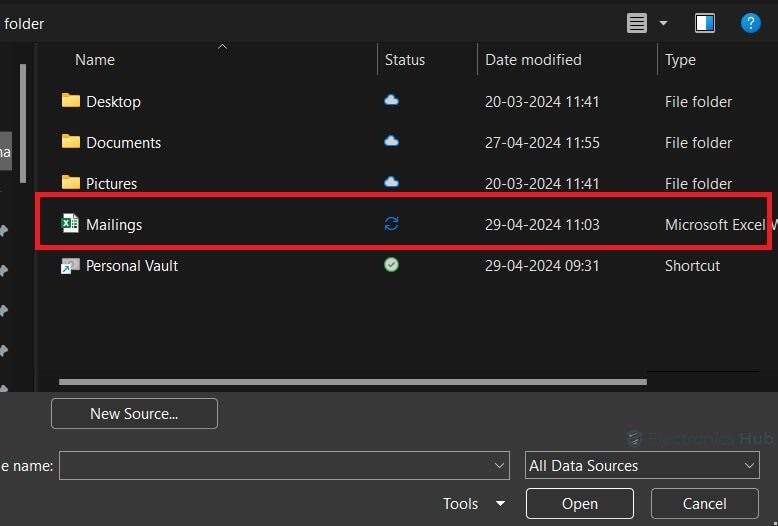
- Browse and select the Excel spreadsheet containing your address list (the one you prepared earlier).
- Click OK twice to proceed.
Step 3: Add Address Block And Finish Merge
We’re at the final step of printing labels from Excel with Microsoft Word’s mail merge feature. For address labels, we’ll insert an Address Block merge field and finish the merge. Here’s how:
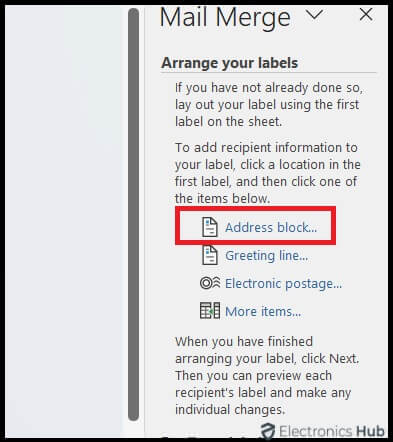
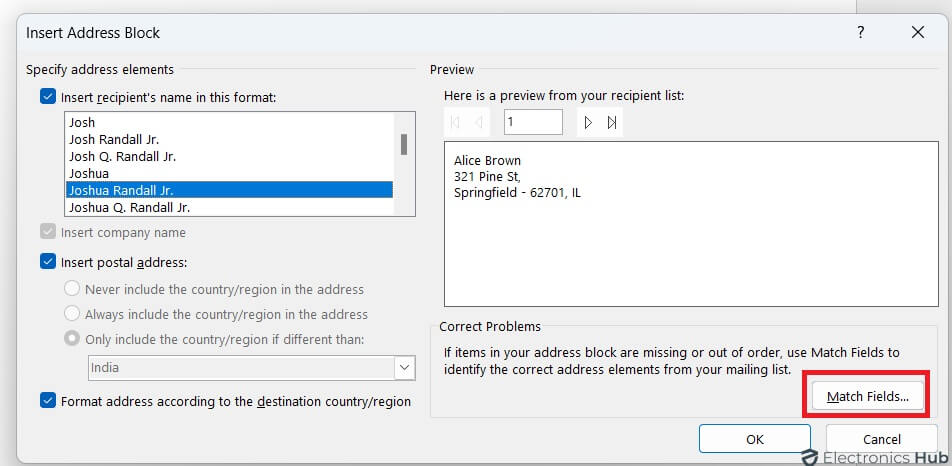
- Click on Arrange your labels and then select Address block to insert recipient information into the label layout.
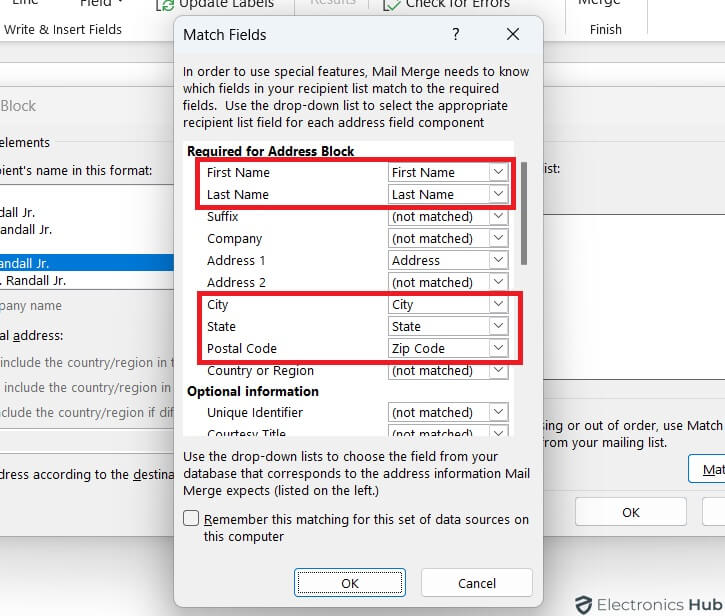
- In the Insert Address Block dialog box, click the “Match Fields” button.
- Verify that the corresponding fields from your Excel data (First Name, Last Name, etc.) match the available fields in Word.
- Click OK if everything matches.
- Click OK again in the Insert Address Block dialog.
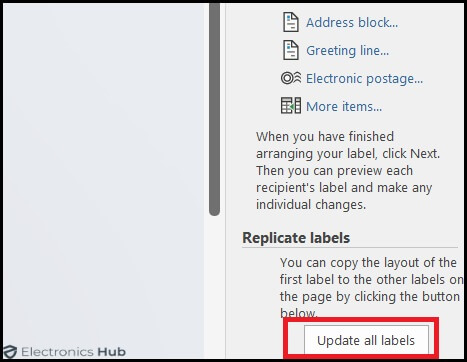
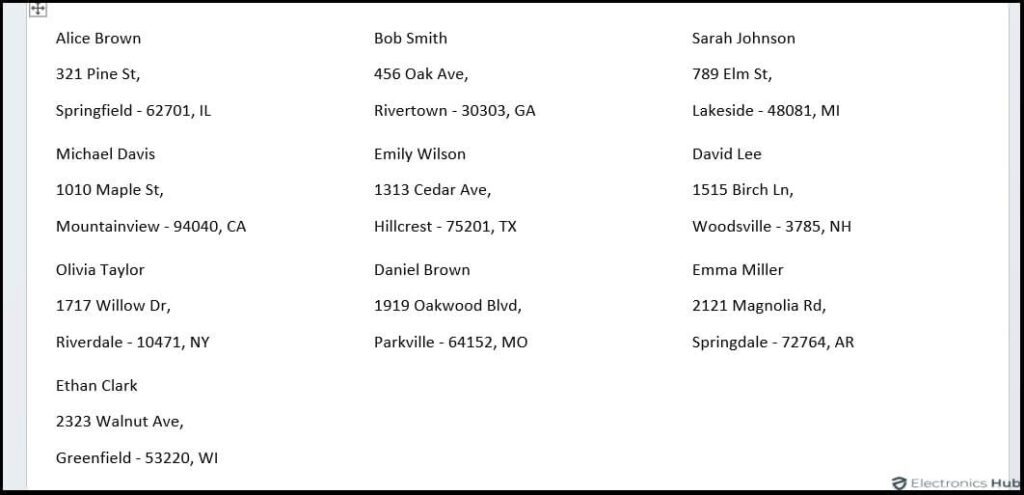
- Now, select Update all labels to populate all the labels in the document with your data.
- Select “Preview your labels” to review the layout and edit details like paragraph spacing if needed.
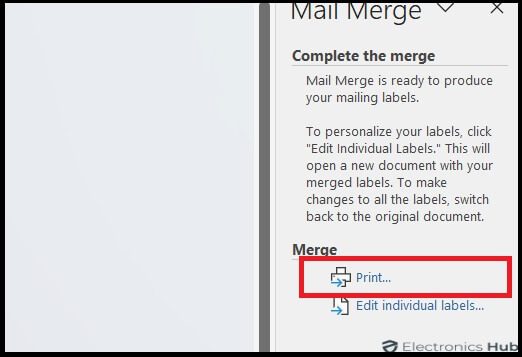
- Finally, click on “Complete the Merge” and choose Print. Review and confirm print settings before clicking OK to print your labels.
Note: If you plan to use this label template again in the future, save the Word document for easy access.
How To Print Labels From Excel On Mac?
Mac users can also print labels from Excel using the Mail Merge feature in Microsoft Word, but the steps are slightly different compared to Windows. Once you have prepared your label data in Excel, open a blank document in Word and follow these steps:
- Navigate to the Mailings tab in the ribbon. Click on Start Mail Merge and choose Labels.
- In the Label Options dialog box, select your label vendor from the Label products list. Match the Product number with the number on your specific label sheet package. Click OK.
- Click File and select Save to save your Word document with the label layout.
- Go back to the Mailings tab and click Select Recipients. Choose Use an existing list.
- Browse and select the Excel spreadsheet containing your address list (the one you prepared earlier).
- Click OK twice to proceed.
- In the Mailings tab, click on Insert Merge Field.
- Select the fields you want to appear on your labels (e.g., First Name, Last Name, Address, etc.). Click OK to insert each field.
- Format the text and layout of the first label to match your desired style. This will automatically apply to all labels.
- In the Mailings tab, click Update Labels to populate all the labels in the document with your Excel data.
- Click on Preview Results to review the labels. You can use Preview Results again to add or remove merge fields as needed.
- Click on Update Labels if you make any changes.
- Once the labels look perfect, click on Finish & Merge and choose Print Documents. Review the print settings before clicking Print to create your labels.
Tips To Print Labels From Excel
When printing labels from Excel using the Mail Merge feature in Microsoft Word, follow these tips for a smooth process:
- Match Column Names: Make sure the column names in Excel match the field names for your labels in Word. This helps Word use the data correctly during the merge.
- Data Location: Put all data to be merged in the first sheet of your Excel spreadsheet. Word only accesses data from the first sheet during the mail merge.
- Format Postal Codes: Format postal code data correctly in Excel so Word can read the values properly. For example, format postal codes as text or numbers as needed.
- Local Storage: Store the Excel spreadsheet for the mail merge on your local machine. This ensures Word can easily access the data without network or sharing issues.
- Preparation Before Merge: Complete any changes or additions to your spreadsheet before connecting it to your mail merge document in Word. This helps avoid discrepancies or errors during the merge.
Note: To import information from Excel into Word, use a comma-separated value (.csv) or text (.txt) file and the Text Import Wizard in Excel.
FAQs:
No, you cannot print mailing labels directly from Excel. Instead, you use the mail merge method in Word to create address labels. After preparing your data in Excel and completing the mail merge process, you can review and print the labels from the Word document.
In Excel, a label typically refers to text entered into a cell. When this text is placed next to a continuous list of values, Excel interprets it as a ‘tag’ representing that range of values. These labels can be used in formulas instead of direct cell references.
Excel doesn’t have a dedicated “Mailings” tab like Word, but you can achieve similar results using the “Mail Merge” feature.
To enable the mailing tab in Excel 365, follow these steps:
* Click on “Options” and then select “Customize Ribbon.“
* In the right column, ensure that the “Mailings” tab is checked. If it’s not, check it and click “OK.”
* If the “Mailings” tab is still not visible after following these steps, you may want to try repairing your Office installation.
Mail merge allows you to generate a set of personalized documents, such as a form letter customized to address each recipient by name. This process involves associating the document with a data source, such as a list, spreadsheet, or database.
Conclusion
Alright, that’s it! With these methods, you can now ditch the pen and use your Excel data to whip up some fancy labels in Word. No sweat, right? So, were these steps easy to follow? Let me know in the comments if you have any questions or your own label-printing hacks to share!

