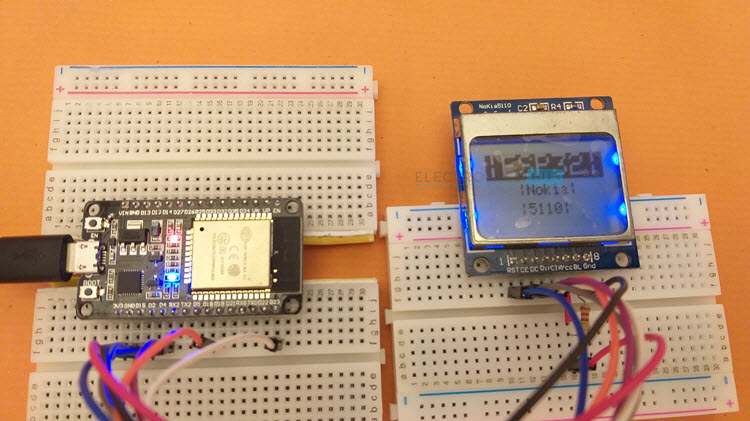
In this project, we will learn how to interface Nokia 5110 LCD with ESP32 DevKit Development Board. We will see a little bit about the Nokia 5110 LCD, the PCD8544 Driver IC from Phillips, how the ESP32 Nokia 5110 Interface works and also display some text and graphics on the Nokia 5110 LCD using ESP32.

ESP32 Nokia 5110 LCD Display
Graphical Displays are very useful if you want to display animations, custom symbols, different types and sizes of fonts and many other graphic related things (shapes, symbols).
Now a days, we are getting bigger and colorful graphical displays, some even with touch screen capabilities. But what if you want a simple display with a decent resolution and lower is cost?
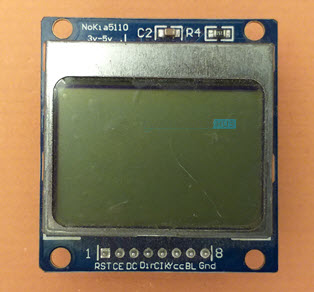
The Nokia 5110 LCD Module is a brilliant choice for this purpose. Originally used in the Nokia 3110 and Nokia 5110 Mobile Phones, the Nokia 5110 LCD has become a popular display device within the DIY community due to low cost, compact size and simple interface.
This and the support from the Arduino Community (and other open-source communities) for drivers, makes the Nokia 5110 LCD a must use display device in our projects.
A Brief Note on Nokia 5110 LCD
Nokia 5110 LCD Module is based on the PCD8544 LCD Controller IC from Phillips. It is capable of driving 84 columns and 48 rows, which unironically, is the resolution of the Nokia 5110 LCD i.e., 84×48 pixels.
The internal 504 Bytes of SRAM of PCD8544 is divided into 6 banks and each bank is capable of storing 84 Bytes of data.
So, 6 Banks * 84 Bytes = 504 Bytes.
An important thing to remember is the Nokia 5110 LCD and the PCD8544 Controller works on 3.3V supply. This won’t be an issue as we are working with ESP32, which is also 3.3V device. But if you plan to use Nokia 5110 LCD with Arduino (or other 5V microcontrollers), then you need to make proper logic level conversions.
I made a dedicate tutorial on Interfacing 5110 LCD with Arduino. Check it out if you are planning to use Nokia 5110 LCD with Arduino.
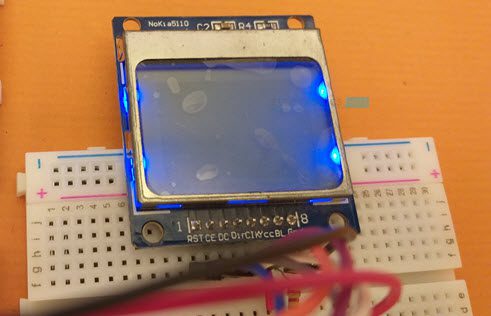
Also, the Nokia 5110 LCD Module comes with a bunch of backlight color options like: red, blue, white, yellow and green. In my case, I got the blue backlight model.
ESP32 Nokia 5110 LCD Interface
Enough theory. Let us proceed with interfacing Nokia 5110 with ESP32. But first, let us take a quick look at the pinout of the Nokia 5110 Module. The following table and image show the pinout of Nokia 5110 LCD.
|
Pin Number |
Pin Name |
Pin Description |
|
1 |
RST | External Reset Input |
| 2 | CE |
Chip Enable |
|
3 |
DC | Data / Command |
| 4 | DIN |
Serial Data Input |
|
5 |
CLK | Serial Clock Input |
| 6 | VCC |
Supply Voltage |
|
7 |
BL | Backlight Supply |
| 8 | GND |
Ground |
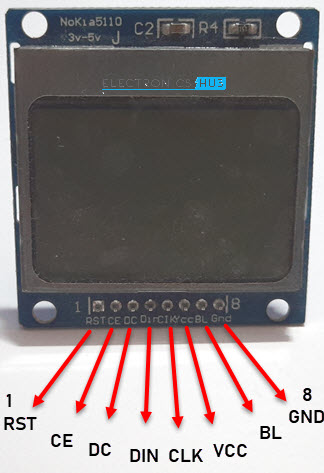
As you can see from the image, the Nokia 5110 LCD (or rather the PCD8544 Controller) uses an SPI like serial interface to communicate with a microcontroller. So, we have to use the SPI pins of the ESP32 Microcontroller.
Even though the ESP32 SoC has four SPI interfaces, two of them are tied to the flash IC. So, we are left with two hardware SPI interfaces. They are: HSPI and VSPI. You can use the following ESP32 Pinout image as a reference.
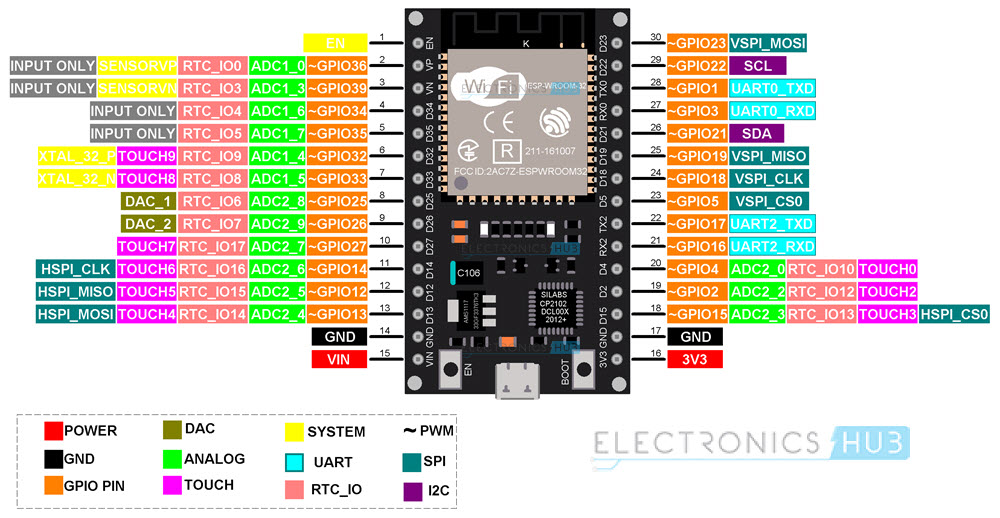
I will use the VSPI interface in this project. We need the MOSI, CLK (SCK) and CS pins from the hardware VSPI interface. The Reset (RST) and Data / Command (DC) pins of the Nokia 5110 LCD can be connected to any GPIO pins of ESP32.
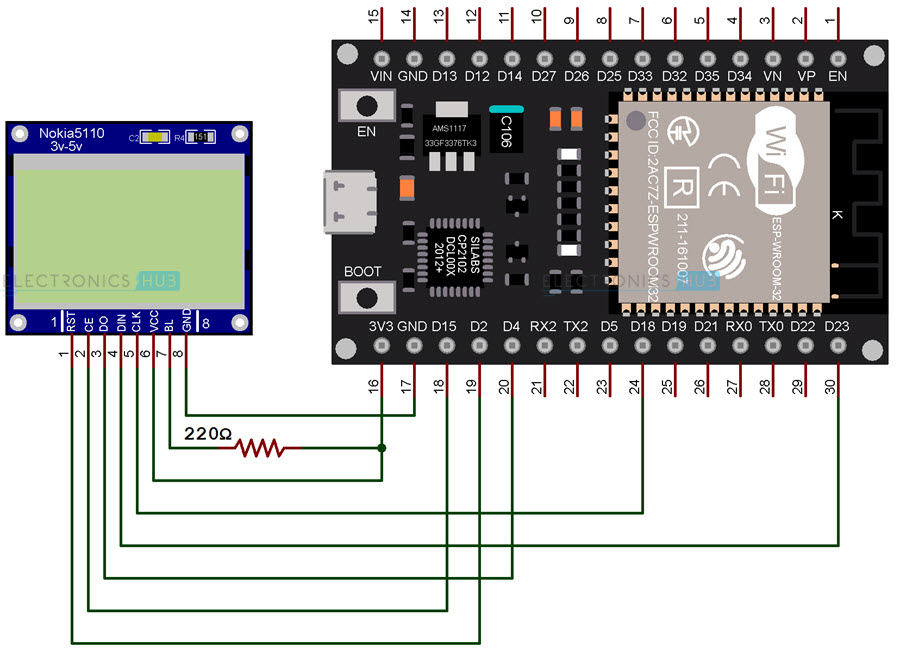
So, the final connections between ESP32 and Nokia 5110 LCD looks something like this:
|
Nokia 5110 LCD |
ESP32 DevKit Board |
|
RST |
GPIO 2 (D2) |
| CE |
GPIO 15 (D15) |
|
DC |
GPIO 4 (D4) |
| DIN |
GPIO 23 (D23) |
|
CLK |
GPIO 18 (D18) |
| VCC |
3.3V |
|
BL |
3.3V (through 220Ω Resistor) |
| GND |
GND |
NOTE: Instead of using VSPI_CS, I used HSPI_CS. But no worries.
You can another GPIO Pin to control the backlight of the LCD but I opted for always on backlight and hence I connected the ‘BL’ pin of Nokia 5110 LCD to 3.3V supply through a 220Ω current limiting resistor.
Components Required
- ESP32 DevKit Development Board
- Nokia 5110 LCD Module
- Breadboard
- Connecting Wires
- Micro-USB Cable
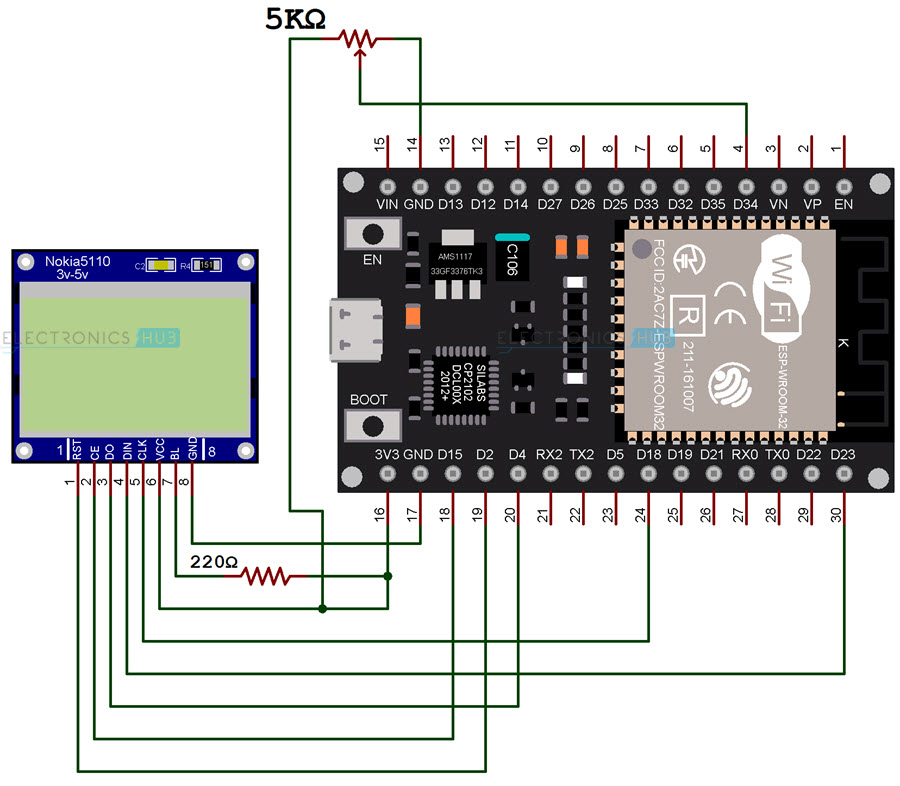
Circuit Diagram
The following image shows the connection of ESP32 Nokia 5110 LCD interface.
Preparing Arduino IDE
You need to download two libraries for Nokia 5110 LCD in the Arduino IDE. They are the device specific ‘Adafruit PCD8544 Nokia 5110 LCD Library’ and a supporting ‘Adafruit GFX’ library. If you worked with Nokia 5110 LCD and installed these libraries before, then you can skip this step.
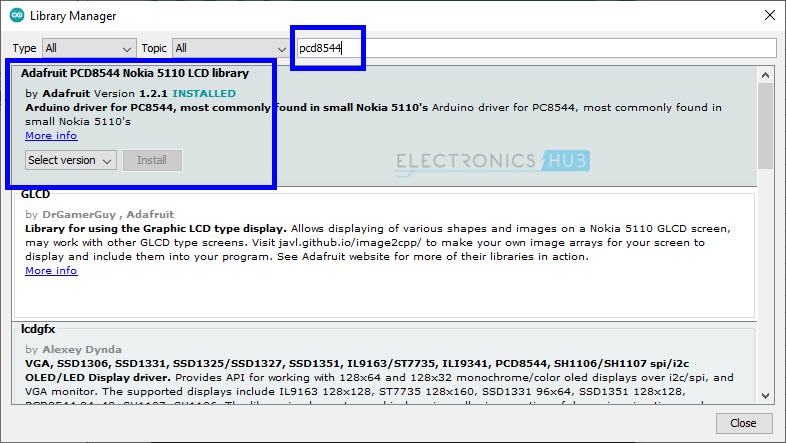
In the Arduino IDE, select Tools -> Manage Libraries. . . to open the library manager.

Search for ‘pcd8544’ using the search bar and install the ‘Adafruit PCD8544 Nokia 5110 LCD Library’.
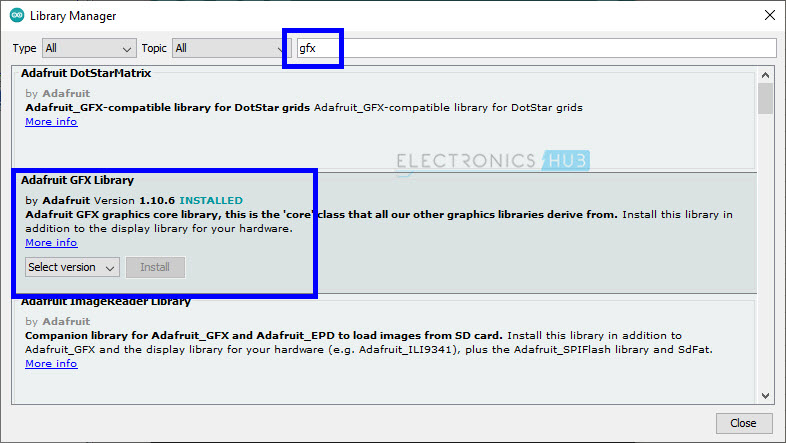
To display small graphics like different shapes and symbols, you have to use the Adafruit GFX library. Search for ‘gfx’ and install ‘Adafruit GFX’ library. After installing both the libraries, you can close the library manager.
Testing Nokia 5110 LCD with ESP32
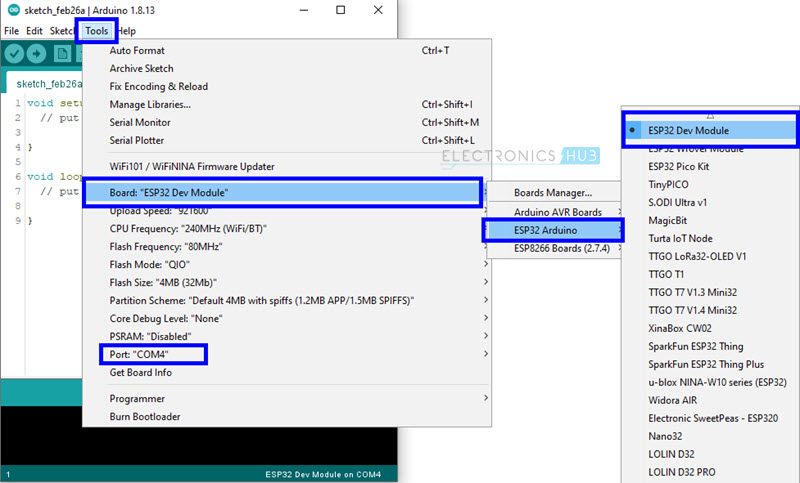
Make all the connections as mentioned earlier and connect the ESP32 to the computer. Go to Tools -> Board and make sure that ‘ESP32 Dev Module’ is selected. Also use the correct COM port.
For the first program, I am simply displaying a text on the Nokia 5110 LCD with two different sizes.
Code
This is a simple code to demonstrate how easy it is to display text on Nokia 5110 LCD using ESP32. You can try other options like display different shapes, normal text and inverted text, change the font and size etc.
Adjust Contrast of the Display
One of the useful features of Nokia 5110 LCD is you can digitally adjust the contrast of the display using a function ‘setContrast’. This is very helpful if you want a software control of the contrast rather than a physical adjustment (like in 16×2 Character LCD).
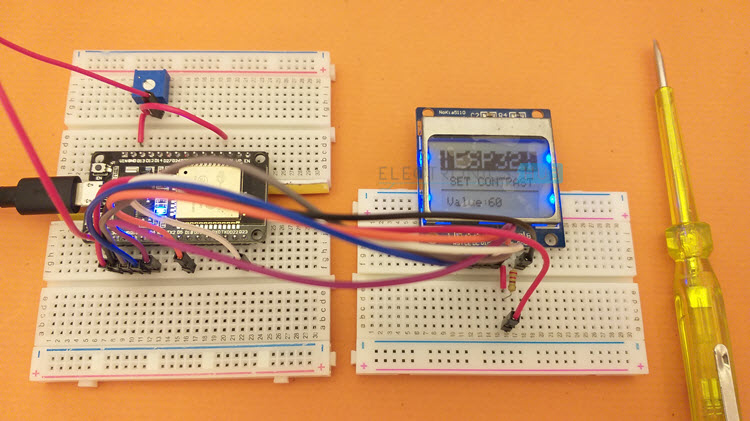
So, I made a small circuit where I connected a 5 KΩ POT to ADC1 channel 6 of ESP32. And based on the output of the ADC, I am setting the contrast of the Nokia 5110 LCD Display.
One important thing to remember is that ADC in ESP32 has 12-bit resolution. Which means the output digital values of the ADC conversion will be in the range of 0 – 4095. But the range of contrast values which the Nokia 5110 LCD can accept is between 0 and 100.
If you used ADC and PWM in Arduino before, then there is a function called ‘map’, which maps one range of numbers to another range (in this case from 0 – 4095 to 0 – 100). We have to use this function in our code.
Circuit Diagram
The following image shows the circuit for adjusting contrast of Nokia 5110 LCD using a potentiometer.
Code
Conclusion
A simple project involving ESP32 Development Board and Nokia 5110 LCD. You learned about Nokia 5110 LCD, the PCD8544 LCD Controller, how the ESP32 Nokia 5110 LCD interface works and how to display simple text on Nokia 5110 using ESP32.
