Controlling your CPU fan speed is key for your computer’s performance and longevity. Whether you’re a gamer needing to cool down during intense sessions or just want to reduce noise, adjusting the fan speed helps. This guide explains why fan speed matters and provides simple, step-by-step instructions to adjust it. We’ll cover methods like BIOS settings, software solutions, and third-party applications. This will help your computer run efficiently and stay quiet when high power isn’t needed. Let’s get started and learn how to manage your CPU fan speed.
How To Identify Which Type Of CPU Fan You Have?
There are a couple of ways to identify the CPU fan you have:
1. Physical Inspection Of The Computer
To manually identify the type of CPU fan, you’ll need to perform a physical inspection:
- Power Down And Unplug: First, make sure your computer is completely turned off and disconnected from any power sources to ensure safety.
- Open The Computer Case: Use a screwdriver to remove the screws securing the side panel of your computer case. Gently remove the panel to gain access to the internal components.
- Locate The CPU Fan: Search for the CPU cooler, which is generally a prominent metal heatsink with a fan mounted on top, positioned over the CPU.
- Identify The Fan Type: Carefully examine the fan and its mounting assembly. Look for any identifiable information such as model numbers, serial codes, or brand logos directly on the fan or its adjacent parts. These identifiers are key in determining the exact model and type of your CPU fan.
2. Utilizing System Information Software
For a non-intrusive way to identify your CPU fan, you can use software solutions that provide detailed hardware analysis:
- System Information Tool (Windows):
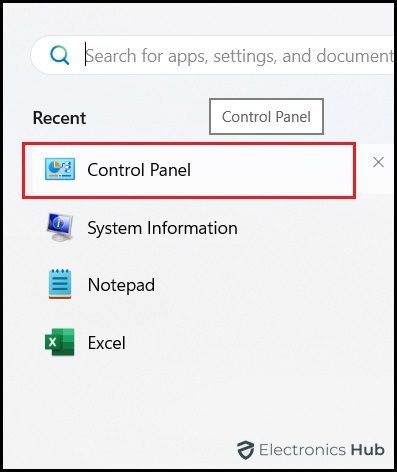
- Accessing The Tool: Press the Windows key, type “System Information,” and hit Enter to open the application.
- Finding CPU Fan Information: Within the System Information window, navigate to the ‘Hardware Resources’ or ‘Components’ sections to find details related to your CPU and cooling system. Some systems may list the fan’s specifications or type.
- CPU-Z (Third-Party Software):
- Download: Go to the official CPU-Z website to download the application. Always ensure you download from a reputable source to avoid security risks.
- Installation and Overview: Once downloaded and installed, open CPU-Z. The software will display multiple tabs each dedicated to different components of your system. While CPU-Z primarily focuses on CPU and motherboard information, it might indirectly provide clues about the fan type through the motherboard chipset or CPU power specifications.
These methods will enable you to determine the type of CPU fan installed in your system, using either direct physical inspection or detailed software analysis, ensuring you have a comprehensive understanding of your computer’s cooling setup.
How To Control CPU Fan Speed?
Here are the steps to control the CPU fan speed using the different methods:
1. Using BIOS/UEFI
- Step 1: Restart your computer and enter the BIOS/UEFI setup. This is usually done by pressing a key during the boot process, such as F2, DEL, or ESC, depending on your motherboard manufacturer.
- Step 2: Navigate to the hardware monitor or PC health status section where you can find the fan control settings.
- Step 3: Adjust the fan speed settings according to your preference. You can set them to a fixed speed or use a temperature-based curve.
- Step 4: Save your settings and exit the BIOS/UEFI. Your computer will restart with the new fan settings active.
2. Fan Controller (Windows 10)
- Step 1: Open the ‘Control Panel’ and select ‘Hardware and Sound.’
- Step 2: Under ‘Hardware and Sound,’ find and click on ‘Adjust system settings’ or ‘Power Options.’
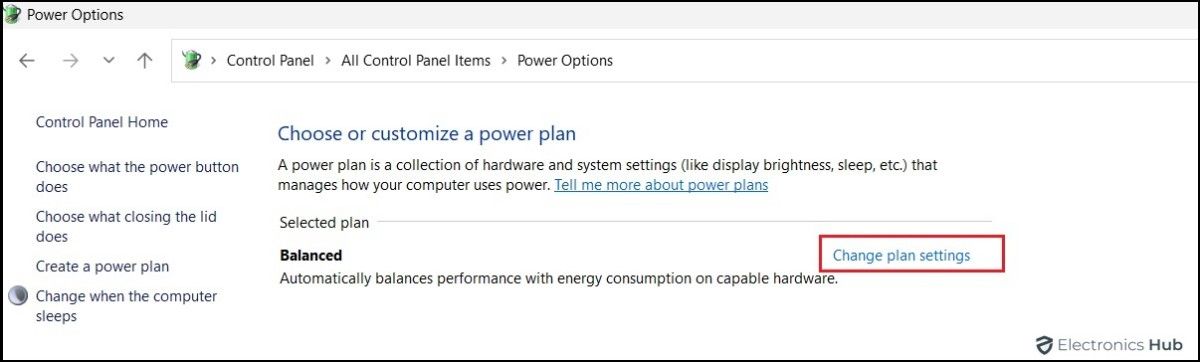
- Step 3: Within ‘Power Options,’ click on ‘Change plan settings’ next to your active power plan.
- Step 4: Click on ‘Change advanced power settings.’
- Step 5: Expand the ‘Processor power management’ section, and then the ‘System cooling policy.’ Here, you can change settings related to how aggressively the fan responds to heat.
- Step 6: Apply the changes and exit.
3. Using Control Panel Option
- Step 1: Access the ‘Control Panel’ and navigate to ‘System and Security.’
- Step 2: Click on ‘System,’ then ‘Advanced system settings.’

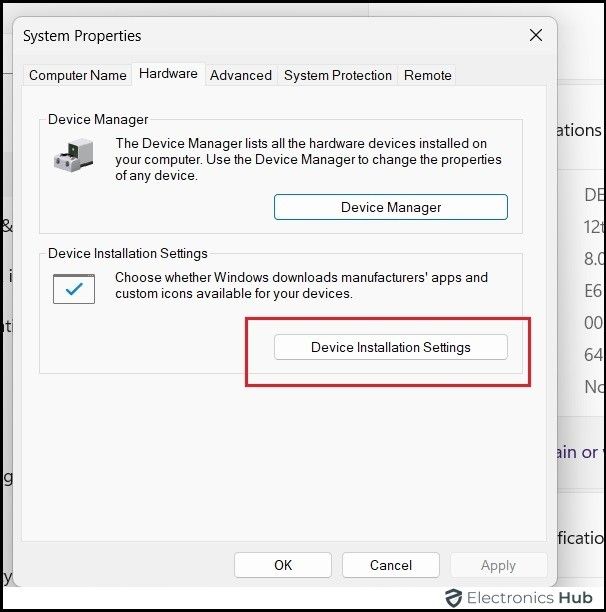
- Step 3: In the System Properties window, go to the ‘Hardware’ tab and click on ‘Device Installation Settings.’
- Step 4: Here, you can adjust settings that might affect how system cooling is managed.
- Step 5: Apply any changes and close the control panel.
4. Adjust Power Settings
- Step 1: Go to ‘Control Panel,’ and then select ‘Power Options.’

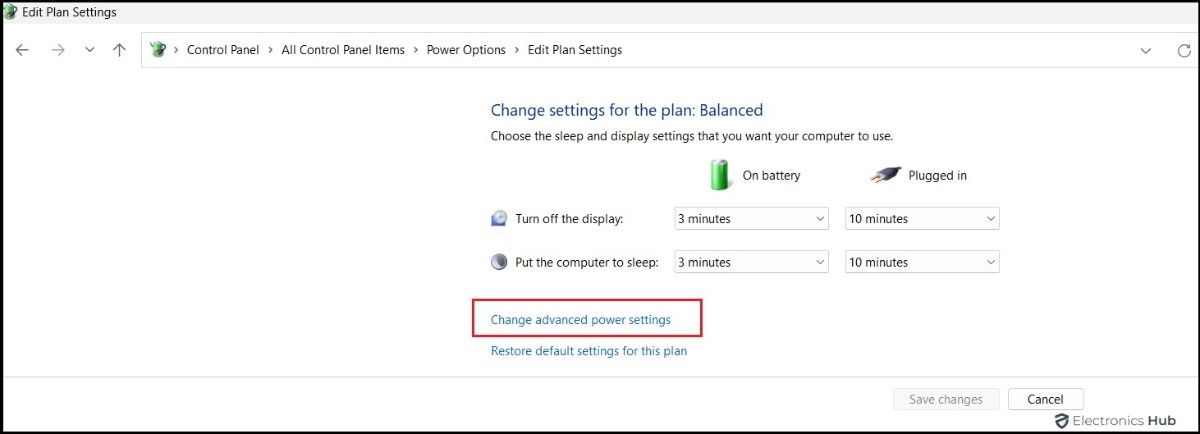
- Step 2: Choose ‘Edit Plan Settings’ next to your current power plan.
- Step 3: Click on ‘Change advanced power settings.’

- Step 4: Expand the ‘Processor power management’ settings.

- Step 5: Here you can adjust the ‘Minimum processor state’.

- Step 6: Set these according to your desired balance of performance and fan noise.
Best CPU Fan Speed Control Software
Managing your CPU fan speed is key to keeping your computer running smoothly and lasting longer. By regulating the fan speed, you prevent your system from overheating, which can prolong the life of your components. There are several programs that can help you control the CPU fan speed:
1. SpeedFan
SpeedFan is a popular fan control software that’s very versatile. It helps monitor and manage your system’s fans, voltages, and temperatures. With SpeedFan, you can set fan speeds to change based on certain temperature levels. This helps keep your CPU cool while reducing noise.
A major benefit of SpeedFan is that it works with many motherboards and sensors. It gives you detailed info about your system’s health, which is great for adjusting your fan settings. Also, SpeedFan lets you set up custom fan profiles. This means you can have specific settings for different activities, like gaming or video editing.
2. HWiNFO
HWiNFO is a powerful tool that provides extensive system information and includes fan control features. It delivers in-depth details on your computer’s hardware, such as temperature, voltage, and fan speeds. This allows you to monitor and adjust the fans as needed.
The software’s comprehensive sensor support makes it ideal for users who need precise information about their system’s performance. Despite its depth, HWiNFO’s fan control functions are user-friendly and suitable for both novices and seasoned users looking to optimize their system’s cooling efficiently.
3. Argus Monitor
Argus Monitor is a dependable and easy-to-use software for controlling fan speeds. It helps keep your computer cool and quiet. Besides fan control, it monitors temperatures, analyzes hard drives with SMART technology, and checks system stability.
A key feature of the Argus Monitor is its custom fan curves. These let you adjust fan speeds based on temperatures from different sensors. This feature helps keep your system cool while minimizing noise. The software can also manage fans connected to PWM headers, making it adaptable for different computer setups.
4. CAM (NZXT CAM)
CAM, developed by NZXT, is an all-in-one monitoring and control software. It features an intuitive interface and a variety of tools. CAM is best known for monitoring systems, but it also provides strong fan control options.
You can set up custom fan profiles with CAM based on temperature levels. This helps ensure that fans increase speed when necessary and stay quiet when the system is idle. Additionally, CAM supports RGB lighting control. This makes it ideal for users with NZXT gear who want a single solution for managing both fans and lighting. The user-friendly interface of CAM makes it simple to keep an eye on your system’s performance and tweak fan settings as needed.
5. MSI Afterburner
MSI Afterburner is favored by gamers and overclockers for its robust GPU overclocking abilities. Besides this, it offers fan control options to adjust GPU and CPU fan speeds.
You can set custom fan curves with MSI Afterburner, which adjust based on temperature, ensuring optimal cooling. The software includes real-time monitoring and an on-screen display to monitor system performance during gaming or other demanding activities. While it’s especially beneficial for those with MSI hardware, MSI Afterburner works well with various systems.
6. ASUS Fan Xpert
ASUS Fan Xpert is a fan control software made for ASUS motherboards. It lets you control your system’s fans in detail. You can create custom profiles and change fan speeds based on temperatures.
The main feature of Fan Xpert is its automatic fan tuning. This adjusts fan speeds to get the best mix of cooling and noise. The software also includes advanced fan calibration to make sure your fans work efficiently. Because it works with ASUS AI Suite, Fan Xpert is a great choice for ASUS motherboard users who want full control over their system’s cooling.
FAQs:
Controlling CPU fan speed is important for balancing temperature and noise. CPUs generate heat, and fans help cool them down. But, fans can be noisy when they spin fast. By adjusting fan speed, you can keep the CPU cool during heavy use by increasing the fan speed. During lighter tasks, you can slow the fan down to reduce noise. This helps maintain a balance between cooling and noise levels.
You can check your CPU temperature using the BIOS or third-party software. The BIOS method is quick but only shows the temperature at startup. For ongoing monitoring, use free programs like Core Temp, HWMonitor, or HWiNFO. These tools display your CPU temperature and provide additional details like fan speed and core temperatures.
Overclocking affects CPU fan speed requirements because it makes the CPU work faster, generating more heat. To prevent overheating and potential damage, the fan must work harder, often spinning faster and becoming louder during demanding tasks. You might need to adjust your fan curve in the BIOS to ensure proper cooling at higher clock speeds.
CPU fan speed issues can arise from dust buildup, poor ventilation, or BIOS settings. To fix this, first turn off and unplug your computer, then clean the vents and fan blades with compressed air. Ensure your computer has good ventilation. If the fan is still noisy or slow, check your BIOS for fan speed settings. If the problem persists, consider replacing the fan.
You can control fan speed directly through the BIOS, but there are other options as well. Some motherboards come with manufacturer software for fan control, available on their support page. Third-party programs like SpeedFan can also adjust fan curves based on CPU temperature, but they need compatible motherboard hardware. If these software options don’t work, you’ll need to use the BIOS for adjustments.
Conclusion
Controlling your CPU fan speed is key for better performance and longer computer life. This guide has covered methods such as BIOS settings, software tools like SpeedFan, and hardware fan controllers. Managing fan speeds helps with cooling, reduces noise, and prevents overheating. This leads to a smoother and more efficient computing experience.
