Arduino is a microcontroller based prototyping board that runs on small DC power. A Relay is a device that helps microcontrollers (or microcontroller based boards) like Arduino to switch on or off different household appliances like motors, lights, water heaters, television and fans etc.
Today, Arduino is being used for a wide range of applications like controlling LEDs, monitoring temperature, logging data and turning on motors etc. Another important task that can be accomplished by the Arduino is controlling a 5V Relay to operate high voltage AC appliances and devices.
How To Use 5V Relay On Arduino
Arduino family of microcontrollers, like UNO, Nano and Mega etc. can be programmed to control a simple 5V relay i.e. switch it on or off on the event of pushing a button, reading the value of temperature from a thermistor or just by setting up a predefined timer.
In this project, we will see a simple circuit where an Arduino UNO will control a 5V relay, which in turn will a lamp.
Note: We have used Arduino UNO in this project as it is more popular than other Arduino boards and beginners in electronics can easily use it. If you have any other board like Arduino Nano or Arduino Mega, you can use it without any hassle.
Caution: We are going to connect 240V Mains supply (or 110V depending on where you live) to the 5V relay module to turn on a lamp. You should be very careful and cautious when using mains supply. If you have even the smallest doubt about wiring it up, don’t hesitate to take help from a professional.
Circuit Diagram
Let us see the circuit diagram for the project. Even though we have used a 5V Relay Module, the connections in this circuit diagram will be describe the complete setup.
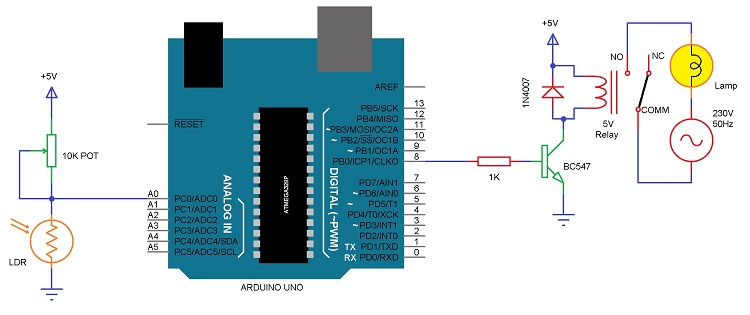
Required Components
- Arduino UNO (or any other Arduino board) [Buy Here]
- 5V Relay
- 1N4007 Diode
- BC547 – NPN Transistor
- Red LED (can be used as a Power ON LED)
- Green LED (can be used as a Relay ON LED)
- 2 x 1K Ohm Resistors (1/4 W – for Red and Green LEDs)
- Lamp
- Wires for connecting DC Voltage components
- Wires for connecting AC Mains and lamp
Circuit Description
Let us now see how the circuit is designed. First thing is we used a 5V relay in this project. This makes it easy as Arduino can power up the relay directly. If you used a 12V relay like we used in this project Arduino Relay Control, you need to use a separate power supply for relay.
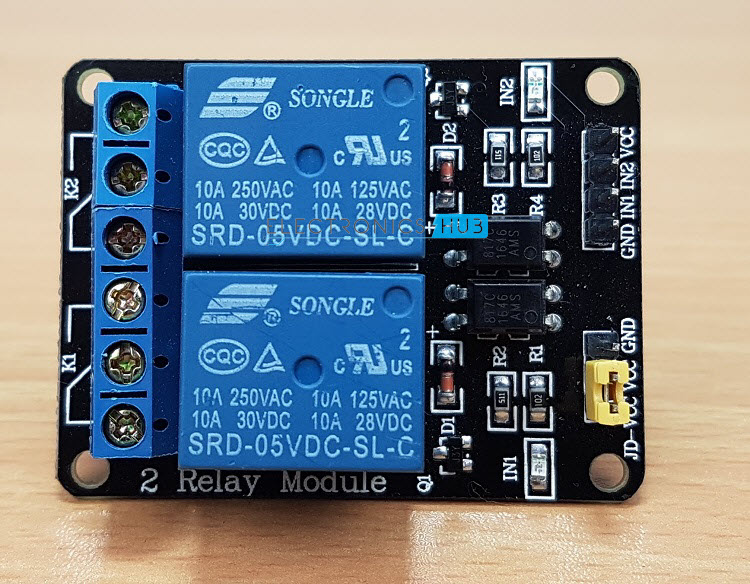
Coming to the design of the circuit, it is very simple as we used a 5V relay module and not the individual components. Although the circuit diagram explains the detailed connections, practically we didn’t need to make all the connections.
Most relay modules (whether 5V or 12V) will come with the aforementioned connection and hence all you need is to give power supply to the relay module i.e. 5V and GND and connect the control signal from Arduino to control pin on the relay board.
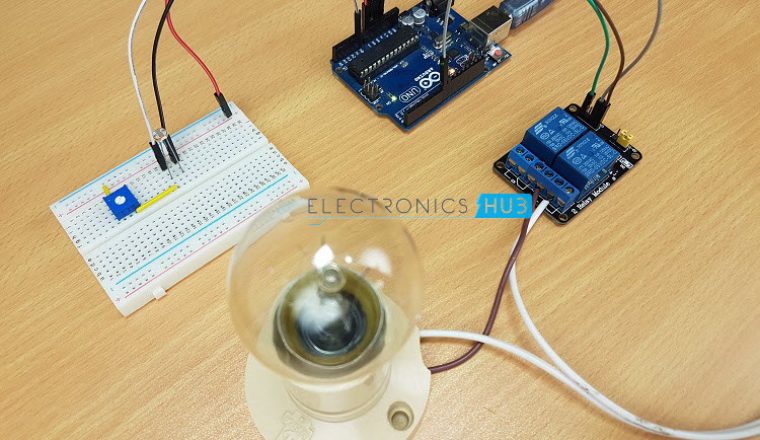
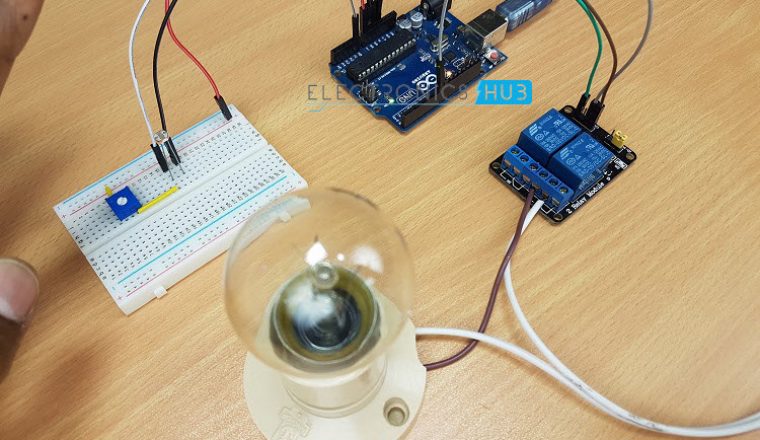
Coming to the load part i.e. the lamp, hot wire from the mains supply is connected to one terminal of the lamp. Other terminal of the lamp is connected to Normally Open (NO) contact of the 5V Relay. Finally, the neutral wire from the mains is connected to the Common (COMM) contact of the relay.
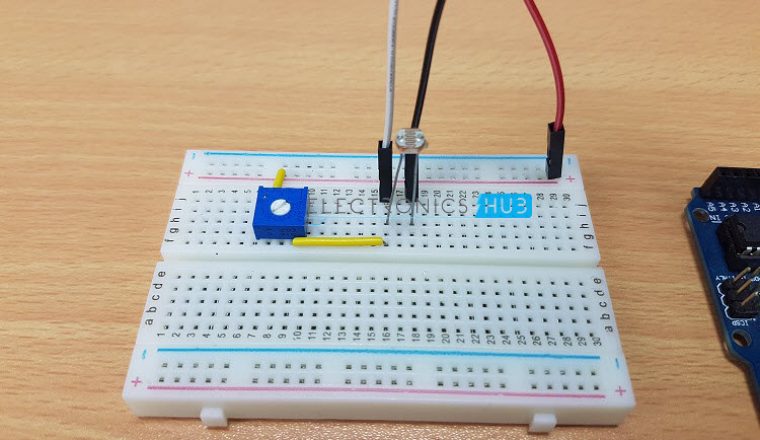
A small light sensor in the form of LDR (Light Dependent Resistor) is used to switch on or off the light automatically. The output of the LDR sensor is given to the Analog Input pin A0.
Component Description
Relay
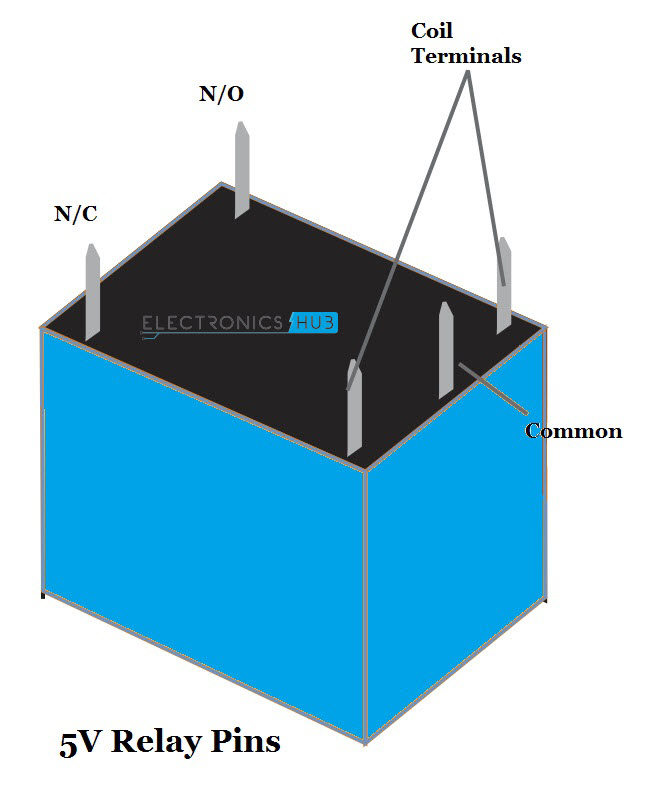
The advantage of using a 5V relay in this project is that the power supply for the relay can be directly given from the Arduino UNO board itself. Let us now see some basics of a relay. A relay is a type of a switch that acts as an interface between microcontrollers and AC Loads.
A simple Single Pole – Single Throw (SPST) relay, like the one used in this project consists of 5 Terminals: 5V, GND, Normally Open (NO), Normally Close (NC) and Common (COMM). Since we need to control this relay with the help of Arduino, a transistor is used with an additional pin called Control Pin on the Relay Module.
 Working of the Project
A simple project, in which Arduino UNO controls a 5V relay is explained here. The working of the project is based on the functioning of the Relay and the ability of Arduino to control the relay. Let us discuss the working of the project.
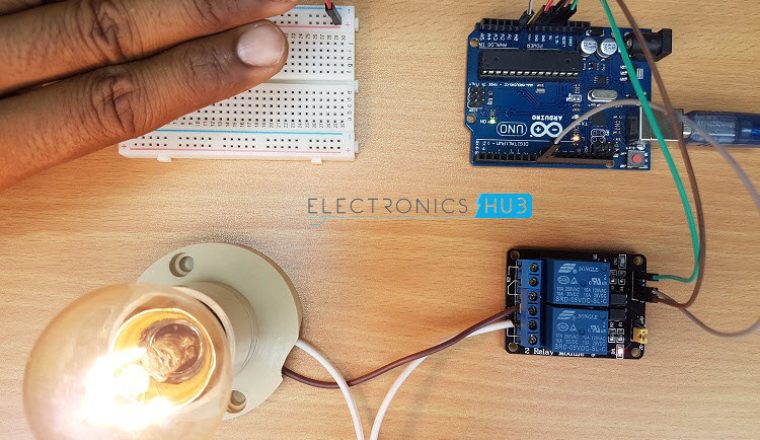
As mentioned earlier, by interfacing Arduino with 5V relay module, we intend to operate an AC load like lamp. Instead of using it directly, we designed a small application where an LDR is used to detect the light intensity and automatically turn on or off the relay.
Under normal lighting conditions, the output from the LDR will be in the range of 80 – 90 (range is 0 – 255). When the lighting conditions go dark (can be done by covering the LDR with hand), the output from the LDR will jump to 130 – 140. This condition can be used to trigger the 5V Relay and turn on the light.
CODE
Advantages and Disadvantages
Advantages: The main and important advantage of connecting a 5V relay with Arduino is that it can be powered by Arduino itself.
Disadvantages: A transistor based relay might not be ideal for long time use as there will always be noise in the relay coil. A suitable option will be using additional isolation like an opto-isolator or completely eliminating the electromechanical relay and replacing it with solid state relay.
Applications
- Interfacing a 5V Relay with Arduino opens up the door to a huge number of applications. Although the main task of the relay is to control a load, how that relay is being operated by the Arduino makes it an interesting project.
- Some of the techniques and methods using which we can control the relay are: Bluetooth, Infrared (IR) remote, RF Transmitter – Receiver Pair or even using Internet.
- Arduino based Home Automation requires the combination of Arduino and many relay module (depending on the number of loads).
Construction and Output Video
Recommended read:

6 Responses
Nice work can you heló me please with arduino code please thanks
Code is uploaded.
plase how do i get the code for the project
Hi,
I have uploaded the code. Check it out.
no the code is not available
Hello sir can we use 5v relay to turn on AC generators just by connecting the wires and by using 9v battery.Because generators will work only if there is no power supply.But relay needs power supply what to do?