In this project, we will learn about DHT11 Humidity and Temperature Sensor and how the Raspberry Pi DHT11 Humidity Sensor interface works. By Interfacing DHT11 Temperature and Humidity Sensor with Raspberry Pi, you can implement a basic IoT Project like a simple Weather Station.
Overview
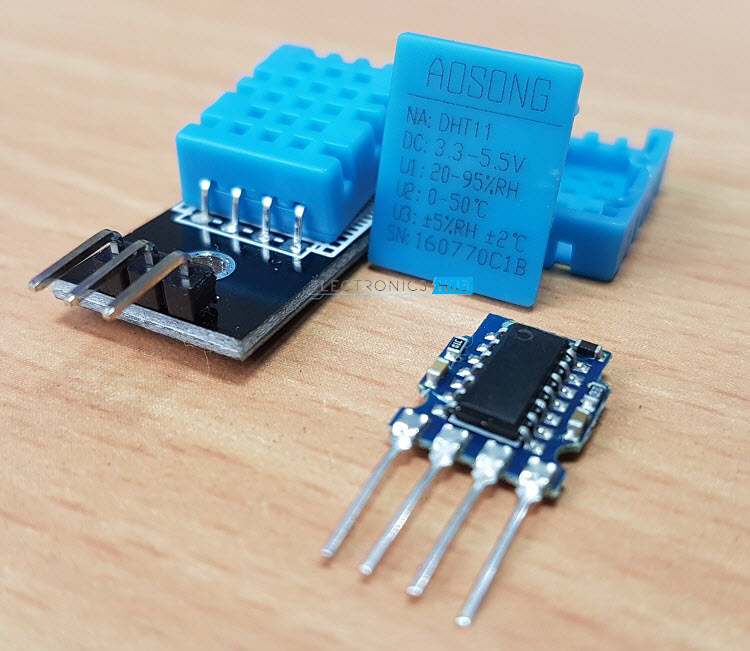
DHT11 is a Digital Sensor consisting of two different sensors in a single package. The sensor contains an NTC (Negative Temperature Coefficient) Temperature Sensor, a Resistive-type Humidity Sensor and an 8-bit Microcontroller to convert the analog signals from these sensors and produce a Digital Output.
I have already worked with the DHT11 Sensor in my DHT11 Humidity Sensor on Arduino Project. In that project, I have mentioned the Pin Configuration of the DHT11 Sensor, how to interface it with a Microcontroller and how the digital Output from the DHT11 Sensor can be decoded.
So, I suggest you to refer to that project once for more information on DHT11 Humidity and Temperature Sensor. I’ll explain a few thing which I have missed in the Arduino Project.
We know that the output from the DHT11 Sensor is Digital. But how exactly we can read this digital data?
Reading Digital Output from DHT11
DHT11 uses a Single bus data format for communication. Only a single data line between an MCU like Arduino or Raspberry Pi and the DHT11 Sensor is sufficient for exchange of information.
In this setup, the Microcontroller acts as a Master and the DHT11 Sensor acts as a Slave. The Data OUT of the DHT11 Sensor is in open-drain configuration and hence it must always be pulled HIGH with the help of a 5.1KΩ Resistor.
This pull-up will ensure that the status of the Data is HIGH when the Master doesn’t request the data (DHT11 will not send the data unless requested by the Master).
Now, we will the how the data is transmitted and the data format of the DHT11 Sensor. Whenever the Microcontroller wants to acquire information from DHT11 Sensor, the pin of the
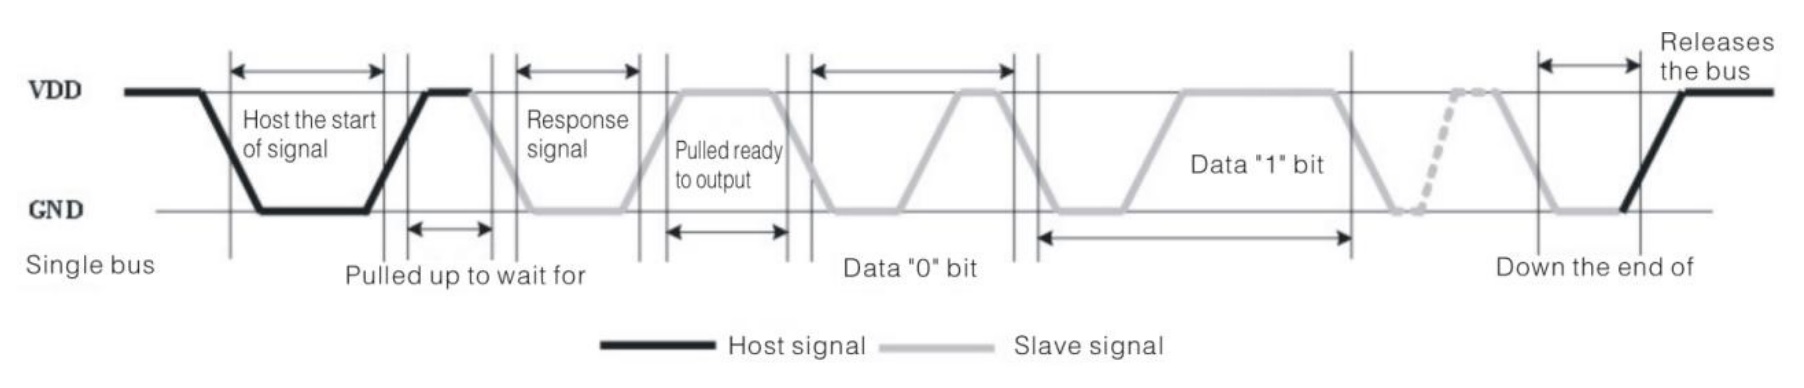
Microcontroller is configured as OUTPUT and it will make the Data Line low for a minimum time of 18ms and releases the line. After this, the Microcontroller pin is made as INPUT.
The data pin of the DHT11 Sensor, which is an INPUT pin, reads the LOW made by the Microcontroller and acts as an OUTPUT pin and sends a response of LOW signal on the data line for about 80µs and then pulls-up the line for another 80µs.
After this, the DHT11 Sensor sends a 40 bit data with Logic ‘0’ being a combination of 50µs of LOW and 26 to 28µs of HIGH and Logic ‘1’ being 50µs of LOW and 70 to 80µs of HIGH.
After transmitting 40 bits of data, the DHT11 Data Pin stays LOW for another 50µs and finally changes its state to input to accept the request from the Microcontroller.
NOTE: We have implemented this logic while programming the Arduino. But for Raspberry Pi, we used a library that takes care of all these things.
Raspberry Pi DTH11 Humidity and Temperature Sensor Interface
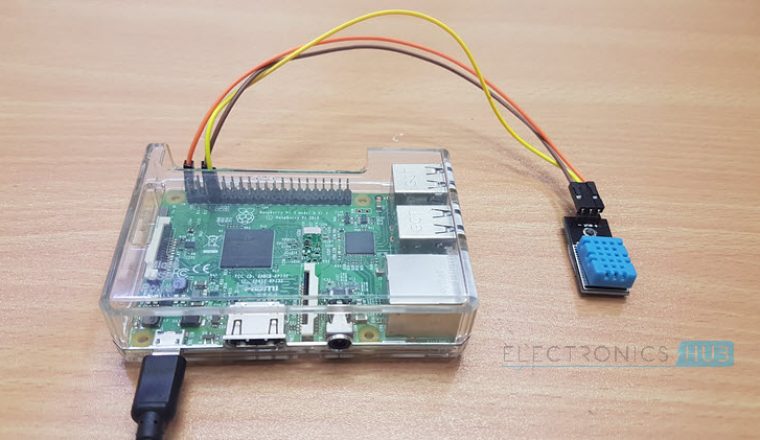
By interfacing the DHT11 Sensor with Raspberry Pi, you can build your own IoT Weather Station. All you need to implement such IoT Weather is a Raspberry Pi, a DHT11 Humidity and Temperature Sensor and a Computer with Internet Connectivity.
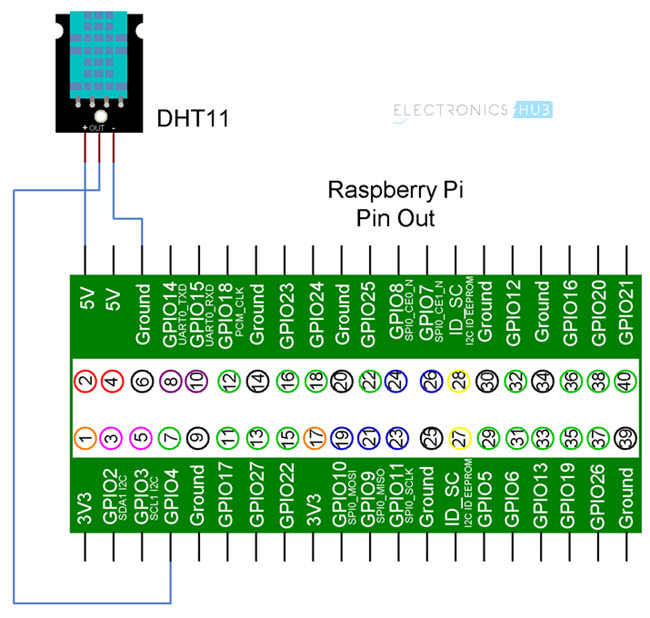
Circuit Diagram
The following is the circuit diagram of the DHT11 and Raspberry Pi Interface.
Components Required
- Raspberry Pi 3 Model B
- DHT11 Temperature and Humidity Sensor
- Connecting Wires
- Power Supply
- Computer
Circuit Design
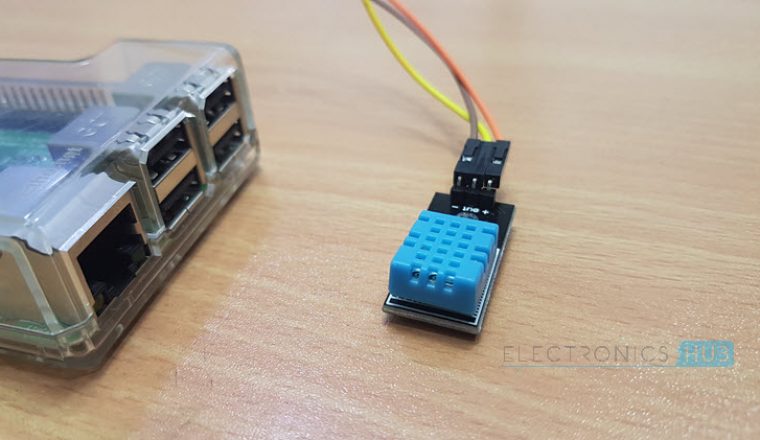
If you observe the circuit diagram, there is not a lot of stuff going on with respect to the connections. All you need to do is to connect the VCC and GND pins of the DHT11 Sensor to +5V and GND of Raspberry Pi and then connect the Data OUT of the Sensor to the GPIO4 i.e. Physical Pin 7 of the Raspberry Pi.
Installing DTH11 Library
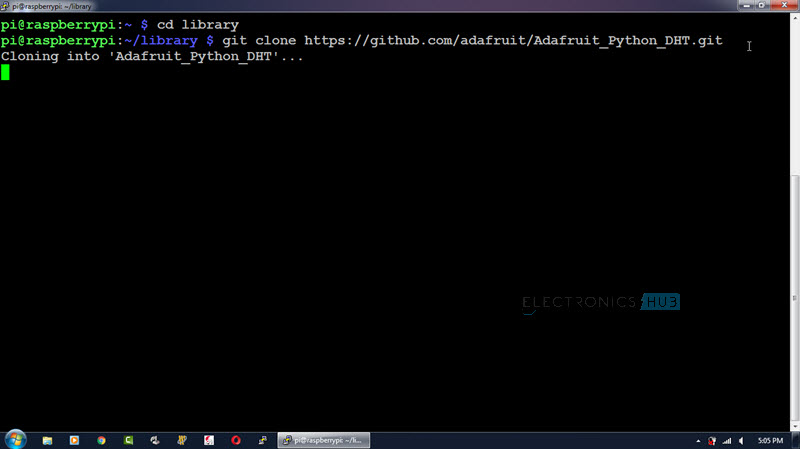
Since we are using a library called Adafruit_DHT provided by Adafruit for this project, we need to first install this library into Raspberry Pi.
First step is to download the library from GitHub. But before this, I have created a folder called ‘library’ on the desktop of the Raspberry Pi to place the downloaded files. You don’t have to do that.
Now, enter the following command to download the files related to the Adafruit_DHT library.
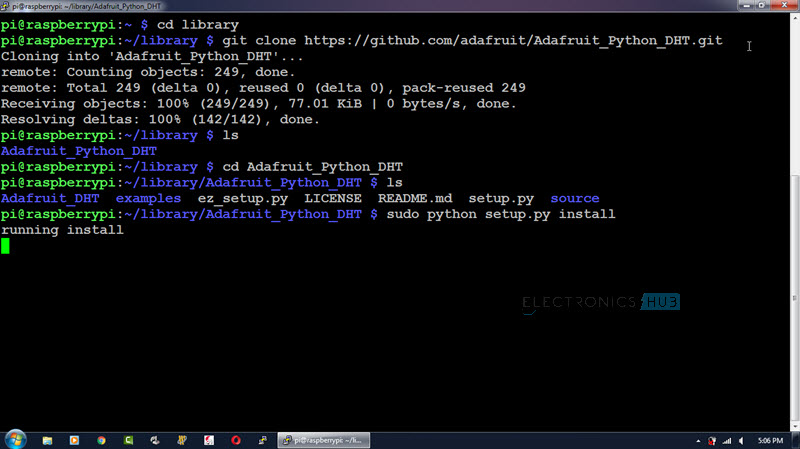
All the contents will be downloaded to a folder called ‘Adafruit_Python_DHT’. Open this directory using cd Adafruit_Python_DHT. To see the contents of this folder, use ‘ls’ command.
In that folder, there is file called ‘setup.py’. We need to install this file using the following command.
Code
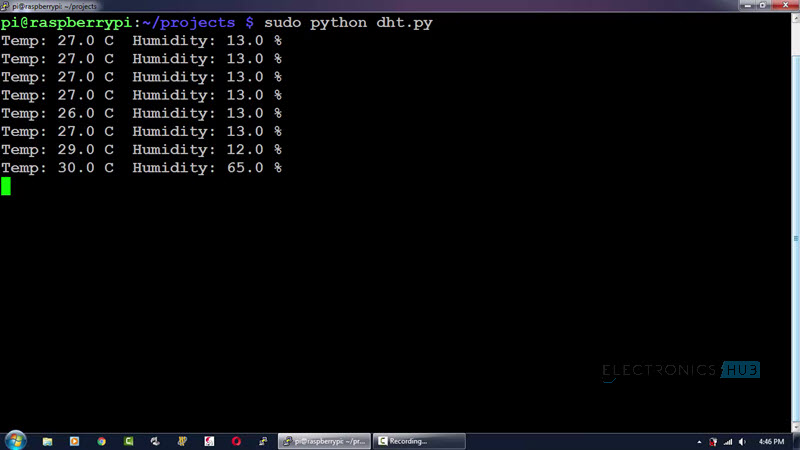
As we are using the library Adafruit_DHT for this project, there is nothing much to do in the Python Programming part. All you need to do is to invoke the library with the Sensor and GPIO Pin and print the values of Temperature and Humidity.
Working
Make the connections as per the circuit diagram and install the library. Use the above python program to see the results.
Applications
DHT11 Temperature and Humidity Sensor is one of the popular sensor modules used by hobbyists for implementing in a lot of IoT Projects. This sensor along with Raspberry Pi can also be used in:
- HVAC Systems
- Thermostats
- Home and Office Climate Control
- Weather Station

6 Responses
What are the applications of this project??
Thanks! This was my first Python project with sensors… now I’m trying to figure out how to add time stamps. Thanks!
very good first project with sensors. keep it up.
What is user name and password it asks? We need to register?
I am implementing this circuit on proteus so how i am supposed to start the programming part for the simulation of this project?
do i need to download the adafruit library for sensors and lcd in my computer
Thanks!!! I’m getting wrong values “Temperature: 1.0 C Humidity: 2.0%”