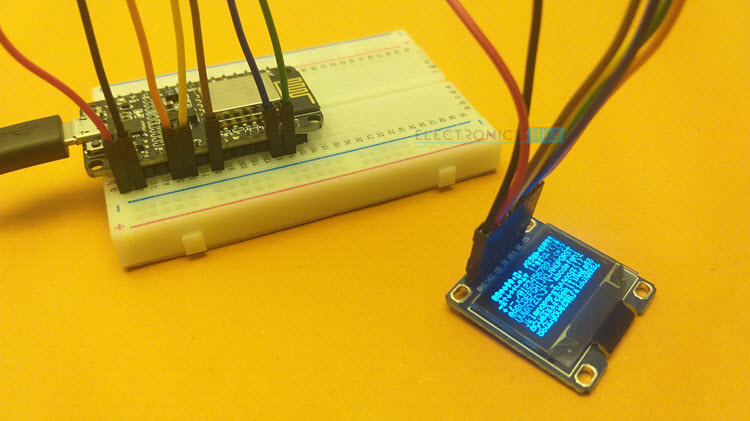
In this tutorial, we will learn how to connect an SSD1306 OLED Display with ESP8266. This particular OLED Display is a 7 Pin SPI type. So, we will use NodeMCU development board instead of regular ESP-01 Module. We will learn the pins needed for interfacing OLED Display with ESP8266 NodeMCU, display bitmap image and understand how ESP8266 NodeMCU OLED Display interface works.
If you want to interface OLED Display with ESP32 Development Board, then I made a dedicated tutorial. Check it out.
OLED Display
Organic Light Emitting Diode or OLED in short is a display technology which is quite popular in Mobile Phones and Televisions. OLED Displays have the ability to generate its own backlight at individual pixel level. This is in contrast to LCD Displays, which require a separate backlight to light up the panel.
Speaking of contrast, since individual pixel emits its own light, it can be turned off as well to produce deep black image. So, the contrast ratio of an OLED Display is much better than a regular LCD.
Due to lower power consumption (only pixels which are lit up draw current), OLED displays are also popular in battery operated devices like Smart Watches, Health Trackers and other wearables.
A Brief Note on SSD1306 OLED Display
For DIY projects, there are some OLED Displays available in the market, usually with a resolution of 128×64 pixels or 128×32 pixels. Also, there are two types of OLED Displays based on the communication interface they provide. One type uses I2C and the other uses SPI.

In this project, we will use an SPI type OLED Display with 128×64 pixel resolution and measuring 0.96” diagonally. This OLED display is based on SSD1306 OLED Driver IC.
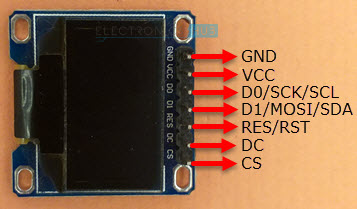
You have to note the SSD1306 OLED Driver IC can be configured to communicate either in I2C Interface or in SPI Interface. So, the same OLED Panel and same OLED Driver IC can result in two devices: one is a 4 pin I2C type and the other is a 7 pin SPI type.
In fact, you can even modify one type to another simply by soldering / de-soldering some SMD resistors.
Identifying SPI Pins in ESP8266 NodeMCU
As mentioned before, this particular OLED is of SPI type. So, we have to search and configure SPI pins in ESP8266. Since, the ESP-01 Module doesn’t fanout all the pins of ESP8266EX SoC, we will be using the NodeMCU Development Board.
If you remember the ESP8266 NodeMCU Pinout tutorial, ESP8266 has two SPI interfaces: SPI and HSPI. But SPI interface is already used by the ESP8266EX SoC for connecting with SPI Flash IC in the ESP-12E Module.
So, we are left with HSPI interface.
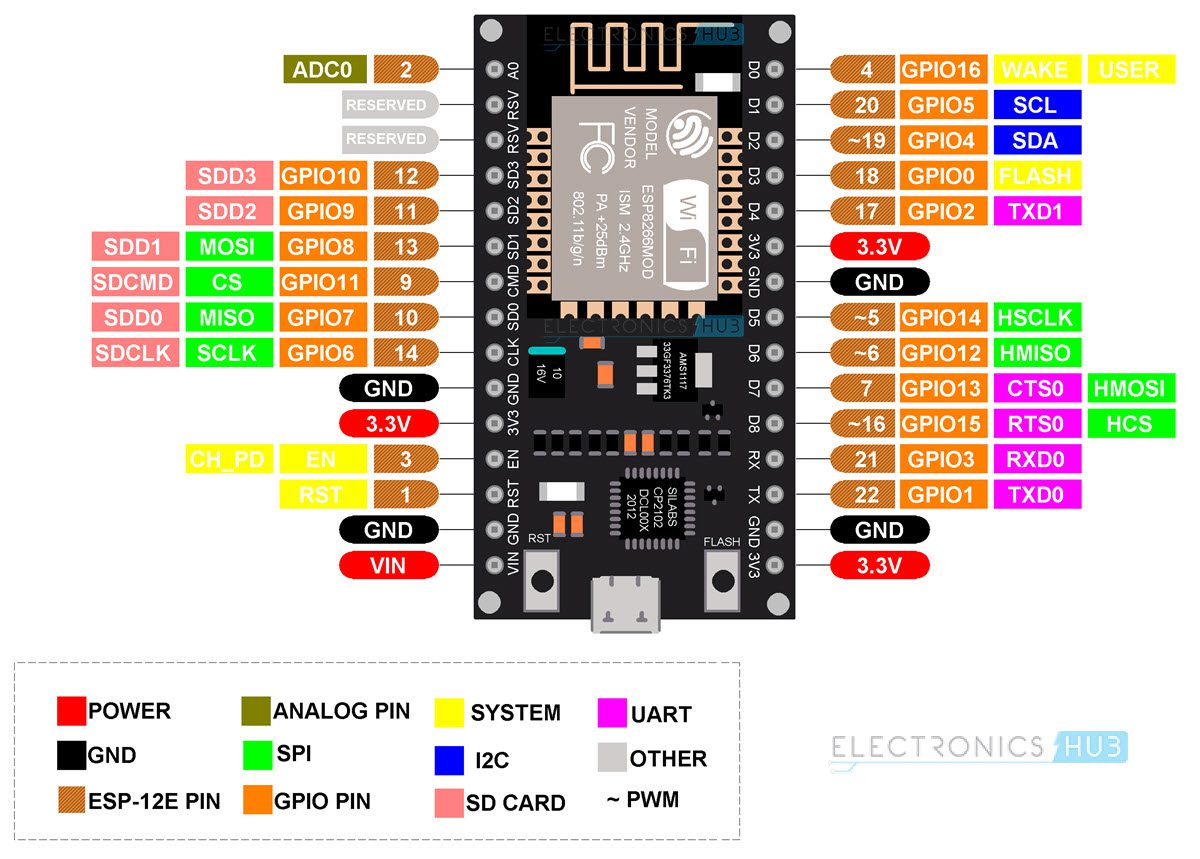
Take a look at the pinout diagram of ESP8266 NodeMCU. HSPI Pins are as follows:
|
HSPI |
GPIO | NodeMCU |
| HSPI_MISO | GPIO 12 |
D6 |
|
HSPI_MOSI |
GPIO 13 | D7 |
| HSPI_CLK | GPIO 14 |
D5 |
|
HSPI_CS |
GPIO 15 |
D8 |
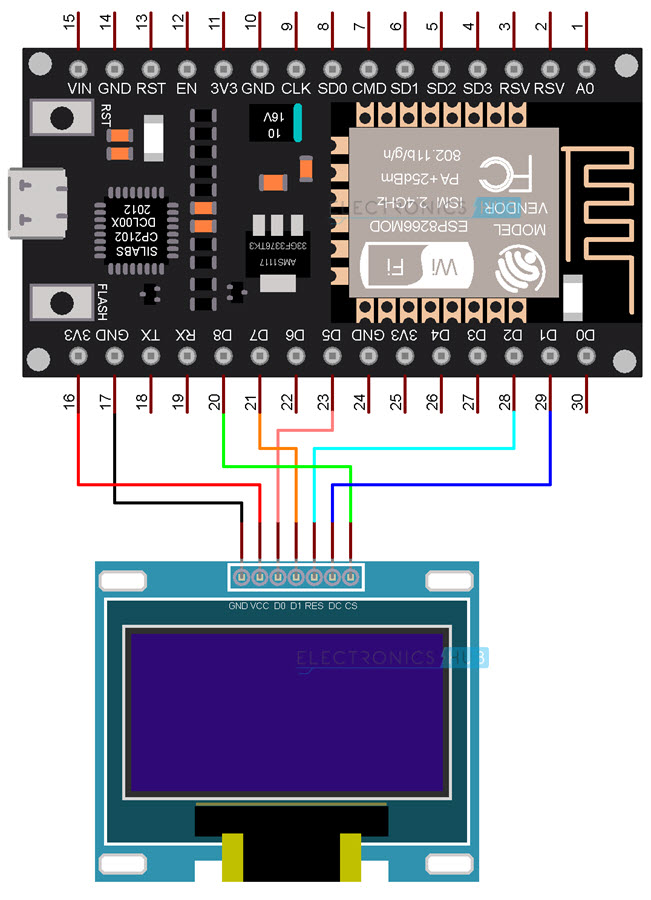
ESP8266 NodeMCU OLED Display Interface
Now that we have identified the SPI Pins of ESP8266 NodeMCU, we can now start with interfacing OLED display with ESP8266. But if you notice the pinout of SPI OLED Display, there are two more pins other than the SPI Pins.
They are RST (Reset) and DC (Data / Command) pins. Since these pins are just control pins, we can use any GPIO Pins of ESP8266 NodeMCU. As GPIO 4 (D2) and GPIO 5 (D1) are free, let us use them for this purpose.
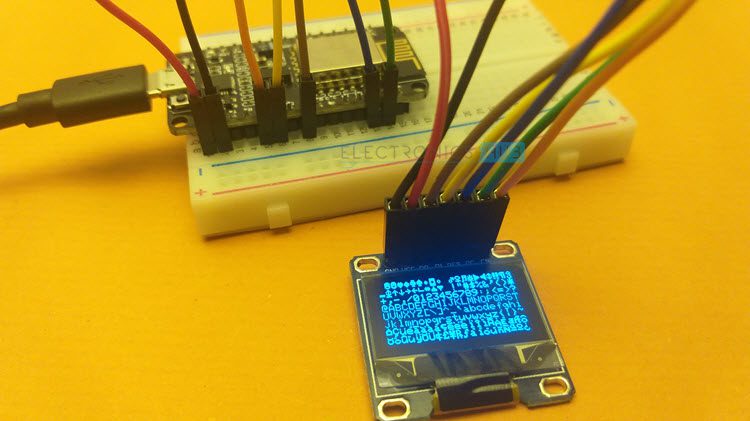
So, finally, the connection between ESP8266 NodeMCU and SPI OLED Display looks something like this:
|
OLED Display |
ESP8266 NodeMCU |
| GND |
GND |
|
VCC |
3.3V |
| D0 (SCK / CLK) |
GPIO 14 (D5) |
|
D1 (MOSI) |
GPIO 13 (D7) |
| RES |
GPIO 4 (D2) |
|
DC |
GPIO 5 (D1) |
| CS |
GPIO 15 (D8) |
Components Required
- ESP8266 NodeMCU Development Board
- OLED Display
- Breadboard
- Connecting Wires
- Micro-USB Cable
Circuit Diagram
The following image shows the circuit diagram of ESP8266 NodeMCU OLED Display Interface. This circuit is specific to SPI OLED Display.
Preparing Arduino IDE
If you worked with OLED Displays (either I2C or SPI type) before, then you probably would have downloaded the necessary libraries for Arduino IDE. Let me take you through those steps once again.
Specifically, you have to download two libraries. One is for the OLED Driver SSD1306 and the other one is for displaying some basic graphics.
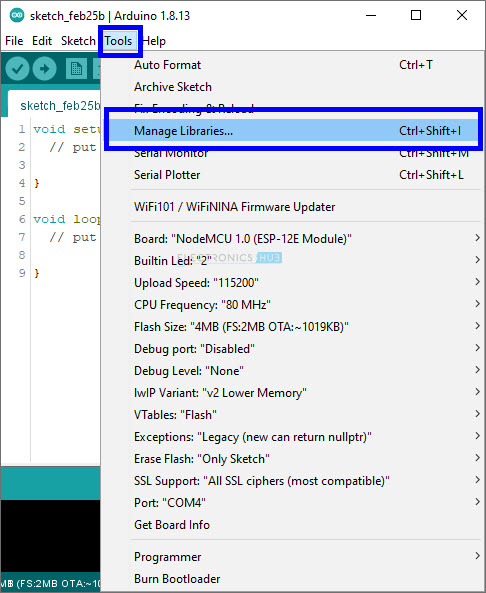
Open Arduino IDE and open library manager by selecting Tools -> Manage Libraries. . .
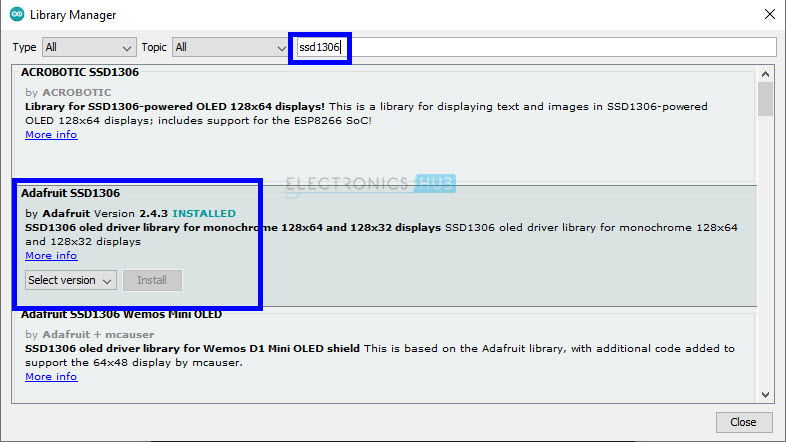
Search for ‘ssd1306’ and install ‘Adafruit SSD1306’ library. As you can see from the image, I already installed it.
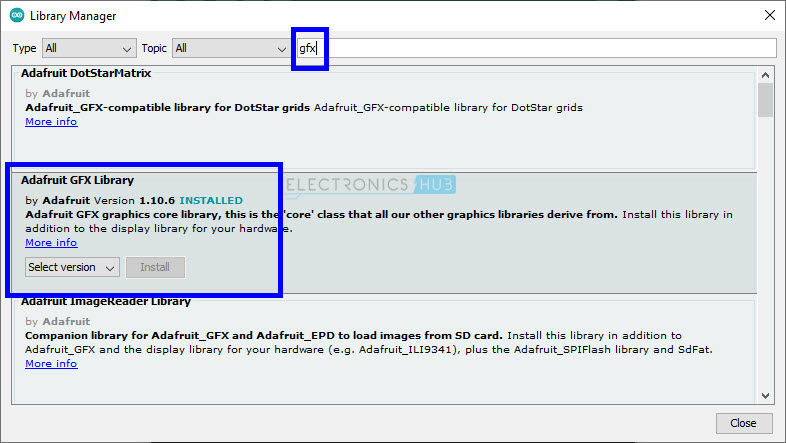
Next, search for ‘gfx’ and install ‘Adafruit GFX’ library. After this, close the library manager.
Make sure that NodeMCU board is selected. If not, then you can select this board by going to Tools -> Board -> ESP8266 Boards and click on NodeMCU 1.0 (ESP-12E Module). Also, select the correct COM Port (if you already made the connections and connected NodeMCU to the computer).

We are now ready to display some stuff on the OLED Display.
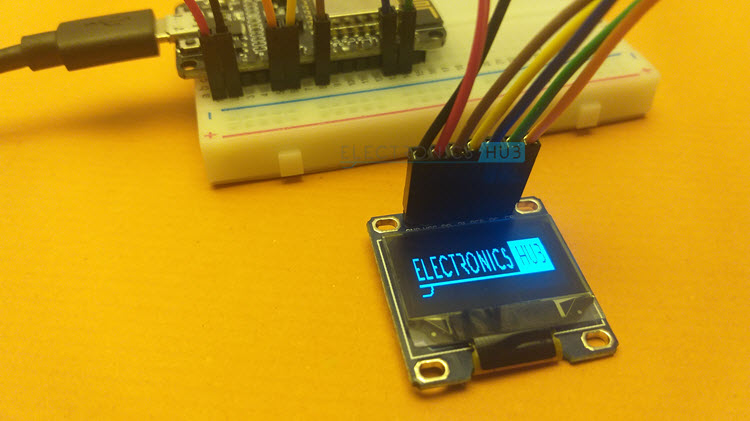
Displaying Text
First, we will write a small program which will display some basic text related info. This includes simple text, inverted text, scrolling text, ASCII Characters and also two sizes of fonts.
Code
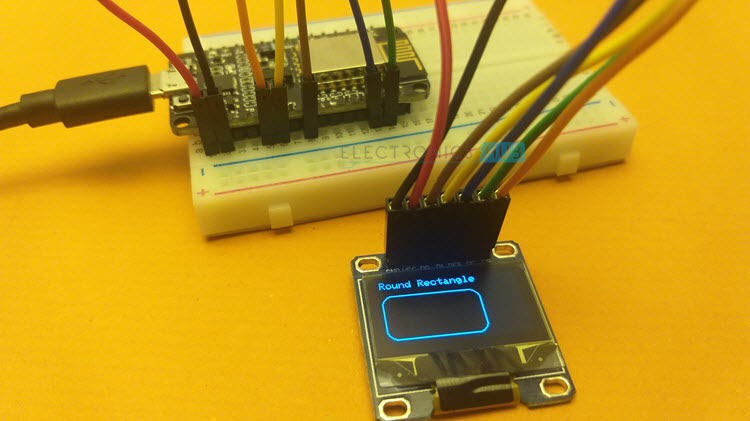
Displaying Graphics
Next, we will use the GFX library to display some basic shapes like rectangle, filled rectangle, round rectangle, filled round rectangle, circle, filled circle, triangle and filled triangle.
Code
Displaying Bitmap Image
Finally, to demonstrate the bitmap displaying ability of SSD1306 OLED Display, let us take a small bitmap image and generate equivalent bytecode for the image (using tools like GIMP or any online tool).
We have to insert this byte code in our code and use the ‘drawBitmap’ function to display the image on the OLED Display.
Code
Conclusion
A simple project demonstrating ESP8266 NodeMCU OLED Display Interface. You learned how to connect ESP8266 with an SPI type OLED Display, download the necessary library files, display different types of text file, some basic graphics and also a bitmap image.
