There might be many cases where you might be working on different electrical circuits or electrical devices and face a short circuit issue. This becomes an even bigger issue when a short circuit can permanently damage your electrical circuit or circuit board. Because of this, finding a short circuit is highly important so that you can get rid of it.
While there are many ways to do the same, using a multimeter is considered as one of the easiest. Thus, we are here with a complete guide on how to find a short circuit with a multimeter. You can also learn more about multimeters and short circuits by going through this guide till the end.
How to Find a Short Circuit with a Multimeter: Step by Step
Since fixing a short circuit issue is highly important, we will first take a look at the steps needed to find a short circuit with a multimeter. You can simply go through the following instructions one by one to easily get rid of the same for ensuring that your electrical circuit works properly:
1. Preparation and Safety

Before using a multimeter for finding a short circuit, it is highly important to ensure that everything is done with proper safety. This ensures that neither your electrical circuit nor your multimeter get damaged while finding a short circuit. For the same, make sure your electrical circuit is completely turned off before checking anything. This includes removing any batteries as well as power adapters.
2. Turn on the Multimeter and Set it to Continuity or Resistance
Now that you have made sure that everything is safe to use, turn on your multimeter and turn it to either the continuity or resistance mode depending on what your multimeter offers. While choosing the resistance scale, keeping it as low as possible is always recommended.
3. Test the Function of the Multimeter
You will also need to test and calibrate your multimeter before you start using it to ensure that it is giving you all the correct measurements. Starting with the resistance mode, calibrating for the same is quite easy. Once you have set your multimeter to resistance mode, you need to touch its probes which should give you a zero or close to zero reading. If the reading is much higher, you need to calibrate till the reading becomes zero. Those of you who are using the continuity mode will see a light flashing and the reading being zero if the probes touch and your multimeter is calibrated correctly.
4. Identify and Locate the Circuit Component
After your multimeter is ready and fully calibrated, you need to find and identify the parts of your electrical circuit that you need to test for a short circuit. Although, while choosing these parts, it is highly important to ensure that a given component has at least some resistance otherwise finding a short circuit will be difficult.
5. Apply the Probe Tips to the Circuit
Once you have identified the desired component which is to be tested for a short circuit, you need to find the two probes of your multimeter which are red and black. You have to touch the black probe to the ground or the chassis of the electrical circuit and the red probe to the component that you want to test. Make sure that both the probes are touching a metal part which can either be a wire, a component lead, or the circuit board foil.
6. Check the Display of the Multimeter
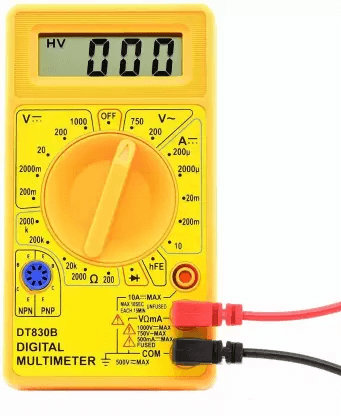
Finally, you can check the display of your multimeter and the reading it is showing. Beginning with the resistance mode, if you are seeing a value of 1 or OL, then there is a short circuit in your electrical circuit. As for the continuity mode, having a reading of 0 or close to 0 will show a short circuit.
Click Here To Know OHM Meter vs Multimeter
Essential Tips for Using a Multimeter
While we have already given information on how to use a multimeter, having more information is always great to get the most out of your multimeter and correctly testing a short circuit. Since a multimeter works as a voltmeter, ohmmeter, and ammeter, you can use a multimeter to check short circuits as well as the performance of your circuit. Some multimeters also allow you to check the capacity of a battery using the various controls of your multimeter.
Choose the Right Device
You also need to make sure that you are using the right type of multimeter for checking short circuits in a given electrical circuit. While all multimeters offer the primary three functions of measuring current, voltage, and resistance, you can also find higher end multimeters with much more functions. This can include more readings, attachments, and modes for a more versatile multimeter.
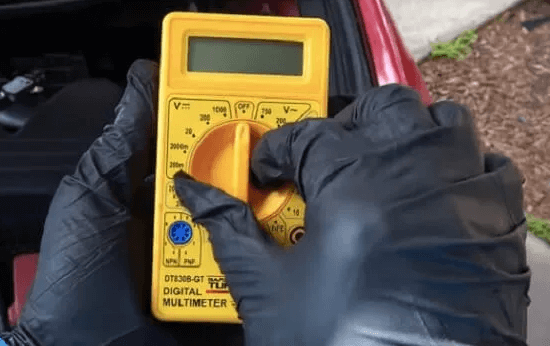
Familiarize yourself with the Features and Parts
Talking about the parts and features of the multimeter that you are using, you will find a large display, a select knob, ports, and probes as its primary parts. Although, older analogue multimeters have a scale and pointer instead of a digital display. As for the ports, this can include up to 4 ports where half are red and half are black. While the black port is made for the COM port, the other three are for taking measurements and readings.
Understand the Ports on your Device
While we have already mentioned the black port of a multimeter that is used for COM connection, the other red ports are for different uses. It includes the following ports:
- VΩ: used for testing resistance, voltage, and continuity
- µAmA: used for measuring the current in a circuit
- 10A: used for measuring large currents of 200mA or more
How to Measure Voltage
Apart from checking for short circuits, you may also want to check the voltage of your electrical circuit. This is quite important to ensure whether you are currently using AC current or DC current. If you are getting a straight line on the display, then it is DC current, and if it is a wavy line, then it is AC current.
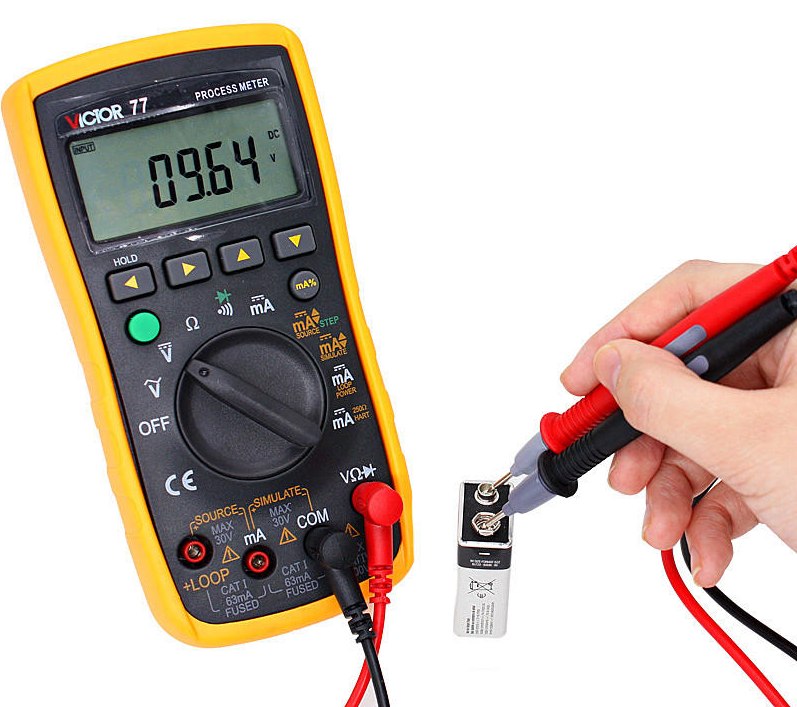
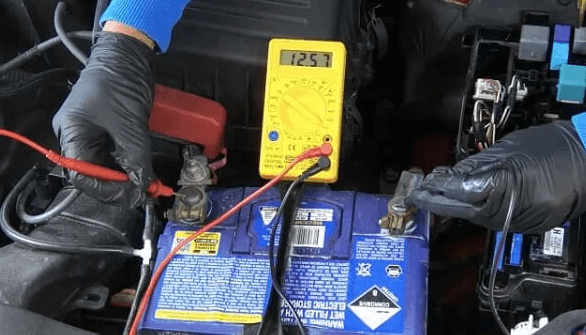
A Typical Measuring Example
To further help you in understanding the usage of a multimeter, let us take an example of testing of a battery. Once you connect a battery to the probes of your multimeter, it will not only show you the voltage type, but also the voltage value as 3 volts or 5 volts depending on your battery. If your multimeter does not support auto ranging, then you may need to select the right range as you will keep getting 1 as a reading until you select the right range.
Conclusion
By going through this guide, you must have proper knowledge about your multimeter as well as using it for testing short circuits. In fact, we have given a complete guide on how to find a short circuit with a multimeter up above. This will allow you to easily ensure whether you have a short circuit in a given circuit or not. You can also find the instructions on how to properly use a multimeter and its various parts. If you have gone through all the information regarding how to find a short circuit with a multimeter, make sure to share your thoughts in the comments section. You can also post any questions down there if you have any!
