One essential formatting tip for improving the readability and structure of text in documents is to create a hanging indent in Microsoft Word. This feature is especially helpful when working on projects like reference lists, citations, or bibliography entries.
A hanging indent centres a paragraph’s first line at the left margin and indents the lines that follow to the right. It gives information a polished, organized look that facilitates access and understanding. Learning this technique is crucial for anyone who writes or writes professionally in order to produce polished and organized documents. This quick tutorial will show you how to use Microsoft Word to create a hanging indent.
Also check –
How to Get Rid of Paragraph Symbol in Word
How do I delete a page in Word that won’t delete?
How to Activate Microsoft Office for Mac?
What is a Hanging Indent?
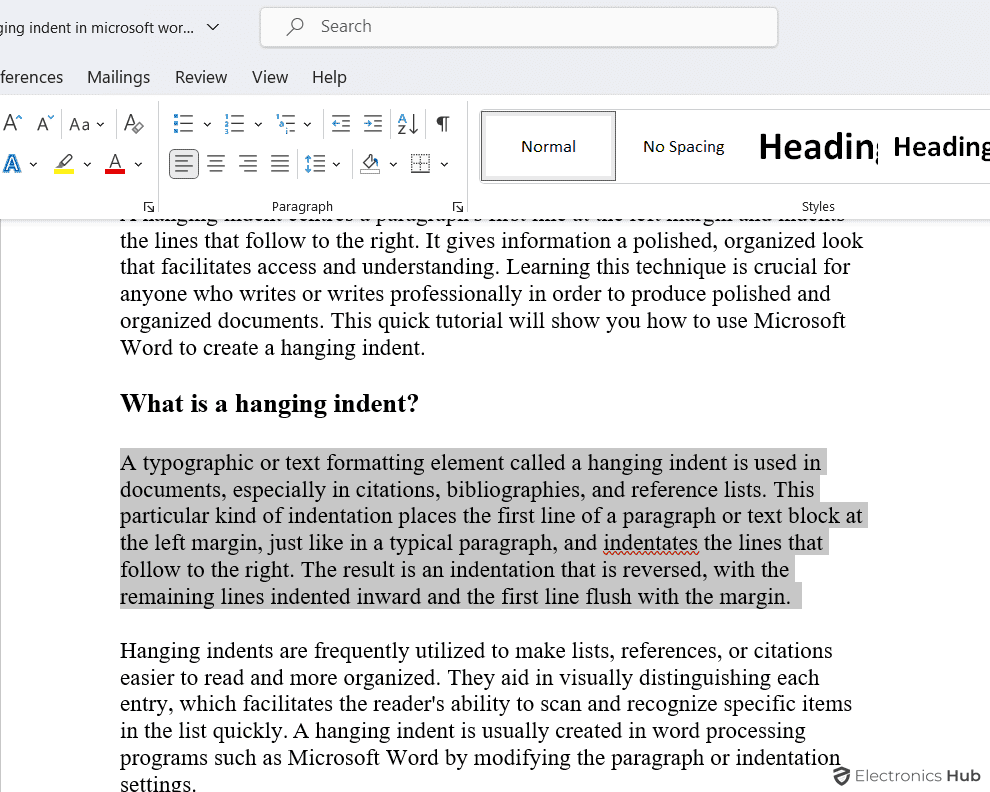
A typographic or text formatting element called a hanging indent is used in documents, especially in citations, bibliographies, and reference lists. This particular kind of indentation places the first line of a paragraph or text block at the left margin, just like in a typical paragraph, and indentates the lines that follow to the right. The result is an indentation that is reversed, with the remaining lines indented inward and the first line flush with the margin.
Hanging indents are frequently utilized to make lists, references, or citations easier to read and more organized. They aid in visually distinguishing each entry, which facilitates the reader’s ability to scan and recognize specific items in the list quickly. A hanging indent is usually created in word processing programs such as Microsoft Word by modifying the paragraph or indentation settings.
How to Create a Hanging Indent in Microsoft word?
On Windows
1. Method 1 (From the Context Menu):
Use these procedures to make a hanging indent in Microsoft Word for Windows:
- Start by opening a Word document.
- Draw attention to the passage or text you wish to format with a hanging indent.
- From the context menu, select “Paragraph” after performing a right-click on the text selection.

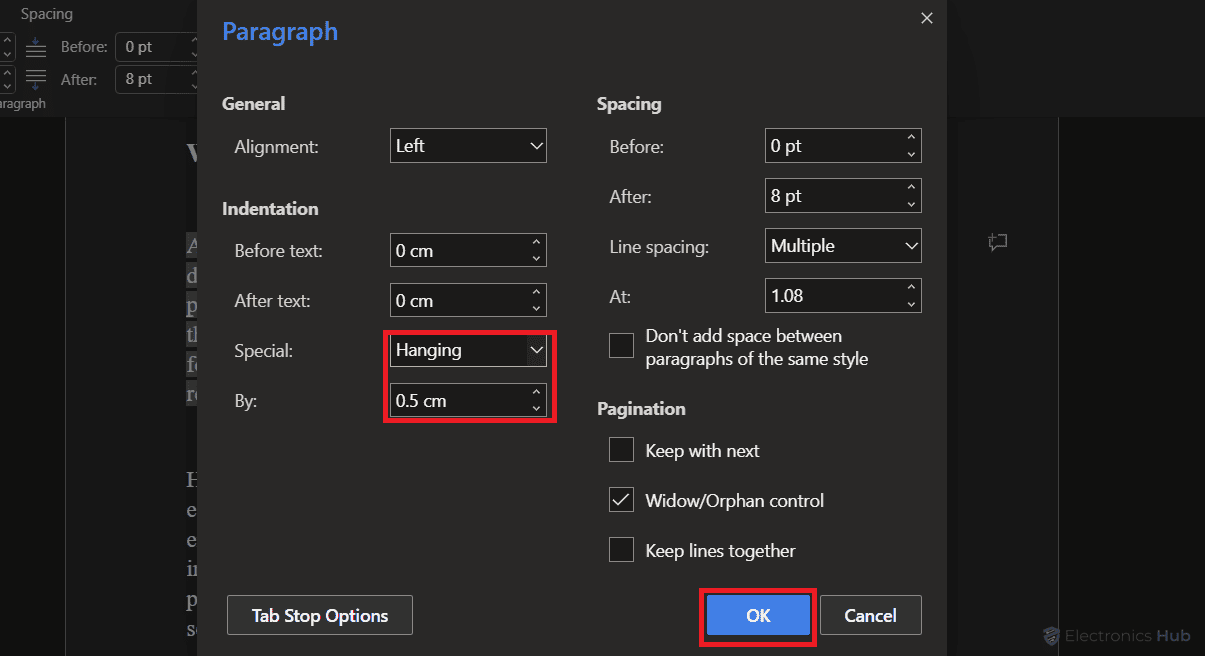
- Locate the “Special” dropdown menu in the “Indentation” section of the “Paragraph” dialogue box.
- Choose “Hanging” from the menu that drops down.
- To specify the desired amount of indent, change the “By” value.
- To add the hanging indent to your text, click “OK”.

The first line of your text will now begin at the left margin, & lines that follow will be indented to the right, giving your text a hanging indent.
2. Method 2 (paragraph settings):
Use the paragraph settings in Microsoft Word to create a hanging indent by doing the following steps:
- Start your file.
- Choose the text that has to have a hanging indent formatted.
- Select the “Home” tab and click the small arrow in the lower right corner of the dialogue box launcher located in the Paragraph group.

- Select “Hanging” from the “Special” dropdown menu in the “Indentation” section of the Paragraph dialogue box.
- Enter the desired indentation value (e.g., 0.5 inches) for the hanging indent.
- To apply the hanging indent to your chosen text, click “OK”.
3. Method 3 (uses the ruler in Word):
Using the ruler, Method 2 in Microsoft Word creates a hanging indent:
- Launch Word and open the document.
- Choose the text that has to have a hanging indent formatted.
- Select the “View” tab, then, if the ruler isn’t already visible, check the “Ruler” option.
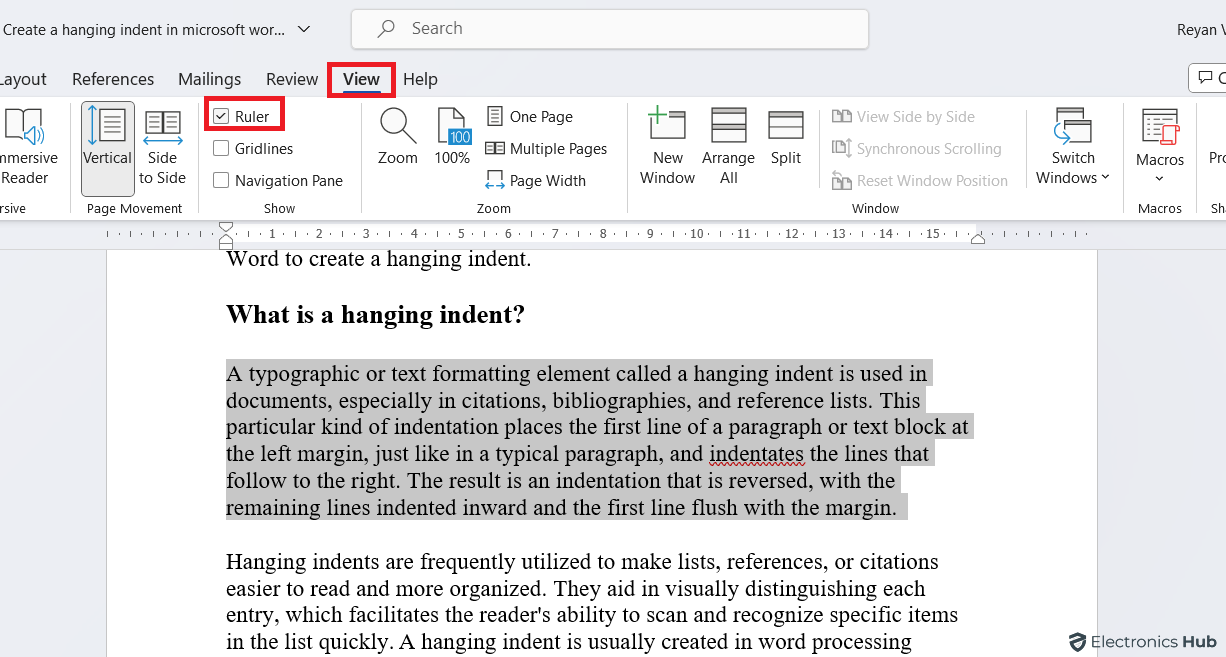
- Find the tiny, rectangle-shaped marker on the ruler that denotes the left indent. To achieve the desired hanging indent position, slide it to the right.
- The text will start with a line that is aligned with the left margin and then indent the following lines to create a hanging indent.
Using the ruler, you can precisely control the placement of your hanging indent with this method.
On Mac
Use these procedures to create a hanging indent in Microsoft Word on a Mac:
- Launch Microsoft Word and open your document.
- Choose the text that has to have a hanging indent formatted.
- Proceed to the “Format” menu and select “Paragraph.”
- Locate the “Special” dropdown menu in the Paragraph dialog box under the “Indents and Spacing” tab.
- Select “Hanging” from the menu that drops down.
- To specify the amount by which you want the lines that follow to be indented, change the “By” value.
- To apply the hanging indent, click “OK”.
Now, your chosen text will have a hanging indent, with the following lines indented to the right and the first line beginning at the left margin.
On Web
Use these steps in Microsoft Word to create a hanging indent:
- Launch Word and open the document.
- Choose the text that has to have a hanging indent formatted.

- Navigate to the ribbon’s “Page Layout” or “Layout” tab.
- To access the Paragraph dialogue box, click the small arrow located in the lower right corner of the “Paragraph” section.
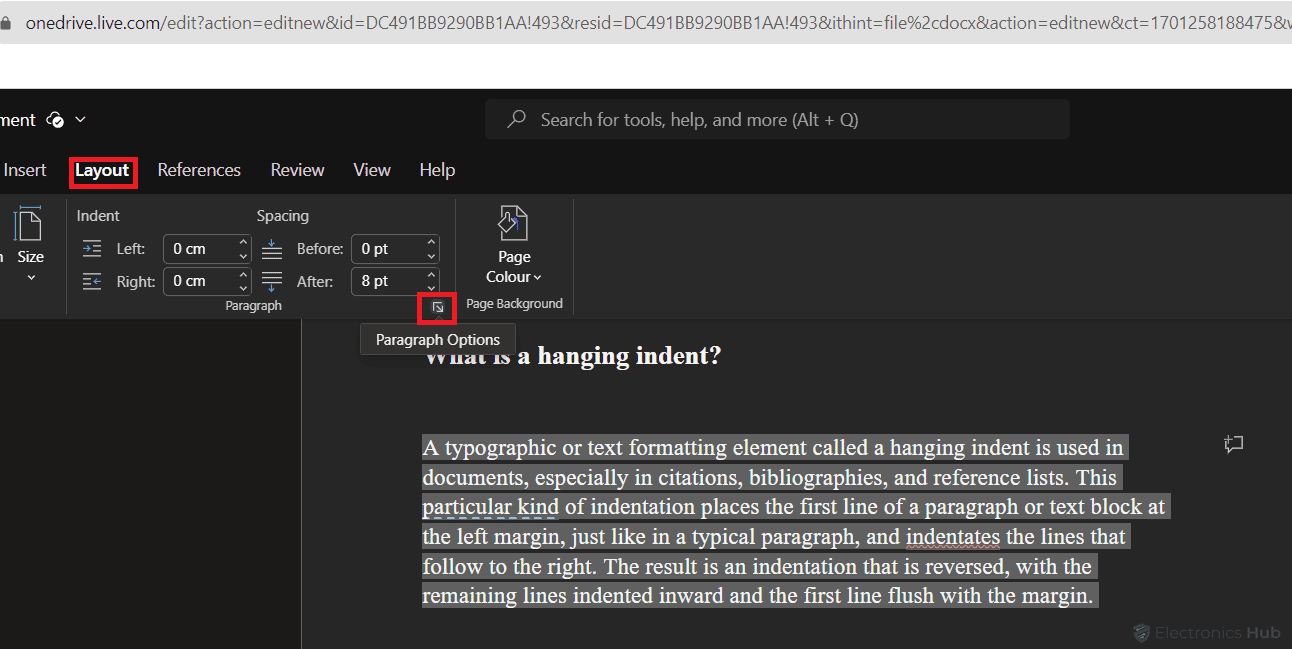
- Select “Hanging” from the dropdown menu under “Special” in the dialogue box.

- To specify the size of the indent, change the “By” value.
- To add the hanging indent to your chosen text, click “OK”.
How to Form a Hanging Indent on the Word for your iPad or Mobile Phones?
You can take the following actions in Microsoft Word for iPad or other mobile devices to create a hanging indent:
- Load the document you want to edit into the Word app on your iPad or other mobile device.
- Choose the passage or text that you want to have a hanging indent for. You can either tap the text and hold it in place, or you can tap it and move the selection handles around as necessary.
- Select the text and then tap the “More” option (shown by an ellipsis or three dots) in the upper toolbar.
- Locate and select the “Paragraph” or “Format” option from the menu that displays. Depending on your device or the version of the Word app, the exact language may change.
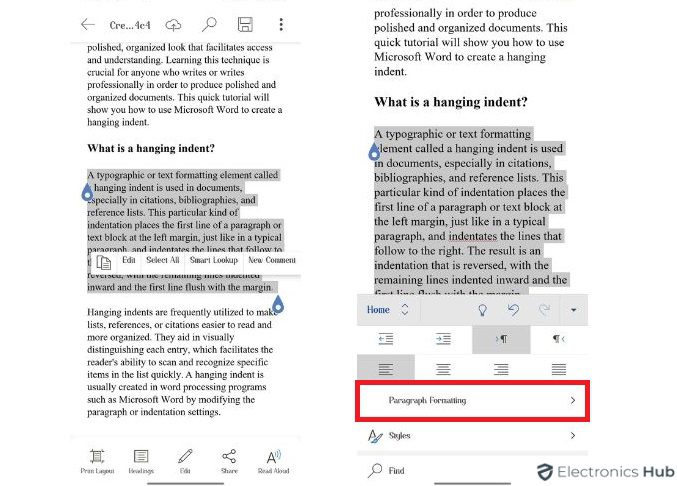
- Check the Paragraph or Format settings for the “Special” or select “Indentation” option.
- Among the options, choose the “Hanging” or opt for “Hanging Indent”.
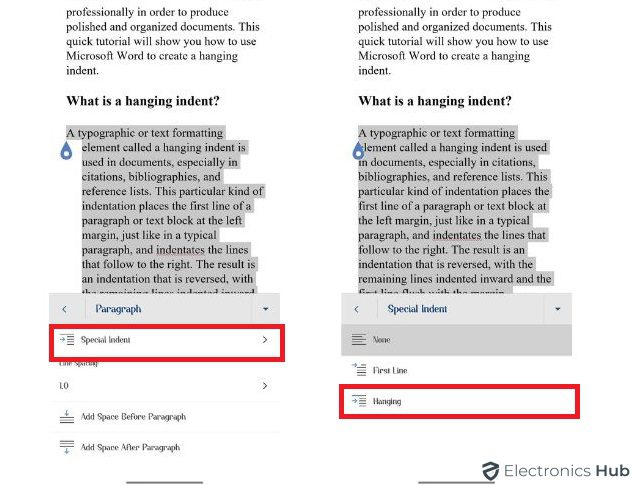
- You might be able to change the hanging indent’s size by entering a numerical value or by utilizing the controls that are offered.
- Verify or save the modifications once you’ve made your choices and edits.
These instructions should generally assist you in creating a hanging indent, though they may differ slightly based on the version of Word and the particular Word app interface on your iPad or mobile device.
How to Apply a Hanging Indent to a Style?
You can use these steps in Microsoft Word to apply a hanging indent to a particular style. Open your Word document first. Next, find the “Styles” group by selecting the “Home” tab. To access the Styles pane, click the tiny arrow located in the corner of the “Styles” group. Once you’ve located the style you wish to change, right-click on it and choose “Modify.” Click the “Format” button at the bottom of the Modify Style dialogue box, then select “Paragraph.” To set the desired hanging indent size, select “Hanging” from the “Special” dropdown menu and modify the “By” value as necessary. Verify the modifications, and your document will now have a hanging indent according to the chosen style, guaranteeing a standardized and expert formatting approach.
Other information
A great way to keep formatting consistent across your document in Microsoft Word is to apply a hanging indent to a style. This feature will be beneficial for academic papers, reports, and documents with references or citations. You can make your document appear more professional and readable by adding a hanging indent to a style, which will ensure that all instances of the style have the same structured appearance. Note that these steps might differ slightly based on your Word version, but the overall procedure stays the same. This method streamlines the formatting process and saves time while maintaining a consistent look throughout your documents.
How to Make a Hanging Indent On Google Docs?
Use these procedures to create a hanging indent in Google Docs:
- Open the document in Google Docs.
- Draw attention to the paragraph or passages for which you wish to use a hanging indent for.

- Select “Format” from the menu at the top of the display.
- Click on the “Format” menu and choose “Align & indent.”

- Select “Hanging” from the sub-menu that displays.
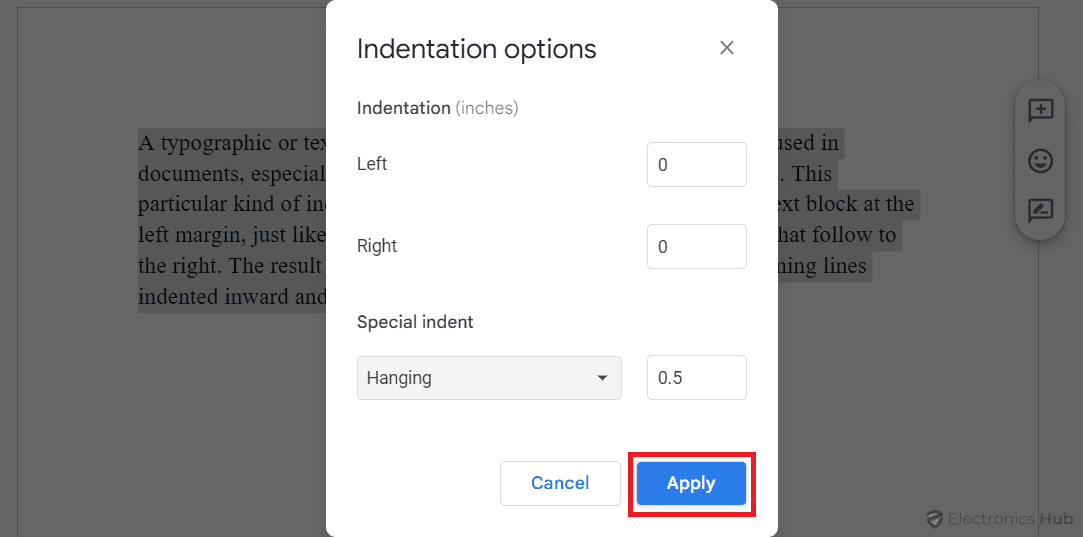
- To determine the appropriate size for the hanging indent, make adjustments to the “First line indent” and “Hanging indent.” To achieve the hanging effect, the “Hanging indent” should be larger than the “First line indent,” and the “First line indent” should generally be set to 0.5″ or another appropriate value.

- To add the hanging indent to your chosen text, click “Apply”.
The first line of your text will now be flush with the left margin, and the lines that follow will be indented to the right, creating a hanging indent. This is especially helpful for structuring references, citations, and lists in your Google Docs document.
Hanging Indent in Microsoft Word – FAQs
Ans: The hanging indent might not function for a number of reasons. Verify that you have chosen the text correctly. Ensure the values for “First line indent” and “Hanging indent” have been changed correctly. Verify that your document has no inconsistencies in page layout or formatting settings. Restarting Google Docs or clearing the cache on your browser may help fix the issue if it still doesn’t go away.
Ans: When using the hanging indent, your first line of a paragraph begins at the left margin and the lines that follow are indented to the right. With the first line aligned with the margin and the remaining lines indented inward to improve readability and organization, it produces a visually distinct appearance. It is frequently used for lists, references, and citations.
Ans: Most word processing programs, such as Google Docs and Microsoft Word, allow you to create a hanging indent with keyboard shortcuts quickly. For Windows, press “Ctrl” + “T,” and for Mac, press “Command” + “T.” Effortlessly apply a hanging indent to any text by selecting it and using these shortcuts instead of navigating through the formatting menu.
Ans: Between the left margin and the first line of a hanging indent, there should generally be 0.5 inches, or roughly 1.27 centimetres, of space; the subsequent lines are indented even further to the right. This formatting style improves readability and organization in documents with reference lists or citations.
Conclusion
In summary, a hanging indent is a useful typographic tool in document formatting, with its 0.5-inch (1.27-centimeter) gap between the left margin and the first line. It is essential for improving the readability and structure of different types of content, such as bibliography entries, citations, and reference lists. Reader navigation and information retrieval are facilitated when items within a list or document are distinguished using this indentation style. Learning how to create a hanging indent is essential to producing polished, professional, and well-structured documents, whether you’re using Google Docs or Microsoft Word. This will ensure that your content is both readable and aesthetically pleasing.
