When assembling a PC, the most crucial step is connecting the power supply to your motherboard. This vital connection between the two helps ensure the electrical power delivery to all its components. It further helps in enabling the PC to work properly. Moreover, understanding this process to connect your power supply to your motherboard becomes essential if you are a computer enthusiast. This is because of the guarantee it provides of the reliability and stability of the complete system.
In this guide today, we are exploring the required steps along with precautions (which must be taken) while you are making this connection. We will also allow a proper understanding and clarity of how you can efficiently power a motherboard.
Connecting Power Supply Cable – A Stepwise Guide
Step 1: Collect the Required Tools
Make sure that, along with preparing a flat and clean surface, you collect all the required tools to perform this process. You will ideally need the following:
- Screw Driver: You will need varied screwdriver sizes as well as types
- Zip/Cable Ties: For cable security and better cable management
- Wrist Bands (Anti-Static): It’s optional, however, you can put it to use for safety purposes.
Once collected, you must get started by attaching or mounting the PSU at the bottom (locate the 4 holes) on the back side of the case.
Note: Avoid over-tightening of the screws.
Step 2: 24-Pin Cable
This step involves connecting the 24-pin power cable directly to the motherboard. You can locate the cable slot at the top corner on the right side of the motherboard.
Now, basically, the 24-pin cable means a power supply cable that is put to use in desktop PCs. This helps connect the PSU i.e. power supply unit, to the motherboard. It thus provides enough power to the graphics card, CPU, memory, etc. It comprises a 24-pin female connector along with a 24-pin male connector.
In the case of certain high-end motherboards, you may need extra auxiliary power connectors that too, with the 24-pin cable.
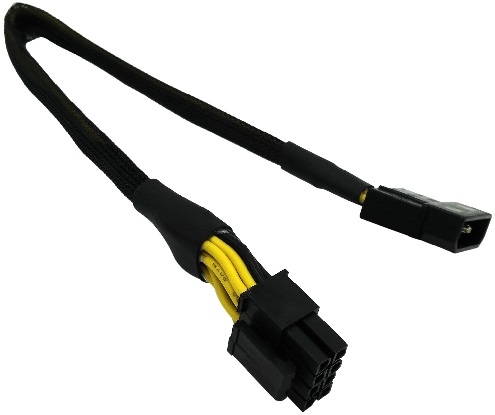
Step 3: 8-Pin (4+4) Cable
The next step involves connecting/inserting the 8-pin (4+4) CPU power cable directly into the motherboard. The slot for the 8-pin connector can be found near the CPU labeled CPU_PWR1 or CPU_PWR.
Now, the 8-pin (4+4) cable provides enough power to the central processing unit socket on the motherboard. It comprises 4-pin connectors, which, when taken together, construct an 8-pin connector. They can also be put to use individually as two 4-pin connectors.
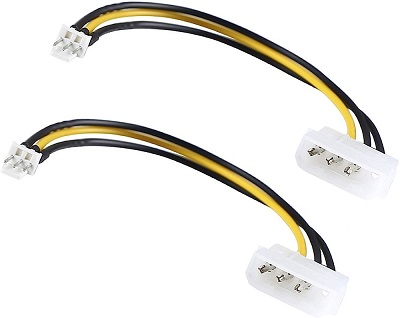
Step 4: Molex Cable
This step involves connecting the Molex cable to the motherboard by locating a connector that comprises 4 holes without any extra parts.
The Molex cable comprises a female connector (with sockets) and a male connector (with many pins/blades). The connectors assure getting securely fit; hence, they provide a further reliable electrical connection.
Step 5: PCle Cable
The PCIe (i.e. PCI Express) power cable tends to be highly used in PCs to provide power specifically to PCIe devices. They could be graphics cards or expansion cards or so. They comprise female connectors (i.e. one or more) at one end and one male connector on the opposite end.
The male connector gets plugged into the PSU. However, the female connectors get connected to varied PCIe devices.
Step 6: SATA Cable
SATA (i.e. Serial ATA), a data and power cable, is used to connect varied storage devices/tools to a computer system. It could be solid-state drives (SSDs), hard disk drives (HDDs), optical drives, or more.
The SATA cable comprises a very thin, flat cable with an L-shaped connector. This cable’s one end is connected to the SATA port on the SATA controller card or motherboard. However, the other end connects to the SATA port on the storage device.
Step 7: Verification of the Connections
Once done with the above steps and noticing if all power cables are properly connected, go forward by double-checking these connections. This will help you understand if these cables are properly seated and secure.
Power Supply Connectors Types
1. AUX Connectors
 AUX connectors, also called auxiliary connectors, are additionally used power connectors in varied computer systems types. This term “AUX” tends to be used for a power connector, which is generically not the prime CPU or/and motherboard power connector.
These power supply connectors may comprise varied pin configurations or shapes based on their specific purpose.
4 Types of AUX Connectors
| Connector Name | Description |
| PCIe AUX Connectors | Allowance of additional power to PCIe expansion/graphics cards |
| Molex AUX Connectors | Power peripherals include older hard drives, case lighting, fans, etc. |
| SATA AUX Connectors | Supply power to SATA-based devices, including HDDs, optical drives, SSDs, and more. |
| Floppy Drive AUX Connectors | Helps in powering floppy disk drives (these are less common in the newest systems) |
2. Molex P4 12V Power Connector
 The Molex P4 12V Power Connector, which you can also name the 4-pin P4 connector, has been particularly used for Pentium 4 processor motherboards. This connector tends to allow extra power to the central processing unit.
It’s been incorporated on ATX-2 motherboards i.e. into the prime ATX power connector. Hence, it is highly crucial that the power supply unit comprises the required 4-pin P4 connector with a Pentium 4 motherboard.
3. Molex Connectors
 Molex connectors tend to be highly utilized electrical connectors and are famous for how reliable and versatile they are. They are mostly used in various industries like electronics, industrial machinery, computers, automotive, telecommunications, and more.
Furthermore, these connectors tend to comprise female and male components that can be disconnected and connected easily. This way, they allow for favorable disassembly/assembly and also feature varied sockets or pins arranged in a particular pattern in terms of apt electrical connections.
Types of Molex Connectors
| Connector Type | Description | Typical Applications |
| Molex Mini-Fit Jr. | Power connectors comprising a compact build/design | Power supplies, industrial equipment, servers, etc. |
| Molex Micro-Fit 3.0 | High-density connectors in terms of power and/or signal | Computers, industrial machinery, telecommunications, etc. |
| Molex MX150 | Sealed connectors that are resistant to vibrations and moisture | Automotive systems or marine applications |
| Molex Picoblade | Miniature connectors to be used for compact builds/devices | Laptops, small-scale electronics, mobile phones, etc. |
| Molex KK | Versatile connectors comprising too many options | Computers, consumer electronics, etc. |
4. Pin Berg Connector
 The 4-pin Berg connector tends to be a particular power connector type, which is highly used for connecting the PSU (i.e. power supply unit) to SFF devices, like 3.5 inches floppy drives. These connectors are available in varied power supply standards, as suggested below.
4-pin Berg connector along with its usage in varied power supply standards:
| Power Connector | Usage |
| 4-pin Berg Connector | Helps in connecting small-sized form factor devices, like floppy drives and the PSU. |
| Shows availability in ATX-2, ATX, and AT power supply standards | |
| AT Power Supply | The power supply standard is older |
| White connectors comprising a particular pin configuration | |
| ATX Power Supply | The power supply standard is modern |
| Black connectors comprising a slightly varied pin configuration in comparison to AT | |
| ATX-2 Power Supply | Doesn’t come into a highly utilized standard |
| Utilized for peripherals, specifically in ATX power supplies |
5. Molex ATX Power Connector
 This one is also named the ATX motherboard power connector. This power connector type is particularly used in a computer system to provide power to the motherboard. It was given its name after their company Molex. This rectangular connector comprises pins, which fit into their respective motherboard sockets.
A standard ATX power connector comprises 24 pins, which are further arranged in two rows, i.e., 12 pins in each row. It tends to provide the given voltages:
- +3.3V
- +5V
- +12V
- -12V
Moreover, when we talk of the connector, it tends to include extra pins for:
- Power on/off signals.
- Standby power.
- Varied control signals.
How is Modular Power Supply Better than Non-Modular Power Supply?
Well, the given table of differentiation between both will help you understand how modular power supply is better:
| Feature | Modular Power Supply | Non-Modular Power Supply |
| Cable Management | Provides options for improved cable management | Limited options for cable management |
| Customizability | Easy customization along with flexibility | Limited choices for customization |
| Airflow/Aesthetics | Improves airflow along with overall aesthetics | Ends up obstructing airflow along with creating cable clutter |
| Easily Installed | Simplifies the process of installation | May need extra effort for cable management |
| Upgradability | Facilitates easy cable removal/addition | Fixed cables that may end up limiting the future upgrades |
| Cost | Typically, on the expensive side because of the added features | In general, they are affordable |
Eight Important Tips For Cable Management
Enlisted are 8 important tips for managing cables with the power supply:
- Plan Ahead: Before installing the power supply, make sure you plan the cable routing. Also, try identifying the most-suitable paths so you can end up avoiding obstruction or clutter.
- Put Modular Cables to Use: If you have been utilizing the modular power supply, make sure you put crucial cables to use. Also, ensure you are leaving out unused cables, which will further help reduce cable clutter and enhanced airflow.
- Put to Use the Space Behind the Motherboard Tray to Route Cables: Utilize this space that most computer cases tend to have, which is behind the motherboard tray to secure, hide, and route your cables.
- Put to Use Velcro Strips and Cable Clips: Velcro strips and cable clips may help you out by securing cables to cable management points that exist or the case. This is how they stop them from getting dangled or tangled.
- Routing the Cables Along Case Channels: Most of the newest computer cases have allowed cable management channels. You can utilize these management channels so you can route and also get to hide these cables for an overall clean look.
- Use Cable Combs/Wraps: When it comes to these cable combs/wraps, they can certainly help in straightening and aligning individual cables, This way, they are allowing them with a neat and organized appearance.
- Leave Space For Proper Airflow: Make sure the cables you are putting to use are not ending up obstructing the airflow path or blocking the fans within the case. If the cable management is good enough, it improves the overall cooling performance.
- Routinely Maintenance: Routine checks on your cable management ensure these cables aren’t tangled or loose. This further will end up maintaining good airflow. Also, this will lead to preventing potential issues.
Power Supply To Motherboard – FAQs
Ans: You can learn about adequate power supply connectors by simply turning towards the motherboard manual. This provides you with specific information or data about these connectors, which are required for your motherboard model. The connectors tend to be labelled. Now, this further helps you with an easy match with the corresponding sockets that are there on the motherboard.
Ans: Typically, it’s advised to use the power supply, which tends to have a wattage equal to or more than what has been recommended for the components of your PC. If you use the lower-wattage power supply, it may end up causing system shutdowns or instability.
Ans: If this issue happens, look forward to powering off the PC immediately and disconnecting the power supply as well. Once done with this, carefully relocate those connectors to be correctly oriented.
Ans: Well, to put to use the right connector that too for every part is crucial. If you go for mixing varied power supply connector types, it may end up leading to compatibility-related issues or it may also end up causing damaged components.
Conclusion
A proper motherboard and power supply connection is required for the apt operation of a computer system. By carefully following all the listed steps in this guide, you can ensure a reliable and stable power delivery to their motherboard. This will further enable all its components to work optimally.
