In this project, I will show you how to burn bootloader on ATmega328 Microcontroller. Using this method, you can use your ATmega328 Microcontroller as a standalone on a custom design or PCB or simply burn bootloader on ATmega328 (as well as you can upload the code).
Introduction
If you are viewing this project, then you might probably have used Arduino board. There is a high possibility that the ATmega328 Microcontroller on Arduino UNO might fail after certain time (or improper connection). In order to reuse that Arduino Board, you need a new ATmega328 IC with Bootloader loaded (I will talk about Bootloader in a minute).
There are other reasons for burning Bootloader on ATmega328 Microcontroller like if you have written your own Bootloader and want to test it out or you want understand the working of microcontroller in detail.
WARNING: It is not recommended to tweak the Bootloader in Arduino if you are new to this kind of stuff.
What is Bootloader?
Simply speaking, Bootloader is small piece of code (executable code in .hex format) that resides in the Microcontroller’s memory. Bootloader in Arduino allows us to program Arduino over serial port i.e. using an USB cable.
The job of Bootloader in Arduino is to accept the code from the computer and place it in the memory of the microcontroller.
Why do we need a Bootloader?
Traditionally, microcontrollers like ATmega328 from Atmel are programmed with the help of dedicated programmers which involves some fancy connections. Bootloaders take out this complexity and provides us with an easy way of programming the microcontroller i.e. just by using an USB cable.
Bootloaders resides in a special secured location of the Programmable Flash Memory of the Microcontroller and usually occupies less than 1KB of memory.
What is the need for Burning Bootloader on ATmega328?
As I mentioned earlier, if you want to upload programs onto a brand new ATmega328 Microcontroller IC, you have to use a special programmer (and also set the fuse bits). But if you burn Bootloader on ATmega328, you can simply program the microcontroller over serial port (USB cable).
Once the ATmega328 Microcontroller is ready with bootloader, you can simply use it in your Arduino Board (as a replacement) or use it as the microcontroller if you are planning to make your own Arduino board.
How to Burn Bootloader on ATmega328?
There are couple of ways to burn bootloader on ATmega328 IC. The first way is to use a Dedicated AVR Programmer Hardware. The second way is to use a working Arduino board as the programmer and burn the bootloader on the target ATmega328 Microcontroller.
In this project, I will be using the second method i.e. use Arduino as a Programmer.
Circuit Diagram
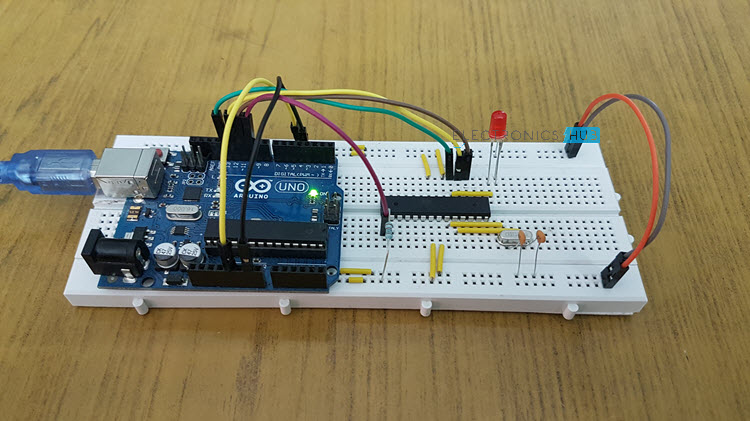
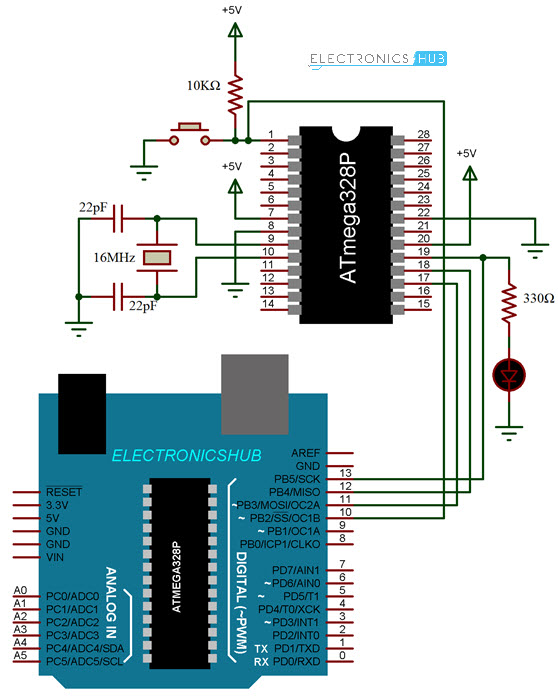
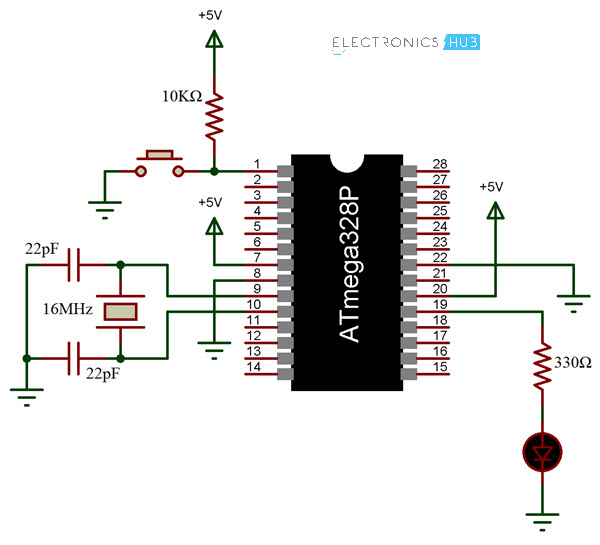
The circuit diagram for burning bootloader on ATmega328 Microcontroller using Arduino is shown below.
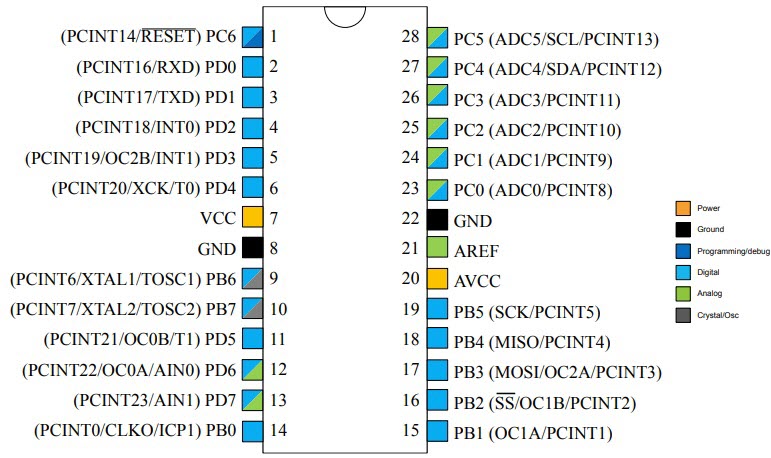
Pin diagram of the ATmega328 Microcontroller is shown in the following image, just in case.
Components Required
- Arduino UNO
- ATmega328 Microcontroller IC
- 16MHz Crystal
- 22pF x 2 Ceramic Capacitors
- 10KΩ Resistor
- Push Button
- 330Ω Resistor
- LED
- Breadboard
- Connecting Wires
- 5V Power Supply
Procedure for Programming Bootloader on Atmega328
As mentioned earlier, Arduino UNO is being used as an AVR programmer here. In order to achieve that, you have to upload a special program onto your working Arduino UNO board called “Arduino ISP”.
So, before making the connections, connect the working Arduino UNO to the computer using USB cable and select the appropriate board and PORT in the Arduino IDE.
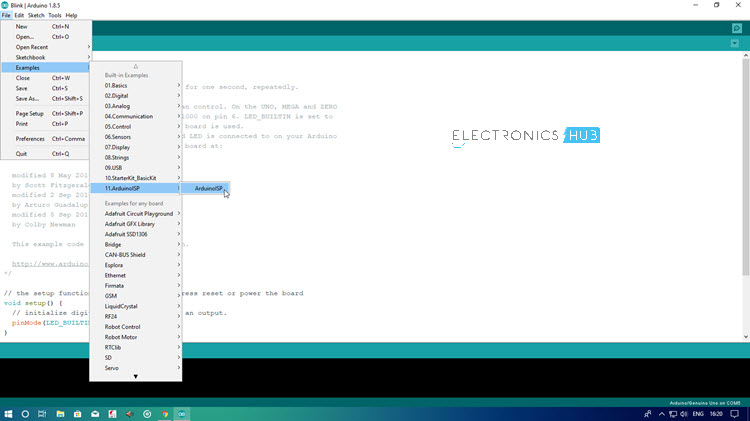
Now, go to File > Examples > ArduinoISP > ArduinoISP. Upload this code to you Arduino UNO in order to turn your Arduino UNO board into an AVRISP Programmer.
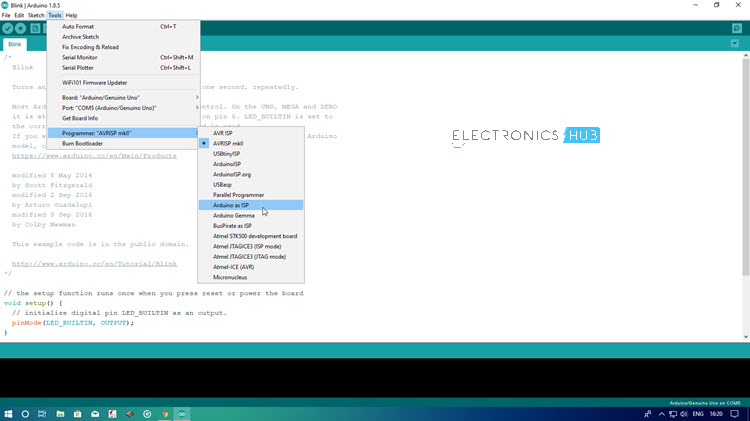
After completing this step, make the necessary connections (if not made already). Now go to Tools > Programmer and select “Arduino as ISP” option. After this, you are ready to burn the bootloader.
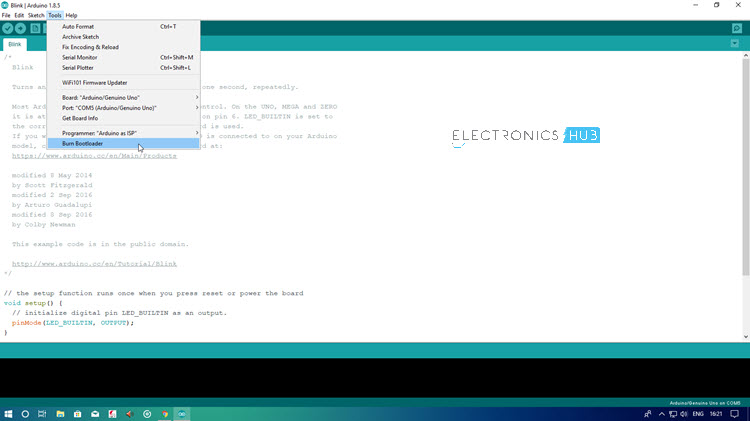
Simply, go to Tools and click on “Burn Bootloader”. Your target ATmega328 Microcontroller will be programmed with bootloader.
Upload Sketches to ATmega328
Once you are done with uploading the Bootloader on ATmega328 Microcontroller, you can continue further by uploading a test sketch on to it. For this, retain the same connections as earlier and open any sketch like Blink Sketch, for example.
Do not change any options i.e. the programmer is still set to “Arduino as ISP”. Now, by holding the “Shift” button on the keyboard, click on “Upload” icon. This will upload the sketch to the ATmega328 Microcontroller IC by using Arduino UNO as the programmer.
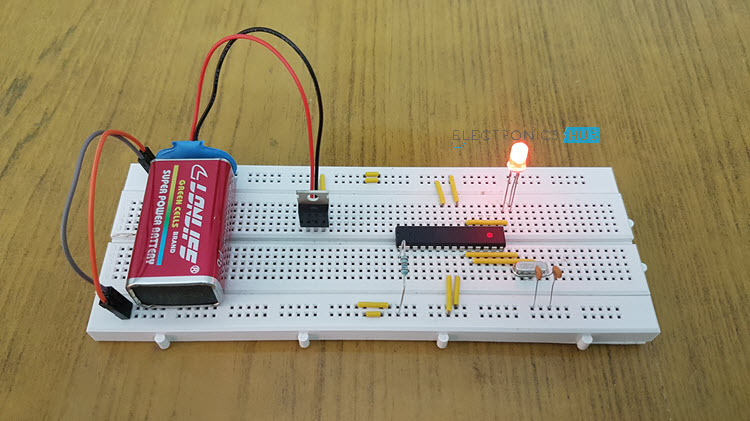
After completing this, you can disconnect the Arduino UNO from ATmega328 Microcontroller and use ATmega328 IC as a standalone device with Blink sketch running on it.
The following image shows the ATmega328 Microcontroller running Blink sketch after being uploaded with the help of Arduino UNO.
NOTE: In order to upload code to Arduino UNO, make sure to switch the programmer back to “AVRISP mkII”.
Conclusion
In this project, I have shown you how to burn Bootloader on ATmega328 Microcontroller IC and also as an extra option I have also shown you how to upload Arduino sketches onto ATmega328 with Bootloader using Arduino UNO.

3 Responses
Nice job….very interesting.clear information.
whenever I try to burn bootloader onto the chip it flags an error message that avrdude: Yinkes! Invalid device signature. please help me out.
thanks.
Can a Arduino NANO be used to perform the same operation?