In this project, I will design a simple Arduino Car Reverse Parking Sensor Circuit using Arduino UNO and HC-SR04 Ultrasonic Sensor. This Arduino based Car Reverse Sensor can be used for an Autonomous Navigation, Robot Ranging and other range related applications.
Overview of Arduino Car Reverse Parking Sensor
Parking a car in congested parking lots and tiny spaces is a tedious job and the important thing is that you must be very careful while reversing so that you do not damage the car (your car or the adjacent one).
Almost all modern cars are equipped with reverse parking sensors that are activated when the car is put in reverse gear and beep at variable rate depending on the distance between the car and the closest obstacle.
The Reverse Parking Sensors that are equipped in the car are basically Ultrasonic Proximity Sensors i.e. they use Ultrasonic Sensors to measure the distance between the car and the object and warn the driver if the car is too close.
In this project, I have built a simple prototype of a Car Reverse Parking Sensor with the help of Arduino UNO and the very famous HC-SR04 Ultrasonic Sensor.
Although this system can be implemented in several DiY projects involving robots, autonomous vehicles etc., I wouldn’t recommend it to actually implement in your car (if your car isn’t already equipped with one).
Output Video
https://www.youtube.com/watch?v=GBKnuKaLs9U
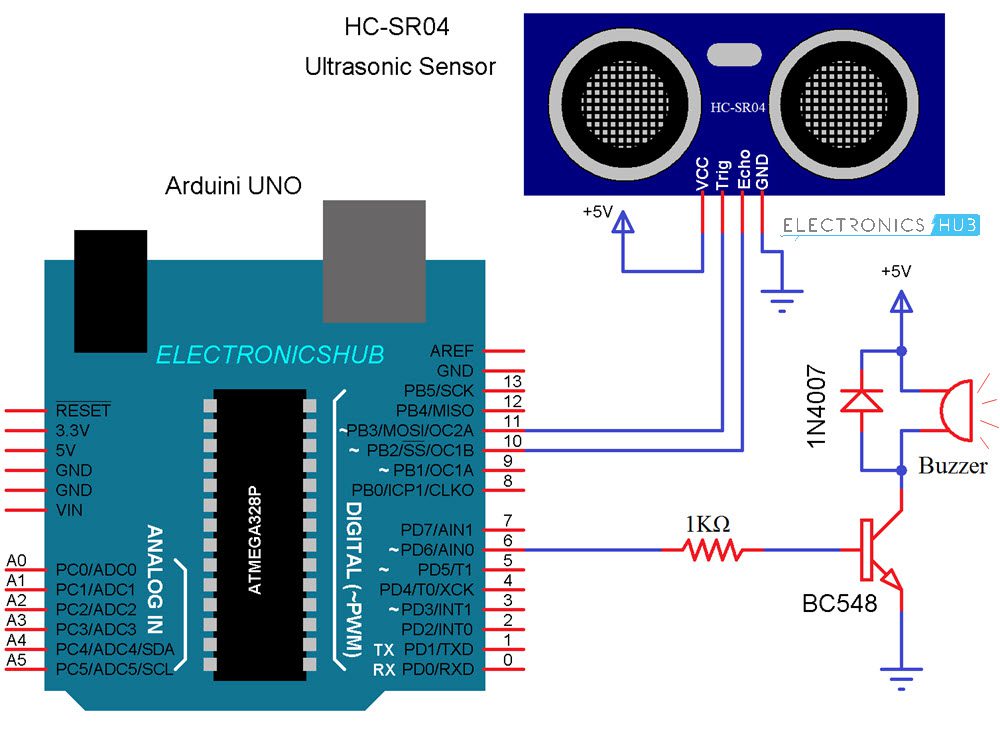
Circuit Diagram
The circuit diagram of Arduino Car Reverse Parking Sensor circuit is given in the image below.
Components Required
- Arduino UNO [Buy Here]
- HC-SR04 Ultrasonic Sensor
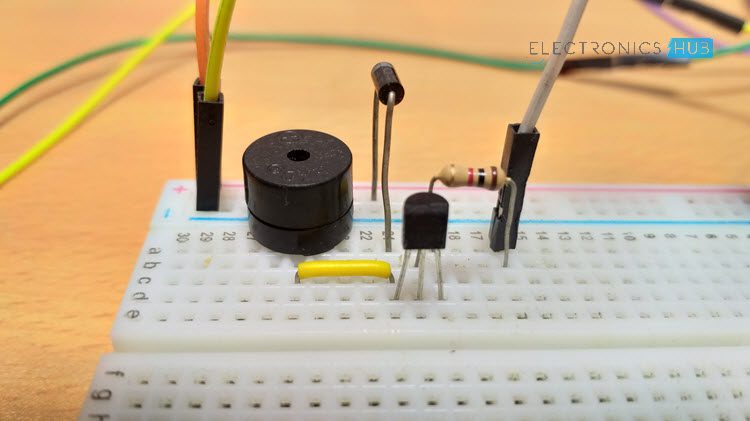
- BC548 NPN Transistor (any NPN Transistor can be used)
- 5V Buzzer
- 1N4007 PN Junction Diode
- 1KΩ Resistor (1/4 Watt)
- Mini Breadboard
- Connecting Wires
- 5V Power Supply
Principle of the Circuit
As mentioned earlier, the Ultrasonic Sensor is the main unit (component) that is responsible for measuring the distance. Arduino UNO acts as the main controlling unit that will control the Ultrasonic Sensor, calculate the distance and activate the buzzer.
The principle of the circuit is as follows: The Ultrasonic Sensor sends acoustic pulses and the Arduino measures the interval of each reflected signal. Based on this time interval, Arduino then calculates the distance of the object.
Arduino then activates the Buzzer if the distance between the sensor and object is less that a certain range.

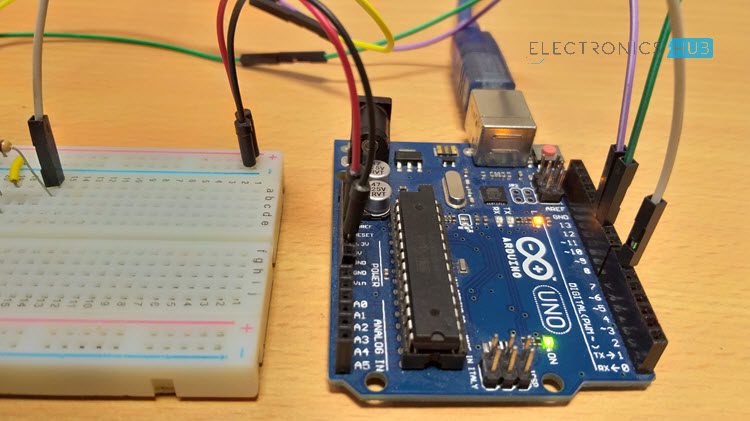
Design of Arduino Car Reverse Parking Sensor Circuit
The design of the Arduino Car Reverse Parking Sensor Circuit is very simple. Starting with the Ultrasonic Sensor, it has 4 pins: VCC, TRIG, ECHO and GND.
The VCC and GND are connected to +5V and GND of the power supply while the TRIG and ECHO are connected to Digital I/O pins 11 and 10 of Arduino respectively.
Even though the buzzer used here is a 5V buzzer, I decided to use a driver circuit for the buzzer consisting of an NPN Transistor. I have used BC548 along with a 1KΩ Resistor (for the base) to drive the buzzer.
Code
The Arduino code for the project is given below.
Code Explanation
The code is very simple and if have followed our PORTABLE ULTRASONIC RANGE METER project, then you can easily understand this code as well.
As per the data sheet of the HC-SR04 Ultrasonic Sensor, its working is as follows:
The TRIG Pin should be high for a minimum of 10µS.
After this, the Ultrasonic Sensor automatically sends 8 acoustic pulses of 40KHz frequency.
The time between this and the reflected signal is calculated by reading the HIGH on the ECHO pin.
Distance can be calculated as Time (for which ECHO is HIGH) * Velocity of Sound (340m/s) / 2.
Using the same principle in the code, first the TRIG is made HIGH for 10µS using the following lines of code.
digitalWrite(trigPin, LOW);
delayMicroseconds(2);
digitalWrite(trigPin, HIGH);
delayMicroseconds(10);
digitalWrite(trigPin, LOW);
Then, the time is calculated for which the ECHO Pin is HIGH using the pulseIn function of Arduino.
Finally, the distance in centimeters is calculated using the following line in the code.
Working
I think the working of the project might have been very clear by now. When the circuit is powered ON, the Arduino will start measuring the distance of the objects in front of the Ultrasonic Sensor.
If the calculated distance is less than 100cm, then Arduino activates the buzzer. If you are interested, you can modify the code to beep the buzzer so that the intensity of the beeps increases with a decrease in the distance (like in a real car).
Applications
The Arduino Car Reversing Parking Sensor Circuit can be used:
- Autonomous Vehicles
- Obstacle Avoiding Robots
- Distance Measurement
- Proximity Detection
- Human Detection
- Drones, UAVs and Helicopters

3 Responses
Hello there.
Can this be connected to a 12V USB port in your car? What is the absolute maximum input voltage for the ATmega328P chip?
Thanks.
ofcourse but operating voltage of microcontroller is 5v but input voltage can be 6-20v
can i upload the same code for arduino nano w/ ATmega328/CH340G?