A good internet connection is essential for work and streaming, relying on your Wi-Fi. It’s frustrating when signals vanish because of hidden names or signal problems. No worries, we’ve got solutions! This blog guides you through the steps when your Wi-Fi seems to disappear.
Why Is My Wi-Fi Not Showing Up?
If your Wi-Fi network isn’t showing up, here are some possible reasons:
- The router may not be turned on or could be malfunctioning.
- Other electronic devices could be interfering with the Wi-Fi signal.
- The network might be set to hide its SSID, making it invisible in Wi-Fi searches.
- The router could have reached its limit for connected devices.
- The router might be outdated or require a firmware update to function properly.
How To Fix “Wi-Fi Network Is Not Showing Up” Issue?
1. Turn on Wi-Fi
Windows: Look for the Wi-Fi icon in the taskbar (usually on the bottom right corner). Click it and ensure “Wi-Fi” is turned “On.”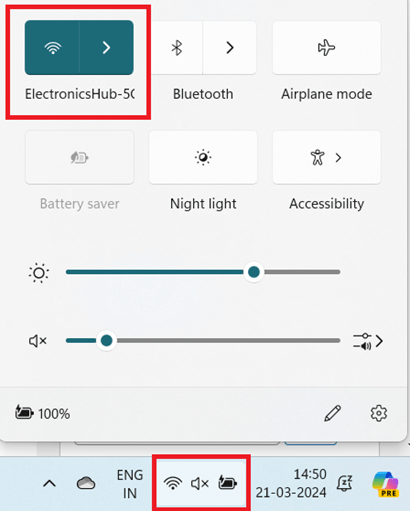 Mac: Click the Apple icon in the top left corner, then select “System Preferences.” Go to “Network” and ensure “Wi-Fi” is turned “On.”
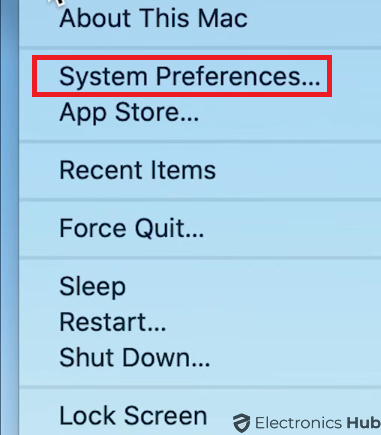
Mobile Devices (Android/iOS): Swipe down from the top of the screen to access the control panel. Locate the Wi-Fi icon and tap it to turn the Wi-Fi “On.”
2. Restart Devices
Step 1: Power down your device (computer, phone, tablet).
Step 2: Unplug your router and modem from the power outlet for about 30 seconds.
Step 3: Plug the modem back in and wait for it to fully boot up (usually indicated by lights).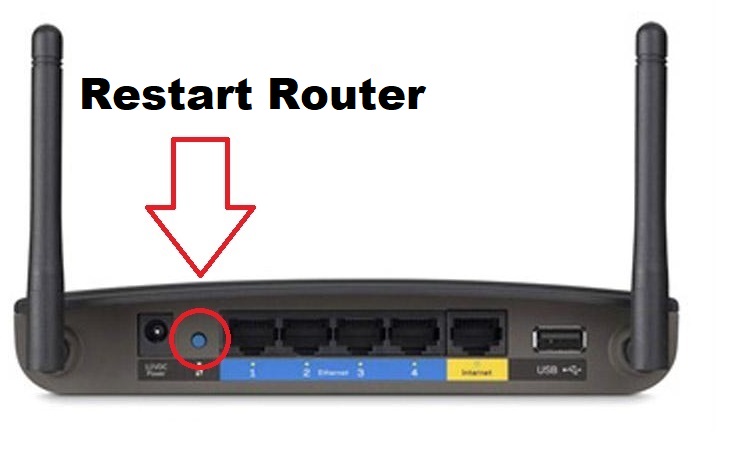 Step 4: After a minute, plug the router back in and wait for it to completely start up as well.
Step 5: Restart your device and try connecting to Wi-Fi again.
3. Check for Hidden Network
Windows and Android:
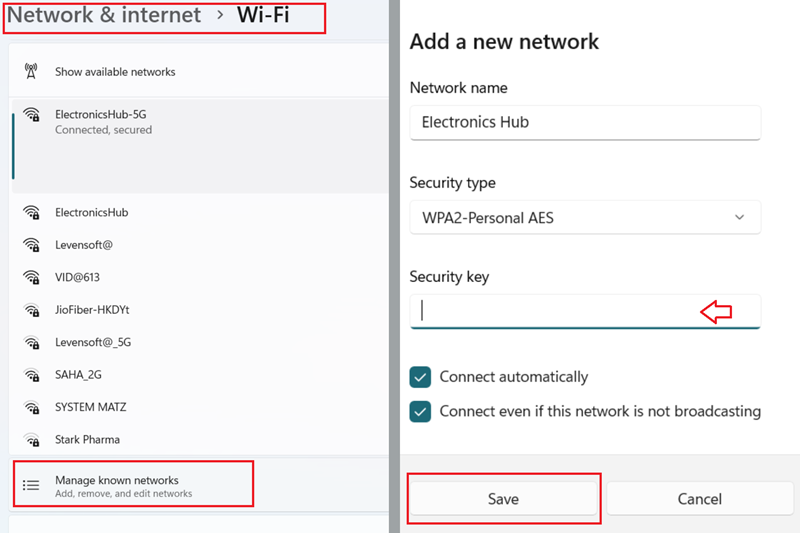
- Go to “Settings” > “Network & Internet” > “Wi-Fi” > “Show available networks.” Look for the network name (SSID)
- If you don’t find your network, Select “Manage Known Networks” and Add a new network manually enter your Network Name, Security Type, and Password.
Mac: Click the Apple icon > “System Preferences” > “Network.” Click the “+” button and select “Create Network.” Choose “Wi-Fi” as the connection type. Enter the hidden network name (SSID) and password.
4. Verify Router Broadcasting
Consult your router’s manual: The manual will have specific instructions on how to check if your router is broadcasting a Wi-Fi signal. This process often involves accessing the router’s web interface through a web browser.
Contact your ISP: If you can’t find instructions in the manual or are unsure about accessing the router’s interface, contact your internet service provider (ISP) for assistance.
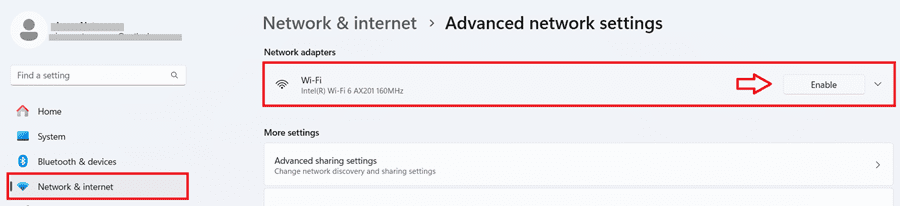
5. Enable Network Adapter
Windows: Go to “Settings” > “Network & Internet” > “Change adapter settings.”
- If you are unable to find go to the search bar and type “Change Adapter Settings” Right-click on your Wi-Fi adapter and select “Enable” if it’s disabled.
Mac: Click the Apple icon > “System Preferences” > “Network.” Select your Wi-Fi adapter from the list on the left. Click the “+” button below the list to add a service if “Wi-Fi” is not listed.
Mobile Devices: Restart your device. Wi-Fi adapter settings might be limited on mobile devices, but a restart can often resolve minor issues.
6. Update Network Drivers (Windows only)
Step 1: Press the Windows key + R to open the Run dialog.
Step 2: Type “devmgmt.msc” and press Enter to open the Device Manager.
Step 3: Expand “Network adapters.”
Step 4: Right-click on your Wi-Fi adapter and select “Update driver.”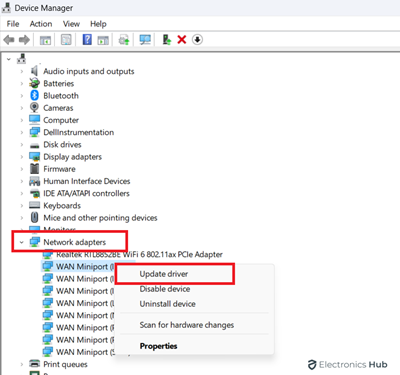
7. Run Network Troubleshooter
Windows: Go to “Settings” > “Network & Internet” > “Status” > “Network troubleshooter.” Run the troubleshooter and follow any on-screen instructions it provides.
Mac: Built-in troubleshooting options for Wi-Fi are limited on Mac. If the above steps haven’t resolved the issue, consider restarting your Mac again or contacting Apple Support for further assistance.
Mobile Devices: Most mobile devices don’t have built-in network troubleshooters. Restarting your device and forgetting the Wi-Fi network (then re-entering the password
8. Check WiFi Settings
The configuration of your device’s WiFi settings can significantly impact its visibility. If your WiFi is still playing hard to get, dive into the settings to ensure everything is in order. Follow these steps to troubleshoot and potentially bring your WiFi network back into the limelight.
a. Access WiFi Settings on Your Device
- Open your device’s settings menu.
- Look for the “WiFi” or “Network”
- Tap or click to access WiFi settings.
b. Ensure WiFi is Enabled and Set to “Visible”
- Confirm that the WiFi toggle switch is turned on.
- Check if your device is set to display available networks.
- Some devices have an option to hide or show WiFi networks – ensure it’s set to show.
9. Signal Interference
Interference refers to unwanted signals that disrupt the intended signal, affecting its quality and strength. In the case of Wi-Fi, interference can cause a weak or unstable connection, or even prevent your device from detecting the Wi-Fi network altogether.
Solutions to Mitigate Interference:
a. Identify and Reduce Interference
- Turn off or relocate electronic devices that might be causing interference.
- Minimize physical obstructions between your router and devices.
b. Router Placement
- Position your router in a central location within your home for optimal signal coverage.
- Place the router away from walls, large objects, and electronics that emit radio waves.
c. Wi-Fi Channel Selection
- Access your router’s settings and change the Wi-Fi channel.
- Use a Wi-Fi analyzer app to identify less congested channels and choose one with minimal interference from neighboring networks.
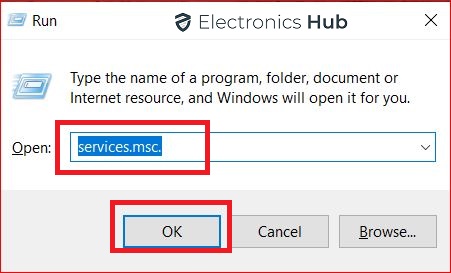
10. Turn on the WLAN AutoConfig service
The WLAN AutoConfig Service is involved with configuring the Wireless Network settings. It applies to all the IEEE 802.11 on your PC. Enabling it might fix the problems with the Wi-Fi.
- Hit the Windows+R keys together to open the Run Dialog box and then type in the word services.msc.
- From the list of services, right-click on the WLAN Autoconfig and select the Properties option.
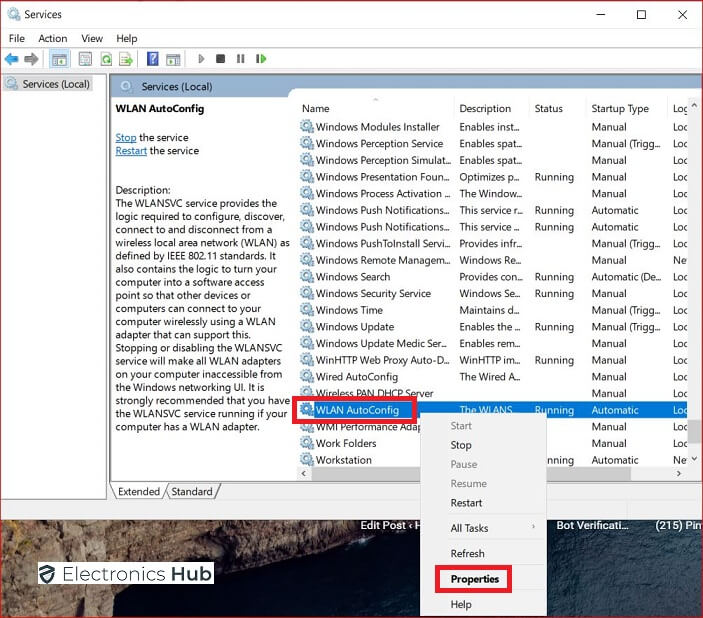
- From the startup type, choose Automatic and then hit the Apply button.
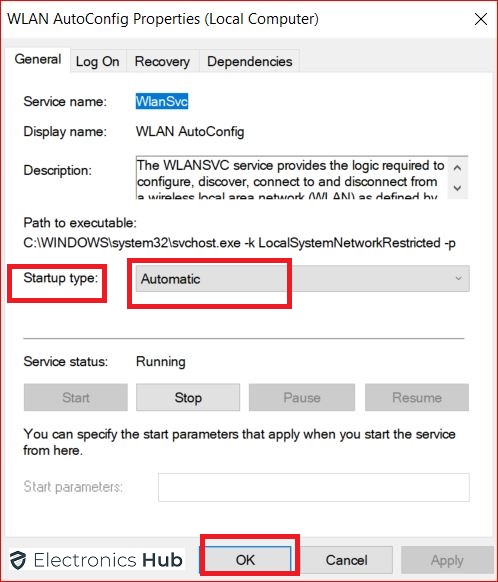
- Finally, restart the pc and see if the error is resolved.
10. Contact Your Internet Service Provider
When troubleshooting your elusive WiFi reaches a dead end, it’s time to involve your Internet Service Provider (ISP). Begin by checking their official website or contacting them to confirm there are no service disruptions in your area. If the issue persists, reach out to their customer support, providing a clear overview of the problem and the steps you’ve taken.
Conclusion
Having a dependable Wi-Fi connection is crucial in today’s digital world. By following these straightforward steps, you can tackle the challenge of a vanishing Wi-Fi. Remember, a reliable connection is not just a luxury but a necessity.
