A thermostat is a controlling hub for devices like air conditioners and furnaces where temperature regulation is extremely important. The efficiency of the thermostat will determine the performance of heating and cooling devices. There are going to be times when you may need to alter the thermostat wiring as per requirements.
Moreover, you may need to upgrade the thermostat to the latest model for more efficiency in temperature detection and regulation of connected devices. In this article, we will explain in detail everything you need to know about thermostat wiring, color system, as well as how to install a new thermostat perfectly.
1. Getting Started – Look For The Common Wire
The common wire helps to deliver constant power. Also called the C-wire, it is important for smart thermostats as well as programmable thermostats. With it, you can set the air conditioner to the desired temperature. However, you will even find some thermostats that will run without the C-wire. It works by providing hot wires and is essential for powering the thermostat. With a C-wire, there will be optimal function.
To determine if your thermostat has a C-wire, you need to turn off your thermostat. Make sure there is no heating or cooling function. Follow it by turning off the AC breaker and then detach the thermostat from the wall. Common wires are labeled as “C”. If you happen to find one, you can now proceed with the installation.
Also Read: Thermostat Not Reaching Set Temperature – Fixes
What If There Is No C-wire?
Always check the back of the thermostat if the “C” wire is tucked. Some old models don’t require the common wire even though it is available. You can even check the furnace to have a look. It may only have a C-wire connection as well as a lead. In this case, you need to find the lead which is near to the thermostat.
However, it is always advisable to seek professional help if you cannot find the difference between a two-wire and four-wire thermostat. You can even look for thermostats that eliminate the need for having a common wire. Keep in mind that there will be limited functionality without a C-wire.
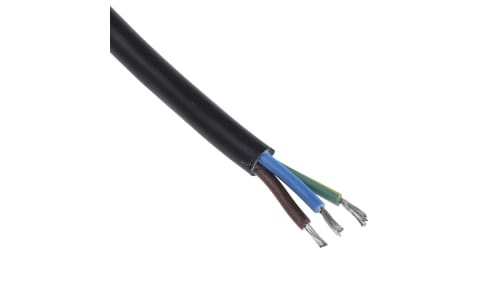
2. Learn Thermostat Wire Colors
Generally, a thermostat base comprises 16 sockets. You have to remove the thermostat control panel to expose the colored wires. You will find multiple letters like C, R, Y1, Y2, W1, W2, BK, and AUX NO. This may not be available with thermostats having two, three, and four wires. In some cases, not all sockets wire are together. However, there are designated wires with color characterization. Here we will explain to you about the thermostat wire colors.
-
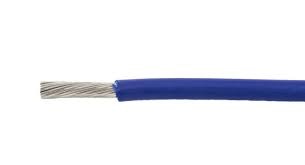
Black Or Blue Wire (C)
In a thermostat, you will find the C-wire which can be in either Black or Blue. The functionality of a C-wire is to offer a continuous 24V electric circuit. It is very important for a smart thermostat and helps to generate overall power.
The Black or Blue wire allows you to connect it to the “C” terminal. However, in older models, you may not find the C-wire as it comes with limited functionality. On the contrary, digital thermostats consume more power even when the appliance is not running.
-
Red Wire (R/Rc)
The red wire is coded as R or Rc. It is for power and provides 24-hour volt AC power. Do keep in mind that these types of wires are only suitable for dual transformers or Air Conditioning systems. In special cases, you will also find Rc or Rh terminals on the dual transformer systems.
-
White Wire (W1/W2)
The main functionality of a white wire is for heating. It is coded as W1 and W2 and is available in gas furnace thermostats. However, it is not at all a requirement for air conditioner thermostats. The wire offers heating in different devices as well as heat pumps. If it comes with W2 coding, it can offer dual-stage heating. W2 wires are suitable for heat pumps.
-
Orange Wire For O
The orange wire is linked to the heat pump. Also coded as an O thermostat wire, it helps to reverse the valve cooling. This type of wire only applies to air source heat pumps. It allows you to connect to the outdoor condenser which is an exterior unit of the heat pump.
-
Dark Blue Wire For B (O/B)
When it comes to the dark blue wire, it can reverse valve heating. Some models require a dark blue or B-wire for the t-stat terminal when the heating mode is on. Keep in mind that the dark blue wire and the orange wire are interchangeable.
-
Green Wire (G)
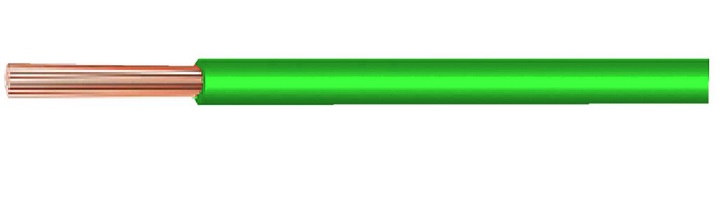
The G-wire or the green wire controls the fan of the air handler. It can terminate the furnace and allows you to connect it to the G terminal. The G-wire is regulated through the power input.
-
Yellow Wire (Y1 And Y2)
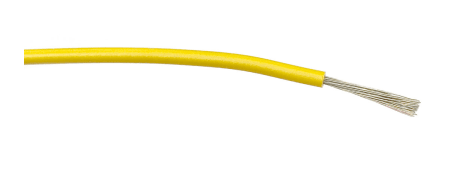
The yellow wire allows you to connect to the compressor. It lets you control the overall system of the air conditioner. The yellow wire ends at the compressor contractor and can connect to the Y terminals. You can even find the one that can be coded as Y1 that can offer single-stage or ordinary cooling. In some air conditioners, it can come with Y2 coding for second-stage cooling. Y2 terminal is only required for dual-stage compressors.
Other Wires (AUX NO, AUX C, AUX NC, BK, RS1, RS2, ODT1, ODT2)
In addition to the above, you will also find the one that can have other wires. Always know that each wire has a specific function. In some cases, it may not have the exact color code. For this, you will have to get a technician while installing the thermostat. Thermostat wiring colors are inconsistent and it can be complicated. You can also check the manual of the thermostat to understand the colored wires better.
Standard Thermostat Wiring Labels, Wire Colors and Their Functions –
| Labels | Colors | Functions |
| C | Blue/Black | Common Wire |
| R | Red | 24V Power |
| RC | Red | 24V Power |
| W1 | White | Heating |
| W2 | Brown/Others | 2 Stage Heating |
| O | Orange | Reverse Valve For Cooling |
| B | Blue | Reverse Valve For Heating |
| G | Green | Indoor Fan/Air Handler |
| Y1 | Yellow | Cooling |
| Y2 | Light Blue/Others | 2 Stage Cooling |
| E | No Fixed Color | Emergency Heating |
| X/AUX | No Fixed Color | Auxiliary Heating |
| S1/S2 | No Fixed Color | For Outdoor Unit |
3. Installing A New Thermostat
Installing a new thermostat has to be done carefully. For this, you need to keep it in the same location where the old thermostat was. Make sure that the wires are pushed through the new hole.
You must do it wire by wire so that there will be perfect installation. If you have the photograph of the old thermostat, you can reconnect the wires with ease. A color-coded design helps to make quick reconnection. Put the wire on the right terminal and follow it by tightening it with the set screw.
-
2-Wire Thermostat Wiring (Furnaces)
What You Have – A basic thermostat has two wires. It can have white and red wire. However, this type of wiring is only for furnaces and does not require a common wire. The red wire is for power and the white wire is for heating.
Process – You can begin the installation by removing the old furnace thermostat’s control panel. Always keep in mind where the wires go. The white wire goes through the w1 or Rh and the red wire will go to the Red R. Alternately, taking a photograph can be very helpful.
The next step would be to unscrew the two wires. You can now remove the motherboard and put the new thermostat. Follow it by reconnecting the white and red wires and tighten down the screw accordingly. Now you can put the control panel back and then give it a test by turning the furnace on.
-
3-Wire Thermo Wiring (Heaters, Boilers)
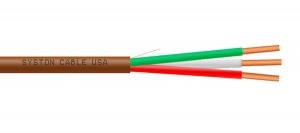
What You Have – A 3-wire thermostat is suitable for warm water heaters and boilers. It can come with the codes W, R, and G. What separates it from the 2-wire thermostat wiring is that it comes with an additional green wire, which is for fans. The (g) green wire acts as the common wire.
Process – You can start the installation process by removing control panel. Always take pictures of the three wires so that there will be an easy installation. You will have to secure the wires by removing the motherboard. Once you are done, you can put the motherboard at the right spot.
Try to remove the wires across the thermostat. The next step will be to properly reconnect the cables which are green to G, white to W or W1, and red 2 R. It has to be followed by tightening the screws. You can now put control panel back and see if it functions appropriately.
-
4-Wire Thermo Wiring (Heat Pumps)
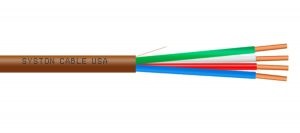
What You Have – With four-wire thermostats, you can have maximum flexibility. It is suitable for heat as well as HVAC. 4-wire thermostats allow the appliance to function normally. Compared to the 3-wire thermostat, this also includes a yellow or blue wire that is for cooling purposes. It helps to produce airflow when there is a need for a fan.
Process – To install a 4-wire thermostat, you will have to turn the control panel off. Take a photograph of the wires so that there will be an easy installation. Now you need to take the motherboard off and keep the wireless securely. Do not leave them as they will get confused in the walls.
The next step would be to screw your new motherboard. You have to reconnect the four lines to the right terminals. The red must go through the R and the white to the W or W1. Similarly, the green will go to G and the yellow or blue will go to the Y terminal. If you are done with it, you will have to screw them securely. To check it, you can turn on the heat pump or the device and see its functioning.
-
5-Wire Thermo Wiring (Any HVAC Device)
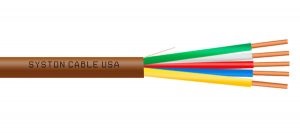
What You Have – 5-wire thermostats are suitable for HVAC devices like heat pumps, air conditioners, and furnaces. What makes it separate from other types of thermostat wirings is that it comes with a common “C” wire. This helps to control anything and includes all the wires that a 4-wire thermostat has.
Process – You can begin by taking the control panel off & exposing the wires. Again always keep a photograph of the wires so that there will be easy labeling. Secure the wires appropriately and do not let them go loose. You can now take the motherboard off and screw on the new motherboard.
Connect the wires to the suitable terminals just like how you did in the 4-wire thermostat. Additionally, it also features a black wire that you will have to insert into the C terminal. It has to be fixed in place. Now you can use the remote control or smartphone app to check if it is installed appropriately.
Note: Don’t Lose The Wires In The Wall
When you replace a thermostat with a new one, you have to unmount the old thermostat from the wall. However, you have to be careful so that you don’t lose the wires in the wall. This is because if you remove the thermostat straight away, the wires will be cut, and the remaining part is likely to get retracted into the wall. Therefore, you have to bend each wire separately outwards.
FAQS:
Some thermostats, particularly those for multi-stage heating or cooling systems, might have additional wires of the same color with a number designation (e.g., W2 for second stage heating). These wires connect to specific terminals on your thermostat matching the number (W2 in this case). Consult your thermostat’s manual for proper wiring.
Yes, many smart thermostats require a C-wire for continuous power. If your existing wiring doesn’t have a C-wire, there might be alternative options like using an adapter or checking if your system can provide power another way. Refer to your smart thermostat’s instructions for compatibility and installation guidance.
If you’re comfortable working with electrical wiring and have experience with thermostats, you can attempt replacing the wires yourself. However, if you’re unsure about any aspect, it’s always best to consult a qualified HVAC technician to ensure safe and proper installation.
Absolutely! Before touching any wires, turn off the power to your HVAC system at the breaker box. Also, be mindful of color variations. While there’s a standard code, slight color differences can occur. Double-check each wire against your thermostat’s manual or existing thermostat wiring to ensure proper connection.
The tools required for replacing thermostat wires are relatively simple. You’ll typically need a small screwdriver to loosen and tighten wire terminals on both the thermostat and the HVAC control board. Additionally, wire cutters or strippers might be helpful for preparing the wire ends if necessary. However, consult your specific thermostat’s instructions for any recommended tools.
Conclusion
If you have some basic technical skills in handling wires, thermostat wiring, and changing a thermostat is going to be easy for you. The basic thermostat wiring stays the same for all models. However, it is wise to go through the manual once and begin your process of installation and replacement. You will have more certainty, and you can operate with confidence after some practice sessions.

One Response
Very good explanations and perfect advice.