Shielded Metal Arc Welding or SMAW is a type of Arc Welding process that takes place between a flux-coated or flux-covered metal rod (also known as electrode) and the work piece. During the welding process, current passes through the electrode and the flux coating on the electrode will burn to release the shielding gas. The inner metal rod acts as the filler element. In the welding community, the electrode (the flux-coated metal rod) is simply referred to as “stick” and hence the SMAW process is often known as Stick Electrode Welding or Stick Welding. But the official American Welding Society (AWS) term is Shielded Metal Arc Welding (SMAW). In UK and some European countries, the term Manual Metal Arc (MMA) Welding is popular.
SMAW is one of the cost common types of arc welding processes worldwide for production welding jobs, repairs, and maintenance. You can use Stick Welding technique on almost all weldable material. Some of materials where you can use stick welding are carbon steel, stainless steel, cast iron, aluminum, copper, and nickel-based alloys.
In this guide, we will understand the basics of SMAW, take a look at the important parameters such as welding equipment, type of current, electrodes, etc. We will also learn how to stick weld.
Basics of Shielded Metal Arc Welding (SMAW)
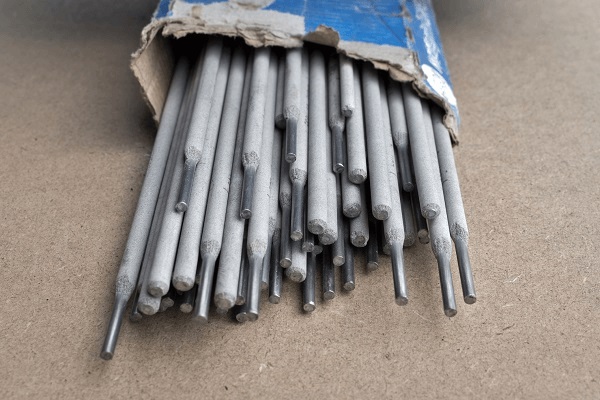
While there are several welding processes that use electrodes, the attribute that differentiates Stick Welding from other types of welding is the presence of flux coating on the electrode. The center of the electrode is a metal rod that becomes a part of the weld pool during the weld process. This metal rod is coated with a combination of chemicals (oxides, fluorides, carbonates, metal alloys, and cellulose) that are held together with the help of silica to form a paste. The paste is then applied on the rod and dried in an oven.
The reason we are focusing on the electrode and its covering is it plays a significant role in the working of SMAW. First of all, as the electrode comes in contact with the work piece, electricity flows and burns the coating. As a result, it releases a dense layer of gases (majority of which is CO2) that shield the weld pool from atmospheric contamination. There is no need for external supply of shielding gas. Next, the flux ionizes during welding and this helps stabilize the arc.
There are a lot of chemicals on the coating and they act as fluxing agent and deoxidizers to clean the weld pool and remove oxides from the metal (usually rust).
As the weld pool cools, the flux-coating forms a layer of slag that covers the hot weld piece. It protects the hot metals from air. Additionally, the slag also defines the shape of the bead.
The center metal rod becomes a part of the weld pool. Depending on the composition of the metallic part of the electrode, it can enhance the physical and mechanical properties of the weld joint.
Overall, the electrode in the Shielded Metal Arc Welding is fully consumed after the welding.
Principle of Operation of Stick Welding
To understand how stick welding works or the principle of operation of Shielded Metal Arc Welding (SMAW), we first need to list out the components necessary for welding process.
- Welding Machine (a Constant Current Welding Power Source)
- Electric Cables
- Consumable Flux-Covered Electrodes
- Electrode Holder
- Work Clamp (Ground Clamp)
In simple terms, stick welding occurs when a low voltage, high amperage, constant current power source generates an electric arc between a flux-coated electrode and the work piece. The power source can be either AC (Alternating Current) or DC (Direct Current).
All the above-mentioned components for a part of a Welding Circuit. In this circuit, the power source (the welding machine) is in series with the electrode and the workpiece. One cable from the power source is attached to the electrode holder. Another cable is connected between the workpiece and the power source with the help of a work clamp.
When we touch the electrode to the work piece, it completes the electric circuit and the current flows from the power source to the workpiece through the electrode and returns through the work clamp to the power source. The electrode acts as both as an electric conductor as well as a filler element.
How Stick Welding Works?
The welding process begins when we strike the workpiece with the electrode and an electric arc is produced. Intense heat from this arc, usually 6,500°F to 7,000°F (3,600°C to 3,900°C) or more, will melt the electrode as well as the surface of the workpiece to form the weld pool.
Instead of constantly touching the workpiece, we have to touch for a couple of seconds and pull the electrode up by a couple of millimeters. This way, the air surrounding the weld pool will ionize and help in transferring the molten droplets from the electrode’s metal core molten pool.
Due to the extreme temperatures from the arc, stick welding process is almost instantaneous and we have to move the arc along the workpiece to melt and fuse the metals.
Which Metals are Suitable for Stick Welding?
Stick welding is one of the oldest and simplest ways of welding metals. The versatility makes it perfect for maintenance and repairs. The materials required are safety equipment, stick welder, electrodes, ground clamp, and tools for removing slag.
Not just for professional applications, shielded metal arc welding is also used by hobbyists. You can use it on different types of metal ranging from carbon steel to high-quality steel. It is also great for cast iron, ductile iron, copper, nickel, and aluminum. However, it is not suitable for non-ferrous materials.
Is Stick Welding AC or DC?
As we mentioned before, you can perform stick welding with both AC and DC power source. The choice of electrode and the availability of proper equipment determines whether the stick welding is AC or DC. It can either be AC, DC, or both.
Direct Current
DC Power Sources are very common for SMAW. In such systems, the current flows continuously and in only one direction. For heavy industrial jobs, a DC power supply can be a perfect choice. It helps to provide a stable and smooth welding arc.
When you choose DC, you will also have the option to go for DCEP (DC Electrode Positive) or DCEN (DC Electrode Negative).
In the DC power supply, there will be one terminal marked with a “+” sign and the other with a “-” sign. We have to connect the electrode holder cable and work clamp cable to these terminals. Depending on where you connect these cables, the system will be either DCEP or DCEN.
DCEP
In DCEP, we connect the electrode cable to the positive “+” terminal of welding machine and the work clamp cable to the negative “-” terminals. The flow of electrons is as follows; from negative terminal of the power source (machine) to clamp, to workpiece, to electrode and finally to the positive terminal.
The main advantage of this setup is that the electrons will flow from the workpiece across the arc and to the electrode. As a result, significant amount of heat will be at the electrode and the remining heat will be at the workpiece, roughly in a 2 to 1 ratio. This means great depth of penetration and excellent bead profile. Hence, DCEP polarity is very popular in SMAW process.
DCEN
When it comes to DCEN, the electrode cable is connected to the negative terminal and the work clamp cable to the positive terminal. As the flow of electrons is reversed in DCEN polarity, the penetration is very little and the beads are also narrow.
However, the choice between DCEP and DCEN is determined by the electrodes. Most SMAW electrodes in the market are compatible with DCEP polarity. But there are some electrodes that work with DCEN and suitable for welding sheet metal.
Alternating Current
As the name suggests, the direction of the current changes/reverses 120 or 100 times in a second, depending on where you live. Current flow in one direction, becomes zero and then reverses. This is one cycle of alternating current and mathematically, we can represent it using a sine wave. If we use an AC welding machine, the polarity of the current at the terminals changes every 1/120 (or 1/100) of a second.
Hence, it doesn’t matter whether you connect the electrode cable to either of the terminals. Due to the quick reversal of the current, both the workpiece and the electrode have similar heat distribution. As a result, the penetration is very balanced and so is the weld bead.
If you are looking for an affordable SMAW machine, then AC only machines are the perfect choice. However, keep in mind that there will be significantly more splatter and arc outages compared to a DC welding machine.
AC power supply serves great when the distance between the work area and the power supply is high. It is not affected when the voltage from the cable drops. You will have to note that the power supply for stick welding should be at a constant voltage. AC has better resistance. However, welding in humid conditions with AC power can lead to shocks.
Constant Current Power Supply for SMAW
There are three types of power supplies that are commonly available for various welding processes. They are
- Constant Voltage
- Constant Current
- Rising Arc Voltage
For Shielded Arc Metal Welding, constant current power supplies are the preferred choice, irrespective of the type of current (AC or DC). In manual welding processes such as stick welding, the welder cannot maintain the arc at a constant length. As the arc length varies, so does the arc voltage. This again has an impact on the welding current.
In a constant current welding machine, the output voltage decreases as the welding current increases. Hence, the power remains almost constant regardless of the arc length.
Advantages of Stick Welding
There are many advantages of stick welding. It offers you the following benefits.
- Stick welding allows you to weld different types of materials
- The process of stick welding is very easy. Even beginners can learn it quickly
- Another great advantage of stick welding is that it does not require additional equipment like a wire feeder or gas cylinder. You can carry it conveniently and move around
- You can easily opt for outdoor work as you don’t have to worry about windy conditions
- By utilizing a fan, you can easily dispose of the welding fumes. However, for other types of welding, this is not possible
- Stick welding is affordable
Disadvantages of Stick Welding
Despite having a lot of advantages, stick welding does come with some limitations. These are some of the disadvantages of stick welding.
- Compared to MIG welding, stick welding is slower in process
- You will have to equip yourself with more skills for keeping the electrode at a certain distance while burning
- There can be reduced efficiency due to the increased time for clean-up
- Stick welding produces a lot of slags and spatter
- The quality will not be great when compared to TIG welding
- It can be difficult to use on thin metals
Stick Welding Machine & Equipment
Being the easiest welding process, stick welding allows you to set it up quickly. It has four parts which include a stick welder, an electrode holder, a ground clamp, and stick welding electrodes.
Cost of Stick Welding Equipment
The price of stick welding equipment varies according to the type of welder you chose (AC or DC). DC SMAW Welders are slightly expensive than AC Welders. Nowadays, combination welders are also available that use both AC and DC. You can get an AC SMAW welder if you are a beginner or if you are on a tight budget.
However, for professional applications, you will have to consider various factors like the brand, spare parts availability, and warranty. It is important to go for stick welding equipment that comes from a popular brand. Some units allow you to convert it into a TIG welder. For heavy industrial manufacturing, you can get the one that has high-end features.
Power or Amperage Requirement For Stick Welder
A stick welder that has a power of 140 amps can be perfect to do almost anything. However, many people get confused with the maximum metal thickness. You can go for unlimited thickness metals with over 130 amps. Do note that more amps will lead to fewer passes. For use with multiple passes, you need to have better skills.
Safety Equipment
While dealing with any type of machine, safety is the prime consideration. Always read the safety information and instructions carefully before going for stick welding. You must completely protect your body from the harmful ultraviolet rays and sparks and also from heat. It would be best to go for long-sleeve clothing that has fire-retardant abilities. Look for a welding helmet and safety glasses. Even while working indoors, make sure that you are working in a well-ventilated area.
Slag Removing Tools
There will be plenty of slags during stick welding. To complete the work, you will have to get rid of the slags. The best way would be to use a chipping hammer. Use a wire brush that has a base metal joint for the cleaning process. For the finishing touches, a wire brush serves great.
How To Choose An Electrode for Stick Welding?
Stick electrodes are of many different types and you need to select the one according to your project. It also depends upon the type of material you are using. For mild steel, electrode E60 or E70 will be great. If you are a beginner, electrode 6013 will serve the purpose. For making strong welds, you can opt for 7018.
Some of the most popular electrodes are 6010, 6011, 6013, 7014, 7018, and 7024. In an electrode, the letter “E” stands for the electrode.
The first two digits represent the minimum tensile strength. In this case, stick welding 6018 means the tensile strength is 60,000 PSI.
The third digit is the position at which the electron will be used while welding. If it has the number “1” then it can be used in any position. However, you can use the number “2” only in a flat position.
Finally, the fourth digit represents the current for using the electrode and the coating of the electrode.
By correctly understanding the markings, you can choose the right type of electrode. You can compare the stick electrodes chart to have the right type of penetration.
How to Stick Weld Your First Workpiece?
Once you have set up everything, you will now move on to the process of laying the first stick welder. Before you proceed, you need to ensure that the settings are correct. Look for the arc settings and confirm whether the polarity coincides with the electrode. The other elements in stick welding are arc length, current settings, electrode manipulation, electrode angle, and the speed of travel.
As the process requires skill, you will have to go for a mock test by practicing on scrap metal. You will have to get some metal scrap pieces and put them as a joint butt joint. This will make sure that you are ready for the task.
Prepare your Welding Piece
To make sure that there will be quality weld while using any type of metal, the welding area must be clean. You can use a wire brush to remove grime and dirt from the welding area. If you don’t clean the welding area, it can result in inclusions, lack of fusion, porosity, or cracking of the weld.
Additionally, you must also make sure that the work clamps spot must be clean. Once you are done with everything, you will have to position yourself so that you can see the weld puddle clearly. Always keep your head off to the side and you must be out of weld fumes. You must be in such a position that enables you to manipulate the electrode and have better support.
Current Setting
How you set up the current is according to the type of electrode. Do note that it is very important while dealing with the right type of metal. Set the current appropriately whether it is AC, DCEP, or DCEN. DCEP Polarity will provide at least 10% penetration. For thinner metals, straight polarity with electrode negative can be great.
In many cases, you will not be sure what electrode to use. It is advised to look at the operating range and set the amperage on the type of electrode. Again you will have to consider the welding position as there needs to be 15% less heat. When you have the right setting, you can adjust the welder by 5 to 10 amps.
When the amperage is too low, the electrode will become sticky when you strike the arc. If you happen to set the amperage too low, the arc will move out or it will stutter. When there is a glowing electrode, it means that the current is too much. Even when the temperature is too high, it can lead to undercutting or excessive spatter.
Starting the Arc
Once everything is done, you will have to start the arc. Hold the stick holder with both your hands. Your position must be in such a way that you must see the area clearly. You will now have to place the electrode’s tip against the metal. When the arc is formed, you can give a slight lift and pull it.
When the arc happens to cut out, it means the stick electrode is lifted too high. There will be a sizzling sound when the arc is lit. Too aggressive sound will reduce the amperage. Again if the amperage is low, there will be a sticky electrode. High amperage will make the electrode char. If there will be too much heat, there will be a negative effect.
Angle of Travel
In stick welding, the angle of travel is an important factor. The backhand or drag technique is for horizontal, flat, or overhead positions. You will have to hold the electrode perpendicularly from the starting point to the joint. Following this, it must be tilted by 5 to 15 degrees to the travel position.
Another technique is the forehand or push. This is suitable for vertical welding where the rod is tilted up to 15 degrees. Whatever technique you adopt, you must adjust your body in the right position. This will provide you with the correct angle. Welders will also have to understand the weld symbol for proper welding.
Speed of Travel
Even the speed of travel determines the overall result. To maintain the arc well, you need to make sure there will be optimal travel speed. If you move too slowly, there will be a wide and convex bead. It can also lead to cold lapping and there will be shallow penetration. On the other hand, moving too fast can reduce the penetration. The fast movement also leads to a crowned and narrow bead. There can be a possible undercut or underfill when the area is outside the weld.
Manipulation of Electrode
Manipulation of electrodes is done with better skills. If you are a beginner, you must try to copy the movement of experienced welders. In doing so, you will be able to make your own style. This will help to provide better techniques and there will be better results.
You can use welding techniques in a circular motion, creating wider fields, or moving it in back and forward motions. Most welders prefer the straight bead. You must never opt for weaving motion if the material has a thickness of 0.25-inch. For making a wider bead on thick material, you need to manipulate it from side to side.
Conclusion
Stick welding is a popular slang term for Shielded Metal Arc Welding (SMAW). It offers many advantages due to its versatility. You can weld on metals that are made of stainless steel, copper, cast iron, or aluminum. There are different types of electrodes that you will have to choose according to the type of applications and metals. However, it does come with limitations as you must be well trained. Without skills, it can be dangerous.

One Response
SMAW/stick welding is done using a machine running at Constant Current not Constant Voltage, your arc length determines your voltage with stick.