Snapchat filters make it fun to express yourself creatively, but what if you want a natural look? This guide shows you how to remove filters while editing live Snaps and offers alternative approaches for saved ones (direct removal isn’t possible in the app). Get ready to enjoy both filtered fun and a timeless, unfiltered look!
How To Remove Filters From Snaps/Photos On Snapchat:
While Snapchat doesn’t provide a direct method for removing filters from saved Snaps within the app, there are various alternative methods to achieve a filter-free appearance. Whether you’re dealing with a live snap or one already captured, there’s a way out here. We’ll also explore what Snapchat filters are all about, so you can choose wisely before taking a snap
Method 1: Using Filter-Free Version
The process of removing a filter before sending a snap on Snapchat is very straightforward and takes just a few seconds. It is the best way that guarantee filter-free results, high image quality, and a simpler and faster way.
Here’s a detailed breakdown of the Filter-Free version:
Launch the Snapchat App: Open the Snapchat app on your phone or tablet.
Switch to Camera Mode: Make sure you’re on the camera screen where you can capture photos or videos. This is typically indicated by the large circle button in the center of the screen.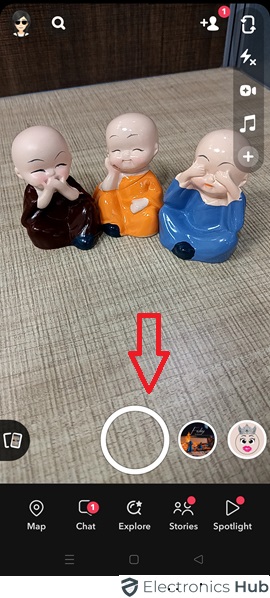
Capture Your Snap:
- Photo: Tap the capture button (the big round button at the bottom of the screen) to take a photo.
- Video: Hold down the capture button to record a video. The button will turn red as you record. Release the button to stop recording.
Access Filters: After capturing your snap (photo or video), you’ll see a preview on the screen. Swipe your finger right across the screen.
Browse Filters: A carousel of available filters appears at the bottom of the screen. Swipe left or right to cycle through different filter options.
Choose “No Filter” (Optional): If you want to remove any applied filter and go for a natural look, simply swipe to the left until you see the circle with a grey background (this represents “No filter”).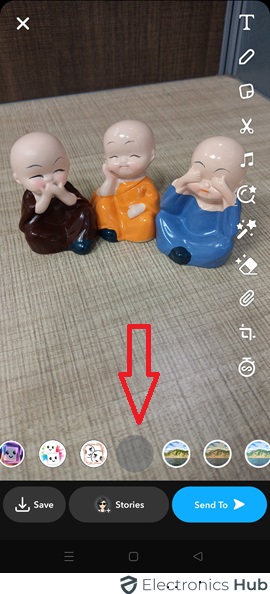
Preview and Send: Once you’re happy with the filter selection (including “No filter” if chosen), you can:
- Edit further (Optional): Add text, stickers, or drawings using the editing tools at the top of the screen (optional).
- Send the Snap: Tap the send button (arrow icon) to send the snap to your recipient(s). You can also tap the “Chat” icon to add the snap to your chat with a friend.

That’s all! By swiping through the filters and selecting “No filter,” you can easily remove any filter effects before sending your snap on Snapchat.
Note: In some cases, people use some basic editing options (Layers or Magic Eraser methods) to edit the contrast & brightness, crop & rotate the image, and remove stickers & text to minimize the filter’s effect.
Method 2: Using Third-Party Photo Editing Apps
Third-party apps can offer solutions for editing photos taken with Snapchat filters, but they have limitations. Understanding these limitations and the capabilities of different apps is essential for desired results.
In certain situations, third-party apps can help minimize the effects of Snapchat filters, primarily through basic filter adjustments like color, lighting, white balance, saturation, or exposure. Additionally, some apps (object removal) may assist in removing small elements like stickers or basic effects, although results may vary.
Here’s a breakdown of each app’s potential (and limitations) for minimizing filter effects:
1. Bunny Pic & Photo Retouch:
Focus: Primarily designed for blemish removal, skin smoothing, and other beauty-related edits.
Limited Use for Filters: These apps wouldn’t be effective for removing Snapchat filters because they target blemishes and imperfections, not filters that alter the entire image or add graphic elements.
2. Snapseed:
More Advanced Editing: A free photo editor from Google used widely by professionals. Offers tools like selective adjustments, curves, and white balance.
Potential for Filter Minimization: Skilled users could attempt to reduce the intensity of color or lighting-based filters by:
- Adjusting white balance to counter color casts from filters.
- Use selective adjustments to target specific areas affected by the filter and bring them closer to their original look.
- Employing the curves tool to fine-tune color tones and saturation.
Limitations: Completely removing Snapchat filters is still not guaranteed. The success depends on the filter type and the user’s editing skills.
3. Photoshop:
Most Powerful Option (for Skilled Users): Provides a vast array of editing tools, including content-aware fill and selective editing.
Potential for Advanced Techniques: In the hands of a skilled user, Photoshop might offer more possibilities for minimizing filter effects through:
- Content-aware fill: This tool could potentially be used to replace areas affected by the filter with replicated details from surrounding areas, but the results can be unpredictable and require careful selection.
- Selective editing: Similar to Snapseed, selective adjustments can be made to target specific color or lighting changes caused by the filter.
- Masking and blending techniques: Advanced users might employ masking and blending tools to isolate and modify filter effects in specific regions of the image.
Important Caveats: Even with Photoshop’s capabilities, completely removing Snapchat filters, especially complex ones, remains highly challenging. The process can be time-consuming and the outcome depends heavily on the user’s skill and the filter itself.
4. Object Remover:
Intended Use: Designed to identify and remove unwanted objects/elements from photos.
Theoretical Use Case for Snapchat Filters (Limited): Potentially applicable for certain filter elements, but with significant limitations:
Only for Simple Objects: The app might work on very basic stickers or small graphic elements added by a Snapchat filter (not Lenses) if they are well-defined and isolated.
Challenges and Limitations:
- Complex Filter Recognition: Object Remover apps struggle to recognize Snapchat filters, especially those that alter a large portion of the image (like glowing backgrounds or color washes).
- Inaccurate Background Fills: Even for simple filter elements, the app might not be able to accurately replicate the background detail behind the filter, potentially resulting in distorted or unnatural-looking areas.
- Binary Removal: These apps typically work in a whole-object removal approach. For subtle filter effects or color changes, they wouldn’t be able to selectively remove just the filter while preserving the original image details.
Verdict:
Each third-party editing app varies in its ability to minimize Snapchat filter effects. Apps like Snapseed and Photoshop offer advanced tools for precise adjustments, while Object Remover and Bunny Pic & Photo Retouch may be more limited. Experimenting with different apps and techniques is key for a natural look, but complete filter removal isn’t guaranteed. For best results, consider capturing snaps on Snapchat without using a filter.
Method 3: Enhancing Your Snapchat Experience without Filters
Filters are a fun way to add a twist to your Snaps, but there’s more to crafting captivating content than relying solely on them. Whether you accidentally apply a filter or prefer a more natural approach, you can still create stunning Snaps by implementing thoughtful planning and clever editing techniques.
Here are some inspiring ways to craft eye-catching Snaps, filter-free:
1. Explore Angles:
Experiment with different viewpoints to add a new life to your Snaps. Try unconventional angles, such as shooting from low to the ground or capturing a bird’s-eye view, to discover unique perspectives that captivate your audience.
2. Play with Lighting:
Good lighting can make or break a photo. Utilize natural light whenever possible, or experiment with indoor lighting to set the mood. Snapchat’s exposure settings can help you find the perfect balance for your Snap.
3. Add Text Narratives:
Enhance your Snap with captions or text overlays to convey a story or highlight key elements. Inject humor, share quotes, or pose questions to engage your audience and personalize your Snap.
4. Diversify Backdrops:
Step beyond the usual locations and seek out diverse environments with interesting backgrounds. Pay attention to details and leverage your surroundings to create visually captivating narratives.
Bonus Tip:
- Capture the original image by taking a screenshot before applying any filters for a completely unfiltered look.
- With practice and these creative techniques, you can craft standout Snaps that shine, with or without filters!
FAQs:
Unfortunately, Snapchat doesn’t currently offer a feature to directly remove face filters (like the dog filter) from saved photos within the app. Since Snapchat uses advanced AR technology to detect your face, it places the face filter almost perfectly which is too hard to remove. While some third-party apps claim to remove filters, they often struggle with accuracy and may pose security risks, potentially violating Snapchat’s terms of service. For the most professional and secure outcome, it’s best to capture photos within Snapchat without using a filter.
Snapchat doesn’t provide a built-in feature to directly remove filters once applied to a photo or video. Filters are embedded into the media and cannot be easily removed within the app.
* Unsaved Snaps: Yes, you can remove filters from snaps before saving them on Snapchat by swiping through filter options or tapping back.
* Saved Photos: No, Snapchat doesn’t have a built-in way to remove filters from saved photos. While editing tools might help with minor adjustments, removing complex filters is generally not possible.
Unfortunately, Snapchat doesn’t offer a native feature to remove filters from a photo within the app. Once a filter is applied and the photo is saved, it becomes a permanent part of the image. To remove a filter, you’ll need to use a third-party photo editing tool that supports filter removal.
Snapchat lens filters are applied to snaps before they are captured and cannot be removed after the snap is taken. If you wish to capture a snap without a lens filter, you can try tapping on the screen to remove any applied lens filters before taking the photo or video.
No, Snapchat doesn’t provide a feature to remove filters from someone else’s photo within the app. Once a photo is captured and saved with filters applied, it becomes a permanent part of the image. To edit filters from someone else’s photo, you would need to ask them for the original image and use a photo editing tool to make modifications.
Snapchat doesn’t offer a built-in feature to remove filters from videos once applied. Once a filter is applied to a video and saved, it becomes a permanent part of the video. However, you can use external video editing software to edit the video and remove the filter.
Unfortunately, Snapchat doesn’t offer an undo feature for filters applied to snaps. It becomes permanent once a filter is applied and the snap is saved. However, you can retake the snap without applying a filter or use editing software to modify the photo.
Conclusion:
This guide reveals how to remove filters when editing live Snaps and offers solutions for saved snaps (though there’s no direct in-app removal). Now, you can excel in both filtered fun and a natural look! Feel free to express yourself, whether using filters or not. Excited to try it out? Grab your phone and start making amazing Snaps – with or without those fun filters!
