Laptops have become an essential part of our daily lives, serving as our go-to devices for work, entertainment, and communication. However, with regular use, laptops accumulate dust and debris over time, which can affect their performance and longevity. In this comprehensive guide, we’ll explore various methods and techniques to effectively clean dust from your laptop, ensuring optimal functionality and prolonging its lifespan.
How to Clean Dust from a Laptop
Dust can wreak havoc on your laptop’s internal components, leading to overheating and reduced airflow. Over time, this can result in performance issues and potential damage to sensitive hardware.
Essential Tools for Dust Cleaning
Introduction to basic cleaning tools, including brushes, microfiber cloths, and vacuum cleaners. Alternatives to compressed air for users who want to clean without it.
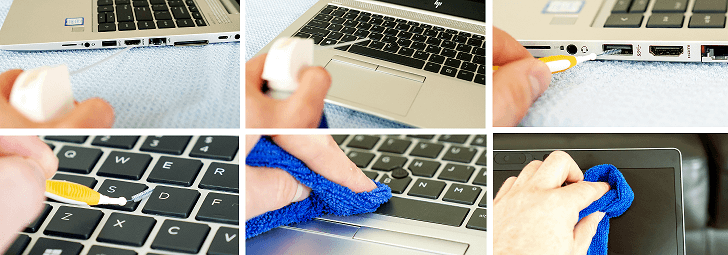
How to clean Laptop Keyboards and Screen
Addressing the often-neglected laptop screen and keyboard, this section outlines best practices for cleaning with minimal risk of damage. Practical tips and techniques are provided for maintaining a clear and functional display and keyboard.
Use Microfiber Cloth: Dampen a microfiber cloth with a small amount of water. Wipe the laptop screen gently to remove fingerprints and smudges.
Keyboard Cleaning: Hold the laptop upside down and gently tap to dislodge loose debris. Use a can of compressed air to blow out dust from between the keys.
Cotton Swabs for Detailing: Dampen a cotton swab with isopropyl alcohol for detailed cleaning between keys. Wipe key surfaces to remove grime and buildup.
Screen Polish (Optional): Optionally, use a screen polish suitable for laptops to add a protective layer. Follow the product instructions for application.
How to Clean Dust from Laptop Ports
To clean laptop ports, use a soft brush or compressed air to gently remove dust and debris. Be careful not to apply too much pressure, as this can damage the ports. Additionally, you can use a cotton swab dipped in isopropyl alcohol to clean stubborn dirt from the ports. Here is a step-by-step guide:-
- Ensure your laptop is powered off. Disconnect any connected cables or devices from the ports.
- Carefully examine each port for visible dust or debris. Identify ports such as USB, HDMI, and audio jacks.
- Use a Soft Brush: Gently brush away loose dust using a soft-bristled brush. Ensure the brush is clean and dry to avoid introducing moisture.
- Cotton Swabs or Toothpick: For intricate ports, like micro USB or charging ports, use a cotton swab or toothpick. Be gentle to avoid damaging the port’s internal components.
How to clean Dust from a Laptop without Opening it
Internal dust can impact performance. Follow these steps for internal cleaning without fully disassembling the laptop.
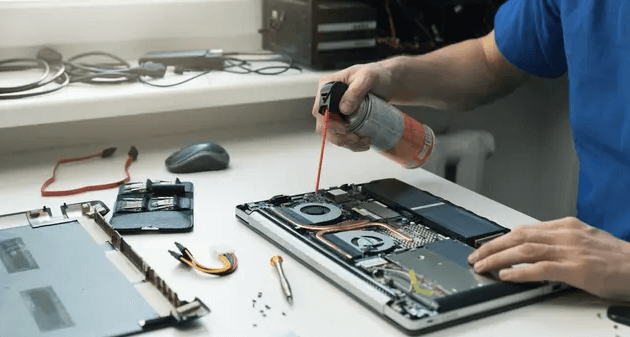
1. Compressed Air:
Use compressed air to blow out dust from external vents. Hold the laptop at an angle to allow dust to exit naturally.
2. Vacuum Cleaner:
Gently vacuum external vents using a small nozzle attachment. Ensure the laptop remains powered off during this process.
3. Repeat for Fan Grills:
Focus on fan grills, directing airflow to dislodge internal dust. Exercise caution to avoid fan damage by holding the fan in place.
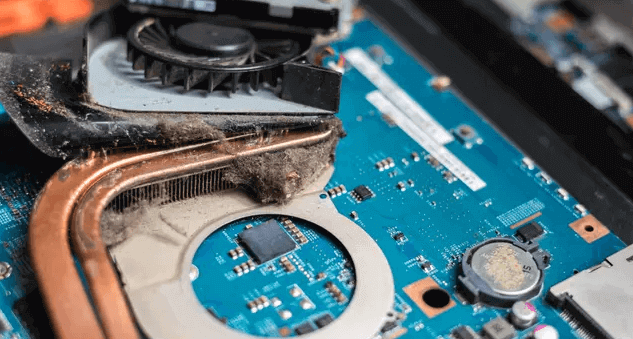
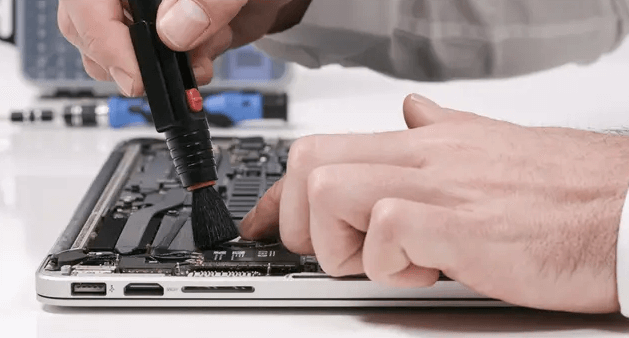
Properly Remove Dust from the Laptop
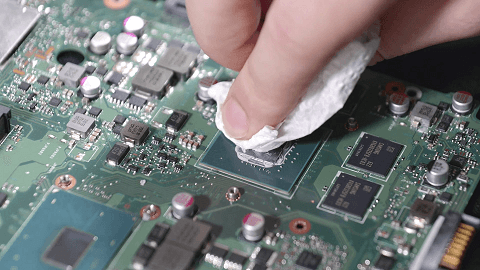
After accessing the inside of your laptop, you can remove dust from its components. When you do so, it starts to perform the way it’s meant to. Dust particles can be fine or flaky. You can remove dust flakes with the help of a hand blower or vacuum cleaner. But, the key is to go slow to prevent air pressure from damaging the fan.
i. Eliminate Dust Particles That Are Of Large Size
To remove large dust particles from your laptop safely, start by powering it off to protect the fan. Ensure it’s disconnected from power to prevent accidents like short circuits. Avoid vacuuming screws by keeping them away. Use a brush attachment for effective dust removal, as vacuum pipes may hinder the process and damage sensitive parts. Set the vacuum to a low setting, stabilize it, and clean the bottom and corners carefully.
-
Tackling Fine-Grained Dust
Disassemble components like hard drive cages and use a soft-bristled brush for finer dust. Exercise patience to prevent component damage. For stubborn dust, use a medium to hard-bristled brush on cooling fins and fans. Remove covers and fans for thorough cleaning, using warm, soapy water for stubborn deposits. Dry components thoroughly before reassembly.
-
Removing the Dust Stuck On The Laptop
A bush with medium to hard hardness is best suitable to remove stubborn dust particles from cooling fins and fans. You can remove the stick on dust by starting with removing the covers and then the fan so that you can easily access the components. There are many case fans that can be used to remove the blades from the drive. In such a case, you need to dip the dusty wings in warm water filled with a mild washing liquid. This will remove the deposits with ease, and then install everything after thoroughly drying.
-
Clean the Processor Cooler
To clean the processor cooler, remove the cooling block and, if necessary, the motherboard for comprehensive cleaning. Only attempt graphics card cooler removal if confident, as thermal pad damage can occur. Renew thermal paste carefully, ensuring proper application to avoid leakage. Organize cables neatly to prevent airflow obstruction, using cable ties if needed.
-
Thermal Paste Renewal
When you detach the cooler from the graphic card or processor, you also need to replace the previous thermal paste with a new thermal interface. For the same, you need to first remove the old paste’s residue and then apply the new heat transfer agent. It is suggested to not over-apply it as it can leak from the gaps due to the cooler’s contact pressure.
-
Detangle Cable Chaos
Data cables and power cables are messily arranged. They are attached to the power supply and mainboard and then to the individual components of your laptop/computer. These cables sometimes conceal heat sinks and fans get stuck to them while hindering airflow. But, this chaos of cables can be prevented with cable ties. However, you must ensure that all the cables are neatly arranged and secured. They should not cause any problem to the air circulation.
-
Dust Filter Mounting
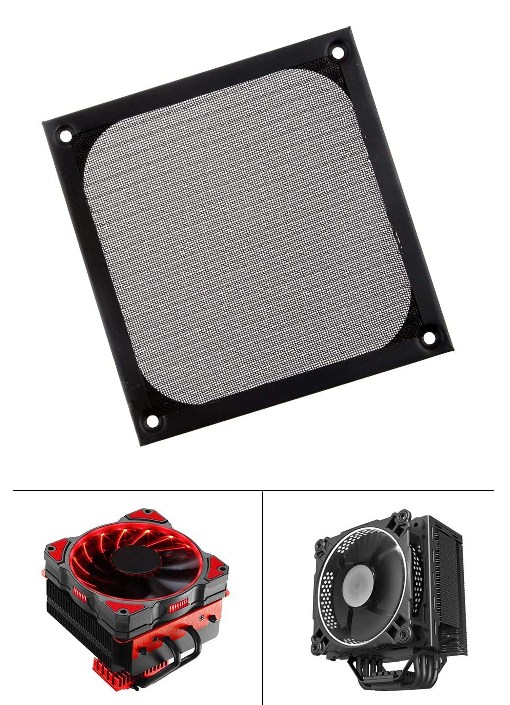
To keep the cleaning process simple, you can opt for this easy solution. Protect your fans with dust protection filters. They can be mounted on the fans and prevent dust from accumulating. But, they call for regular washing or cleaning for them to work properly.
Conclusion:
By following these comprehensive steps, users can maintain a dust-free laptop, ensuring optimal performance and longevity without the need for compressed air.
