Connecting your AirPods to a MacBook enhances your audio experience, whether for video chats, music, or focused work. While these earbuds pair automatically with iPhones, linking them to a MacBook might require extra steps, especially if they’re not using the same Apple ID.
This guide will show you how to connect your AirPods to your MacBook for a better listening experience across all your Apple devices.
Can You Connect AirPods to Mac?
Yes, AirPods can be easily connected to a MacBook. However, ensure your MacBook has Bluetooth functionality and runs a compatible macOS version.
Challenges:
- Compatibility issues may come, especially with older MacBook models.
- Bluetooth connectivity problems might occur intermittently.
- Software updates on the MacBook may affect AirPods connectivity.
Below, we’ll explore solutions to overcome these challenges while connecting your AirPods to Mac.
How To Connect AirPods To MacBook?
The process of connecting AirPods to your MacBook requires just a few clicks. If in case you have connected AirPods to your iPhone and the Macbook Air and iPhone are in the same iCloud account, you don’t have to do any pairing.
Also, the pairing has to be done only in the beginning. You don’t have to do any setup after that. All you have to do is to put in the AirPods as it is already set up with the Mac. You can follow these steps and do it.
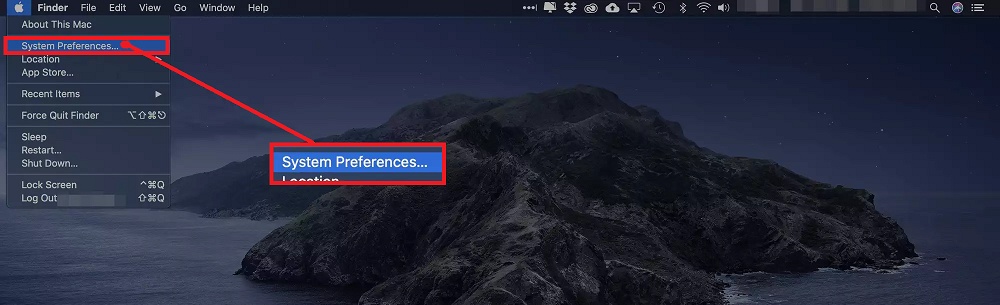
Step 1: On your Macbook, click on the Apple menu.
Step 2: Hit on “System Preferences.”
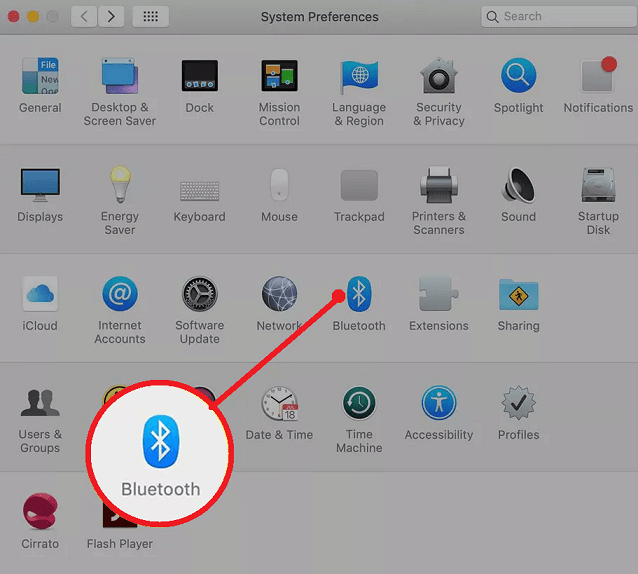
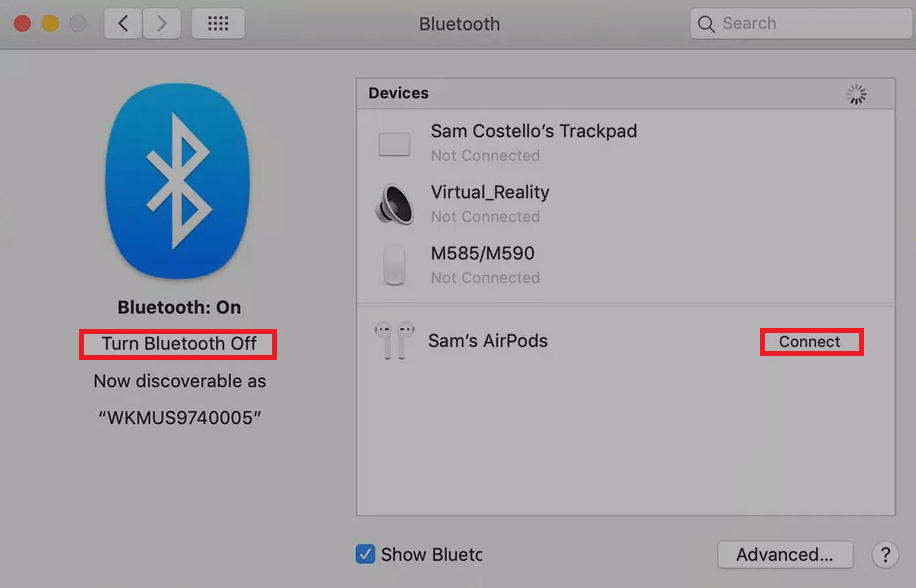
Step 3: Select “Bluetooth.”
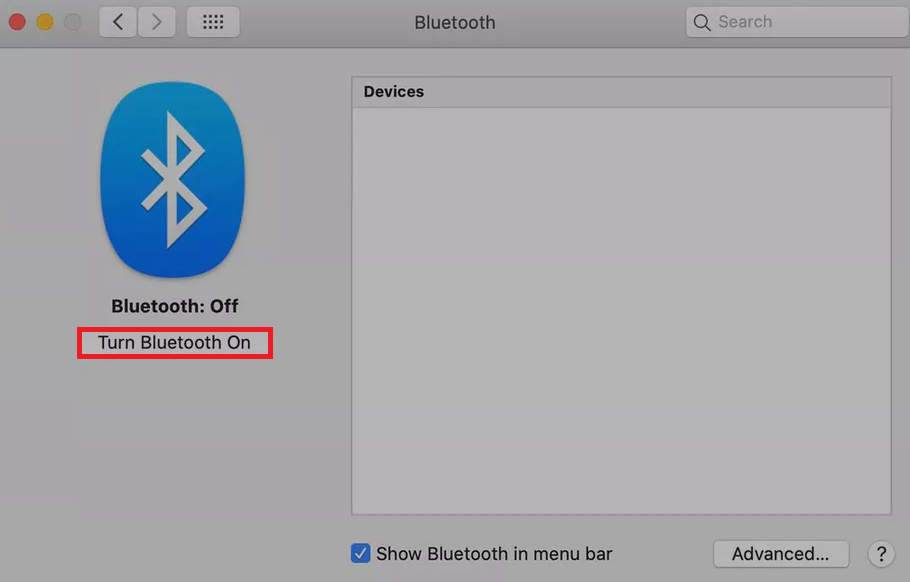
Step 4: Click on the option “Turn Bluetooth On.” You must leave this window open.
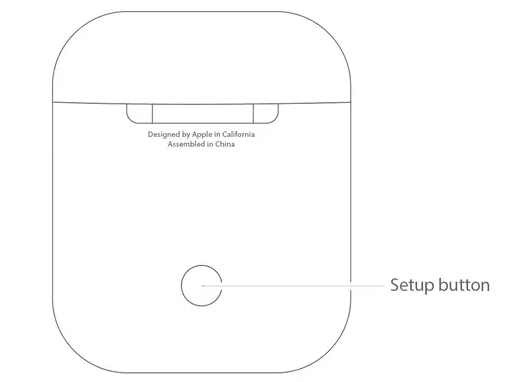
Step 5: Open the lids of the AirPods charging case.
Step 6: Press the button and wait for the lights to blink.
Step 7: The Bluetooth window will display AirPods and you will have to click on “Connect.”
Can You Connect Multiple AirPods to a MacBook?
By connecting two pairs of AirPods to one Macbook, you will be able to listen to the same music on two AirPods. This may sound great but you will be able to do it. However, the Mac operating system does not come with dual pairs of audio output. You will have to perform these steps to connect two pairs of AirPods.
Step 1: Navigate to “Finder.”
Step 2: Select “Utilities.”
Step 3: Launch the “Audio MIDI Setup.”

Step 4: Click on the “+” sign followed by “Multi-Output Device.

Step 5: Check on the box which is next to the Airpods sets.
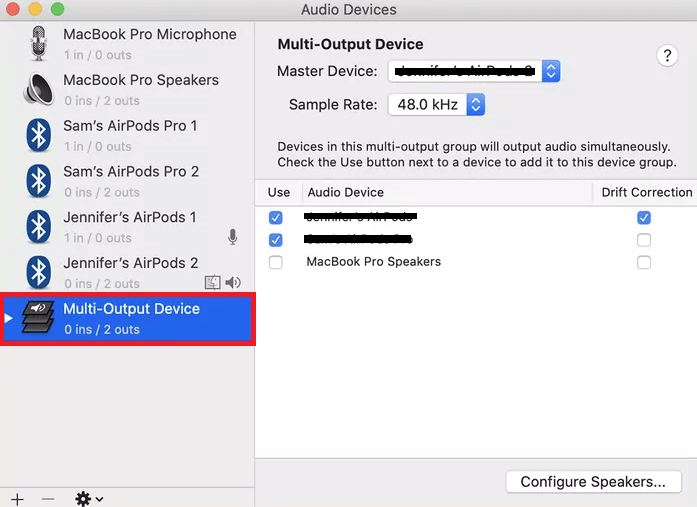
Step 6: From the drop-down menu of Master Device, select the AirPods.
Step 7: Check on the box Drift Connection.
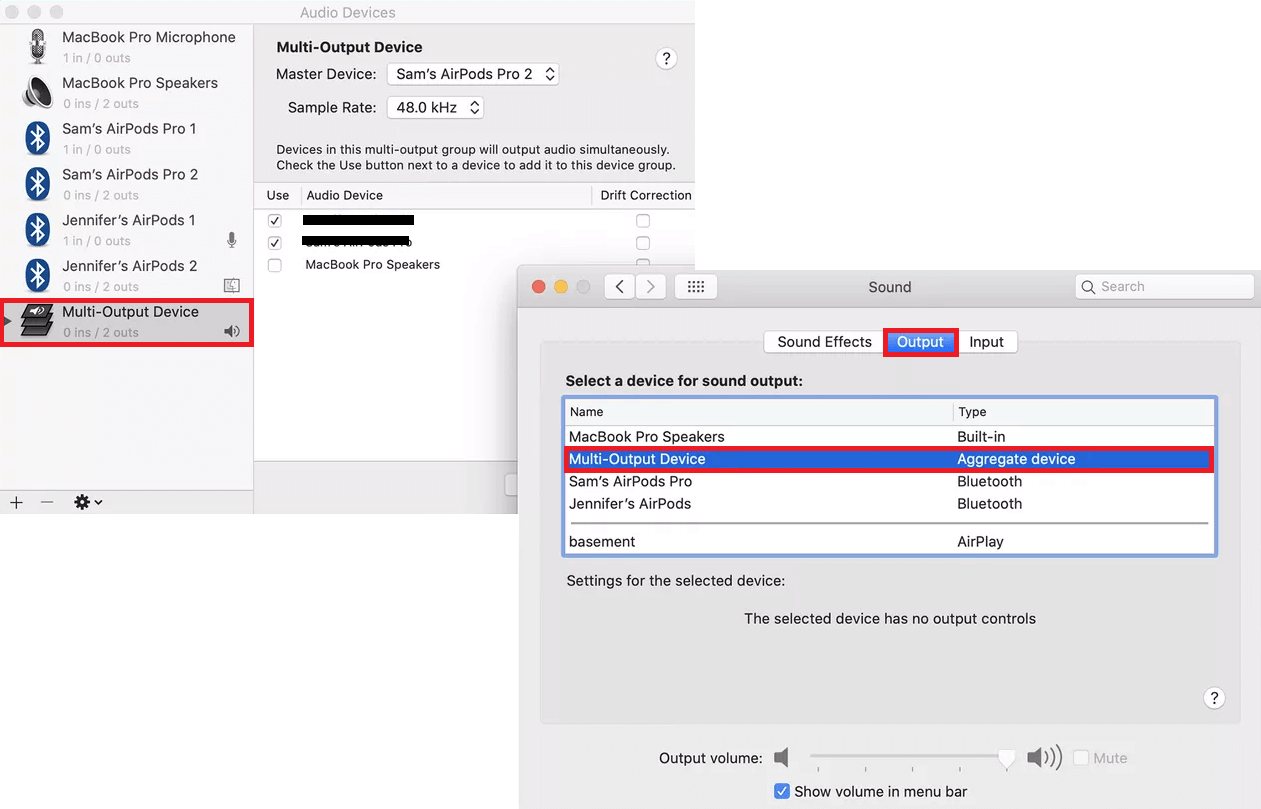
Step 8: Open the Apple menu and go to “System Preferences.”
Step 9: Click “Sound” followed by “Multi-Output Device.”
How To Set Up AirPods With Mac And Other Bluetooth Devices
Pairing AirPods with Your Mac
- Check compatibility:
- AirPods (2nd gen): macOS Mojave 10.14.4 or later
- AirPods Pro (1st gen): macOS Catalina 10.15.1 or later
- AirPods (3rd gen): macOS Monterey or later
- AirPods Pro (2nd gen): Latest macOS version
- If already set up with your iPhone and the same Apple ID is used on your Mac, your AirPods might connect automatically. Otherwise, follow these steps:
- Place the AirPods in your ears and open Control Center on your Mac.
- Select Bluetooth and choose your AirPods.
- To pair manually if AirPods do not appear:
- Open System Settings, click Bluetooth.
- Ensure Bluetooth is active.
- Place AirPods in the charging case and open the lid.
- Hold the setup button on the back until the status light flashes white.
- Click Connect next to your AirPods in the list.
- If audio outputs through Mac speakers, open Control Center, click Bluetooth, and select AirPods as the output device.
Using AirPods with Non-Apple Devices
- Ensure Bluetooth is enabled on your device. For Android: Settings > Connections > Bluetooth.
- With AirPods in their case, open the lid.
- Press and hold the setup button until the status light flashes white.
- Select your AirPods from the device’s Bluetooth list.
Managing Automatic Switching Between Devices
- AirPods (2nd and 3rd gen) and AirPods Pro (1st and 2nd gen) can automatically switch among devices (Mac, iPhone, iPad) that use the same Apple ID and are on macOS Big Sur or later, iOS 14 or later, and iPadOS 14 or later.
- If a call comes on your iPhone while using the Mac, AirPods switch to the iPhone call automatically.
- To manage this feature on Mac:
- Open Bluetooth preferences with AirPods in your ears.
- Click Options next to your AirPods and select Connect to This Mac.
- Choose “When Last Connected to This Mac” for manual control or “Automatically” to re-enable automatic switching.
How To Connect AirPods To Mac With A Different Apple ID
When attempting to connect AirPods to a MacBook with a different Apple ID, users often encounter confusion and frustration due to the personalized nature of Apple devices. Each Apple ID is associated with specific settings and preferences, making cross-device connectivity a tad more complex. However, through the steps to seamlessly pair your AirPods with your MacBook, irrespective of the Apple ID disparity.
1. Ensure Compatibility
Before initiating the pairing process, confirm that both your AirPods and MacBook are compatible with each other. Ensure that your MacBook supports Bluetooth connectivity and that your AirPods are sufficiently charged.
2. Access Bluetooth Settings
Begin by accessing the Bluetooth settings on your MacBook. To do so, click on the Apple menu in the top-left corner of your screen and select “System Preferences.” From the System Preferences window, click on “Bluetooth.”
3. Put AirPods in Pairing Mode
Next, place your AirPods in pairing mode. To achieve this, open the AirPods case with the AirPods inside and hold the setup button on the back of the case until the status light flashes white.
4. Locate AirPods on MacBook
Once your AirPods are in pairing mode, they should appear in the list of available Bluetooth devices on your MacBook. Look for your AirPods in the list and select them to initiate the pairing process.
5. Follow On-Screen Instructions
Follow the on-screen instructions to complete the pairing process. You may be prompted to enter a passcode or confirm the connection on both your MacBook and your AirPods.
6. Adjust Audio Output
After successful pairing, adjust your MacBook’s audio output settings to ensure that audio is routed through your AirPods. You can do this by clicking on the volume icon in the menu bar and selecting your AirPods from the list of available output devices.
7. Test Connectivity
Finally, test the connectivity of your AirPods with your MacBook by playing audio or making a test call. Ensure that the audio is clear and that there are no connectivity issues.
How To Connect AirPods To MacBook And iPhone Simultaneously
Connecting your AirPods to both your MacBook and iPhone at the same time offers unparalleled convenience, allowing you to seamlessly switch between devices without the hassle of re-pair. This section will guide you through the process, ensuring effortless dual-device connectivity.
- Enable Bluetooth on MacBook via “System Preferences” > “Bluetooth.”
- Enable Bluetooth on iPhone through “Settings” > “Bluetooth” Ensure both devices are discoverable.
- Open the AirPods case and hold the setup button until the status light flashes white, indicating pairing mode.
- On MacBook, locate AirPods in the Bluetooth devices list and select them to start pairing. Follow on-screen instructions to complete connection.
- In iPhone Bluetooth settings, find AirPods and tap to connect. Follow any additional prompts.
Once connected, AirPods should seamlessly switch between MacBook and iPhone. Test by playing audio on both devices. Troubleshoot if issues arise, checking Bluetooth settings and audio output selection.
How To Connect AirPods Max to Your Mac?
- Ensure your Mac is updated to macOS Big Sur 11.1 or later.
- If previously paired with your iPhone using the same Apple ID, your AirPods Max should automatically connect to your Mac.
- If not connected, wear your AirPods Max, open Control Center from the menu bar, click on Bluetooth, and select your AirPods Max.
- To pair manually:
- Open System Settings from the Apple menu, then click Bluetooth.
- Turn Bluetooth on.
- Press and hold the noise control button on your AirPods Max until the status light flashes white.
- Click Connect next to your AirPods Max under Nearby Devices.
- If audio still plays through Mac speakers, open Control Center, select Bluetooth, and ensure AirPods Max are set as the output device.
Connecting AirPods Max With Non-Apple Bluetooth Devices
- Ensure Bluetooth is enabled on your device:
- For Android devices: Go to Settings > Connections > Bluetooth.
- Hold the noise control button on your AirPods Max until the status light flashes white.
- Once AirPods Max appear in your device’s Bluetooth list, select them to connect.
Note: Features like Siri won’t be available, but Active Noise Cancellation and Transparency mode can still be used.
Conclusion
As we conclude this comprehensive guide on connecting your AirPods to your MacBook, you’ve now equipped yourself with the knowledge to navigate through two distinct scenarios. Whether bridging the gap between different Apple IDs or achieving the finesse of dual-device connectivity, your AirPods are now seamlessly integrated into your tech ecosystem.
