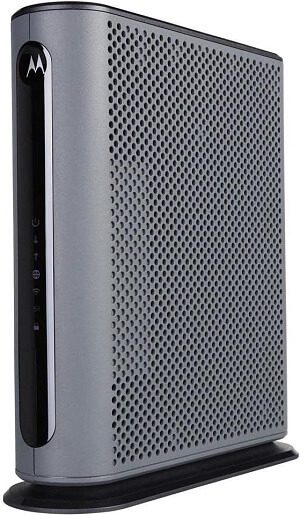
As a leading telecommunications services provider in the United States, Cox Communications offers an extensive range of modem routers designed to deliver exceptional internet services. Understanding how to access and configure your Cox modem router is quite important for managing your home network effectively.
Whether you’re setting up for the first time or making adjustments to enhance your connection, this guide covers everything – installation, login ways, configuration, device reset, and even maintenance tips. Also, it provides clear instructions to optimize network performance, enhance security, and troubleshoot connectivity issues.
How To Access Your Cox Modem Router?
Here is the detailed procedure that helps you to log into your Cox modem router successfully. Follow them carefully to easily access and configure your Cox router to optimize your network settings.
- Connect to the Internet: Use any internet-enabled device and connect it to the Internet via Wi-Fi or Ethernet.
- Open a Web Browser: Type the router’s IP address into the browser’s address bar (default – 192.168.0.1). If you don’t know the IP address, check the back of the router, visit the Cox website, or contact customer service. Or you can find it under the web application’s LAN (or) Network

- Enter Login Details: Enter the login details whenever it is needed. You can usually find the default username and password located on the sticker printed on the back or bottom of the router. If you’ve changed these login credentials, use the newly changed ones.

- Modify Settings: Once logged in, you can change the default settings to match your preferences. This includes changing usernames and passwords, adjusting security settings, managing connected devices, setting parental controls, and tracking internet performance via web applications.
- Save Changes: Ensure you save all changes and verify they are applied before logging out.
How To Configure Your Cox Modem Router
To configure any setting in your Cox Modem Router, you need to log into the Cox router’s interface. For this, you need to open any web browser and enter the IP address of your router in the address bar and thereby your login details, when requested (as mentioned above).
Follow this detailed procedure to customize your Cox modem router settings…
Change or Update the Login Details
Here is the step-by-step process to change the router’s login credentials:
- After a successful Cox cable internet login, click on the Wi-Fi settings
- Enter new credentials in the designated fields to change the username and password.
- Apply the new login details and save the changes.
- Ensure to change the router’s login credentials for security purposes. Yet avoid using weak or easily guessable passwords that can be cracked by hackers.
Set-up Parental Controls
Not all routers (especially older ones) have built-in parental control features. Some routers might need third-party software or hardware.
- Access your router’s settings to set up parental controls.
- Click on the “Parental Control” option on the web app to configure the parental controls.
- Select devices or websites that should be blocked and create time limits for internet access (to apply certain restrictions on the web pages).
- Make sure to save all your changes before exiting the app.
Note: The specific options and steps might vary depending on your router model.
Change (or) Update Security Settings
The specific options available might vary depending on your router model. It’s essential to keep your router’s firmware updated for optimal network security.
- Access your router’s settings.
- Find the “Security” or “Firewall” section to modify the security settings.
- Enable certain features like – strong encryption (WPA2 or WPA3), firewall protection, or intrusion prevention (if available) to prevent unauthorized access.
- Consider disabling remote access if not needed.
- Save your changes before exiting the website.
Check for Firmware Updates
To ensure optimal performance and security, regularly check for firmware updates.
- Access your router’s settings and look for a “Firmware” option in the app.
- Check for an “Update” option and click on it (if available).
- Follow the on-screen instructions to download and install the available updates.
That’s all about the configuration process. Following these steps will help you to successfully modify the settings.
Remember to save all changes before logging out of the app. Simply click on “Save” and “Apply.” Once all changes have been made to your requirements, you can log out of the app.
Also check:
How To Install Cox Service?
Setting up your new Cox internet service is straightforward and hassle-free. With these right steps, you can have your connection up and running in no time. Here is the easy process of installing your Cox modem and router, from unboxing to connecting your devices. Let’s take a quick look at this process:
Before You Begin
Make sure you have received the Cox self-installation kit that includes:
- Instructions booklet
- Internet modem and router
- Two coaxial cables
- One Ethernet cable
- Two-way splitter (optional)
- Power cord
Installation Steps
1. Connect the Coaxial Cable:
- If using a receiver, connect the modem to the cable outlet using a splitter (provided) to also connect the receiver.
- If standalone internet service, connect the coaxial cable directly to the cable outlet.
2. Power Up the Modem:
- Plug the power cord into an electrical outlet to power up the device.
- The modem will typically take 5-10 minutes to boot up.
- The status light will blink upon starting and become steady and bright after a couple of seconds.
- When once it is fully charged, the device is ready for use.
3. Connect the Modem to the Router:
- Use the Ethernet cable to connect the modem’s LAN port to the router’s WAN port.
- This allows the router to receive internet signals, which are transmitted across the home (or) office via the router’s antenna.
4. Power Up the Router:
- Plug the router’s power cord into an electrical outlet.
- The status light will begin to flash up on its connection to a socket.
- Wait for the router’s status light to become solid and bright (typically takes 3 – 5 minutes).
5. Connect to Wi-Fi:
- On your internet-enabled device, navigate to Wi-Fi settings.
- Find the SSID (network name) and password printed on the router label.
- Enter the credentials to connect your device to the Cox’s Wi-Fi network (superfast Cox Internet) within a second.
6. Complete Activation:
- Open a web browser.
- You might be automatically redirected to the activation page.
- If not, visit https://activate.Cox.net/ to direct you to the activation page
- Follow the on-screen instructions.
- Enter your Cox account information and your router will be ready to use (not immediately yet it takes time to activate).
Note: The activation process typically takes 24 – 48 hours after submitting the account information. Also, your internet will not be functional until Cox modem activation is complete.
After Activation
Create an account on Cox.com to manage your online services, including:
- Connected devices
- Parental controls
- Internet usage and performance
Key Essentials To Login Cox Modem Router
After proper installation of your Cox modem router, you need to check its performance or make necessary adjustments with a quick login. To access your Cox modem router’s settings, you’ll need:
Here’s the list:
- A device with a web browser
- High-speed internet connection
- Cox Modem Router
- IP Address (default one – 192.168.0.1 or 192.168.1.1)
- Login Credentials (default username and password located at the back or bottom of modem router).
Additional Notes:
- These steps are a general guide. Refer to the specific instructions provided in your Cox self-installation kit for any variations.
- If you encounter any difficulties during the installation, contact Cox technical support for assistance.
How To Reset Your Cox Modem Router
Follow the below-mentioned steps to reset your Cox modem router:
- Locate the Reset Button: The “Reset” button is typically found on the back or bottom of the router.
- Use a Paperclip or Similar Object: Gently press and hold the reset button for about 10-15 seconds till the power light turns off using any sharp-pointed objects.
- Wait for the Reset: The router will reboot once the lights turn off, which may take a few minutes. However, for some models the power light flashes before they turn off.
- Reconnect Devices: Once the router is back online, reconnect your devices to the Wi-Fi network. You can open the web browser when the router restarts and the light stops blinking.
- Reconfigure Settings (Optional): If necessary, log in to your router’s configuration page (using the default IP address, username, and password found on the router) to restore your preferred settings.
- Save the Changes: Finally, configure your router based on your preferences as all the settings will be changed to their default status. Click “Apply” to save the changes before logging out from the web app.
Note: Some routers may have a reset option in their web interface. If you prefer not to perform a physical reset, check your router’s manual or support documentation for alternative methods.
Following these steps will help you restore your Cox modem router to its factory default settings.
How To Maintain Your Cox Modem Router?
Moving on, let’s look at some important tips and precautions that must be taken care of while using your Cox modem router.
- Place the router in a cool and dry place. Don’t expose it to direct sunlight (or) any heat sources.
- Clean the router with a soft and dry cloth to remove dust and dirt.
- The system firmware must be updated periodically to ensure that the device is running with the latest software.
- Set a strong username and password to protect your network from unauthorized access and cyber threats.
- Moreover, change the username and password more frequently.
- Always enable security features such as WPA2 encryption, firewall protection, and so on to safeguard your network.
FAQs: Access Cox Modem Router
The WPS (Wi-Fi Protected Setup) button allows wireless devices to connect to your network without using a password. The location of the WPS button varies by router model. It’s typically found on the back or side of the device. If you can’t locate it, consult your router’s manual to know where it is on your Cox router model.
If you’re stuck on the login page, try these steps:
* Verify your internet connection.
* Double-check the router’s IP address (usually 192.168.0.1 or 192.168.1.1).
* Clear your browser cache and cookies.
* Try logging in from another web browser.
* Restart your router (or) power cycle the router.
If none of these tips works, then simply contact COX customer service.
Here are the possible reasons that you can’t access the login page of your Cox modem router.
* Incorrect IP address.
* Network connectivity issues.
* Router problems (try restarting).
* Firewall or security software interference.
* Incorrect login credentials.
If you’ve forgotten your Cox modem router password, you’ll typically need to reset the router to its factory default settings. This will erase all custom settings, so it’s important to back up any configurations if necessary. After resetting, you can log in using the default username and password (usually “admin” or “user” for the username and a blank password or “admin” for the password). These credentials are often found on a sticker on the router.
Most Cox modem routers do not have built-in remote access capabilities. This means you need to be connected to the same Wi-Fi network as the router to access its configuration page. However, some advanced routers or third-party software might offer remote access features. Check your router’s manual or contact Cox support for further assistance.
If you’re experiencing troubleshooting connectivity issues with your Cox router, you can try these steps:
* Check all cable connections.
* Restart your modem and router.
* Verify there are no internet outages in your area.
* Check your connection by connecting a device directly to the router using an Ethernet cable.
* Reset your modem and router to their factory device settings.
* Contact Cox support for further assistance.
Conclusion
By following these steps and having the necessary information, you can easily access your Cox modem router’s settings. This allows you to customize your network, troubleshoot issues, and optimize your internet experience. Remember to prioritize strong security measures when managing your router settings to protect your network from unauthorized access.
If you continue to encounter difficulties, don’t hesitate to check your router’s manual or contact Cox customer support for further assistance. Also, you can write to us in the comments section. We will respond promptly to resolve your queries.
