A wood lathe is a great way to begin your woodworking journey. With this, you can work on numerous projects and strengthen your overall woodworking.
But here’s a catch for beginners. Whether you’re willing to open a workshop or pursue it as a hobby, working with a wood lathe can make you disquiet.
This comprehensive guide will help to make you more familiar with a wood lathe. Not only this but I’m sure that you’ll be able, to begin with, your first ever lathing project.
So, let’s dive in.
Getting Started with Wood Lathe
The instructions provided below will take you one step closer to your lathe journeys. Also, these instructions are divided into steps so you don’t get confused and have a clear idea of what to do next.
Step 1: Select a Suitable Lathe for Your Task
Starting with the first obstacle you’ll encounter. Which type of lathe would work fine for you? Generally, there are two categories of the wood lathe, serving different purposes.
-
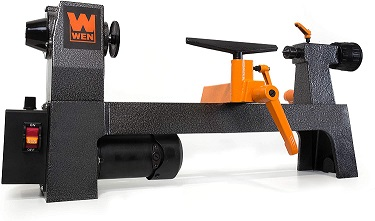
Benchtop Lathe
-
Advanced Lathe
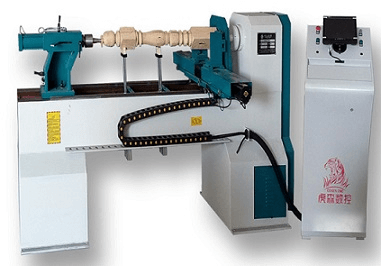
The advanced lathe category has several other types for advanced woodworking or factory usage purposes. On the flip side, the Benchtop lathe is an ideal choice for small household projects.
We’ll take the benchtop lathe for further discussion. Also, it’s highly advisable to consider a benchtop if you’re a complete beginner.
Before going further, we shall know about some of the important factors and terms related to a benchtop lathe. Having a good idea about them will not give rise to unnecessary confusion in the upcoming steps.
- Bed Length: This is the length of the working area. In other words, it is the maximum length from one corner to another corner of the lathe. A lathe with a long bed length will allow you to work on big projects, and the smaller will allow you with detailed work.
- Swing: It is the maximum diameter you can work on. Every lathe has a specific range of swings to work with.
- Horsepower: It is the popular unit that denotes the power of the machine. In the wood lathe, having a higher horsepower will allow you to work on heavier projects without any issue. The higher the amount of torque the more rotation power you’ll get.
- RPM: It is an acronym for rotation per minute. And every lathe has its range of rpm. Always pay attention to the amount of RPM while you’re working. Different RPMs are required to serve different purposes. Slow RPM is much suitable in the beginning to turn the irregular shape of the wood piece. On the other hand, a high RPM will provide you with smooth and clean woodwork.
Step 2: Come up with an Idea
Pick up the one idea that you always wanted to give a shot. If you aren’t having anything on your wishlist don’t worry. Just pick any of the fundamental projects. Take some time if needed, but don’t stress out.
The most basic is to turn an irregular wooden piece into a smooth cylindrical shape. Becoming good at this will make your basics strong.
Step 3: Pick an Ideal Tool
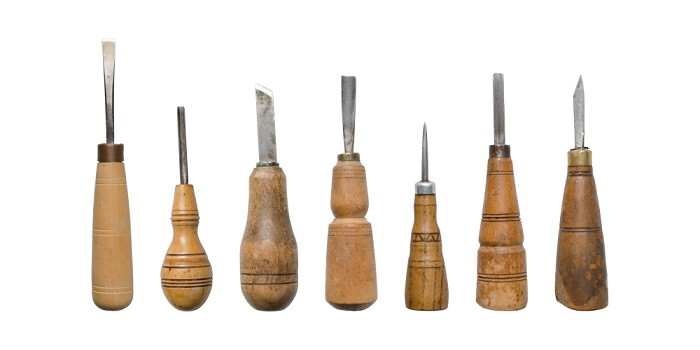
The tools we used in lathe work are known as chisels. These are the things that shape your project in the most desired way. There are numerous chisels available in the market, and each of them serves different designing purposes. However, you should pay attention to the basics first. Here are some of the most common chisels, everyone should have.
- Gouges: These are the most common types of tools. They are shaped in such a way that performing desired cuts becomes so easy. Here you can practice with several types of gouges, such as bowl gouges and knurling gouges.
- Scrapers: Scrapels are mostly used for removing extra wood from the flat or cylindrical shaped wood pieces. They’re mostly flat or slightly curved in shape.
- Parting tools: Parting tools are thin edgy tools that are used for cutting off the wood which are thin, vee tipped tools for cutting off workpieces.
- Spoon cutters: As the name suggests, these are the cutters with spoon shaped edges. These are mostly used for bowl making purposes.
Step 4: Picking the Right Wood for the Project
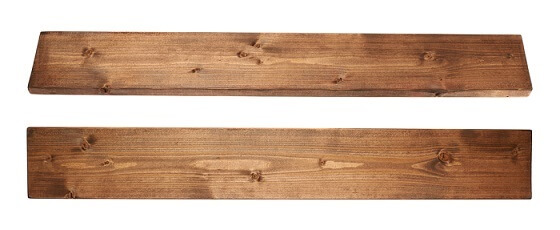 Beginners should always aim for soft and new wood pieces. Among numerous options, the lodge-pole, balsam fir, yellow pin are some of the advisable wood. On top of that look for a wood piece having a high number of grains and the lowest numbers of knots in it. Also, the tight knots are okay to go with but wood with loose knots aren’t safe.
Here’s an important factor to consider if you’re aiming for freshly cut wood. Trunk logs are more preferable to limb woods.
Step 5: Convert the Log into a Square Shape, if Necessary
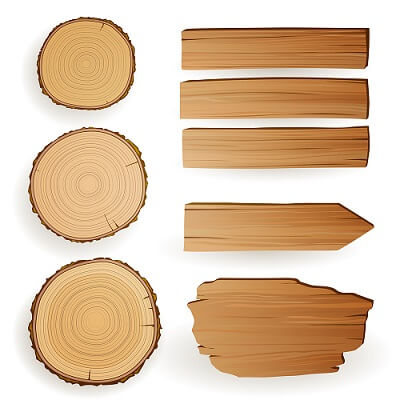 Converting an irregular shape into a squared log will be helpful in the further process. Let me take an example to make this crystal clear. If you’re considering a piece of lumber with a dimension of 2X4 inches, convert it into 2X2 inches for simplification.
With more cylindrical shapes such as square or octagonal, it would be easy for you to work on them. Moreover, you’ll end up with optimum grinding only.
Step 6: Derive the Most Desired Length you Want to Work With
This step is also about fixing the wood to the fullest for smooth lathing. If you’re a complete beginner, don’t go anywhere beyond 2 ft (at least in the beginning). Whereas if you’re confident in working fine with the long wood pieces, go ahead.
However, the more the length will be, the more difficulty you’ll face. One of the common challenges in such a situation is- maintaining the same diameter to the whole wood.
Step 7: Mark the Centers and Position It
It’s time to begin some real work. To place the wood piece in an accurate position you should mark the centers of the wood. Now, gently place the wood log between the centers of the lathe and position it firmly.
Cross-check that the tailstock is not locked and start sliding it towards the end of your wood piece. After this, start tightening the spindle of the tailstock so that the wood gets into the headstock spindle as well.
Make sure that this process has no flaws and the placement of the wood piece is done correctly.
The final thing to ensure is the lathe keys should be out of the machine.
Step 8: Place the Tool Rest at the Most Adequate Position
Hope you correctly positioned the wood piece. The only thing you need to do is place the tool rest at one fixed point. It should rest parallel to the length of the wood piece.
Here’s the moment that’ll need micro calculation. The distance of the tool rest should be close to the wood piece. But at the same time, it shouldn’t be too close that may affect the rotation of the lathe.
The golden distance here would be maintaining the distance of an inch or less. As you’ll get better control with the closest position of tool rest.
Step 9: Check Everything is Okay Before you Start Working
After setting up the whole process, you should go for the free spin and check whether everything is fine or not. Of course, the wood piece should not hit the tool.
Always give a certain rotation with your bare hand first and then spin it with a machine. This will help you to know if there’s sufficient clearance or not.
Step 10: Pick an Ideal Chisel
 Although you’re free to pick any type of chisel for your desired project, a roughing gouge will be the perfect pick. Roughing gouge is used to convert any irregular wood piece into smooth cylindrical wooden work.
It is highly advisable to get good at holding the tool on the tool rest. Rest your non-primary hand on the metal blade behind the tool rest and the primary near the handle. A good gesture to maintain here would be your elbow in and steady. Also, lean your body weight towards the lathe for getting better control.
Step 11: Begin the Work
The beginning is always difficult, the same things follow here. After setting up everything this is the time to turn on the lathe. Make sure the speed of the lathe is at the minimum to prevent any possible accident or mistake.
Keep the edge of the tool at rest firmly, making a clear distance from the rotating wood piece. Now, it’s time to slowly bring it towards the rotating wood. You need to maintain a soothing effect here. It should just touch the surface of the wood and get shaped with it.
Any misplacement can ruin the project or the tool, make sure that you’re not moving it too quickly as well. Although it’s normal to expect mistakes in the beginning. There’s no need to worry if you did a terrible task on the first attempt.
Further, in the truing process, you need to focus on the chips and their size to be cut. The chips here should be always less than ¼th of an inch in length to get the smooth rounded shape.
Step 12: Repeat the Same Process to the Complete Length of the Wood Piece
After getting a satisfactory result for the first time, now you should repeat the same thing to the whole wood piece. To do so, move the cutting edge parallel to the woodwork. Aiming to make a light cut to the length will give better results and fewer errors.
Twisting the tool a bit left and right (while working) will throw the debris in another direction. In this way, you’ll not get covered with those chips.
Play with the angles and try to find the best angle to do this.
Step 13: Push the Tool Towards the Stock of the Lathe
You should try to push the tool towards the stock continuously. It’ll help you to remove the equal parts with more ease. Also, this is the best way to remove the angular parts and get the desired cylindrical shape.
Step 14: Inspect Your Work Frequently
Inspecting your work is recommended to have a proper track of what you’re doing. Stop the lathe and have a look at the wood piece you were just working on. Pay attention to the cuts and stress cracks formed till now. You might remove some of the debris with your hand that may have started forming.
Moreover, don’t forget to measure the diameter of the wood to know how closer you are to the goal.
Step 15: Try to Make the Wood Piece Smoother
After doing the main part, it’s time to smooth things out. To do so, increase the speed of the lathe and decrease the contact between the tool and the wood. Your tool should be barely touching the wood piece for ensuring utmost smoothness.
Step 16: Finish your Work by Sanding the Wood Piece
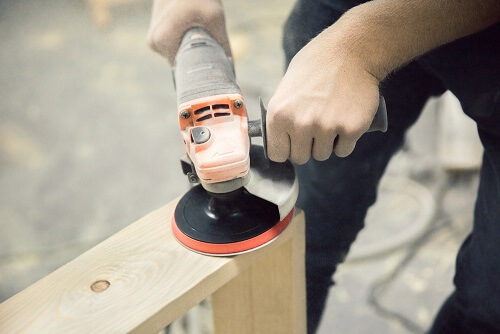 This part is not mandatory though. But it’s a good practice to sand down the unwanted layer of the wood.
You can perform this sanding either manually or with the lathe as well. Take sandpaper and firmly hold it in a position where it’s just touching the wood piece. Now turn on the lathe, and gently sand the whole wood. Remember, don’t hold the sandpaper too tightly against the wood. Otherwise, you’ll end up sanding more wood than required.
Tips for Beginners
Pay more attention to the lathe you’re working with
There’s no doubt that the type of lathe you’ll use will have a great impact on your projects. You might want to work with a mini wood lathe if making small sticks, pens, or a bowl. The smallest the lathe will be, the more detail you’ll be able to provide.
There are also bigger lathes available in the market. A lathe with a longer bed length will allow you to work on comparatively bigger projects.
Master the Basic Toolkit
In the beginning, your monkey mind might suggest you try different tools all at once. But, here’s the thing. You should have a solid foundation before you start working with other fancy tools.
Pay more attention to mastering the basic toolkit you’ve. Start with the roughing gouge, it’s one of the most vital tools when it comes to lathing.
The Golden Rule to Have Clear Cuts
Want a hack for clear and accurate cuts? Many beginners and even experienced woodworkers rely completely on the strength of their hands. Instead, you should try to use your body weight for accurate and uniform pressure all around the wood piece.
Using this technique will help you to get more desired results that too without much fatigue to your hands.
Measures to Consider while Using the Lathe
You need to understand that working with the lathe is not child’s play. A small recklessness can lead to an injurious accident. Also by not taking proper measures, you have a high risk of damaging the lathe.
The safety measures mentioned below will help you to have better control over the machine. These points become mandatory if you’re a complete beginner.
- Read the instructions/manual of the lathe, you’ll work upon it.
- Clothes getting stuck on a moving machine is always a sign of an accident. Always wear tight-fitting clothes.
- Don’t forget to wear the safety specs. The remains might harm your eyes.
- Similarly don’t forget to protect your ears, if you have got sensitive ears and generally avoid machine noise.
- Try to avoid wearing any type of extras- jewelry, watches, or rings.
- Always start the lathe at minimum speed
- It’s always a good practice to rotate the workpiece using your hand first. Otherwise, if the wood piece is not placed properly, it might harm anyone present in the nearby area.
Conclusion:
I hope the information provided above will give you a great kick start to your woodworking career or hobby.
Just like other machines, the lathe will also take some time to have good control over it. I know it seems a bit overwhelming when you see others producing creative woodwork with smoothness. But remember, they must’ve worked really hard to inspire someone. And now it’s your turn too.
The main key here is not how much you practice in a day but how consistent you’re. Devoting the same hours every day will help to increase your muscle power. Thus, getting desired wood pieces in a shorter time.
