Have you noticed your vehicle’s temperature gauge inching into the danger zone or experienced a consistent need to replenish coolant? Well, an often underestimated culprit behind these concerns resides under your car’s hood – the radiator cap.
The radiator cap plays a pivotal role in your vehicle’s cooling system. If you find yourself constantly topping off coolant or worrying about your daily commute, you can put your concerns to rest by delving into this article. We’ll shed light on this seemingly minor yet critical automotive component, explaining its functionality, warning signs of trouble, potential causes, the consequences of a faulty cap, and how to fix/rectify or replace it.
Let’s explore the realm of the radiator cap for proper maintenance of the vehicle, ensuring a safe and comfortable journey.
Understanding The Radiator Cap
 The radiator cap stands as a crucial element of your vehicle’s cooling system. It is designed to seal and pressurize the radiator, helping to regulate the engine’s operating temperature. It serves as a portal through which coolant can maintain the requisite pressure, preventing it from reaching the boiling point/overheating (particularly in high-performance vehicles or modified engines requiring extra cooling). Additionally, the radiator cap’s pressure-release valve ensures that any excess pressure can escape to maintain the coolant system and the radiator within safe operating parameters.
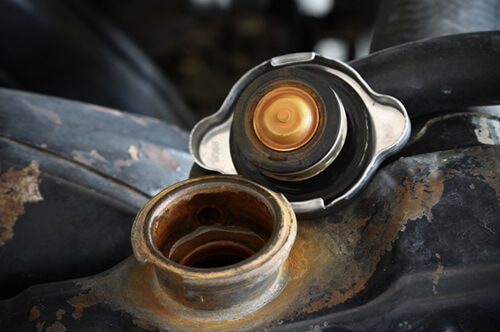
This rad cap is located on the top of the radiator itself, which is placed at the front of the engine compartment. In some vehicles, especially new models, it might be positioned on an overflow or expansion tank that is connected to the radiator. To locate it, you need to open the hood of your car, and you can find the radiator cap easily near the front of the engine bay. You have to be cautious and ensure that the engine is cool before removing the cap to prevent any hot coolant and stream.
How Does A Radiator Cap Work?
The radiator cap is a vital part of your vehicle’s cooling system that safeguards & maintains the engine’s optimal temperature. It consists of various functions. Firstly, it helps to maintain the right pressure in the cooling system, protecting your radiator and hoses. When your engine runs, it gets hot, causing the coolant in the radiator to expand. The radiator cap is equipped with a spring-loaded valve designed to keep the pressure around 15 to 16 pounds per square inch (PSI). This higher pressure raises the boiling point of the coolant, allowing it to absorb more heat from the engine without evaporating.
If the coolant temperature goes above the recommended pressure limit, the radiator cap has a safety valve that opens up. Here the air from the atmosphere or coolant, letting excess coolant and steam escape into an overflow/expansion tank. When the engine cools down, it creates a vacuum, pulling the excess coolant back into the radiator. This cycle of pressurizing, expanding, and releasing helps keep your engine’s temperature in check, preventing it from overheating, which, in turn, makes the radiator cap a vital contributor to engine health and performance.
But the radiator cap isn’t just about pressure. It also keeps the cooling system sealed, preventing outside contaminants from getting in. It plays a role in raising the boiling point of the coolant, preventing the formation of scale, and assisting in transferring coolant to an expansion recovery tank when the coolant gets hot, expands, or the pressure increases.
In a nutshell, the radiator cap is like a guardian for your engine, making sure it stays at the right temperature and functions smoothly.
What Happens If a Radiator Cap Goes Bad?
When your car’s radiator cap goes bad/fails, it can cause various problems in the cooling system, with coolant leakage being a common issue. Typically, a faulty cap fails to seal properly over time, allowing coolant to escape. Eventually, it can’t maintain the necessary pressure in the system. This leads to a drop in coolant levels, causing the coolant to boil at a lower temperature, which can result in overheating, potential breakdowns, and engine damage.
If the pressure-release valve in the cap doesn’t work correctly, it can’t release excess pressure, which might harm the radiator or hoses. Overheating can be a sign of forming air pockets within the cooling system. If the radiator cap does not create a good seal, it allows air to enter the system, creating pockets that disrupt proper coolant circulation.
In short, a malfunctioning/bad radiator cap can compromise the safety and efficiency of your vehicle’s cooling system. So, replacing the radiator cap promptly is crucial to prevent costly engine damage and breakdowns.
Recognizing the Warning Signs & Symptoms of a Bad Radiator Cap
It’s crucial to identify the signs of a bad radiator cap early to avoid cooling system troubles and potential engine damage. Here are common indicators that signal it’s time to fix/replace your radiator cap.
- Coolant Leakage – If you see coolant seeping around the cap or from the overflow reservoir, it’s a clear sign of a bad radiator cap. This leakage results in a compromised sealing gasket within the cap. Additionally, you can inspect under the hood for any signs of leaks near the cap.
- Low Coolant Levels – A constant drop in coolant levels without visible leaks elsewhere in the cooling system, can point to a faulty radiator cap symptom that fails to maintain the needed pressure, causing coolant loss. This often results in an overflowing reservoir and the mysterious disappearance of engine coolant. However, pressurized cooling systems are designed to prevent overheating and coolant loss.
- Overheating – A problematic radiator cap can’t handle the pressure reduction upon heating/boiling of the coolant. This leads to frequent engine overheating, even at lower temperatures than intended.
- Hissing or Steam Sounds – Hearing hissing or seeing steam escaping from the radiator cap area while turning off the engine. This indicates improper pressure release and coolant loss.
- Coolant Reservoir Overflow – A malfunctioning cap causes excessive buildup of pressure in the cooling system. This forces coolant into the expansion tank, resulting in overflow and potential coolant loss.
- Visible Damage – Check the cap for visible signs of damage like dents, cracks, or corrosion, in which the physical damage can compromise the sealing ability of the rad cap.
- Radiator Hose Collapsing – A bad cap prevents the cooling system from drawing coolant back from the reservoir if the engine cools down. It causes the hose to collapse and reduces coolant flow, due to the loss of coolant.
- Check Gaskets – If you observe a leak around the edge of the cap, it may be due to a faulty gasket. If the leak is coming through the cap itself, then the cap is likely bad/damaged. In either case, replacing the radiator cap is the recommended solution. It’s also essential to inspect both flanges in the radiator opening, the top rim, and the inside flange for any issues.
- Rapid Temperature Fluctuations – Instant temperature gauge fluctuations between cold and hot may result from the maintenance of incorrect pressure, leading to temperature spikes.
- Milkshake-Like Residue – Occasionally, a faulty cap can mix the coolant with engine oil, creating a milky residue in the overflow tank or radiator. This indicates a potential breach between the coolant and oil systems.
- Check Engine Light – In most modern vehicles, a malfunctioning radiator cap triggers the check engine light due to irregular coolant pressure readings monitored by the engine’s sensors.
- Visible Deterioration – Regularly inspect the rubber gasket or seal on the radiator cap for signs of wear, brittleness, or cracks. This damaged seal affects its ability to seal properly.
Verdict: In short, if you notice any of these warning signs or experience cooling system issues, it’s recommended to inspect and replace your radiator cap promptly if necessary. This ensures the proper functioning of the cooling system and helps prevent potential engine damage.
Causes of a Faulty Radiator Cap Symptoms
Several factors can lead to a radiator cap going bad or malfunctioning. Here’s a breakdown:
- Heat and Pressure – Extreme heat and pressure in the engine compartment will weaken or lose the tension of the spring mechanism inside the radiator cap over time.
- Wear & Tear – The rubber seals and essential components of the radiator cap naturally deteriorate due to exposure to pressure, heat, and chemicals in the coolant. This natural aging & wear results in leaks and loss of sealing effectiveness.
- Corrosion – Moisture and exposure to coolant can lead to corrosion of the metal parts of the radiator cap, weakening its structure and compromising its functionality.
- Contaminants – The accumulation of dust, debris, and contaminants around the cap’s seal will restrict proper sealing, causing coolant leaks and loss of pressure.
- Coolant Quality – Contaminated or poor-quality coolant causes radiator cap issues. Coolant with incompatible additives or impurities can increase wear and lead to early failure.
- Improper Installation – An incorrectly installed radiator cap won’t seal the coolant effectively, resulting in leaks and pressure loss. It’s crucial to follow the manufacturer’s installation guidelines.
- Overheating Events – Repeated engine overheating puts extreme stress on the radiator cap, causing damage to its components and reducing its effectiveness.
- Physical Damage – Accidental damage, like hitting the cap against other engine components or dropping the cap will result in structural damage and thereby affect the sealing ability of the cap.
- Chemical Damage – Certain chemicals, such as additives or sealants used in the cooling system, can react with the materials in the radiator cap and cause degradation and failure over time.
- Age and Mileage – Radiator caps, like other car parts, wear out and have to be replaced occasionally as part of routine maintenance, every 2 to 4 years or as recommended by the vehicle manufacturer. However, high-mileage vehicles are more prone to cap wear and failure.
Verdict: Inspect the radiator cap regularly and replace it promptly whenever required. This simple but crucial step helps to maintain a healthy cooling system and prevents potential engine damage, resulting in a safe and comfortable drive.
How to Fix the Signs of a Bad Radiator Cap?
Fixing a faulty radiator cap is a straightforward task that safeguards your cooling system and your engine’s well-being. Here’s how to do it:
- Safety First – Before starting the process, ensure the engine is fully cool. Attempting to open a hot radiator cap can result in hot coolant spraying out, leading to injuries/burns. Allow at least an hour for the engine to cool down properly to work on the cooling system. Usually, it is safe to open the cap when you comfortably hold the radiator hose or the temperature is usually below 60°C.
- Gather Your Tools – You’ll need a compatible new radiator cap that matches your vehicle’s specifications recommended by your car manufacturer.
- Locate the Radiator Cap – Find the radiator cap, which is mostly atop the radiator. If you’re unsure, consult your car’s owner’s manual for the exact location.
- Release Pressure – Before removing the radiator cap, release any remaining pressure in the cooling system. Cover the cap with a towel or thick cloth to protect yourself from steam. Gently turn the cap counterclockwise till a hissing sound is heard, which indicates pressure release. Ensure to wait till this hissing sound stops to fully take off the cap.
- Remove the Old Cap – After releasing the pressure, unscrew to remove the old rad cap. Scrutinize it for any visible damage or signs of wear, like a damaged gasket or seal.
- Install the New Cap – Ensure to install a perfectly compatible, new radiator cap for your vehicle. Place it on the radiator neck properly and turn it clockwise until snug, confirming that it is seated correctly.
- Check the Gasket – Verify that the rubber gasket or seal on the new cap is in good condition. This gasket is vital to creating a proper seal.
- Top-Up Coolant – Add coolant (if required) till it reaches the recommended level whenever you notice the coolant level in the radiator or overflow tank drops due to the faulty cap.
- Secure the Cap – Double-check that the new radiator cap is secured tightly, and it should be snug but not overly tight.
- Test Run – It’s time to start the engine and let it reach its normal operating temperature. Then watch the temperature gauge for signs of fluctuations or overheating. Also, check for any coolant leaks around the cap or elsewhere in the system.
- Recheck Coolant Level – After a complete cool down of the engine, reinspect the coolant level in the radiator and overflow tank, topping up if necessary.
- Dispose of the Old Cap – Dispose of the old radiator cap properly, as it is considered hazardous waste due to its exposure to coolant and potential contaminants.
Verdict: Replace a bad radiator cap by following these steps. This will ensure that the vehicle’s cooling system functions properly and reduce the risk of overheating and engine damage. If you aren’t sure how to perform the task, then consider hiring a professional mechanic to do this task accurately for its effective functioning.
Replacing a Bad Radiator Cap
Replacing a bad or malfunctioning radiator cap promptly is essential for safe and effective driving. Here’s a simple guide on how to replace a bad radiator cap:
- Make sure the engine is completely cool.
- Find the radiator cap, usually on top of the radiator.
- Place a towel or thick cloth over it to protect yourself from steam and heat.
- Start turning the old cap gently counterclockwise to release any remaining pressure.
- Wait till you hear a hissing sound, which indicates the pressure release.
- After the pressure is released, remove the old cap carefully, check it thoroughly for damage, and dispose of it properly.
- Now it’s time to take the new radiator cap, which is compatible with your vehicle’s type.
- Place it on the radiator neck and turn it clockwise till it is snug. Check whether or not the rubber gasket or seal on the new cap is in good condition.
- Start the engine to monitor the temperature gauge for any issues, and also check for coolant leaks.
- Recheck and top up the coolant level (if necessary), and ensure the new cap is securely tightened.
When to Replace this Cap?
Radiator caps do not typically require frequent replacement, but it is recommended to do so every five years to prevent potential issues from arising. Replacing the cap at this interval helps maintain the efficiency of the cooling system and reduces the risk of overheating problems.
Bad Radiator Cap – FAQs
Ans: No, it is not safe or recommended to drive with a damaged or rusted radiator cap. A compromised cap can lead to severe engine damage and coolant loss. A properly functioning cap maintains system pressure, which is essential for proper coolant circulation and temperature control. A loose cap can prevent the system from running at the necessary pressure, causing the coolant to overheat and leading to various issues, including pockets of air in the cooling system, blown head gaskets, warped cylinders, or even a cracked engine block.
It is possible to start and drive the car without a radiator cap, but the coolant may boil at a lower temperature, enhancing the risk of engine overheating, reduced cooling efficiency, and potentially leading to engine breakdowns and expensive repairs. To avoid serious engine damage, it is essential to shut off the engine immediately at the initial signs of overheating and address them promptly to resolve these consequences.
Ans: The cost of a radiator cap replacement is relatively low, ranging from $10 to $30 for the part itself based on the make & model of the vehicle. Also, its labor cost (mechanic) for installation is minimal, often ranging from $20 to $50. Therefore, the overall replacement cost of a radiator cap will cost you around $30 to $80. Thus, it is an affordable maintenance task that prevents more expensive cooling system problems in the long run.
Ans: The radiator cap plays a crucial role in the cooling system by maintaining a specific pressure level and releasing excess pressure when it reaches a pre-determined point. As the coolant heats up, it expands, increasing pressure. Therefore, a higher-pressure radiator cap can help prevent overheating. If the cap fails, the vehicle may lack sufficient cooling capacity, leading to chronic overheating. It’s advisable to install a new radiator cap when replacing the radiator.
Pressure ratings for radiator caps vary, typically ranging from 4 PSI to 30 PSI. Older vehicles often use a 16 PSI cap, while newer ones opt for a 20 PSI or higher cap. It’s essential to ensure that all cooling system components, including the radiator cap, hoses, clamps, thermostat, gaskets, and water pump, are in good working condition. A high-pressure radiator cap raises the boiling point, providing protection against boiling over at the upper end of the operating temperature range and generating additional heat.
Ans: It is not advisable to open the radiator cap until the engine has cooled completely. The sealed system, when exposed to air while hot, can lead to boiling and cause severe burns. However, you can use the top radiator hose as an indicator. If you can comfortably hold the hose, the temperature is typically below 60°C, making it safe to open the radiator cap. Always push down on the cap and turn it until it comes off after releasing the pressure. Removing the radiator cap when the engine is hot can cause the coolant to spray out, so be sure to let the engine and radiator cool down completely before attempting to remove the cap.
Ans: A radiator cap contains a 2-way valve and a pressure relief valve to control pressure changes as the coolant temperature fluctuates. Radiator caps can have two different seal types – double seal caps and single seal caps. Single seal caps are commonly used in non-recovery systems, while double seal caps are used in non-recovery systems and other systems.
Ans: A radiator cap keeps the cooling system under pressure, which raises the boiling point. For every pound of pressure added to a closed cooling system, the boiling point is raised by approximately 3 degrees. For example, if water normally boils at 212°F and you add 16 pounds of pressure to the system, the boiling point would be raised to around 260°F.
Ans: The radiator cap should be tightened securely by hand until it feels properly seated. There is typically a valve or vent in the cap that can release coolant if it’s overfilled or if the pressure gets too high. To tighten the cap, place it on the radiator opening and seat it properly. Turn it clockwise until you feel resistance, applying downward pressure as you turn it whenever you find the sweet spot.
Ans: The radiator cap should be in a system that remains full of coolant at all times. This means that it should be full to the cap. The cooling system should be entirely filled with fluid. When the system heats up and expands, excess coolant goes into the overflow tank, causing the level to rise from the cold to the hot mark. When the engine cools down, the coolant should return from the expansion tank to the radiator.
Ans: Opening the radiator cap while the system is at rest does not introduce air. Air is usually introduced by removing and replacing a hose, allowing air to enter the section where there’s no longer fluid. Actually, a fault or incompatible radiator cap can introduce air into the cooling system, resulting in issues like bubbling in the coolant or antifreeze reservoir, especially around the cap seal.
Ans: A high-pressure radiator cap, when functioning correctly, helps normalize pressure within the cooling system and keeps the engine cool. However, if the cap cannot maintain the accurate pressure for the vehicle, the engine may start to overheat. Overheating can also be a sign of air pockets within the cooling system. Radiator caps serve as pressure relief valves and prevent excessive pressure that could cause damage to the radiator, hoses, heater core, or water pump seal.
Conclusion
Ultimately, never underestimate your radiator cap’s importance. Although small, it plays a significant role in keeping your engine cool and running smoothly. In case of notice symptoms like hissing sounds, coolant leaks, or overheating, consider checking and potentially replacing the radiator cap. However, it is essential to pay attention to these small details as a part of your regular vehicle’s maintenance will prevent costly repairs and keep your engine in good shape. So, check out these signs and take preventive measures promptly to maintain the radiator cap properly for a smooth and safe ride.
Also, feel free to share your queries and questions regarding the radiator cap issues with us in the below comments section. We will respond promptly to resolve them and help you with proper maintenance of your vehicle for happy driving.
