Interfacing a Touchscreen LCD with a Raspberry Pi is very useful as this setup can be used to develop Raspberry Pi based stand-alone systems like Weather Monitoring Stations, Security Systems, and Camera Interfacing etc. Adding a Touchscreen to your Raspberry Pi opens up doors to a lot of projects as well as increases the portability of the system.
Having a nice LCD Display on your Raspberry Pi can allow us to make complex projects like a media center, personal computer, smart phone, tablet, etc.
How to Setup Touchscreen LCD on Raspberry Pi?
There are different types of Touchscreen LCDs available in the market today for Raspberry Pi from different manufacturers with different screen sizes, resolutions, operable with stylus, etc.
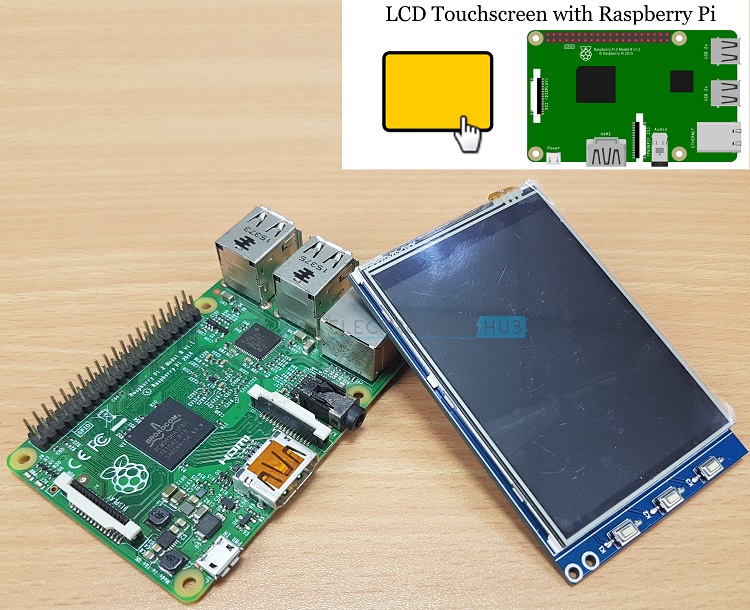
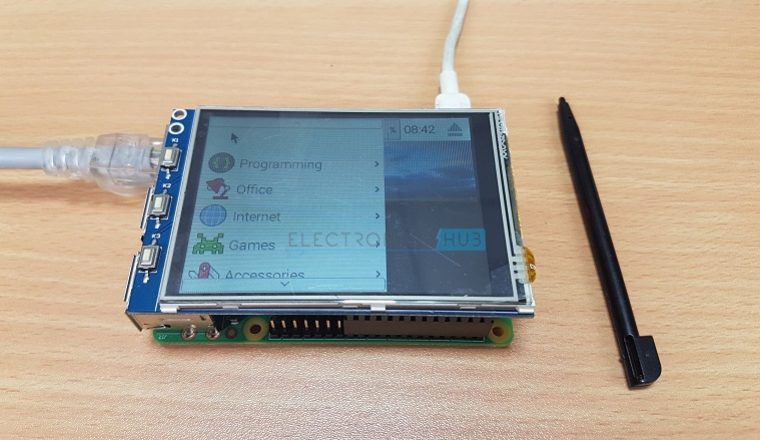
In this project, we will see how to setup an LCD Touchscreen on Raspberry Pi. For this project, we have chosen a WaveShare SpotPear 3.2 inch RPi LCD V4 touchscreen type LCD display.
NOTE: We’ll show you how to setup WaveShare 3.2 inch LCD with Raspberry Pi using the official drivers and also the provided Raspbian image. We tried to install this using our own Raspbian Jessie and Drivers but there were some problems. We will definitely update how to install any type of LCD with Raspberry Pi very soon.
Getting started with WaveShare SpotPear 3.2 inch LCD
There are different manufacturers of Touchscreen LCD displays for Raspberry Pi like Adafruit, Newhaven Display, Haoyu, Freetronics, WaveShare, Watterott Electronics and many more but we thought Touchscreen LCD displays from WaveShare for Raspberry Pi are affordable, easy to use and comes with drivers and their own version of Raspbian OS (our thoughts and might differ with other users).
There are many variants of Touchscreen LCDs from WaveShare like 2.8 inch, 3.2 inch, 3.5 inch, 5 inch, 7 inch, 10.1 inch etc. For setting up an LCD Touchscreen with Raspberry Pi, we are going to use a 3.2 Inch WaveShare SpotPear LCD.
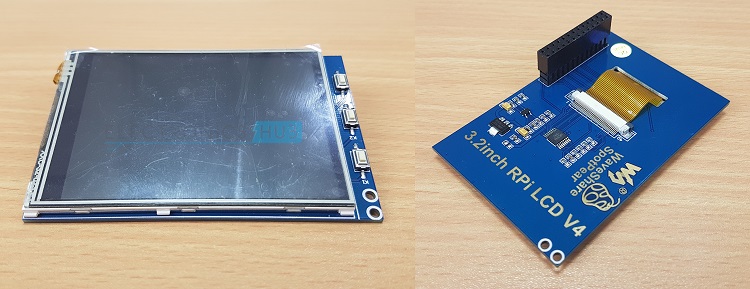
This particular LCD Display has a Resistive Touchscreen with a screen resolution of 320×240. It is interfaced to Raspberry Pi using SPI protocol. The LCD module has 3 user button that can be programmed to do additional functions.
The Wave Share 3.2 inch display can be directly plugged in to the Raspberry Pi on the GPIO Pins. It uses 26 Pins of the available 40 pins of the Raspberry Pi’s GPIO. Out of the 26 pins used, some do not have any connections (NC – No Connection).
First we will see the Pinout of the Raspberry Pi GPIO and then we will see the relevant pins required to connect LCD using SPI. The following image shows the pin out of Raspberry Pi’s GPIO Pins.
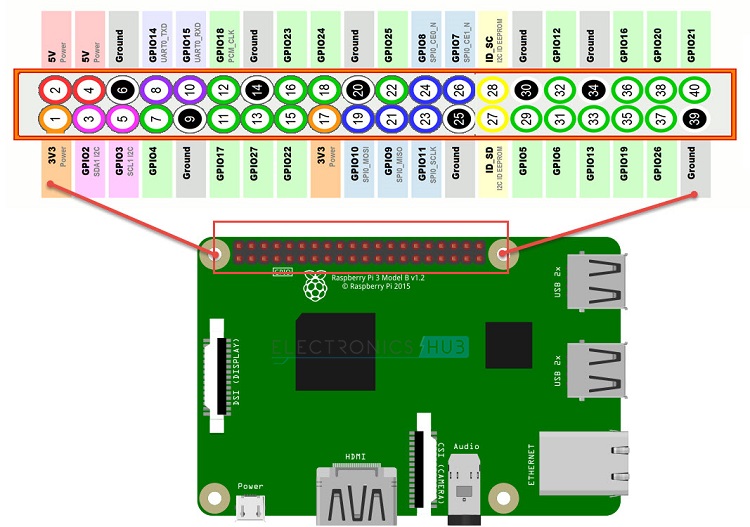
In these 40 pins, the connector on the back of the WaveShare 3.2 inch LCD has 26 pins (2 rows with 13 pins in each). The following table gives the list of pins we are going to need to interface the LCD with Raspberry Pi.

Downloading Drivers and OS
Now that we have seen the basic information about the WaveShare Touchscreen LCD module, we will proceed with the setup. There are two ways you can setup the LCD: 1. Use your own OS (Raspbian) and install the drivers or 2. Use the provided OS image file (it can also be downloaded) and do a fresh install of the OS.
If you want to test whether the LCD is working or not, you can go with the OS image provided by the manufacturer of the LCD. It is usually given in a CD or can be downloaded from the official website.
Write this image file on to the microSD card, insert it into Raspberry Pi and boot the Pi with LCD inserted on the Raspberry Pi. The Raspberry Pi directly enable the Touchscreen LCD display.
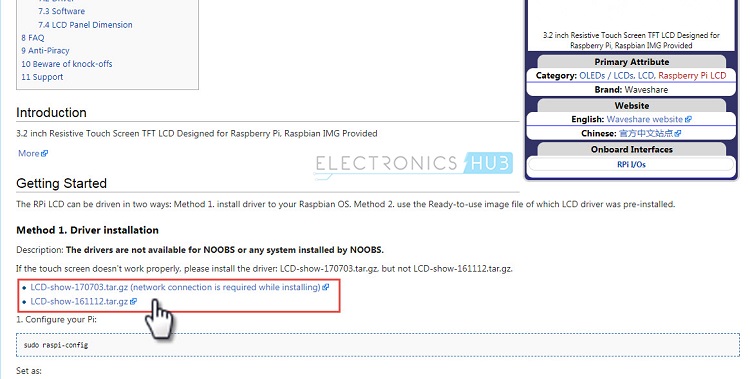
But, if we want to use our Raspberry Pi with any OS of our choice, like Raspbian Jessie for example, first thing we need to do is download the drivers for the LCD Module from the website.
For WaveShare SpotPear 3.2 inch LCD, the drivers can downloaded from this site https://www.waveshare.com/wiki/3.2inch_RPi_LCD_(B)
You can also download the image file from this site. There are two versions of drivers in the website. We have downloaded the first one (LCD-show-170703.tar.gz) and put it in the Desktop. Do not unzip or unrar it.
Assuming you have already setup the Raspberry Pi using the headless setup (no monitor or keyboard), we will proceed by copying the downloaded driver file in to the Raspberry Pi’s memory (microSD Card).
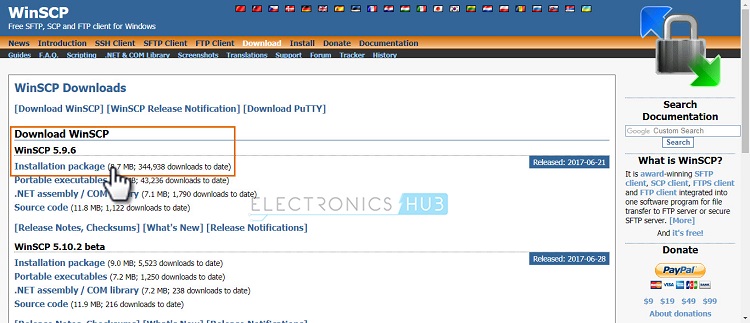
For this, we need a FTP client like FileZilla or WinSCP. You can use any of the client and we are using WinSCP. It can be downloaded from this site https://winscp.net/eng/download.php
Download the WinSCP and install it. Once the installation is completed, open the WinSCP application. As soon as you open it, you will be asked to enter the details of the session. Select File Protocol as SFTP (SSH File Transfer Protocol) and enter the IP Address of the Raspberry Pi in the Host name field.
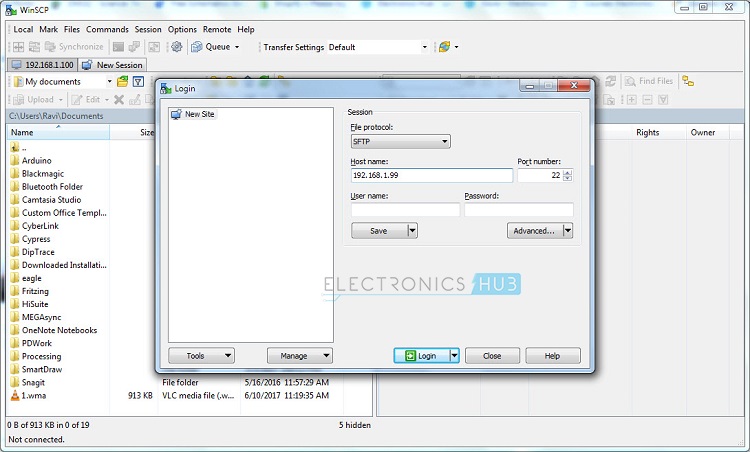
You can proceed further by clicking on the Login button. You then need to enter the username and password of the Raspberry Pi.
Enter those details as per your settings (if default settings are unchanged, username is pi and password is raspberry). After successful login, you will enter into the main screen of the WinSCP application.
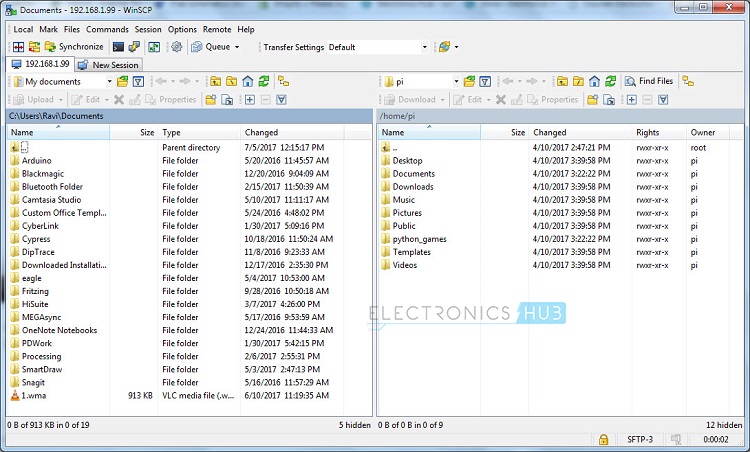
The screen is divided in to two halves and the left side the host computer (in our case the Windows PC which we are using) and the right side is the SSH connection (Raspberry Pi).
On the left side, go to the folder where you have downloaded the LCD Driver file. In our case, it is located on the Desktop. On the right side, go to home/pi folder. Drag and drop the LCD Driver File from left side to right side.

You will get a message about file transfer and just press ok. The file is now transferred from my desktop to Raspberry Pi. You can now disconnect the Raspberry Pi from WinSCP (Session Disconnect).
NOTE: Before proceeding with the installation, make sure that your Raspberry Pi is connect to the Internet.
Now, open Putty and login in to Raspberry Pi. After logging in successfully, we need to extract the contents of the LCD Driver file. To see the list of files and directories, you can enter the following command and press enter.
Now, to extract the contents, enter the following command. This command will extract the contents of the file LCD-show-170703-tar-gz to the present folder.
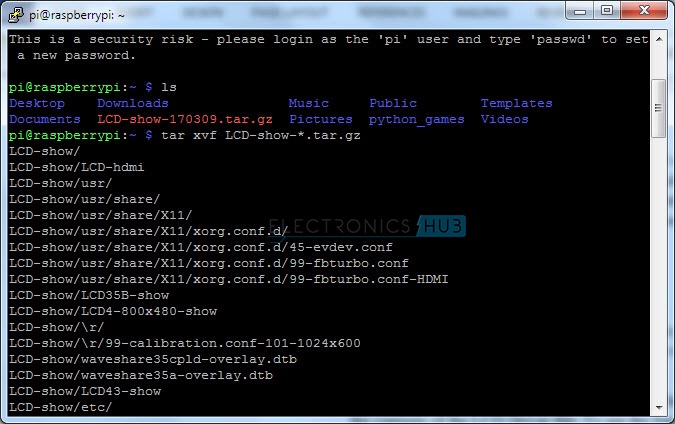
A new folder with name “LCD-show” will be created in the process. We need to go in to that directory. For that type the following command and hit enter.
Now, since our WaveShare LCD Module is a 3.2 inch one, we need to install the drivers specific for this LCD Module. For that, enter the following commands one after the other.
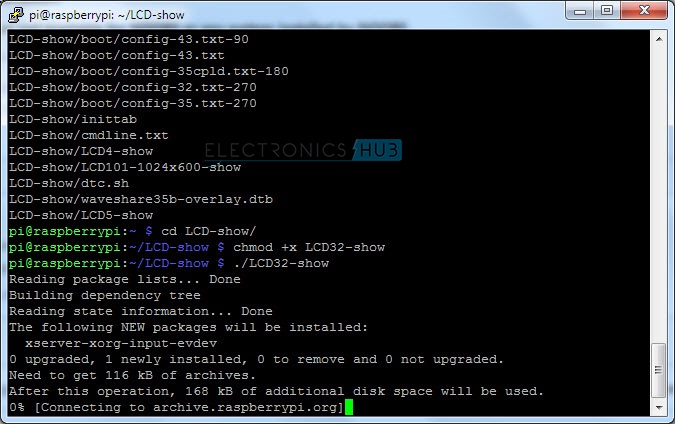
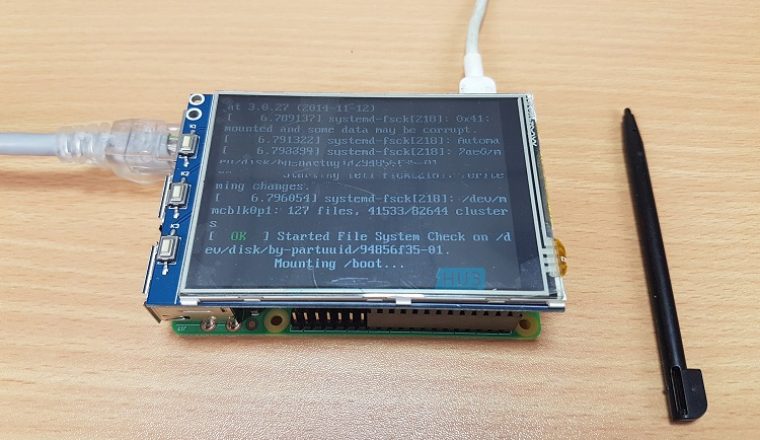
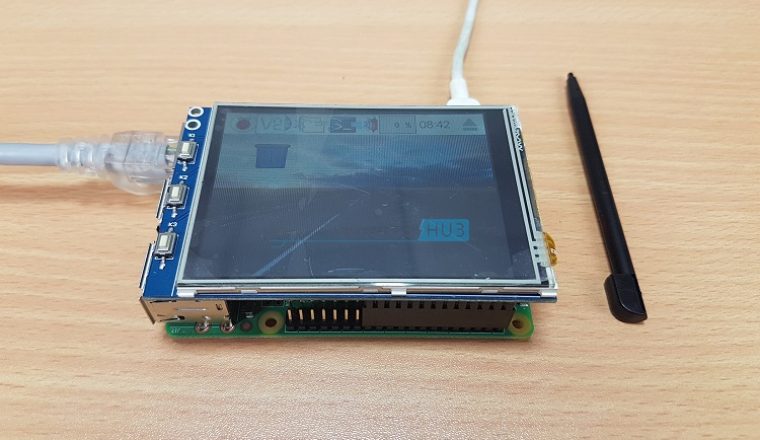
After entering the above commands, the installation of the LCD Touchscreen drivers will be initialised and the Raspberry Pi will automatically reboot. If not, you reboot the Raspberry Pi and after booting up, the Raspberry Pi will directly display on the LCD.

One Response
1) I am running RASPIAN STRETCH and my Pi3 is NOT headless …
Why doesn’t tvservice automatically recognize the LCD and install the proper drivers during boot .