Windows 10 is the most popular operating system for PC users. However, it is not the most ideal operating system as you have to face system issues from time to time, and you have to troubleshoot them to fix the issues.
Similarly, you may come across the “No Internet, Secured” issue occasionally if you connect to a wireless internet connection. It could be really frustrating when the internet is not available for online activities. However, this issue of “No Internet, Secured” can be resolved easily, and we will illustrate all the possible solutions in the article.
What Is This “No Internet, Secured” Issue?
The “No Internet, Secured” issue generally appears as a pop-up message in the System Tray of Windows 10. Sometimes, you may also appear as a notification and you might be wondering what the problem is. Basically, “No Internet, Secured” implies your computer does not have an active internet connection though the connection is secured. This could happen due to network issues as well as any issue on your computer.
However, “No Internet Secured” message could be a misleading message at times. This is because even when you have an active internet connection, Windows can show you this erroneous message. This message appears more often on Windows Surface devices though it appears occasionally on all Windows 10 devices. Therefore, let us focus on how to fix this “No Internet, Secured” issue.
How To Fix “No Internet Secured” Error?
Here are the steps you have to take one by one and we are sure that one of them will fix the issue.
1. Disconnect your VPN
If you have connected your computer to a local Wi-Fi network and you get the message “No Internet, Secured”, you have to first check if your VPN is turned on. If it is turned on, you have to disable it at least temporarily. This is because VPN has certain security features that could block the internet connection. Therefore, disable VPN service and refresh the internet connection to see if the problem is fixed. If the internet connection is there but you are seeing the message, you should ignore the message.
2. Reset IP configuration
Sometimes, resetting the IP configuration of your system can help you get over the network issues you are facing. All you have to do is right-click on Start button and click on Windows PowerShell. On Windows PowerShell, enter the following commands.
ipconfig /release
ipconfig /renew
Restart your computer and see if the problem is solved.
3. Check Internet Connection Properties
Here are the steps to follow to check Internet Connection properties.
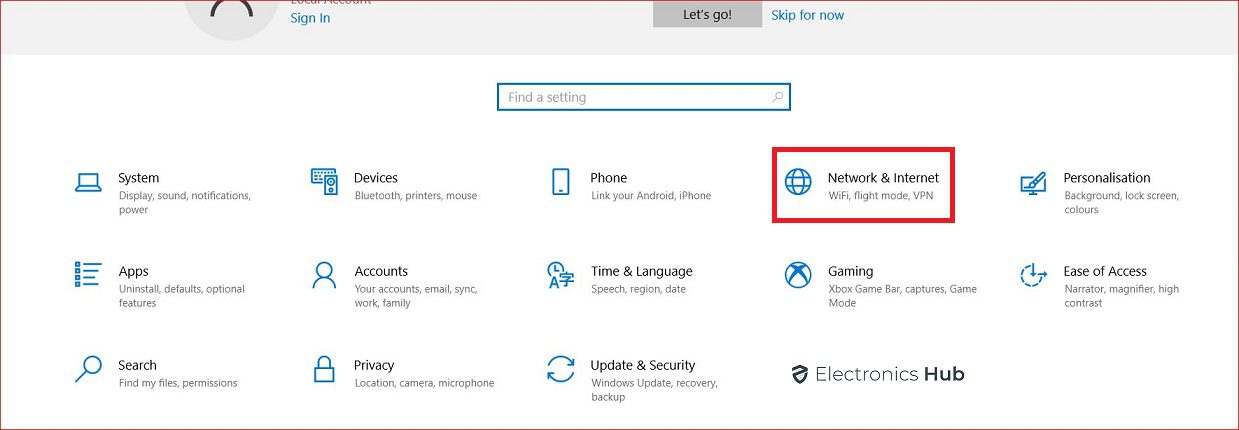
Step 1: From Network system tray, click on Network & Internet Settings.
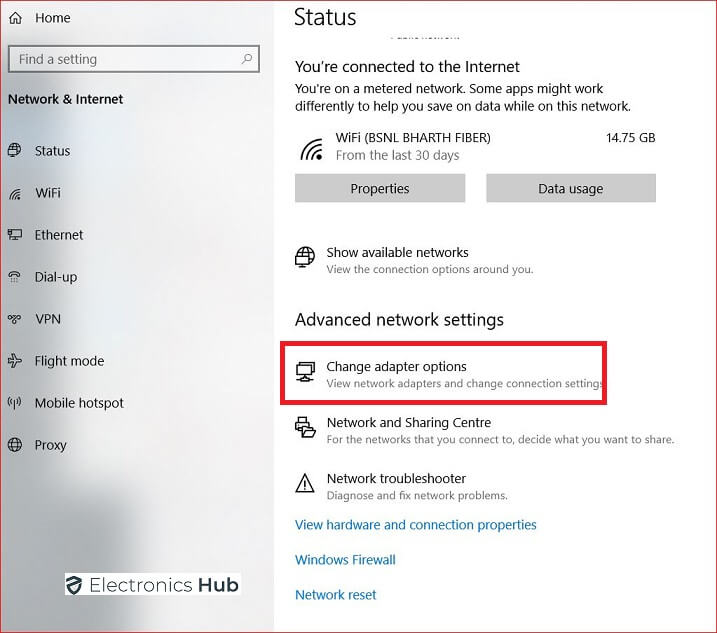
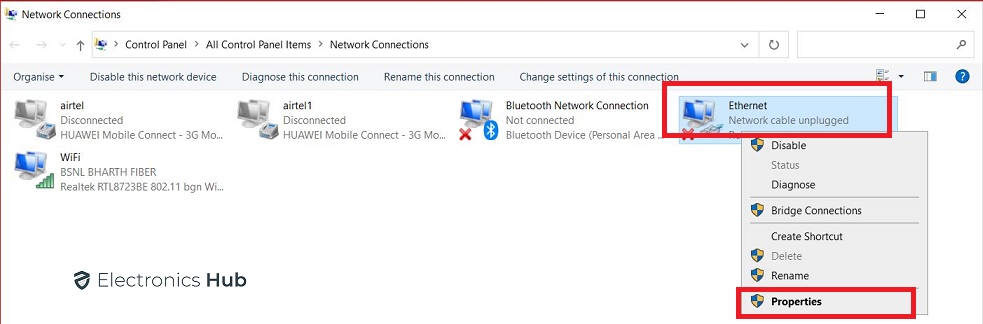
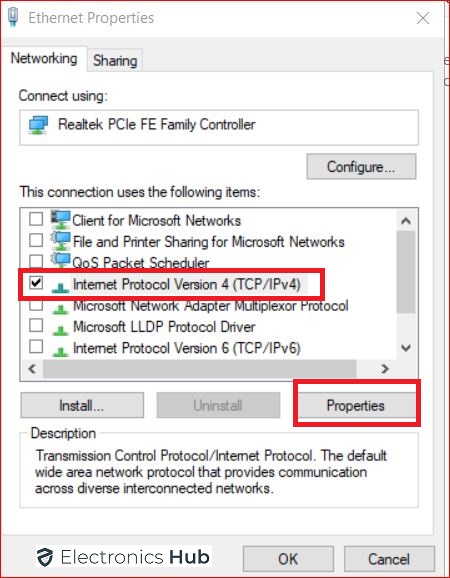
Step 2: Click on Change Adaptor Options and right-click on Connection such as Ethernet or Wi-Fi and select Properties.
Step 3: Ensure all the properties are confirmed except MS network adapter multiplexor protocol option.
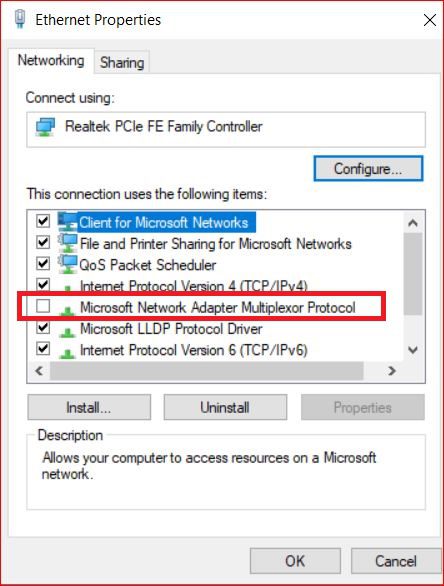
Step 4: If anything else is unchecked, check them and click on Ok button and restart the computer.
4. Uncheck IPv6
IPv6 is a relatively new network protocol that is fast replacing IPv4 which is still the most widely used protocol. The reason for this replacement is that the IPv4 protocol is running out of IP addresses. Since this is a new protocol, there are certain errors that users are facing. Therefore, you can disable IPv6 and restart your computer to see if the problem is solved.
Step 1: From Network system tray, click on Network & Internet Settings.
Step 2: Click on Change Adaptor Options and right-click on Connection such as Ethernet or Wi-Fi and select Properties.
Step 3: From Properties dialog box, uncheck Internet Protocol Version 6 and finally, click on Ok button. Lastly, restart your computer and check if you have found the solution.
5. Set a Custom DNS Server
Generally, the DNS server of the network is set to default. However, this default setting can be an issue at times and it can lead to “No Internet, Secured” problem. Therefore, change it from default DNS server to custom DNS server. Your internet service provider must have provided some custom DNS server address to you. If not, ask for it and here are the steps to change it.
Step 1: From Network system tray, click on Network & Internet Settings.
Step 2: Click on Change Adaptor Options and right-click on Connection such as Ethernet or Wi-Fi and select Properties.
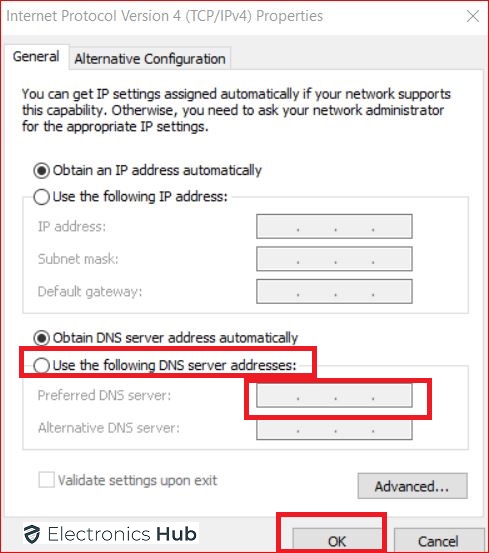
Step 3: Select Internet Protocol Version 4 and click on Properties.
Step 4: From the DNS Server section, select “Use the following DNS server addresses”. Thereafter, enter the custom addresses that you have from your ISP.
Step 5: Finally, click on Ok button and restart your computer.
6. Update The Driver Of Your Network Device
If you are connecting to any Wi-Fi network after a long time, there is a chance that your device’s driver has become outdated. Besides, any glitch in the driver can cause connection issues. Therefore, you should update the driver of your device and here are the steps to follow.
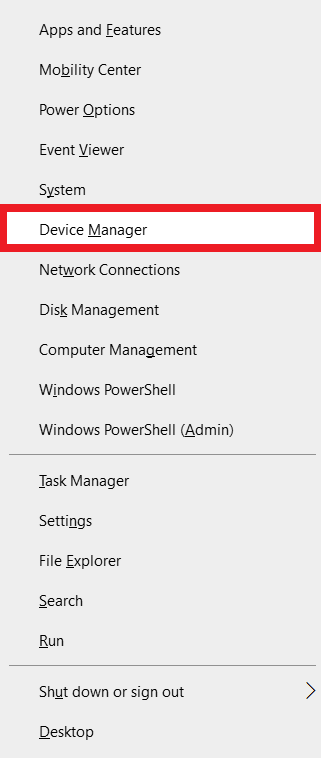
Step 1: Right click on the Start button and select Device Manager.
Step 2: Go to Network Adapters and click on it to expand it.
Step 3: Select your network device from the list and right-click on it.
Step 4: From the menu, select the Update Driver option.
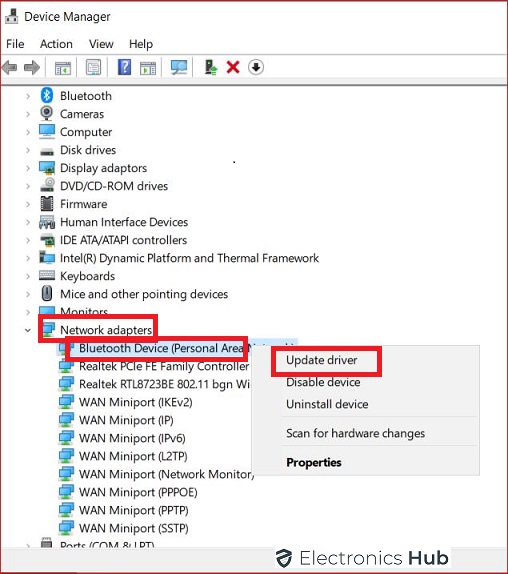
Step 5: Wait patiently for Windows to search for the latest driver and update it automatically.
Windows might reboot to reflect the changes. If it does not work, you can Disable Device, reboot your computer and again Enable Device from the menu option just below Update Device.
7. Reset Winsock
Reset Winsock is another solution to fix the no internet secured issue. If you have never heard of it, then it’s the Win Sockets API, which is a specification for your system’s interaction with network services. So if you wish to rest Winsock, just follow the command- “netsh winsock reset catalog”.
8. Seek Help of Network Troubleshooter
Finally, if nothing of the above works for you and your computer if offline, you should seek the service of Network troubleshooter. Windows 10 comes with Network Troubleshooter tool to investigate internally if there is any issue with the current network.
Open Network troubleshooter by pressing Windows + I keys together. This will open Settings. Go to Network & Internet and then to network Troubleshooter. Follow the on-screen instructions minutely and let the tool detect and repair any issue in the network connection.
Conclusion
Now, if your problem is solved, you must have your internet connection running well and good by now. However, if the problem is not solved which means you are offline and you are seeing the error message, you should try and connect your device with another network temporarily to see if the problem is truly with the previous network or not. If nothing is working out, you can seek the service of a professional.
