Hardware monitoring is very important for high-end computers, especially for those who have built a gaming system. As you may already know, gaming peripherals such as high-end CPUs, graphic cards, and RAMs are very powerful and require a lot of power to run. On top of that, the prices of high-end PC components have been increased a lot recently due to the worldwide shortage of silicon which is an essential element for these components.
Thus, it is very important to take proper care of these computer parts and make sure they are performing as they are supposed to even at a high load. Today, we will be talking about one of the most popular hardware monitoring software made by MSI called MSI Afterburner. This might be a familiar program for many users as MSI includes a driver CD containing the software with MSI-made GPUs.
Even if you are not familiar with the software at all, don’t worry. We will be covering all aspects of the software in our guide today so that you can install and customize the software as you desire. To get all the necessary information about MSI afterburner, you should read our guide until the end.
MSI Afterburner Overlay Customization Guide
MSI Afterburner is one of the most popular hardware monitoring software and is currently being used by the majority of professional gamers and content creators. Thus, it is great to have this software installed in your system and manage your hardware with it.
MSI afterburner allows you to monitor various parameters of the hardware installed in your systems such as the GPU, RAM, and even the fan speed installed on your graphics card. You can also control the parameters of the GPU like core voltage, core clock, and even the memory clock of your graphics. Thus, the software is very important for those who overclock the components on their computer.
Installation and Initial Setting
Before you can start using the software, you will have to download, install and configure the initial settings on the MSI afterburner software. Here’s how you can do it.
- Download the MSI afterburner software from the link given here.
https://www.msi.com/Landing/afterburner/graphics-cards
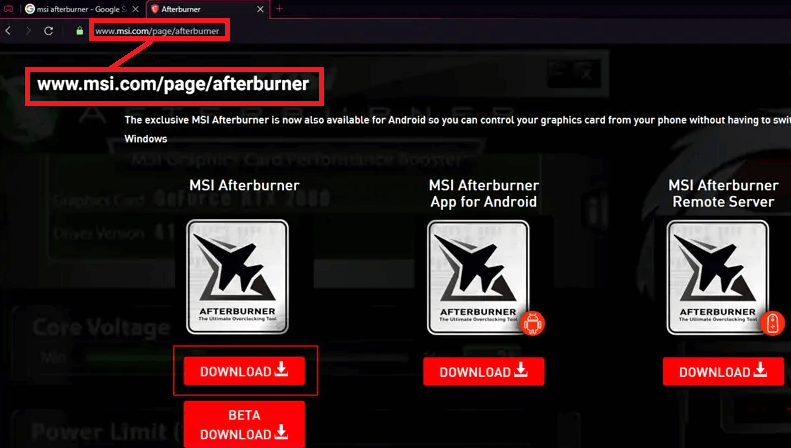
- MSI afterburner setup also includes Rivatuner Statistics Server software which you can install simultaneously. It is a frame rate monitoring software along with a built-in screen recording program. It is not completely necessary, but you can install it as well for complete monitoring.
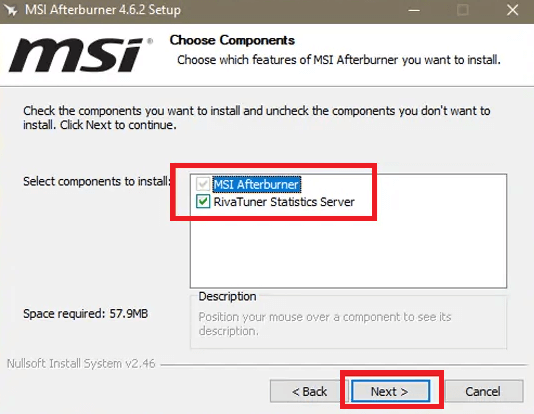
- Once you download the setup, extract the zip file and double-click on the .exe file to initialize the setup.
- In the setup, you will be asked to select the components to install. Check or uncheck the Rivatuner Statistics Server and press Next based on your requirements.
- Now, select the destination folder and start the installation. Wait until the program is installed.
- Once the software is installed, you can launch the program from the installation screen by checking the “Run MSI Afterburner” option and clicking Finish.
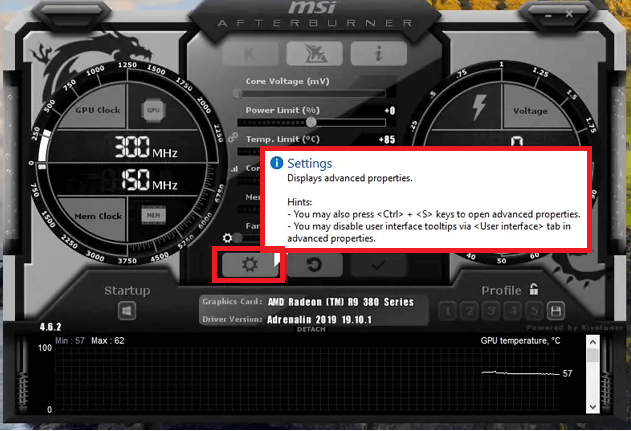
- Now, simply click on the gear icon on the left-hand side to enter the configuration page.
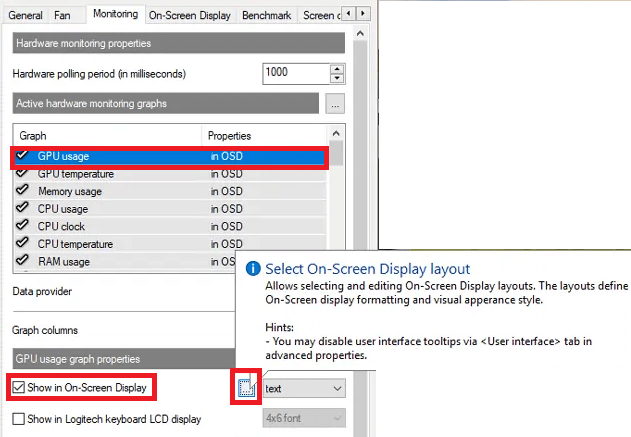
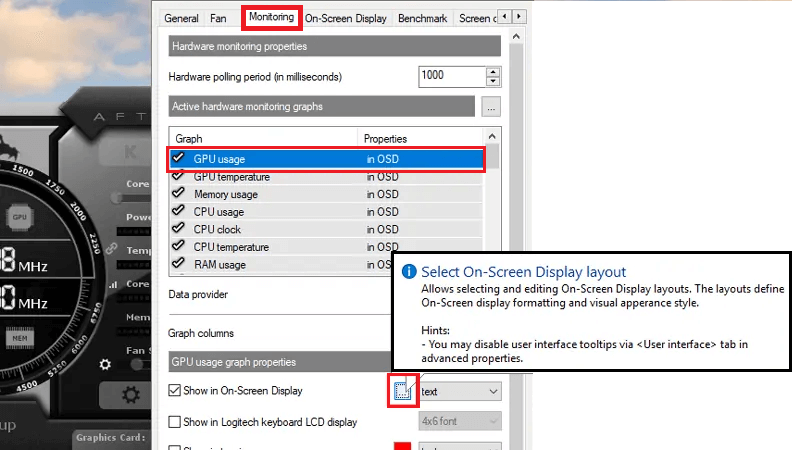
- Now, head over to the “monitoring” tab and check the parameters that you wish to monitor with the software.
- Also, make sure that you select the Show in On-Screen Display option and click on Apply.
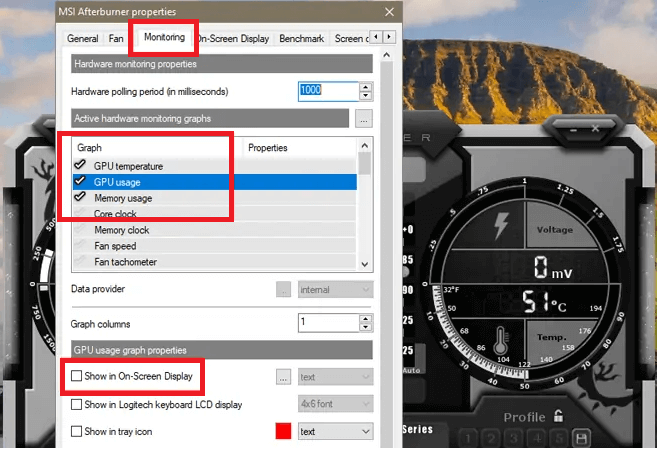
- You can also arrange the parameters in a specific order by simply dragging the parameters within the list. The overlay within a game or program shall appear exactly in this order.
Changing Colors
A lot of users like to customize the theme of monitoring software with the theme of their setup and the games that they usually play. You can do that in MSI afterburner as well by following these steps.
- In the monitoring section, scroll down until you find the Show in On-Screen Display option and click on the little box present on the right side.
- Here, you can manage the parameters regarding each of the overlay options.
- To change the colors, open this section and click on the Group color options.
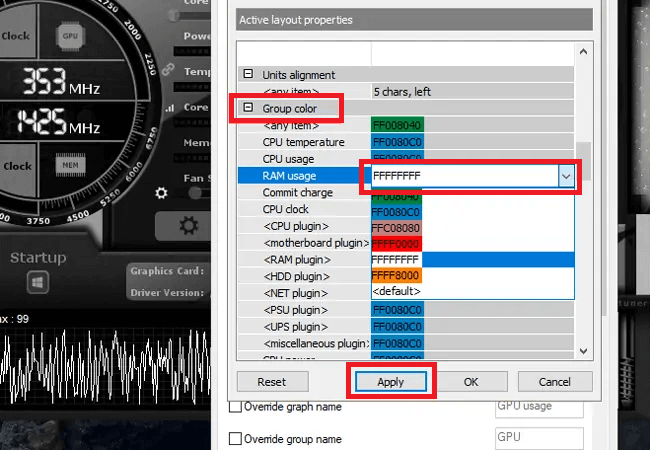
- Now, you will see all of the parameters that you have selected earlier that are to be displayed on the overlay.
- In front of each parameter, you can see a color code. Simply double-click on it and select the color from the list.
- You can also enter the code of a particular color which you wish to get on the overlay.
- You can also change the color of the values that are dynamic from this section. For that, simply click on the System color 0 option available in the Colors library section..
- Now, you can select the color of your choice from the RGB color palette available here.
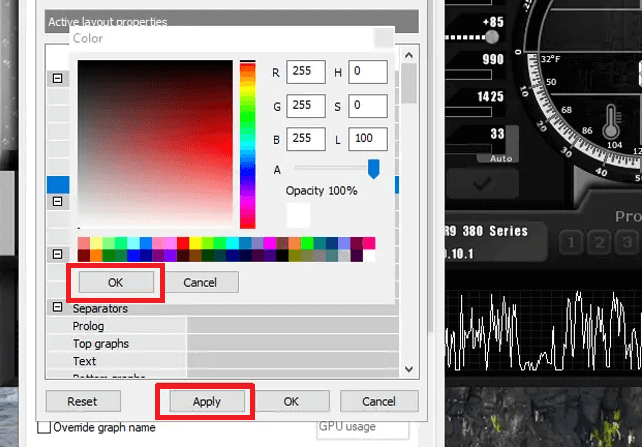
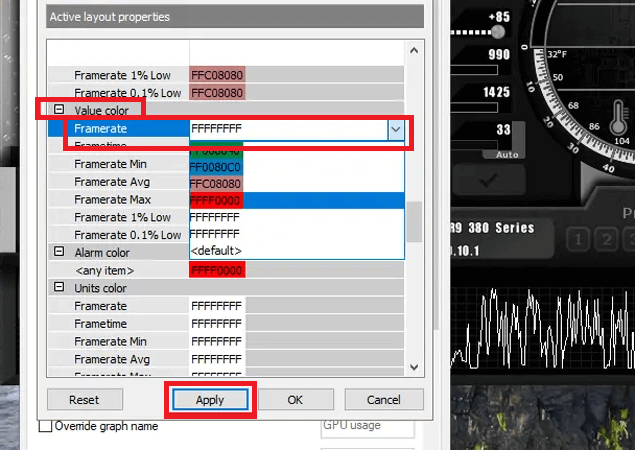
- To change the value color, just click on the Value Color option and select the color of your choice. Click Apply to save the changes.
- The overlay parameter also offers the units along with the values. To change the color of the units, open the Units color option and select the color as before.
Grouping
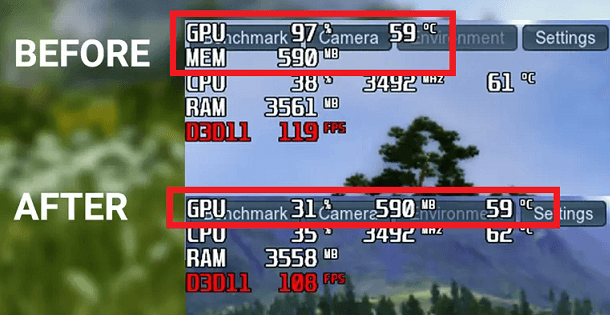
Grouping is a great feature of MSI afterburner overlay as it allows you to group similar features together. For example, you will be able to group parameters related to the GPU such as usage, temperature, and speed and put them in a single line. This makes the overlay shorter, yet more comprehensive.
- To group various parameters in the overlay, go to the top of the monitoring section.
- Here, you will find the list of all visible parameters. Now, simply put the parameters that you wish to group in order.
- Now, select the subsequent parameter and scroll down until you find the Override group name option.
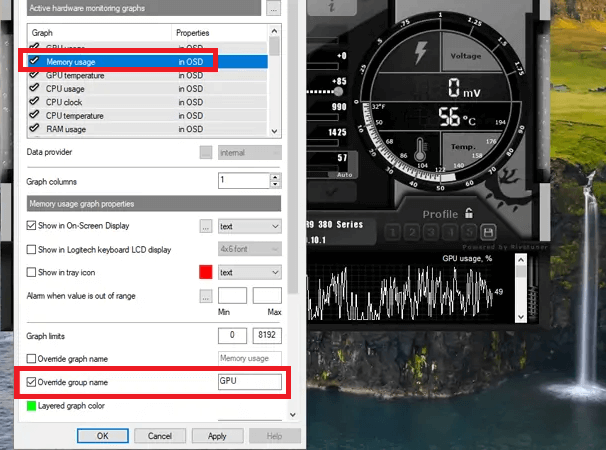
- Click on the checkbox to activate grouping and rename the section to the parent hardware.
- For example, if you are grouping the memory clock of GPU with usage, simply name the group as GPU.
- Now, perform the same action for all similar parameters and click Apply.
Changing Names
The names of the groups, values, and even the parent hardware can be changed in the MSI afterburner software. Therefore, you can rename the sections to what you wish to see in the overlay. This shall make the overlay quite easier to understand even when you are focused on the game.
- There is an Override group name option which we have seen in the earlier steps.
- To rename the group, simply click on the box in front of the option and type in the text that you wish to see instead of the group name.
- For example, you can insert the name of your graphics card or CPU instead of the terms GPU and CPU.
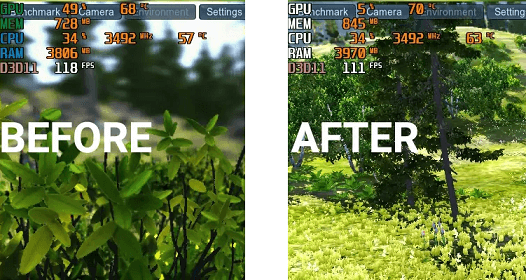
- It is very beneficial for those who record benchmark videos and publish the results online. It offers an instant acknowledgment of what GPU, CPU, and RAM are being used at the time of the benchmark.
Adding Graph
Apart from the values, MSI afterburner also offers you to get a graph of the performance right within the overlay. This enables more information about the performance of the hardware as you can check the drops in performance at certain places in the game.
- To add a graph in the overlay, simply select the Framerate parameter from the list.
- Now, scroll down in the application and look for the overlay options. In front of the Show in On-Screen Display, you will see a selectable option.
- Once you click on it, a small drop-down menu will appear that allows you to choose between text, graph, and simultaneous text and graph.
- Once you select the graph option, you will see a horizontal graph along with the FPS value at the end of the graph.
- You can also change the color of the graph from the small box present on the right side of this option.
- It is recommended to change the color of the graph to something which is easily identifiable even with a bright background.
Units Size
Each of the parameters in the overlay contains specific units at the end. For example, speed will be represented with MHz units and the usage will be represented with a % sign. While keeping the unit text to the default is recommended, you can still change the size of the text.
- To change the units size, head over to the Units Size option in the Active layout properties window.
- Now, click on it to find additional options regarding the unit’s size.
- Here, you will find the drop-down menu with options to change the size of the unit.
- You get 3 options here which are default, 50% larger than the default, and 50% smaller than the default.
- Select the appropriate option for your usage and click Apply to save the changes.
Changing Font and Size
A lot of users use a custom font throughout their computers. Well, you can use the same font even on the overlay of the MSI afterburner. However, you will have to open the RivaTuner software to change the font and font size of the overlay.
- Once you open the RivaTuner software, look for the Raster 3D option.
- Here, you can select the font of your choice for the overlay. Along with that, you also get the option to change the font size as well as style such as bold and oblique bold.
- You will also find a little preview in the lower section of the window to get an idea about your selection.
- Once you finalize the font and style, simply click on Ok to save your preferences.
Positioning
Depending upon the game you are playing, you might have to change the position of the overlay of MSI afterburner performance statistics overlay. By default, it is located at the top right of your screen. However, some games present a part of the HUD in that section which might require repositioning of the overlay.
- To adjust the position, simply open the RivaTuner software.
- Here, you will find an option to manually adjust the horizontal and vertical coordinates of the value.
- You also get a preview of the results so that you can check whether the values are correct or not.
- Once you have located the perfect position, just tap enter key to save the changes.
Spacing
In the overlay, there are various invisible columns that are present between multiple values which creates a visual difference between them. You can adjust this space manually from the MSI Afterburner software.
- To adjust the spacing, just open the MSI afterburner software again and head over to the Select On Screen Display option.
- Again, click on the small box present on the right side of the checkbox.
- After that, you will have to find the Alignments library option to manage the spacing.
- In the Alignments library option, there are 2 options available. Select the Alignments 1 option to change the spacing.
- Now, you can input a value in this option and save it. Keep in mind that lower values will decrease the spacing between characters.
On-Screen Display Toggle Hotkeys
Lastly, let’s talk about the hotkeys that you can press even when you are in the game to enable or disable the overlay quickly. The default key might interfere with a certain in-game feature which you might want to change asap to avoid interference in the game.
- In MSI Afterburner settings, open the On-Screen display tab.
- In this section, the first option allows you to change the hotkey for the overlay.
- To change the hotkey, just click on the box present in front of the Toggle On-Screen Display option and press the keys that you want to use for the overlay.
- The key combination will appear in the box once you have pressed it.
- Now, click on Apply to save the changes.
Conclusion
Downloading and installing hardware monitoring software like MSI afterburner is quite easy. But, it gets a bit tricky to customize the software according to your liking. While the default options are good enough for most users, some wish to customize various options such as the colors, size, and positioning of the overlay. For those, we have offered almost all customization options available in MSI afterburner. Once you go through our guide, you will be able to set up the MSI afterburner overlay the way you want with ease.
