Are you wrestling with formatting your SD card to FAT32? Discovering the ropes of this essential process unlocks a world of seamless data sharing across platforms. In our comprehensive guide titled “How to Format SD Card to FAT32,” we delve into the nitty-gritty of this procedure. This step-by-step walkthrough caters to Windows and Mac users alike, providing varied methods to ensure your SD card is formatted efficiently and hassle-free. Dive in, simplify your tech life, and make your SD card a universally compatible storage powerhouse!
What is FAT32 Format?
FAT32, an acronym for File Allocation Table 32, stands as a file system widely recognized for its compatibility across various platforms. It represents a storage format that efficiently manages data on SD cards and other storage devices. FAT32 allows for the organization of files into a structured system, enabling seamless access and transfer between different operating systems like Windows, macOS, and Linux. Its key feature lies in accommodating files up to 4GB in size, making it suitable for a wide array of digital devices, from cameras to gaming consoles. This format’s versatility and broad support make it an optimal choice for users aiming for cross-platform data interchange without the constraints of proprietary systems.
Why Can’t Format an SD Card to FAT32 in Windows?
In Windows environments, formatting SD cards with 32GB or smaller storage capacity adheres to the FAT32 file system, a natural fit for these devices. However, as storage capacity increases to 64GB or 128GB, exFAT becomes the default file system. Despite this, certain specific instances, like the 3Ds SD card, necessitate the use of the FAT32 file system, compelling users to format their SD cards to FAT32, regardless of size.
Due to limitations within FAT32, Windows tools do not facilitate the creation of a FAT32 partition on physical devices larger than 32GB. This means direct formatting to FAT32 isn’t supported for 64GB memory cards or USB drives. So, when faced with the need to format a 64GB SD card to FAT32 using Windows utilities, users encounter a roadblock.
Fortunately, circumventing this hurdle is possible with the aid of third-party FAT32 format tools. These robust solutions offer the means to effectively format larger capacity memory cards or flash drives to the required FAT32 format, stepping in where Windows-built utilities fall short.
Format SD Card to FAT32 on Windows
Windows provides several methods to format an SD card to the FAT32 file system, catering to various user preferences and technical expertise. Whether you prefer user-friendly interfaces or command-line utilities, Windows offers versatile options to achieve the desired formatting for your SD card.
Format 32 GB SD Card or Smaller to FAT32 Using Windows Explorer
Windows Explorer provides a straightforward method to format smaller-capacity SD cards (32GB or smaller) to the FAT32 file system. Follow these steps to accomplish the formatting:
- Insert SD Card: Insert the SD card into your computer’s card reader or use an external card reader connected to your PC.
- Open Windows Explorer: Go to “This PC” or “My Computer” and locate your SD card under the list of drives.
- Select “Format”: Once you’ve found the SD card, right-click on it to reveal a dropdown menu. From the dropdown menu, choose the “Format” option. A new window will pop up.

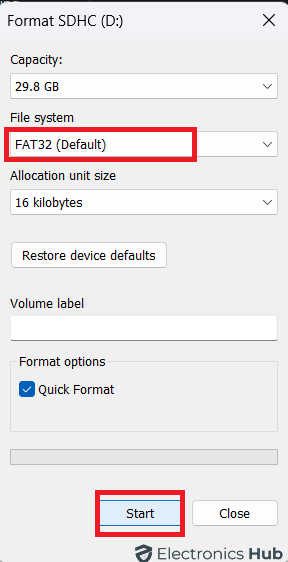
- Choose FAT32 as File System: In the formatting window, under “File System,” select “FAT32” from the drop-down menu. You can assign a name to your SD card under “Volume label” if desired.
- Start Formatting: Click on the “Start” button to initiate the formatting process. A warning message might appear, stating that formatting will erase all data on the card. Confirm the action by clicking “OK.”
Once the formatting process finishes, a notification will indicate the successful completion. You can then safely eject the SD card.
Format 32 GB SD Card or Smaller to FAT32 Using Windows Disk Management
For users seeking a more controlled approach to formatting, Windows Disk Management provides a robust solution for formatting SD cards (32GB or smaller) to the FAT32 file system. Here’s a step-by-step guide:
- Insert the SD Card: Connect the SD card to your computer’s card reader.
- Open Disk Management: Press Win + X and select “Disk Management” from the menu. Alternatively, right-click on the Start button and choose “Disk Management.”
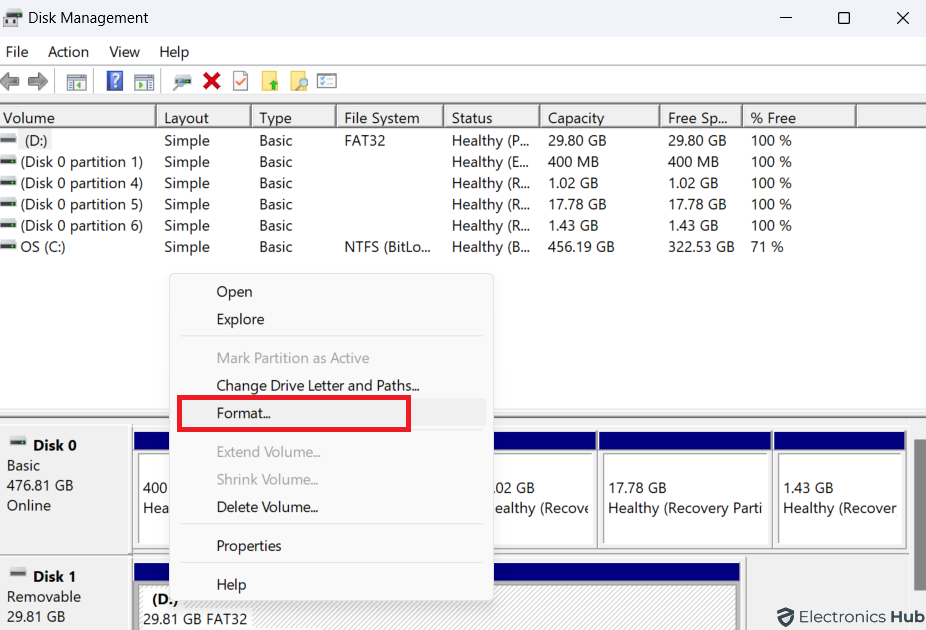
- Locate the SD Card: In the Disk Management window, find your SD card in the list of available drives. It will be labeled with its capacity.
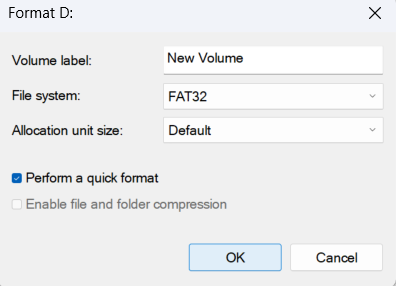
- Format the Partition: Right-click on it and select “Format.” Choose FAT32 as the file system. Optionally, you can assign a name to the SD card under “Volume label.”
- Start Formatting: Click on “OK” or “Format” to start the formatting process. Confirm the action if prompted. Note that formatting will erase all data on the card.
Once the formatting process completes, a message will indicate its success.
Format 32 GB SD Card or Smaller to FAT32 Using Diskpart
Formatting a 32GB or smaller SD card to FAT32 via Diskpart involves executing commands in Command Prompt (CMD):
- Open Command Prompt: Press Win + X and choose “Command Prompt” or “Command Prompt (Admin)” from the menu.
- Launch Diskpart: In the Command Prompt window, type “diskpart” and press Enter.
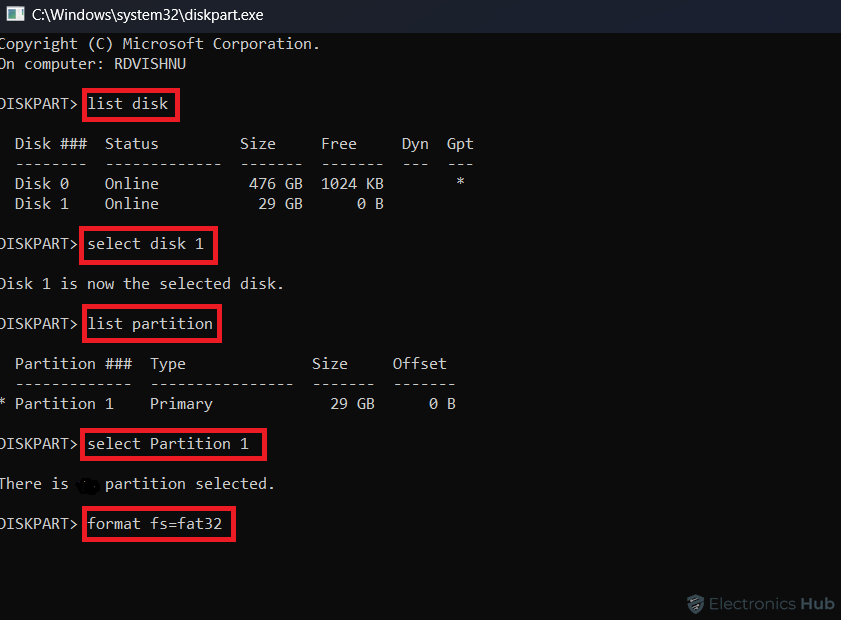
- List Drives: Type “list disk” and press Enter to display a list of connected drives. Identify your SD card based on its size.
- Select the SD Card: Type “select disk X” (replace X with the disk number assigned to your SD card) and press Enter.
- Create a New Partition: Type “list partition” and press Enter.
- Select the Partition: Now type “select partition 1” and press Enter.
- Format as FAT32: Type “format fs=fat32” quick and press Enter to format the partition as FAT32 quickly.
- Exit Diskpart: Type “exit” and press Enter to exit Diskpart.
After completing these steps, your 32GB or smaller SD card should be successfully formatted to FAT32 using Diskpart.
Format 32 GB SD Card or Smaller to FAT32 Using PowerShell
Formatting a 32GB or smaller SD card to FAT32 via PowerShell involves executing commands. Follow these steps:
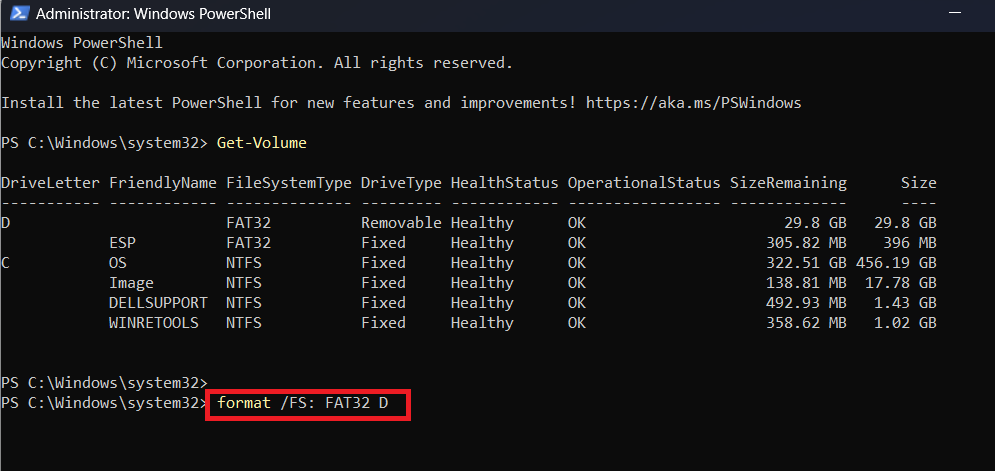
- Open PowerShell: Launch PowerShell as an administrator by right-clicking on the Start menu and selecting “Windows PowerShell (Admin).”
- List Available Drives: Type Get-Volume and press Enter to display a list of available volumes, including your SD card. Note the volume number assigned to your SD card.
- Format to FAT32: Enter the command: format /FS: FAT32 X (replace X with the drive letter assigned to your SD card).
- Formatting Process: Allow PowerShell to complete the formatting process. Once finished, you’ll receive a confirmation message.
Format SD Card Higher Than 32 GB Using FAT32 Format Tool
When dealing with SD cards larger than 32GB and aiming to format them to FAT32, utilizing a dedicated tool like the FAT32 Format Tool is a practical solution. Here are the steps to achieve this:
- Download and Install FAT32 Format Tool: Begin by downloading and installing the FAT32 Format Tool on your computer.
- Insert the SD Card: Plug the SD card into your computer’s card reader.
- Select the SD Card: Launch the FAT32 Format Tool application. From the list of available drives, choose your SD card.
- Choose FAT32 as File System: In the FAT32 Format Tool interface, select FAT32 as the desired file system.
- Initiate Formatting: Click on the “Start” or “Format” button to initiate the formatting process.
- Confirmation: Confirm the action if prompted, acknowledging that all data on the SD card will be erased.

Once the formatting process is complete, the FAT32 Format Tool will provide a confirmation message.
Format SD Card Higher Than 32 GB Using HP USB Disk Storage Format Tool
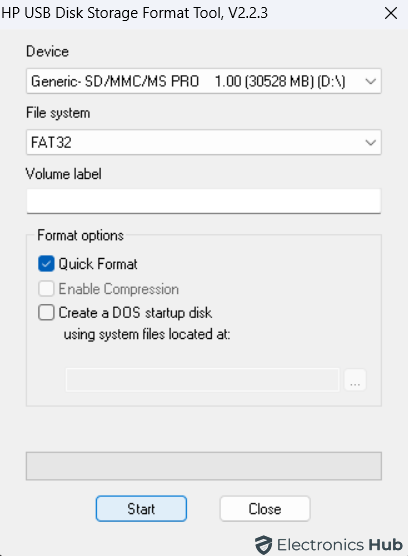
You can also employ the HP USB Disk Storage Format Tool for formatting SD cards larger than 32GB to FAT32, ensuring compatibility across various devices. Follow these steps:
- Download and Install HP USB Disk Storage Format Tool: Start by downloading and installing the HP USB Disk Storage Format Tool on your computer.
- Run as Administrator: Locate the HPUSBDisk.exe in File Explorer, right-click on it, and select “Run as administrator” to launch the tool with elevated privileges.
- Select the SD Card: In the HP USB Disk Storage Format Tool interface, click the “Device” dropdown and choose your SD card from the list of available drives.
- Choose FAT32 as File System: Click on “File system” within the tool’s interface and select “FAT32” from the options.
- Initiate Formatting: Once you’ve selected FAT32, click the “Start” button to begin the formatting process.
Following these steps using the HP USB Disk Storage Format Tool facilitates the formatting of SD cards larger than 32GB to FAT32, ensuring optimal compatibility for your storage needs.
Format SD Card to FAT32 on Mac
When it comes to formatting an SD card to FAT32 on a Mac, the process is user-friendly and straightforward. Follow these steps:
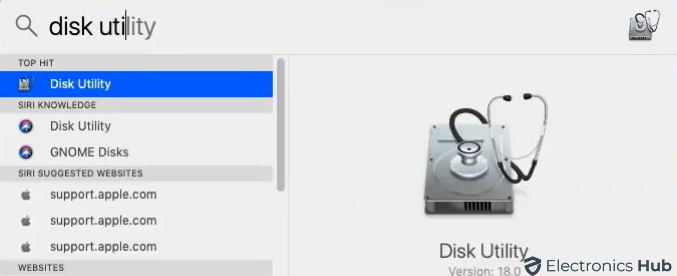
- Enter Disk Utility: Open Disk Utility on your Mac. You can find it in the Applications > Utilities folder or use Spotlight to search for it.
- Select Your SD Card: In Disk Utility, locate and select your SD card under the external section.
- Click Erase: Once your SD card is selected, click on the “Erase” button.
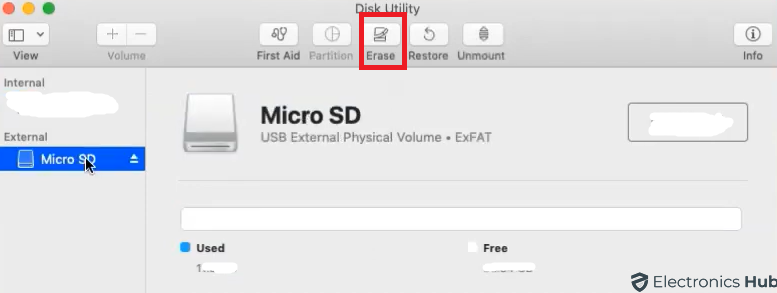
- Choose Format: Click on the “Format” dropdown and select “MS-DOS (FAT),” which is equivalent to the FAT32 option used in Windows.
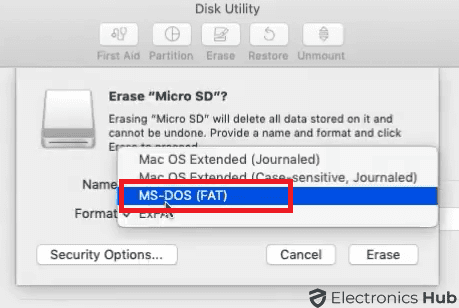
- Initiate Erase: Click the “Erase” button to start the formatting process.
Wait for the process to complete. Once finished, you’ll receive a confirmation that your SD card has been successfully formatted to FAT32.
Format SD Card to FAT32 – FAQs
Ans: While FAT32 is widely compatible, it’s not always the best choice for larger-capacity SD cards. For cards above 32GB, exFAT might offer better performance and support for larger file sizes.
Ans: The duration depends on the size and speed of the SD card, but typically, formatting smaller cards is quicker compared to larger-capacity cards.
Ans: Using third-party tools carries a slight risk. Ensure you’re using reputable software from trusted sources and follow instructions carefully to avoid data loss or card corruption.
Ans: No, Windows utilities have limitations and do not directly support formatting physical devices larger than 32GB to FAT32. Third-party tools are recommended for this purpose.
Conclusion
In conclusion, formatting your SD card to FAT32 unlocks seamless data sharing across platforms like Windows, macOS. While Windows offers user-friendly methods for cards under 32GB, larger cards require third-party tools like FAT32 Format Tool or HP USB Disk Storage Format Tool. Macs simplify the process through Disk Utility, allowing you to format any SD card to FAT32 with just a few clicks. Regardless of your platform, remember to back up your data before formatting, as the process erases all existing files. With the right approach, your SD card can become a universally compatible storage powerhouse, simplifying your tech life and maximizing its utility.
