Connecting speakers to a receiver is a crucial step in configuring your audio system. A faulty connection can distort the signal causing weak, muted audio or utter silence. Also, most speaker wires include positive and negative cores that must match receiver terminals for effective speaker functioning. Swapping them can cancel sound waves, lowering audio quality.
Whether you’re fond of music or movies, a proper speaker wire connection provides high-quality sound and safety. In this comprehensive guide, we’ll walk you through the detailed process of connecting the speaker wire to a receiver.
Outline
Toggle- Understanding Speaker Wire and Connectors
- Required Tools and Materials
- How To Connect Speaker Wire To Receiver?
- How to Connect Bare Speaker Wire to Receiver?
- How to Connect 4 Conductor Speaker Wire to Receiver?
- Troubleshooting Common Speaker Connection Issues
- Connect Speaker Wire to Receiver – FAQs
- Conclusion
Understanding Speaker Wire and Connectors
Speaker wire and its connectors are the silent heroes behind your audio setup. Before commencing the connection process, it’s essential to understand the basics for establishing a reliable connection.
A speaker wire is a specialized cable that transmits audio signals from the receiver to the speakers. It has two conductors. They are usually color-coded for easy identification. One is for the positive terminal and one is for the negative terminal.
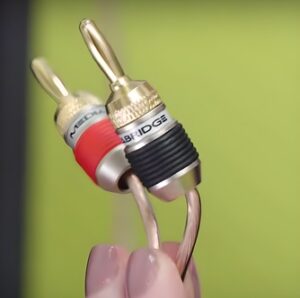
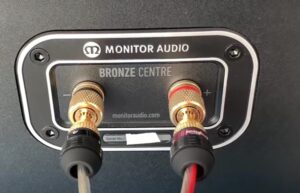
Connectors establish a secure and reliable connection between the speaker wire and the receiver. The most common types of connectors are banana plugs, spade connectors, and bare wire connections. Banana plugs provide a simple and convenient option, while spade connectors offer a more secure connection. Bare wire connections are the most basic method and require more effort.
By understanding these parts and making good connections, you can get clear, rich audio from your speakers.
Required Tools and Materials
You will need a few tools and supplies to connect the speaker wire to the receiver. Below is a list of things you must have:
- Speaker Wire: Choose a wire gauge appropriate for your speaker distance and power needs (typically 12-gauge to 16-gauge).
- Wire Cutters: They are used to snip the speaker wire to your desired length.
- Wire Strippers: A specialized tool designed to strip the insulation without damaging the wire.
- Banana Plugs or Spade Connectors (Optional): These connectors provide a convenient and secure connection.
- Screwdriver: Required for connecting bare wire to the receiver terminals.
- Marker or tape: Used to label the wires for easy identification.
- Safety Glasses (Optional): Wearing safety glasses protects your eyes from stray wire clippings.
Now that we have everything we need, let’s get started with the connection process.
How To Connect Speaker Wire To Receiver?
Here are the steps to follow when connecting a speaker wire to a receiver:
Step 1: Identify Receiver’s + and – Terminals
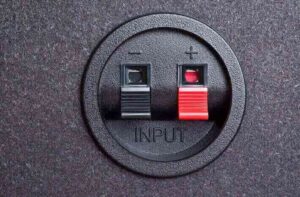
First, identify the positive and negative terminals of your receiver. Most receivers label these terminals as “+” and “-,” or use color-coded markings. The positive terminal is usually red, while the negative terminal is black.
If your receiver lacks clear markings, refer to the user manual or the manufacturer’s website for assistance.
Step 2: Finding Speakers’ + and – Terminals
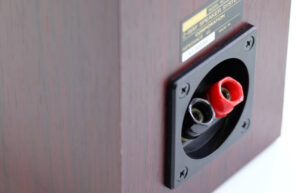
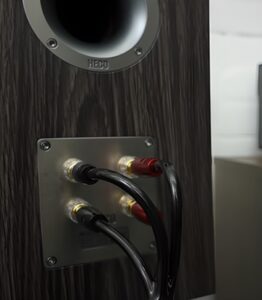
Next, identify the positive and negative terminals on your speakers. Similar to the receiver, these terminals are often marked or color-coded. The positive terminal on the speaker is usually red, whereas the negative terminal is black.
If you’re unsure, see the speaker’s manual or the manufacturer’s instructions.
Step 3: Strip the Speaker Wire
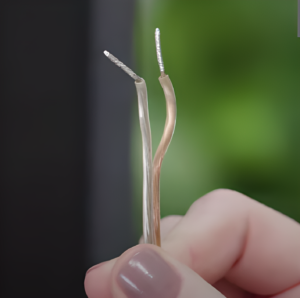
Now that we know the terminals, it’s time to strip the speaker wire. Cut off the excess wire, leaving enough length to reach the receiver and speakers. Use wire cutters or strippers to remove half an inch of insulation from the wire ends to expose the bare conductors.
Step 4: Speaker-Receiver Connection
Insert the bare wire into banana plugs or spade connectors and tighten tightly. If your receiver has bare wire terminals, put the exposed wire into “+” and “-” terminals. Make sure the connections are secure to avoid poor audio quality or device damage.
Step 5: Connecting Speaker Wires to the Speakers
After connecting the wire to the receiver, attach it to the speakers. Repeat Step 4 and match the positive and negative terminals. Check for tight connections again to ensure sound quality.
Step 6: Testing the Speaker Connection
Once the speaker wire is attached to the receiver and speakers, test the connection. Play music or a movie soundtrack on your audio system. Listen carefully to confirm all speakers are producing sound without distortion or interruption.
If you have problems, check the troubleshooting section.
How to Connect Bare Speaker Wire to Receiver?
Follow these steps if you are connecting a bare speaker wire to a receiver.
Step 1: First, ensure your receiver is off and unplugged for safety. Then identify the color-coded speaker terminals (red +, black -) on the receiver’s back panel.
Step 2: Gently strip half an inch of insulation from each wire end to expose the metal strands with a cutter or stripper. And twist these strands tightly together.
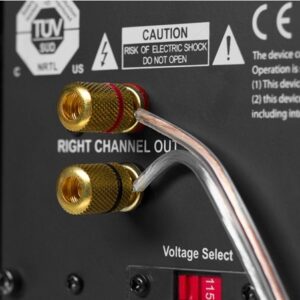
Step 3: Now based on your terminal type, press down on the spring clip lever for the matching terminal (red/black) and insert the bare wire. Else release the binding post terminal screw and insert the wire around the post before tightening it.
Step 4: Repeat for the other as well. Once the connection is made, verify all connections, including receiver and speaker positive/negative wires.
Step 5: Reconnect power. Switch on the receiver, and enjoy clear audio from both speakers.
How to Connect 4 Conductor Speaker Wire to Receiver?
The 4-conductor speaker wire is rarer than the 2-conductor type. Most of the 4-conductor speaker wire acts as two distinct speaker cables wrapped in the same jacket. Each wire has two conductors, one positive (+) and one negative (-) in the jacket.
Step 1: Turn off and unplug your receiver before connecting.
Step 2: Identify the receiver’s back panel speaker terminals. They will be color-coded (red + and black -) for the left and right channels.
Step 3: Now, cut the 4-conductor wire’s jacket to expose the two cables. Inner cables usually have two insulation colors.
Step 4: Treat each inner cable as a speaker wire. Use color to identify each wire’s positive and negative conductors (see the wire manufacturer’s instructions).
Step 5: Finally, connect two speaker cables to your receiver. Follow the same steps as you would for the regular speaker wire (refer to my earlier explanation on connecting bare speaker wire if needed).
Step 6: Connect the positive and negative wires of one inner cable to the red and black terminals for one speaker. Connect the other inner cable to the speaker terminals of the other speaker.
Troubleshooting Common Speaker Connection Issues
Though the connection process looks simple, you may encounter some common issues along the way. Here are a few troubleshooting tips:
- Check for Loose Connections: Double-check that all the speaker wire connections are tight and secure.
- Verify Correct Polarity: Ensure that the positive and negative terminals on both the receiver and speakers are matched correctly.
- Inspect the Wire Insulation: Make sure there are no frayed or damaged areas in the speaker wire insulation that could cause a short circuit.
- Try Other Speakers or Wires: If you’re experiencing sound issues, try connecting different speakers or use another set of speaker wires to isolate the problem.
If you still can’t resolve the issue, review the user manual of your receiver or speakers, or get assistance from a qualified audio specialist.
Connect Speaker Wire to Receiver – FAQs
Ans: The ideal gauge depends on the distance between your speakers and receiver and the power output of your system. Generally, thicker gauges (e.g., 12-gauge) are better for longer distances (over 50 feet) or high-powered systems. For shorter distances (under 30 feet) and lower power setups, a 16-gauge wire is sufficient.
Ans: No, the speaker wire is specifically designed for low-voltage audio signals. Using regular electrical wire is not recommended.
Ans: Avoid doing this. It can degrade sound quality and pose safety risks. It’s better to use the proper length of speaker cable.
Ans: These pre-terminated connectors make installation easier and more secure than bare wire terminals. They also have color coding for polarity (+/-).
Conclusion
Finally, connecting speakers to a receiver is an easy task with the right tools and resources. We hope that the above-mentioned tips help you in establishing a proper connection. Remember to follow the steps carefully, ensuring proper polarity and secure connections.
Now that you know how to connect a speaker wire to a receiver, it’s time to create your own audio system. Happy listening!

